Unlock the prettiest Easter nails with simple pastel designs! Learn easy-to-follow inspiration and DIY tips for a charming, festive manicure that anyone can create, perfect for spring celebrations.
Spring is here, and with it comes the delightful charm of Easter! For many of us, this means thinking about festive outfits, delicious treats, and yes, perfectly coordinated nails. If you’re dreaming of a manicure that captures the soft, sweet spirit of the season, especially in gorgeous pastel shades, you’ve come to the right place! Sometimes, finding the perfect Easter pastel nail design can feel a little overwhelming, with so many cute ideas out there. But don’t worry, we’re going to break it down into simple, fun steps. Get ready to discover some genius inspiration that’s totally achievable, even if you’re just starting with nail art. Let’s dive into creating a beautiful, springtime look that will make your nails shine!
Easter Pastel Nail Design: Genius Inspiration for Every Skill Level
Pastel colors are the heart and soul of Easter. Think soft baby blues, gentle mint greens, creamy lavenders, delicate pinks, and sunny yellows – they just scream spring! This year, let’s elevate your Easter manicure beyond a single solid shade and embrace the creativity that pastel nail art offers. Whether you’re a beginner looking for something super simple or a seasoned DIY nail enthusiast ready to try more intricate designs, we’ve gathered some truly genius inspiration that’s perfect for the occasion. We’ll cover everything from easy accent nails to chic color-blocking, making sure you have a stunning look for your Easter celebrations.
Why Pastels for Easter Nails?
Pastel colors are intrinsically linked to Easter for a few sweet reasons. Historically, pastel shades represent rebirth and new beginnings, themes central to the springtime celebration of Easter. Think of blooming flowers, fluffy baby chicks, and decorated Easter eggs – these are all tinged with soft, delicate hues. These colors are also incredibly versatile and flattering, offering a gentle pop of color without being overpowering. They evoke a sense of calm, joy, and renewal, making them the perfect palette for a festive yet sophisticated manicure.
Essential Tools for Your Pastel Nail Design Journey
Before we jump into the inspiration, let’s make sure you have the basic tools to bring these adorable designs to life. Starting your nail art journey doesn’t require a professional kit; a few key items will get you far!
- Base Coat: Protects your natural nails from staining and helps your polish last longer.
- Top Coat: Seals your design and adds a glossy, chip-resistant finish.
- Pastel Nail Polishes: The stars of the show! Gather a few of your favorite soft shades.
- Thin Nail Art Brush or Dotting Tool: Essential for creating fine lines, dots, and small details.
- Nail Polish Remover & Cotton Swabs: For cleaning up mistakes and perfecting your edges. Essential for any DIY nail art!
- Optional: Nail Art Stickers or Decals: A super easy way to add intricate designs without freehand drawing!
Simple & Chic: Easy Easter Pastel Nail Design Ideas
Ready to get inspired? These designs are perfect for beginners and can be adapted to any pastel color combination you love.
1. The Gradient Ombre Masterpiece
A soft pastel ombre is elegant and surprisingly easy to achieve. It looks intricate but is totally doable with a little practice!
How to Create:
- Apply a base coat and let it dry completely.
- Paint your nails with your lightest pastel shade as the base.
- Take a makeup sponge (a clean cosmetic sponge works wonders!) and apply stripes of 2-3 pastel colors vertically on the sponge.
- Gently dab the sponge onto your nail, starting from the cuticle and working upwards. You might need to dab a few times to build up the color blend.
- Clean up any excess polish around your nails with a cotton swab dipped in nail polish remover.
- Once dry, finish with a high-shine top coat. The sponge helps create that seamless blend!
2. The Playful Polka Dot Fun
A classic for a reason! Polka dots in contrasting pastel shades add a cheerful touch to any Easter look.
How to Create:
- Start with a pale pastel polish as your base color (e.g., light yellow or baby blue).
- Once dry, use a dotting tool or the tip of a toothpick to create dots in a contrasting pastel shade (e.g., pink or mint green).
- You can make your dots uniform or randomly spaced for a more whimsical feel.
- Experiment with different sized dots and color combinations on each nail!
- Seal with a top coat.
3. The Sweet French Tip Twist
Give the traditional French manicure a delightful Easter makeover with pastel tips!
How to Create:
- Apply a sheer nude or pale pastel color on your entire nail as a base.
- Once dry, use a fine nail art brush to carefully paint a pastel color of your choice (like lavender or peach) along the tips of your nails.
- For straighter lines, you can use French tip guides or even small pieces of tape placed strategically.
- Alternatively, try doing the tips in different pastel colors for a vibrant, multi-colored effect.
- Apply a clear top coat to finish.
4. The Minimalist Accent Nail
Love a subtle nod to the holiday? Focus your creativity on just one or two nails!
How to Create:
- Paint all your nails with a single, beautiful pastel shade.
- On one or two accent nails (usually the ring finger or thumb), add a simple design. This could be:
- A few tiny dots in a contrasting pastel.
- A delicate stripe or swirl.
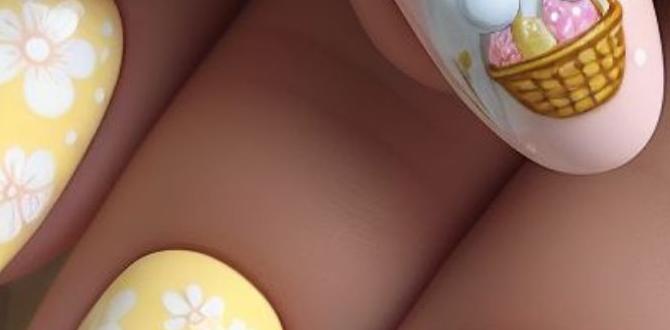
- A tiny Easter-themed sticker (like a small bunny silhouette or egg outline).
- Apply a top coat to all nails.
This is a fantastic way to incorporate nail art without it feeling too over-the-top, perfect for those who prefer understated elegance.
5. The “Easter Egg” Speckled Design
Mimic the look of a beautiful, speckled Easter egg with this fun and easy technique!
How to Create:
- Paint your nails with a base pastel color (e.g., cream, light pink).
- Let it dry completely.
- Dip a stiff-bristled brush (an old toothbrush or a dedicated nail art splatter brush works well) into a slightly darker pastel or even a muted metallic shade.
- Hold the brush over your nail and gently flick the bristles with your finger or a toothpick to splatter tiny flecks of color onto the nail.
- Start with a light hand and add more splatters as desired.
- Once dry, seal with a top coat. Look at that perfectly imperfect Easter egg look!
Taking It Up a Notch: Intermediate Pastel Nail Designs
If you’re feeling a bit more adventurous, these designs offer a unique flair while still being beginner-friendly with a little patience.
6. The Chic Color-Blocked Squares
Geometric designs are always in vogue, and color-blocking with pastels is a surefire way to make a statement.
How to Create:
- Choose 2-3 complementary pastel shades.
- Paint your nails with one color.
- Once dry, use painter’s tape or nail art tape to create geometric sections on your nail. Press the tape down firmly to prevent color bleeding.
- Paint the exposed section with a second pastel color.
- Carefully peel off the tape while the polish is still slightly wet for clean lines.
- Repeat with a third color if desired, using tape to block off previously painted sections.
- Seal with a top coat.
For a cohesive look, try assigning different color blocks to different nails, or get creative with diagonal splits and triangles!
7. The Delicate Floral Accent
Embrace the blooming season with simple floral accents! You don’t need to be a master painter to achieve this.
How to Create:
- Apply a soft pastel base color (like mint green or baby blue) to all nails.
- On your accent nail(s), use a small dotting tool or a fine brush to create a few simple flower shapes.
- Option 1 (Easy Dots): Place several small dots of pink or lavender in a circle to form a flower, then add a tiny yellow dot in the center for the stigma.
- Option 2 (Simple Petals): Use a fine brush to paint small, curved strokes radiating from a central point to create petals.
- Add tiny green leaves with a fine brush if you like.
- Let dry and seal with a top coat.
This is a beautiful way to add a touch of springtime charm without overwhelming the nail.
8. The Easter Bunny Silhouette or Egg Outline
For a truly festive touch, incorporate iconic Easter symbols in a minimalist way.
How to Create:
- Paint your nails a solid pastel color.
- On an accent nail, use a tiny detail brush and a contrasting polish (white, black, or a darker pastel) to carefully paint:
- A simple outline of a bunny’s head or a full bunny silhouette.
- The outline of an Easter egg, perhaps with a “cracked” look.
- You can also use fine nail art stickers for this, which are incredibly easy to apply! Look for bunny, chick, or egg outlines.
- Finish with a top coat.
Pro Tips for Flawless Pastel Application
Pastel polishes can sometimes be tricky! They can be more sheer and prone to streaking than darker colors. Here are some tips from Nailerguy to ensure your pastel manicure looks salon-perfect:
- Always Use a Base Coat: This is crucial for preventing staining, especially with lighter colors, and provides a smooth surface for polish application.
- Apply Thin Coats: Instead of one thick coat, apply two or three thin coats for smoother, streak-free coverage. Pastels often build opacity better this way.
- Allow Drying Time Between Coats: Patience is key! Let each coat dry sufficiently before applying the next to avoid smudging.
- Clean Up Mistakes Immediately: Keep a precision brush or a sharpened orange stick dipped in nail polish remover handy. Clean up around the cuticle and sides of your nails while the polish is still wet for a crisp finish.
- Don’t Skip the Top Coat: A good top coat will not only add shine but also protect your design from chipping and fading, helping your beautiful Easter nails last longer.
- Consider a Gel Top Coat: If you have a UV/LED lamp, a gel top coat can provide an incredibly durable and glossy finish that lasts.
Choosing Your Pastel Palette: Color Combinations to Inspire
The beauty of pastels is their soft, harmonious nature. They tend to look good together, but here are a few ideas to get you started:
| Theme/Vibe | Color Combinations | Design Ideas |
|---|---|---|
| Classic Easter | Baby Blue, Mint Green, Pastel Pink, Creamy Yellow | Polka dots, Ombre, Simple floral accents |
| Sweet & Romantic | Lavender, Blush Pink, Peach, Soft Coral | French tips in contrasting pastels, Delicate swirls, Minimalist hearts |
| Fresh & Bright | Sky Blue, Lemon Yellow, Light Aqua, Soft Lilac | Color-blocked geometric shapes, Speckled egg effect, Gradient tips |
| Subtle & Chic | Pale Grey, Soft Beige, Milky White, Muted Lavender | Accent nail with fine lines or dots, Monochromatic shades, Sheer polish with a hint of sparkle |
Don’t be afraid to mix and match! The goal is to have fun and create a look that makes you feel joyful and festive.
External Resources for Nail Care and Trends
Maintaining healthy nails is the foundation of any great manicure. For more on nail health and understanding ingredients, the U.S. Food & Drug Administration (FDA) offers valuable information on cosmetic products, including nail care. Staying updated on beauty trends is also fun, and websites like Allure often showcase the latest in nail art and design.
Frequently Asked Questions about Easter Pastel Nail Design
Q1: How do I prevent pastel nail polish from streaking?
A1: Pastel polishes can be more sheer. Apply two to three thin coats instead of one thick coat. Ensure each coat is dry before applying the next, and always use a good base and top coat. A smooth base coat is key!
Q2: What if I’m terrible at freehand nail art? What are the easiest designs?
A2: No worries! The easiest designs for beginners are solid pastel colors, simple polka dots (using a dotting tool or even a pen tip!), and using nail art stickers or decals. The gradient ombre technique with a sponge is also surprisingly forgiving!
Q3: Can I mix pastel cream polishes with glitter or metallic top coats?
A3: Absolutely! Mixing a glitter or metallic top coat over a pastel base can add a beautiful dimension and sparkle. It’s a simple way to make your pastel design more eye-catching for the holidays.
Q4: How long should I let each coat of polish dry?
A4: It’s best to let each coat of polish dry for at least a minute or two before applying the next. For top coats, wait until the color layers are no longer tacky. Using quick-dry drops can speed up the process!
Q5: What colors are considered “pastels” for Easter?
A5: Pastels are colors that have white mixed in, giving them a soft, light, and airy appearance. For Easter, common pastels include baby blue, mint green, pale yellow, lavender, soft pink, peach, and cream. Think of the colors of Easter eggs!
Q6: Can I combine different pastel designs on one manicure?
A6: Yes, absolutely! You can have polka dots on one nail, an ombre on another, and a solid pastel on a third. Mixing and matching can create a really unique and fun Easter look.
Q7: How can I make my DIY pastel nail designs last longer?
A7: Always start with a good base coat, apply thin coats of polish, and finish with a high-quality, chip-resistant top coat. Reapply your top coat every couple of days to maintain shine and protection. Avoiding harsh chemicals and prolonged water submersion also helps!
Conclusion: Your Dreamy Easter Manicure Awaits!
There you have it – a treasure trove of genius inspiration for your Easter pastel nail designs! From simple yet stunning ombres and playful polka dots to chic color-blocked patterns and delicate floral accents, there’s a perfect design for everyone, regardless of your nail art experience. Pastels are inherently joyful and celebratory, making them the ideal choice for ushering in spring and embracing the festive spirit of Easter. Remember, the most important thing is to have fun with it! Experiment with different color combinations, try out the techniques that speak to you, and let your creativity shine. Your nails are a fantastic canvas for self-expression, and these soft, beautiful hues are sure to bring a touch of springtime magic to your look. So grab your favorite pastel polishes, have a wonderful time creating, and enjoy your beautiful, festive Easter manicure!

