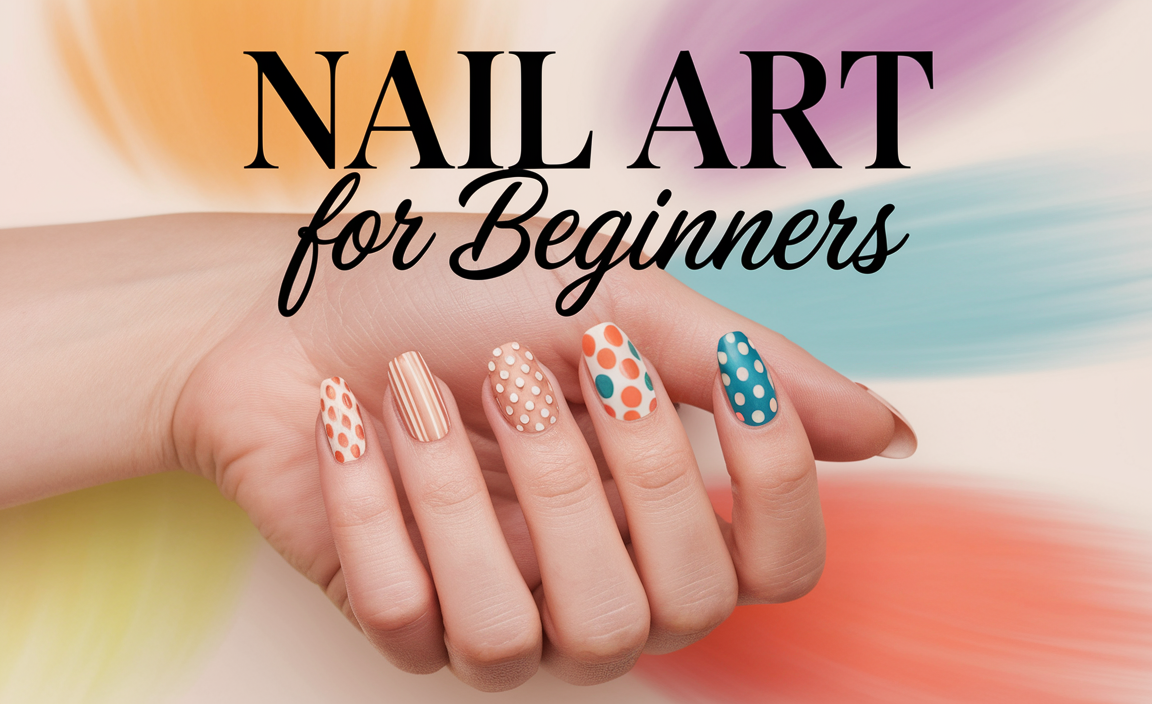
The easiest nail designs are simple, yet chic looks that require minimal tools and skill, focusing on clean lines, solid colors, or subtle accents. Think single accent nails, glitter gradients, or minimalist dots to elevate your manicure effortlessly.
Hey there, nail lovers! Are you dreaming of gorgeous nails but feel like intricate nail art is just too complicated? Maybe you’ve scrolled through endless tutorials and felt a pang of “I could never do that.” I totally get it! Achieving beautiful, stylish nails doesn’t have to mean spending hours with tiny brushes and fancy tools. You can absolutely create stunning looks right at home, with designs that are as easy to do as they are to admire. Get ready to discover how simple and fun DIY nail art can be, and unlock your inner nail guru without the fuss. Let’s dive into the world of effortless elegance!
Unlocking Your Inner Nail Artist: The Beginner’s Guide to Effortless Nail Designs
Welcome to the wonderful world where stunning nails meet serious simplicity! We’re talking about designs that look like you’ve just stepped out of a salon, but were actually created with minimal effort and a dash of at-home creativity. If you’ve ever thought fancy nail art was out of reach, think again. This guide is your secret weapon to achieving chic, eye-catching manicures without the frustration.
We’ll break down some of the most beginner-friendly nail designs that require just a few basic tools and a little bit of patience. Forget the pressure of perfection; these are all about expressing your personal style and enjoying the process. Get ready to transform your nails into mini works of art, one easy step at a time.
Why Go for Easy Nail Designs?
There are so many fantastic reasons to embrace the simpler side of nail art. For starters, they’re incredibly time-efficient. In our busy lives, who has hours to spare on intricate patterns? Easy designs let you look polished and put-together without a huge time commitment.
- Time-Saver: Get a polished look in minutes, not hours.
- Budget-Friendly: You don’t need a professional’s toolkit; basic supplies will do.
- Low-Stress: Perfect for beginners, reducing the anxiety of “messing up.”
- Versatile: Easy designs can be as casual or as elegant as you need them to be.
- Confidence Booster: A beautiful manicure, no matter how simple, can make you feel amazing!
Ultimately, easy nail designs democratize beauty. They prove that gorgeous nails are accessible to everyone, regardless of skill level or budget. It’s about embracing your creativity and making your nails a fun form of self-expression.
Your Essential Toolkit for Effortless Nail Art
Before we jump into the designs, let’s talk tools. The good news is, you don’t need a whole makeup artist’s arsenal. A few basic items will get you started on the path to nail art success.
Must-Have Essentials:
- Nail Polish Remover: For cleaning up mistakes and preparing your nails. Acetone-free options are gentler on the nail bed after repeated use.
- Cotton Pads/Balls: To apply nail polish remover.
- Nail File: To shape your nails. A fine-grit file is best for natural nails to avoid damage.
- Cuticle Pusher (Orange Stick or Metal): To gently push back your cuticles for a clean canvas.
- Base Coat: Protects your natural nails from staining and helps polish adhere better. Crucial for longevity!
- Top Coat: Seals your design, adds shine, and prevents chipping. A good quick-dry top coat is a lifesaver.
- Your Favorite Nail Polishes: A curated collection of colors you love is key!
Optional (but helpful) Additions:
- Dotting Tools: These come in various sizes and are fantastic for creating dots, swirls, and simple patterns.
- Thin Nail Art Brush: For drawing cleaner lines or applying small details.
- Toothpick: A surprisingly effective tool for creating small dots or transferring glitter.
- Scotch Tape or Makeup Sponge: For creating gradients or sharp lines.
Having these on hand will make executing even the simplest designs a breeze. Remember to invest in good quality base and top coats; they make a huge difference in how your manicure looks and lasts!
The Easiest Nail Designs: Step-by-Step & Stunnning Looks
Now for the fun part! Let’s break down some of the most straightforward yet impressive nail designs that you can master in no time. We’ll focus on techniques that deliver maximum impact with minimum fuss.
1. The Classic Solid Color with an Accent Nail
This is the epitome of easy elegance. It’s sophisticated, looks intentional, and is incredibly adaptable to any outfit or occasion. The beauty lies in its simplicity.
What You’ll Need:
- Base Coat
- Two coordinating or contrasting nail polishes (one for the accent nail, one for the rest)
- Top Coat
How to Do It:
- Prep: Start with clean, filed nails. Apply a thin layer of base coat and let it dry completely.
- Base Color: Apply two thin coats of your chosen base color (the one for your non-accent nails) to all nails except your ring finger. Let each coat dry thoroughly.
- Accent Color: Apply one or two thin coats of your accent polish to your ring fingernails. Ensure it dries completely.
- Top It Off: Once all polish is dry, apply a layer of top coat to all nails to seal in the color and add shine.
Pro Tip: For a subtle upgrade, use different finishes – a matte on the accent nail and a glossy finish on the others, or vice versa.
2. Glitter Gradient (Ombre)
This design looks intricate but is surprisingly simple to achieve. It’s perfect for adding a touch of sparkle and dimension to your nails, and it’s super forgiving of any minor imperfections.
What You’ll Need:
- Base Coat
- Your favorite nail polish color
- Glitter nail polish (either fine glitter or chunky glitter)
- Top Coat
- Makeup sponge (optional, but recommended for a smoother blend)
How to Do It (Using a Sponge for Best Blend):
- Prep: Apply base coat and one or two thin coats of your chosen color polish to all nails. Let it dry completely.
- Sponge Application:
- Apply a layer of glitter polish to your sponge. You can go from the tip downwards, or just in the area you want the glitter to be concentrated.
- Gently dab the sponge onto the tip of your nail. You want to build up the glitter gradually.
- Reapply glitter to the sponge as needed and repeat dabbing onto the nail, working down towards the cuticle area. The goal is to have the most glitter at the tip and less as you move down.
- Sponge Application (Alternative): Alternatively, paint the glitter polish directly onto the end of your nail with the polish brush, and then use the sponge to gently blend the edge downwards.
- Clean Up: Use a brush dipped in nail polish remover to clean up any glitter that got onto your skin or cuticles.
- Seal and Shine: Once the glitter polish is dry, apply a generous layer of top coat to smooth out the texture and add high shine. Two coats of top coat might be needed for chunky glitters.
How to Do It (Without a Sponge): For a quicker, though sometimes less blended, version: apply the glitter polish directly to the tips of your nails, then use the brush to drag the glitter down a short way. You can layer for more opacity. This is great for a “glitter tip” look.
3. Minimalist Dots
Dots are your best friend when it comes to easy, chic nail art. They add a playful yet sophisticated touch. The size and placement are entirely up to you!
What You’ll Need:
- Base Coat
- Your chosen polish color for the background
- A contrasting polish color for the dots
- Dotting tool (or toothpick/pen tip)
- Top Coat
How to Do It:
- Prep: Apply base coat and let it dry.
- Base Color: Apply one or two thin coats of your background polish. Let it dry completely until it’s not even slightly tacky. This is important to prevent smudging.
- Dotting Time:
- Dip your dotting tool (or toothpick) into your contrasting polish. For a clean dot, pick up a small, round bead of polish.
- Gently press the dotting tool onto your nail where you want the dot.
- You can create patterns: a single dot off-center, multiple dots in a line, a scattered effect, or even a simple French tip with dots.
- Let it Dry: Allow the dots to dry completely.
- Seal: Apply a thin layer of top coat over the entire nail, being careful not to drag the dots.
Tip: Experiment with different sized dotting tools for varying dot sizes and effects. You can also use two colors of dots on one nail for more visual interest!
4. The Chic Half-Moon Manicure
This retro-inspired look is timeless and surprisingly easy to recreate. It defines the base of your nail with a distinct shape, adding a pop of color or a contrasting shade.
What You’ll Need:
- Base Coat
- Two coordinating or contrasting nail polishes
- Small circular stickers (like hole punch reinforcement stickers) or nail art guides
- Top Coat
How to Do It:
- Prep: Apply base coat and let it dry.
- First Color: Apply your first polish color (this will be the “moon” color) to the base of your nail, creating a C-shape or half-moon curve. Let it dry completely.
- Apply Guide: Carefully place a circular sticker or nail art guide just above the painted half-moon, following the curve. This will act as a barrier for your next color. Ensure the sticker is sealed down firmly to prevent polish from seeping underneath.
- Second Color: Paint your second polish color over the rest of the nail, up to the edge of the sticker. Apply two thin coats if needed. Let each coat dry thoroughly.
- Remove Guide: While the last coat is still slightly wet (but not wet enough to smudge), carefully peel off the sticker. Removing it while slightly wet helps prevent the polish from peeling with the sticker.
- Clean Up & Seal: Use a brush dipped in polish remover to clean up any edges. Once dry, apply a top coat to seal everything in.
Alternative Method (No Sticker): You can freehand the half-moon. Paint the full nail with your base color. Once dry, use a striping brush or toothpick to paint a fine line along the edge of your natural nail bed, then fill in the semi-circle area with your accent color or a nude shade.
5. Simple Stripes
Stripes, whether fine and delicate or bold and graphic, can instantly elevate your manicure. The key is a steady hand and patience.
What You’ll Need:
- Base Coat
- Your chosen base polish color
- Contrasting polish color for the stripes
- Thin striping nail art brush OR a toothpick/fine-tipped pen
- Top Coat
- Optional: Striping tape (for very precise lines)
How to Do It (With a Brush/Toothpick):
- Prep: Apply base coat and let it dry.
- Base Color: Apply one or two coats of your base polish. Ensure it dries to a completely hard finish – any tackiness will lead to smudges.
- Dip and Draw: Dip your striping brush or toothpick into your contrasting polish. You want a small bead of polish on the tip, not too much.
- Create Stripes: Gently draw your stripes onto the nail. For vertical stripes, start at the cuticle and draw a straight line to the tip. For horizontal stripes, start from one side and draw across. You can do one strategic stripe, multiple parallel stripes, or a criss-cross pattern.
- Let Dry: Allow the stripes to dry completely.
- Seal: Apply top coat carefully, trying not to disturb the painted stripes.
How to Do It (With Striping Tape):
- Prep and Base: Apply base coat and your first color. Let it dry completely hard.
- Apply Tape: Carefully apply strips of striping tape onto the dry nail in your desired pattern (e.g., diagonal, horizontal). Press the edges down firmly to create a seal.
- Apply Second Color: Paint over the tape with your second color. Ensure full coverage. Two thin coats might be best. Let this coat dry until it’s dry to the touch but not fully hardened.
- Remove Tape: Gently peel off the striping tape using tweezers or your fingers. Peel it away from the painted area.
- Seal: Once dry, apply top coat to seal the design.
Tip: For the best results with tape, ensure it’s applied to a perfectly smooth, fully dried surface. Removing the tape while the top color is almost dry prevents lifting.
6. The Power of Negative Space
Negative space manicures are incredibly chic and modern. They utilize the bare nail as part of the design, making them super easy and quick.
What You’ll Need:
- Base Coat
- Clear Top Coat
- One or two colors of polish, OR striping tape/stickers
How to Do It (Simple Geometric Shapes):
- Prep: Apply base coat and let it dry.
- Create Pattern:
- Using striping tape or stickers, create geometric shapes (squares, triangles, diagonal lines) on your nail, leaving sections of the bare nail exposed.
- Alternatively, use a fine brush or toothpick to paint simple geometric lines or shapes directly onto the clear base coat, leaving other areas bare.
- Coloring (Optional): If using tape, you can paint over the entire nail with a color, let it dry, then carefully remove the tape to reveal the bare nail sections.
- Seal: Once everything is dry, apply a generous layer of clear top coat to seal the design and add shine.
Tip: A good clear top coat is essential here to make the design pop and protect the bare nail areas.
7. The Simple French Tip Upgrade
The French manicure is a classic for a reason, but you can give it a modern, easy twist. Forget the perfect white line; we’re going for something a little more fun.
What You’ll Need:
- Base Coat
- Nude or sheer pink polish
- A contrasting or metallic polish for the tip
- Thin striping brush OR dotting tool OR even your polish brush
- Top Coat
How to Do It:
- Prep: Apply base coat and let dry.
- Base Color: Apply one or two thin coats of your nude or sheer pink polish. Let it dry completely.
- New Tip Color:
- With a Brush: Dip a thin striping brush into a contrasting or metallic color and carefully paint a fine line along the edge of your nail. You can do a traditional white tip, a colored tip, or even a double line.
- With a Dotting Tool: Use a dotting tool to create a series of small dots along the tip of the nail, connecting them to form a thin line.
- With Polish Brush: For a thicker, more graphic tip, carefully use the polish brush of your contrasting color to paint a straight or curved line across the tip.
- Let Dry: Allow the tips to dry thoroughly.
- Seal: Apply top coat to seal everything.
Tip: Try a metallic gold or silver for a sophisticated update, or a bright neon for a fun pop!
Nail Care Tips for the Best Results
Even the easiest nail designs look best on healthy, well-cared-for nails. Here are a few simple tips to keep your nails in top shape:
- Keep them Hyd


