Ready to rock gorgeous marble nails? This guide breaks down how to do marble nail art with simple steps, making it easy for anyone to achieve stunning, effortless results at home using basic tools. You’ll be a marble nail pro in no time!
Hey nail lovers! Lisa Drew here from Nailerguy, and I’m so excited to dive into one of the most chic and surprisingly easy nail art trends: marble nails! Have you ever looked at those gorgeous, swirly marble designs and thought, “There’s no way I can do that”? I hear you! It looks so intricate, like something only a professional artist could create. But guess what? It’s totally achievable, even if you’re just starting with your nail art journey. Frustratingly beautiful designs are a thing of the past! We’re about to unlock the secret to creating stunning marble effects that look like you just stepped out of a high-end salon, all from the comfort of your home. Get ready to impress yourself and everyone around you. Let’s get those nails looking like a work of art!
Why Marble Nails Are the Ultimate Trend
Marble nails have a magic all their own. They blend sophistication with a touch of artistic flair, making them a favorite for so many reasons:
Timeless Elegance: Marble patterns evoke a sense of luxury, like natural stone or high-end décor. This timeless appeal means your marble nails will always be in style.
Versatility: Whether you’re heading to a business meeting, a fancy dinner, or just a casual day out, marble nails fit any occasion. They can be as subtle or as bold as you like.
Uniqueness: No two marble patterns are ever exactly alike! Each swirl and blend creates a one-of-a-kind masterpiece on each nail.
Beginner-Friendly: While they look complex, the techniques for creating marble nail art are surprisingly simple and forgiving, perfect for beginners.
* Customizable: You control the colors, the intensity of the swirls, and the overall look. Want a classic black and white? A soft pink and gold? You’ve got it!
Gather Your Marble Nail Art Essentials
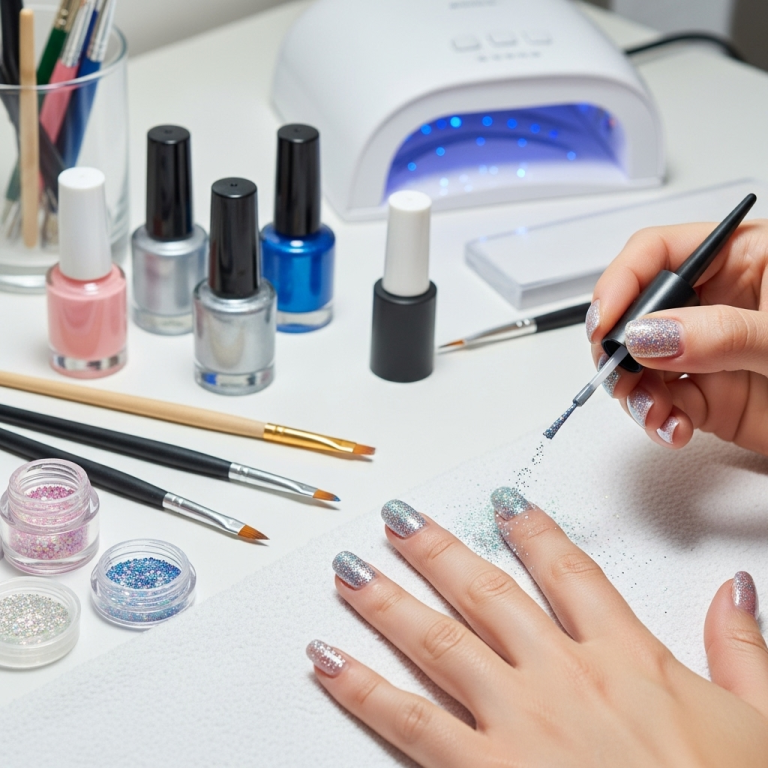
Before we start swirling, let’s make sure you have everything you need. The beauty of marble nail art is that you don’t need a whole lot of fancy, specialized tools. Most of what you need, you might even already have!
Essential Tools You’ll Need:
- Base Coat: To protect your natural nails and help polish adhere.
- Top Coat: To seal your design and add shine.
- Nail Polish Colors: At least two contrasting colors for your marble effect. A white or black base is common, with another color for the swirls.
- Toothpick, Dotting Tool, or Thin Nail Art Brush: To create and blend the marble patterns.
- Nail Polish Remover: For quick clean-ups of any accidental smudges.
- Cotton Swabs or Small Brush: For precise clean-up around the cuticle area.
- Optional: Acetone Soak/Water Marble Dish (for water marble technique): This is for a specific method but is a great option to explore!
Having these items handy will make your marble nail art session smooth and enjoyable. Let’s talk about the different ways you can achieve this stunning look!
How to Do Marble Nail Art: The Simplified Step-by-Step Guide
There are a few popular methods for creating marble nail art, each with its own charm. We’ll cover the easiest, most accessible techniques first.
Method 1: The Direct Polish Swirl (Beginner Favorite!)
This is the most straightforward way to get that marbled effect directly on your nail, perfect for when you’re just starting out.
Step 1: Prep Your Nails
Start with clean, dry nails. Push back your cuticles and gently buff your nails to create a smooth surface. Apply a thin layer of your favorite base coat and let it dry completely. This step is crucial for nail health and polish longevity!
Step 2: Apply Your Base Color
Paint your nails with your chosen base color. This is usually a lighter shade like white, cream, or a pale nude, as it helps the other colors pop. Apply two thin coats for even coverage and let the second coat dry for about 1-2 minutes until it’s still slightly tacky. This slight tackiness is key for the next step!
Step 3: Create Your Marble Swirls
Now for the fun part! Take your contrasting polish color (e.g., black, gold, pink). Dip your toothpick, dotting tool, or thin nail art brush into the polish.
Gently touch the tip of your tool to the nail surface and drag it with thin, wavy lines. Don’t press too hard; just let the polish flow. You want to create a few random, organic lines that look like veins in marble. Don’t overdo it – less is often more!
Step 4: Swirl and Blend
Immediately after creating your lines, take a clean toothpick or the fine tip of your nail art brush and carefully drag it through the lines you just made. Make a gentle “S” or “Z” shape, blending the colors together. Move slowly and deliberately. You can do one or two gentle passes. Over-blending will make the colors muddy, so be mindful of that!
The goal is to create distinct swirls and veins, not a uniform blend. If you want more color, you can add another thin line and blend again, but remember that tackiness we talked about. You don’t want to lift the base polish.
Step 5: Clean Up and Seal
Dip a cotton swab or a small brush (angled brushes are great for this) into nail polish remover. Carefully trace around your cuticle and sidewalls to clean up any polish that got where you didn’t want it.
Once you’re happy with the marble effect and it’s dry to the touch (it usually dries quickly because the polish layers are thin), apply a generous layer of your top coat. Cap the free edge of your nail (paint a little on the edge of your nail tip) to help prevent chipping and seal in your beautiful design.
Let it dry thoroughly. And voilà! You have your own stunning marble nails!
Method 2: The Water Marble Technique (A Bit More Advanced, But Stunning!)
The water marble technique gives an incredibly intricate and seamless marble effect. It requires a bit more practice but the results are breathtaking.
Step 1: Prepare Your Water
Fill a small cup or container with room temperature water. You can add a drop of white vinegar to the water to help the polish spread better, though it’s not strictly necessary.
Step 2: Prep Your Nail and Fingers
Apply a thick layer of petroleum jelly (like Vaseline) or a latex liquid latex barrier around your cuticle and sidewalls. This is essential! Water marbling gets messy, and this barrier protects your skin from polish, making cleanup a breeze. You can also use tape to create a barrier. Apply your base coat and let it dry completely. A white base coat works best for vibrant colors.
Step 3: Drop the Polish
Choose your colors. Open the caps and have them ready. Hold the bottle about 6 inches above the water. Let the first drop of polish fall into the center of the water. Immediately follow with a drop of your second color, letting it fall directly onto the first drop. Continue dropping colors onto each other in the center.
Step 4: Swirl the Pattern
Once you have a few drops, use a toothpick or a stylus to gently swirl the colors outward from the center. Create a pattern by dragging the tool through the surface of the polish. Don’t over-swirl; a few gentle drags are usually enough. Aim for patterns that resemble marble veins.
Step 5: Create Your Nail Impression
Once you have a pattern you like, dip your finger (protected by your barrier) into the water at an angle, right into the swirling polish. The polish will adhere to your nail. As you pull your finger out, use a toothpick to remove any excess polish that’s floating on the water surface around your finger.
Step 6: Clean Up and Seal
Gently peel off the petroleum jelly or latex barrier from your skin. Use a nail polish remover-soaked brush or cotton swab to clean up any remaining polish on your skin. Once your nail is dry, apply a top coat to seal the design. Repeat for each nail!
This method is a bit trickier to master, but with practice, you can achieve incredibly detailed and beautiful marble designs. For more on nail prep and technique, the Nail Superstore offers some fantastic insights into getting your nails ready for any design.
Marble Nail Art Color Combinations to Inspire You
The beauty of marble is its adaptability to virtually any color palette. Here are some crowd-pleasing combinations to get your creative juices flowing:
Classic & Chic
- White base with Black and Grey swirls
- Black base with White and Silver swirls
- Nude base with Gold and Cream swirls
Bold & Beautiful
- Deep Teal base with White and Navy swirls
- Burgundy base with Rose Gold and Pink swirls
- Emerald Green base with Gold and Black swirls
Soft & Romantic
- Pale Pink base with White and Light Grey swirls
- Lavender base with White and Periwinkle Blue swirls
- Peach base with Cream and Gold accents
Fun & Vibrant
- White base with Bright Pink and Orange swirls
- Cobalt Blue base with Yellow and White swirls
- Turquoise base with Coral and White swirls
Don’t be afraid to mix and match! You can even add glitter or metallic accents to your marble design for an extra bit of sparkle.
Troubleshooting Common Marble Nail Art Issues
Even the most seasoned nail artists encounter a few bumps in the road. Here are some common problems and how to fix them:
Problem: The colors are muddy and not distinct.
Solution: This usually happens from over-blending. Try to do fewer swirls with your toothpick. If you’ve already applied it, let it dry and apply another thin, contrasting line and smudge very gently with a clean toothpick tip.
Problem: The polish is too thick and won’t swirl properly.
Solution: Make sure you’re using fresh polish. Old polish can become thick and gummy. For the direct swirl method, ensure your base color is still slightly tacky but not fully dry. For water marbling, try adding a tiny bit of thinner to your polish, but be careful not to over-thin it.
Problem: My skin gets covered in polish!
Solution: This is where the prep is key! For the direct swirl, a cleanup brush dipped in remover is your best friend. For water marbling, petroleum jelly or liquid latex is a lifesaver. Apply it generously around your cuticles before you start.
Problem: The design is lifting or peeling.
Solution: Ensure you’re using a good base and top coat. Also, be sure to cap the free edge of your nails with your top coat. If the polish design itself seems weak, ensure your layers weren’t too thick, as thick layers can take longer to dry and may not adhere as well.
Problem: It’s taking too long to dry.
Solution: Thin coats are essential! Thick layers of polish, especially multiple ones for intricate designs, will take ages to dry and increase the risk of smudging. Consider using quick-dry drops or a fast-drying top coat.
Nail Care Tips for Maintaining Your Marble Masterpiece
Once you’ve perfected your marble nails, you want them to last! Here are some tips:
- Reapply Top Coat: Every 2-3 days, add an extra layer of top coat to refresh the shine and protect your design.
- Protect Your Hands: Always wear gloves when doing household chores, especially washing dishes or using cleaning products. These can strip the polish and dull the shine.
- Avoid Harsh Chemicals: Even without dish duty, limit your nails’ exposure to harsh chemicals.
- Moisturize: Keep your cuticles and hands moisturized with cuticle oil and hand cream. Healthy cuticles make your manicure look even better! For more on effective nail care, the NHS provides general healthy skin advice that extends to nail health.
- Be Gentle: Try not to use your nails as tools (e.g., to open cans or scrape things).
Following these simple tips will help keep your stunning marble nails looking fresh and gorgeous for as long as possible.
Marble Nail Art Inspiration Table
Let’s look at some popular marble nail art styles to give you even more ideas.
| Style | Description | Best For |
|---|---|---|
| Classic Black & White | Sharp, contrasting lines creating a sophisticated and timeless look. | Everyday elegance, formal events. |
| Monochromatic Gradient | Utilizes different shades of the same color for subtle, blended patterns. | Subtle sophistication, professional settings. |
| Metallic Accents | Incorporates gold, silver, or rose gold veins for a touch of glam. | Evening wear, parties, adding a luxury feel. |
| Pastel Swirls | Soft, dreamy color combinations perfect for spring and summer. | Casual outings, seasonal manicures. |
| Jewel Toned Fusion | Rich, deep colors like emerald, sapphire, or ruby blended together. | Fall and winter fashion, making a statement. |
Frequently Asked Questions About Marble Nail Art
Q: Can I do marble nail art without special tools?
A: Absolutely! You can achieve a beautiful marble effect using just a toothpick or even a straightened paperclip for swirling. The key is the polish application and gentle blending.
Q: How many colors should I use for marble nails?
A: Most marble designs use two to three colors for good contrast and definition


