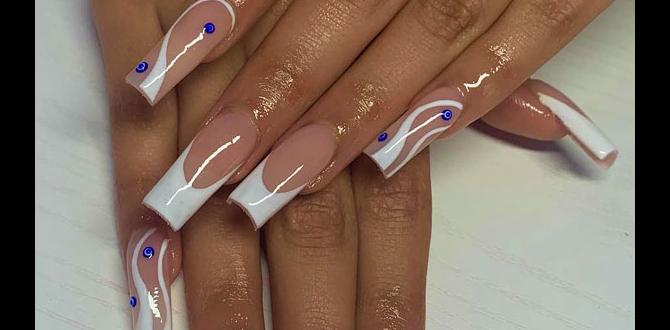
Diamond glitter coffin nails are a dazzling way to add sparkle and sophistication to your look. This tutorial will guide you through creating this stunning manicure at home, making it simple and fun for beginners to achieve salon-worthy results.
Let’s talk nails! Are you dreaming of a manicure that’s both chic and brilliantly sparkly? Diamond glitter coffin nails are the answer! They’re a stunning choice that instantly elevates any outfit and brings a touch of glamour to your fingertips.
Maybe you’ve seen them on social media and thought, “Wow, that looks complicated!” Or perhaps you’re just starting your nail art journey and aren’t sure where to begin. Don’t worry, I’ve got you covered!
Achieving this glamorous look at home is totally doable, and honestly, it’s a lot of fun. We’ll break down every step so you can create your own dazzling diamond glitter coffin nails with confidence.
Ready to sparkle? Let’s dive in!
Why We Love Diamond Glitter Coffin Nails
Coffin nails, also known as ballerina nails, have a distinctive tapered shape that’s both elegant and edgy. When you add diamond glitter to this silhouette, you get a manicure that’s truly show-stopping. It’s like wearing tiny disco balls on your fingers!
The allure of diamond glitter coffin nails lies in their versatility and undeniable sparkle. They can dress up a casual look or complement a formal ensemble. Plus, the reflective nature of the glitter catches the light beautifully, creating a mesmerizing effect. It’s a trend that’s here to stay because it’s simply gorgeous!
Key Elements of the Look:
- The Shape: The coffin shape provides a sleek canvas.
- The Glitter: Fine, diamond-like glitter creates intense sparkle.
- The Shine: A high-gloss top coat seals the deal, making them gleam.
Getting Started: What You’ll Need
Before we jump into the step-by-step process, let’s gather our supplies. Having everything ready will make the application smooth and enjoyable.
Essential Tools and Materials:
- Nail File: For shaping your nails. A medium-grit file is good for shaping, and a finer grit can be used for smoothing.
- Nail Buffer: To smooth out any ridges and create a clean surface.
- Cuticle Pusher/Orange Stick: To gently push back your cuticles.
- Nail Polish Remover: To clean your nails of any oils or old polish.
- Base Coat: This protects your natural nails and helps polish adhere better.
- Your Chosen Polish Color: A neutral, nude, or sheer pink often works best as a base for glitter, but any color you love will do!
- Diamond Glitter Nail Polish: Look for polishes specifically labeled as “diamond glitter,” “holographic glitter,” or “fine iridescent glitter.”
- Clear Top Coat: A good quality top coat will add shine and protect your design.
- Optional: Nail Glue and Loose Glitter: If you want to build up the glitter effect or have more control.
- Optional: Tweezers: Helpful for placing larger glitter pieces.
- Optional: Dotting Tool: For precise placement of glitter.
Step-by-Step Guide to Diamond Glitter Coffin Nails
Now for the fun part! Follow these simple steps to create your own dazzling diamond glitter coffin nails.
Step 1: Prep Your Nails
A good manicure starts with clean, prepped nails.
- Remove Old Polish: If you have any old nail polish on, remove it completely using nail polish remover and a cotton pad.
- Shape Your Nails: Gently file your nails into the coffin shape. To do this, file the sides straight up to create parallel lines, then file the tip to a point. Ensure all nails are the same length and shape. You can aim for a soft taper or a sharper point, depending on your preference.
- Buff Your Nails: Use a nail buffer to gently buff the surface of each nail. This removes any shine and creates a smooth surface for the polish to adhere to, preventing chipping.
- Cleanse: Wipe each nail with nail polish remover to get rid of any dust or oils. This is a crucial step for long-lasting polish.
Step 2: Apply Base Coat
A base coat is your nail’s best friend!
- Apply one thin layer of base coat to each nail. Let it dry completely. This step protects your natural nails from staining and provides a smooth surface for your polish.
Step 3: Apply Your Base Color (Optional but Recommended)
For a more polished look, a sheer or light-colored polish underneath the glitter can provide a beautiful depth.
- Apply one or two thin coats of your chosen polish color (e.g., nude, pink, or sheer white).
- Allow each coat to dry thoroughly before moving to the next step.
Step 4: The Glitter Application
This is where the magic happens!
There are a few ways to achieve the diamond glitter effect:
Method 1: Using Glitter Nail Polish
This is the easiest method for beginners!
- Dip Your Brush: Dip your glitter nail polish brush into the bottle, but avoid overloading it with too much product. You want enough glitter for coverage without clumping.
- Apply to Nails:
- Full Glitter Coverage: For a full glitter effect, apply the glitter polish evenly over your entire nail. You might need two coats for maximum sparkle.
- Glitter Gradient: For a more subtle look, start applying the glitter polish from the tip of the nail and work your way down, feathering the application as you go. This creates a beautiful ombré effect.
- Accent Nail: Apply glitter to one or two accent nails for a touch of sparkle.
- Let it Dry: Allow the glitter polish to dry completely. Glitter polish can sometimes take a little longer to dry than regular polish.
Method 2: Using Loose Glitter and Clear Polish
This method gives you more control over the glitter density and placement.
- Apply Clear Polish: Apply a thin, even layer of clear nail polish (or your base color if it’s still a bit tacky) to the areas where you want glitter. Work on one nail at a time, as clear polish dries quickly.
- Dip or Sprinkle Glitter:
- Dip Method: If using a dense glitter effect, gently dip the wet nail into a small dish of loose glitter.
- Sprinkle Method: For more targeted placement, use a small brush or tweezers to carefully sprinkle the loose glitter onto the wet polish. You can also use a dotting tool to pick up small amounts of glitter and place them precisely.
- Press and Tap: Gently press the glitter into the wet polish to ensure it adheres well. Tap off any excess glitter onto a piece of paper.
- Build Layers (Optional): If you want a more intense glitter payoff, you can repeat steps 1-3, applying another thin layer of clear polish and then more glitter.
- Clean Up Edges: Use an orange stick or a small brush dipped in nail polish remover to clean up any glitter that has gotten onto your skin or cuticles.
- Let it Dry: Allow the clear polish and glitter to dry completely for at least 10-15 minutes.
Step 5: Apply Top Coat
This is the final, crucial step to seal in your sparkle!
- Apply a Thick Layer: Apply a generous, smooth layer of your clear top coat over the entire nail. Make sure to cap the free edge of your nail by running the brush along the tip. This helps prevent chipping and keeps your glitter locked in.
- Smooth Out Glitter: If your glitter application is a bit bumpy, a good quality, thicker top coat can help to smooth out the surface and create a glass-like finish. You might need two layers of top coat.
- Let it Dry: Let your top coat dry completely. This can take anywhere from 5 to 15 minutes, depending on the product. Avoid touching them until they are fully hardened.
Maintenance Tips for Your Diamond Glitter Coffin Nails
To keep your dazzling nails looking their best for as long as possible, follow these simple maintenance tips:
- Be Gentle: Avoid using your nails as tools. Don’t pop open cans or scrape off stickers with them, as this can cause chipping or breakage.
- Wear Gloves: When doing household chores, especially those involving water or harsh chemicals (like washing dishes or cleaning), wear rubber gloves. Water can soften the nail polish and weaken the bond to your natural nail.
- Moisturize: Keep your hands and cuticles moisturized with a good hand cream or cuticle oil. This prevents dryness and keeps the skin around your nails looking healthy, which complements your manicure.
- Touch-Ups: If you notice a small chip or a bit of wear along the tip, you can sometimes get away with applying an extra layer of top coat to seal it until your next manicure.
- Gentle Removal: When it’s time to remove them, use an acetone-based nail polish remover for best results, especially with glitter. Soak cotton balls in acetone, place them on your nails, wrap with foil, and let them sit for about 10-15 minutes. Gently wipe off the polish and glitter.
The Science Behind Long-Lasting Polish
Want your Diamond Glitter Coffin Nails to stay put? Understanding a bit about nail polish science can help! A good manicure relies on proper adhesion.
Nail polish itself is a complex mixture. The film formers (like nitrocellulose) create the hard coating. Plasticizers provide flexibility, solvents evaporate to allow the film to form, and colorants provide the hue. The surface of your natural nail, however, can be oily or have microscopic ridges. This is where preparation and base coats are vital. A good base coat creates a slightly tacky layer that fills in imperfections and bonds better with both the natural nail and the polish.
The top coat plays a crucial role not just in shine but also in adhesion and protection. High-quality top coats contain polymers that create a strong, durable, and glossy surface. They seal the polish from the environment, preventing evaporation of the solvents that keep the polish flexible and therefore prone to chipping. Some top coats also contain UV inhibitors to prevent yellowing. For an excellent overview of nail polish composition and how it works, you can refer to resources like ThoughtCo’s explanation of how nail polish works.
Choosing the Right Glitter: What to Look For
Not all glitter is created equal! For that coveted diamond sparkle, here’s what to consider:
Diamond Glitter Nail Polish vs. Craft Glitter for Nails
It’s important to use products specifically designed for cosmetic use.
| Feature | Diamond Glitter Nail Polish | Craft Glitter (Unspecified Use) |
|---|---|---|
| Safety | Made with cosmetic-grade, non-toxic materials safe for skin and nails. | May contain metals, plastics, or other materials not safe for prolonged skin contact or nail application. Can have sharp edges. |
| Particle Size & Shape | Typically fine, uniform particles designed to lie flat and create a smooth, sparkly surface. Reflective properties are optimized for shine. | Can vary greatly in size, shape, and texture. May be too chunky or have sharp edges that snag or feel uncomfortable. |
| Application | Formulated for easy application with a brush. Glitter is suspended in a suitable polish base. | Requires careful handling and often a specific adhesive or clear polish base. Can be difficult to control coverage. |
| Longevity | Designed to be durable and long-lasting when used with a base and top coat. | May not adhere as well or wear as long. Can degrade or lose sparkle over time. |
When shopping for your diamond glitter, look for descriptions like “fine holographic glitter,” “iridescent glitter,” or “diamond dust.” These terms suggest the finely milled, highly reflective particles that give the desired luminous effect.
When to Choose Loose Glitter vs. Glitter Polish
Both have their merits!
- Glitter Polish:
- Pros: Easy to apply, consistent color payoff, readily available.
- Cons: Can be harder to remove, less control over placement and density.
- Loose Glitter:
- Pros: High control over placement, density, and color combinations. Can create unique textures. Often easier to remove than dense glitter polish.
- Cons: Requires more steps and a steady hand. Need to purchase a separate clear polish or adhesive.
For a truly “diamond” look, very fine, holographic, or iridescent loose glitters often give the best sparkle and a smooth finish when applied carefully over a clear or nude base.
Styling Your Diamond Glitter Coffin Nails
These nails are a statement in themselves! But how can you style them and what colors complement them best?
Complementary Colors
While glitter is fantastic on its own, pairing it with the right base color can make it pop even more.
- Nudes and Neutrals: These are classic for a reason. A soft beige, milky pink, or creamy white provides a sophisticated backdrop that lets the glitter shine without competing.
- Sheer Pastels: Think baby pink, light blue, or lavender. These add a touch of color while maintaining an airy, ethereal feel.
- Deep Jewel Tones: For a more dramatic contrast, a deep navy, emerald green, or burgundy can make holographic or silver glitter look incredibly striking.
- Black: A black base with silver or iridescent glitter creates a glamorous, edgy vibe, perfect for evening wear.
Occasions
Diamond glitter coffin nails are surprisingly versatile!
They’re perfect for:
- Special Events: Weddings, parties, holidays, anniversaries.
- Date Nights: Add a touch of confidence and allure.
- Fashion Forward Loungewear: Even relaxing at home can be glamorous!
- Everyday Glam: If you love a little sparkle every day, rock them!
Common Beginner Mistakes and How to Avoid Them
Even experienced nail enthusiasts make mistakes sometimes! Here are a few common pitfalls for glitter manicures and coffin shapes, and how to sidestep them:
- Clumpy Glitter:
- Mistake: Applying too much glitter polish at once or not letting layers dry properly.
- Solution: Apply glitter polish in thin, even coats. If using loose glitter, apply it to a still-tacky layer of clear polish and gently press to distribute. Work in thin layers. If using loose glitter and applying over a dried clear coat, use a sticky base coat or a gel tack layer designed for glitter.
- Uneven Glitter Coverage:
- Mistake: Applying glitter unevenly, leaving bare spots or dense patches.
- Solution: For glitter polish, try dabbing motions rather than sweeping. For loose glitter, build it up gradually and evenly with a brush or tweezers.
- Rough Glitter Surface:
- Mistake: Not enough top coat to smooth out the texture.
- Solution: Use a good quality, slightly thicker top coat. Apply in thick, smooth strokes and cap the free edge. You might need two coats of top coat to achieve a perfectly smooth, glass-like finish over chunky glitters.
- Misshapen Coffin Nails:
- Mistake: Filing too aggressively, unevenly, or not using a proper guide.
- Solution: File gently and consistently. Start with straighter side walls and then taper to a point. Use steady, even strokes. If unsure, check out some visual guides online for nail filing techniques. Don’t be afraid to trim length before filing if you have a lot to work with.
- Chipping at the Tips:
- Mistake: Not capping the free edge with base, color, and top coat.
- Solution: Always swipe your brush along the very tip of the nail with every layer (base, color, glitter, and top coat). This seals the edge and greatly improves longevity.
FAQ: Your Diamond Glitter Coffin Nail Questions Answered
Let’s tackle some of those common questions you might have about this dazzling nail trend!
Q1: How do I achieve the coffin shape if my nails are short?
If your natural nails aren’t long enough for a coffin shape, you can achieve this look


