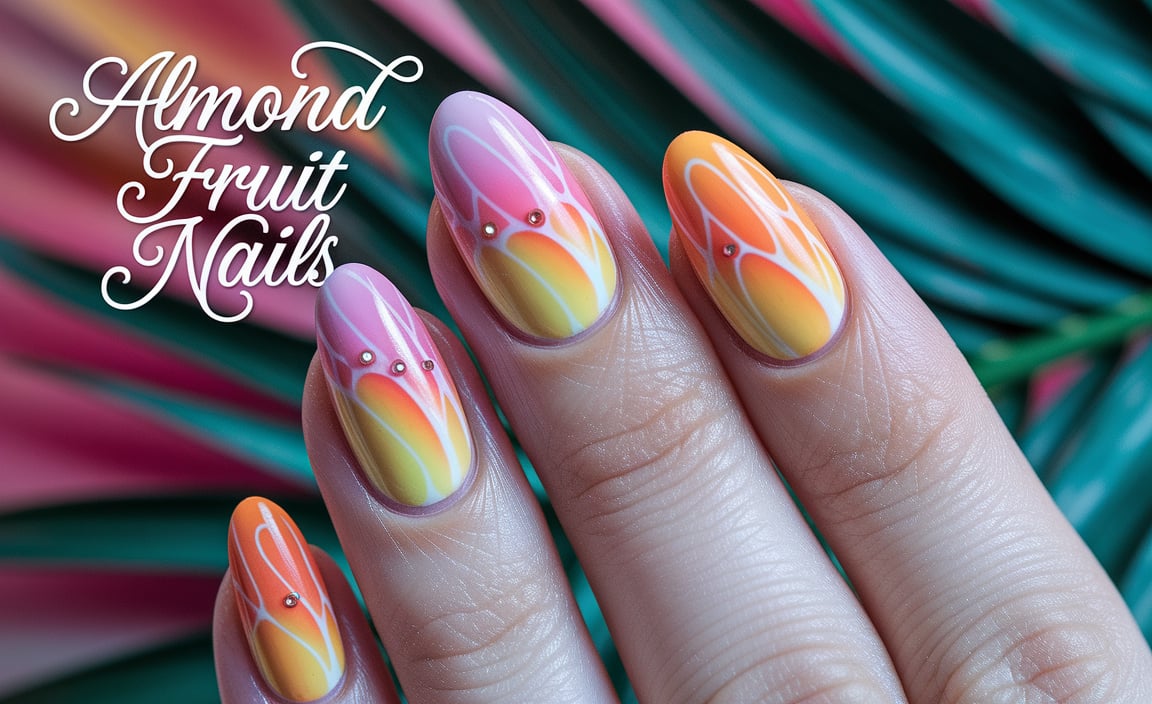
Learn how to create stunning detailed butterfly accent nails with this easy-to-follow guide. Perfect for beginners, we’ll cover essential tools, simple techniques, and tips to make your nails flutter with style!
Hey nail lovers! Have you ever seen those gorgeous, intricate butterfly designs on nails and thought, “Wow, I wish I could do that”? It can feel a little daunting at first, right? Like you need super steady hands or years of art school. But guess what? Creating beautiful, detailed butterfly accent nails is totally achievable, even if you’re just starting out. We’re going to break it all down, step-by-step, so you can add this magical touch to your manicures. Get ready to feel inspired and confident as we dive into making your nails flutter!
Frequently Asked Questions About Detailed Butterfly Accent Nails
What are accent nails?
Accent nails are simply one or two nails on each hand that you decorate differently from the rest. They’re a fun way to add a pop of design without overwhelming your whole manicure. For example, you might paint your other nails a solid color and make your ring finger a detailed butterfly accent nail!
What makes a butterfly nail design “detailed”?
Detailed designs usually involve finer lines, shading, gradients, or tiny hand-painted elements that give the butterfly a more realistic or intricate look. Think delicate wing patterns, subtle color blends, or tiny antennae. The goal is to go beyond a simple outline.
Do I need special tools for detailed butterfly nails?
While you can get creative with basic tools, special brushes like fine-tip liners or dotting tools really help. Stencils or nail stickers are also great beginner-friendly options for achieving detail without freehand painting.
How long do detailed butterfly accent nails usually last?
Properly applied gel polish or acrylics with detailed nail art can last anywhere from 2 to 4 weeks. Regular nail polish designs might last 3-7 days, depending on wear and care. Using a good top coat is key for longevity!
What if my butterfly design isn’t perfect?
Don’t worry! Every nail artist started somewhere. The beauty of accent nails is they draw attention. Even if a detail is slightly off, the overall effect can still be stunning. Practice makes perfect, and the joy is in the creative process!
Can I do butterfly accent nails on short nails?
Absolutely! Butterfly designs can be adapted for any nail length. You might opt for a smaller, more simplified butterfly on shorter nails or focus the detail on the center of the wing. The key is scaling the design to fit the nail size.
Where can I find inspiration for butterfly nail designs?
Pinterest, Instagram, and beauty blogs are amazing resources! Search for hashtags like #butterflynails, #detailednails, #nailarttutorial, and #accentnails. You’ll find countless ideas in every color and style imaginable.
Essential Tools and Supplies for Your Butterfly Nails
To create those fluttery, detailed butterfly accent nails, having the right tools makes all the difference. Don’t worry if you don’t have everything right away; you can start with the basics and build your collection!
Nail Prep Essentials
Before any art, proper prep is crucial for a manicure that lasts and looks its best. Think of it as preparing your canvas!
- Nail File: For shaping your nails gently.
- Nail Buffer: To smooth the nail surface and remove shine, which helps polish adhere better.
- Cuticle Pusher/Orange Stick: To gently push back cuticles for a clean nail bed.
- Nail Polish Remover: To clean off any oils or old polish.
- Lint-free Wipes: Essential for a clean application without leaving fuzzy bits behind.
Base and Top Coats
These are non-negotiable for a pro finish and durability.
- Base Coat: Protects your natural nails from staining and helps polish stick.
- Top Coat: Seals your design, adds shine, and prevents chips. A gel top coat cures under a UV/LED lamp for super long-lasting results.
Color Polishes
Choose a few colors for your butterfly. Think vibrant hues, pastels, or even metallics! You’ll also need a base color for the nail itself.
Detail Tools (The Art Supplies!)
This is where the magic happens! Different tools allow for different levels of detail.
- Fine-Tip Detail Brushes: These are your best friends for drawing thin lines, outlines, and intricate patterns. Look for sizes like 00, 000, or even micro-liners.
- Dotting Tools: Come in various sizes. Use the smaller heads for tiny dots that can create texture or highlights on the wings, or for drawing small circular elements.
- Striping Tape: Thin, adhesive tape that can be used to create sharp, clean lines for geometric elements or to section off parts of your design.
- Nail Art Pens: Similar to fine-tip brushes but often come in a pen format, which can be easier for some beginners to handle.
- Dotting Swirl Stick Tool: A dual-ended tool with a ballpoint tip on one end and a swirl or fine point on the other, great for precise dots and lines.
Optional Enhancements
Want to take your butterflies to the next level?
- Nail Stencils/Stickers: Pre-made designs that you can place on your nail for a quick and easy detailed look.
- Gems/Rhinestones: Tiny studs can add sparkle and dimension, perhaps to the body of the butterfly.
- Glitter: For a shimmery effect or to highlight wing patterns.
- Nail Art Palette/Surface: A clean surface (like a tile, glass mat, or even a piece of foil) to mix colors or dispense small amounts of polish for easy brush dipping.
- UV/LED Lamp: Essential if you’re using gel polishes for curing.
Choosing Your Butterfly Design
There are so many beautiful butterfly styles! As a beginner, it’s smart to start with designs that are manageable and then work your way up to more complex ones.
Beginner-Friendly Designs
These focus on simpler shapes and fewer intricate details.
- Outline Butterflies: Use a fine-tip brush to draw the outline of a butterfly. Fill it in with a solid color or a simple gradient. Add minimal details like dots or tiny lines on the wings.
- Stencil Butterflies: Place a butterfly stencil on your nail, paint over it, and carefully remove the stencil. This gives you a perfect shape with clean lines. You can then add minimal hand-painted embellishments.
- Sticker Butterflies: Peel-and-stick nail stickers are the easiest way to get a detailed butterfly. Apply a base coat, let it dry, place the sticker, and seal with a top coat.
- Geometric Butterflies: Use striping tape or a fine brush to create geometric shapes that form a simplified butterfly. Think triangles and squares for wings.
Intermediate Designs
Once you’re comfortable, you can try designs with a bit more flair.
- Shaded Wings: Use two or three colors blended together on the wings to create a softer, more dimensional look.
- Patterned Wings: Add small dots, stripes, or swirls within the wing shape to mimic real butterfly wing patterns.
- Two-Tone Butterflies: Use contrasting colors for the outline and the fill to make the butterfly pop.
- Gradient Butterflies: Apply a smooth color transition across the wings.
Advanced Designs
These require more practice and a steadier hand but look spectacular!
- Realistic Wing Details: Hand-paint delicate veins, scales, and intricate eye-spots found on real butterflies.
- 3D Elements: Incorporate small embellishments or sculpted gel to give the butterfly wings a raised, almost lifelike appearance.
- Ombre Wings with Fine Details: Combine a smooth ombre effect with finely painted patterns over the top.
Step-by-Step Guide to Detailed Butterfly Accent Nails
Let’s get to the fun part! This guide focuses on a popular technique using a fine-tip brush for detailed, hand-painted butterflies. Remember to work on clean, prepped nails. This tutorial assumes you’re using regular nail polish; for gel, you’ll need to cure each layer under a lamp.
Step 1: Prep Your Nails
Start by cleaning your nails. File them to your desired shape. Gently push back your cuticles using a cuticle pusher. Lightly buff the surface of your nails to create a smooth base for polish adhesion. Wipe away any dust with a lint-free wipe and nail polish remover to ensure your surface is clean and oil-free.
Step 2: Apply Base Coat
Apply a thin, even layer of your base coat. This protects your nails and helps your polish last longer. Let it dry completely.
Step 3: Apply Base Color
Choose a solid color for the rest of your nails (if you’re doing other nails) or for the nail you’ll put the butterfly on. Apply two thin coats of your chosen base color, allowing each coat to dry thoroughly. A good base ensures your accent nail design stands out beautifully. For example, a soft pastel or a deep jewel tone can make a butterfly pop.
Step 4: Sketch the Butterfly Outline (Lightly!)
This is where your fine-tip brush comes in! Dip it into black or dark brown polish (or any color you want your outline to be). On your accent nail, very lightly sketch the basic shape of a butterfly. Don’t press too hard. Think of two larger upper wings and two smaller lower wings. You can also sketch a simple body or “antennae.” If you’re nervous, you can even sketch this very lightly with a pencil on your nail, then go over it with polish.
Beginner Tip: If freehand sketching feels intimidating, try using a nail art pen or even a toothpick for a slightly thicker, but manageable, line. Look at a picture of a butterfly for reference!
Step 5: Fill In the Wings
Now, pick your wing colors. You can use one color or multiple for a gradient effect. Using your detail brush or a smaller polish brush, carefully fill in the outlined wing shapes. For a gradient, apply one color, then add another while the first is still slightly wet, gently blending the edges with your brush.
If you’re doing detailed patterns, you can add them now while the base color is still a little soft, or wait until it’s completely dry for cleaner lines.
Step 6: Add the Details
This is what makes it “detailed”! Use your fine-tip brush with contrasting colors or a metallic polish.
- Wing Veins: Draw thin lines radiating from the center of the wings, mimicking natural veins.
- Patterns: Add small dots, swirls, or check patterns within the wing areas. Tiny dots can create a lovely texture.
- Highlights: Use white or a lighter version of your wing color to add small highlights on curves or edges to give dimension.
- Eyespots: Some butterflies have “eyespots” on their wings. You can create these with small dark circles and a dot of a lighter color.
- Antennae & Body: Refine the antennae and body of the butterfly with your detail brush. You can add a tiny dot of metallic polish at the tip of the antennae for an extra touch.
Step 7: Clean Up Edges
Dip a small, stiff brush (an old, clean eyeliner brush works great!) into nail polish remover. Carefully clean up any polish that got onto your skin around the nail. This makes your design look super professional and sharp. Do this gently so you don’t smudge your artwork.
Step 8: Apply Top Coat
Once everything is completely dry, apply a generous, even layer of top coat over your entire nail, including the butterfly design. Make sure to cap the free edge of your nail by running the brush along the tip. This seals your art, prevents chipping, and adds a beautiful shine. For gel polish, cure this layer under your UV/LED lamp.
Alternative Methods for Detailed Butterflies
Not everyone loves freehand painting, and that’s perfectly okay! There are fantastic ways to achieve detailed butterfly looks with less freehand drawing.
Using Nail Stencils
Nail stencils are adhesive cutouts that you place on your nail to create a design. Metal stencils for stamping are also available, and some come in butterfly shapes. For painted stencils:
- Apply your base color and let it dry completely.
- Carefully place the butterfly stencil onto your accent nail. Ensure it’s adhered well to prevent polish from seeping underneath.
- Apply your desired butterfly colors over the stencil openings. You can do a single color fill or multiple colors.
- While the polish is still wet, carefully peel off the stencil. This leaves you with a clean, outlined butterfly shape.
- Once dry, you can add finer hand-painted details or highlights with a brush, or leave it as is for a simpler look.
- Seal with a top coat.
Using Nail Stickers and Decals
This is arguably the easiest method for achieving very intricate and detailed butterflies. These are pre-printed designs that you simply apply to your nail.
- Prepare your nails and apply your base color. Let it dry completely.
- Gently peel the desired butterfly sticker or decal from its backing paper. Use tweezers for precision.
- Carefully position the sticker onto your nail. Press down firmly from the center outwards to smooth out any air bubbles.
- Especially if using water decals, ensure the edges are pressed down smoothly.
- Apply a thick, generous layer of top coat over the sticker. This is crucial to seal the edges and prevent the design from peeling up. For gel polish, you’ll want to use a gel top coat and cure it.
Where to find them: Many beauty supply stores and online retailers like Amazon or Etsy offer a wide variety of detailed butterfly nail stickers and decals in all sorts of styles.
Using Nail Stamping
For those who want detailed patterns without freehand painting, nail stamping is a game-changer. You’ll need a stamping plate with butterfly designs, a stamper, and a scraper.
- Apply your base color and let it dry completely.
- Apply a highly pigmented stamping polish onto the butterfly image on your stamping plate.
- Hold the scraper at a 45-degree angle and quickly scrape across the plate to remove excess polish.
- Immediately roll the stamper over the design to pick it up.
- Quickly and gently roll the stamper onto your accent nail.
- Seal the design with a specialized top coat for stamping (if using regular polish) or a gel top coat (if using gel). Regular top coats can sometimes smudge stamped images, so test yours first!
Helpful Resource: The National Institute of Standards and Technology (NIST) offers insights into various manufacturing processes, including those that inspire intricate designs like those found on nail stamping plates.
Tips for Long-Lasting and Beautiful Butterflies
Want your butterfly accent nails to stay flawless? Here are some pro tips:
- Work in Thin Layers


