Quick Summary
Mastering cute nail design ideas at home is achievable for beginners! Explore essential styles like minimalist dots, chic stripes, easy gradients, and charming floral accents using simple tools and techniques. Unleash your creativity with these fun, DIY-friendly manicure trends that are perfect for everyday wear and special occasions.
Want to add some flair to your fingertips without a salon visit? You’re not alone! Achieving cute nail designs at home can feel a little daunting, especially if you’re just starting. Many of us dream of polished, stylish nails but struggle to replicate salon looks with everyday tools. It’s frustrating when those intricate patterns turn into smudges or the polish just doesn’t look quite right. But don’t worry! With a few essential techniques and a dash of creativity, you can create gorgeous nail art right at your kitchen table. Get ready to transform your nails into tiny works of art!
Your Ultimate Guide to Cute Nail Design Ideas at Home
Hey there, beautiful! Lisa Drew from Nailerguy here. If you’ve ever admired beautifully decorated nails and thought, “There’s no way I can do that myself!” — let me be the first to tell you that you absolutely can! Creating cute nail designs at home is a fantastic way to express your personal style, add a pop of color to your day, and feel a little extra special. It’s all about starting with the basics and building your confidence. In this guide, we’ll dive into some essential, beginner-friendly nail design styles that are super achievable and totally adorable. We’ll cover everything from the tools you’ll need to step-by-step instructions for some of my favorite looks. Let’s get those nails looking salon-worthy, from the comfort of your own home!
Why DIY Nail Art is Your New Best Friend
There are so many reasons to embrace DIY nail art. Forget expensive salon appointments! Doing your nails at home is budget-friendly and lets you experiment with different looks whenever inspiration strikes. Plus, it’s a wonderfully relaxing way to de-stress. You get to be the artist, choosing the colors and patterns that make you happy. It’s a form of self-care that leaves you with beautiful results you can show off!
Essential Tools for Your Home Nail Art Studio
Before we dive into the fun designs, let’s talk about the tools that will make your nail art journey smoother. You don’t need a whole professional kit to start! Here are a few must-haves that will help you create amazing cute nail design ideas at home:
- Base Coat: This protects your natural nails and helps your color last longer.
- Top Coat: The shiny (or matte!) finish that seals your design and adds durability.
- Nail Polish Colors: Start with a few of your favorite shades!
- Dotting Tools: These come with different-sized metal tips for creating perfect dots and small designs. They are inexpensive and incredibly versatile. You can find a great set on Amazon.
- Thin Nail Art Brush: A fine-tipped brush is perfect for drawing lines, swirls, and intricate details.
- Toothpicks/Bobby Pins: Great substitutes for dotting tools if you’re in a pinch! The rounded end of a bobby pin works surprisingly well for dots.
- Cotton Swabs & Nail Polish Remover: For cleaning up any mistakes (we all make them!).
- Acetone-Free Nail Polish Remover: Gentler on your nails and cuticles, especially important when you’re cleaning up intricate designs.
- Nail Files & Buffer: To shape your nails and create a smooth surface.
Getting Started: Prep is Key!
Great nail art starts with great nails! A little preparation goes a long way in making your designs look polished and last longer.
- Clean Your Nails: Start with clean, dry nails. Remove any old polish.
- Shape Your Nails: File your nails to your desired shape. Always file in one direction to prevent splitting.
- Buff Your Nails: Gently buff the surface of your nails to create a smooth canvas. This helps polish adhere better.
- Apply Base Coat: Apply one thin layer of your favorite base coat. Let it dry completely. This is crucial for preventing staining and extending the life of your manicure.
Essential Cute Nail Design Ideas for Beginners
Now for the fun part! Let’s explore some simple yet stunning nail design ideas you can easily recreate at home. These are perfect for building your confidence and making your nails look super cute!
1. The Classic French Tip (with a Twist!)
The French manicure is timeless, but you can easily update it with color!
How To:
- Apply your base coat and let it dry.
- Paint your nails with a sheer pink, nude, or white polish. Let it dry completely.
- Using a fine-tipped brush or a striping tape, carefully paint a curved line along the tip of your nail. Instead of just white, try a pastel color, a metallic shade, or even a glitter polish for a fun twist! For a cleaner line, you can use stencils or a specialized French tip guide.
- Let the tips dry completely.
- Apply a thin layer of top coat to seal everything in.
2. Dainty Dots & Polka Dots
Dots are incredibly easy to create and look charming on any nail.
Tools: Dotting tool, toothpick, or the end of a bobby pin.
How To:
- Apply your base coat and let it dry.
- Paint your nails with your chosen base color. Let it dry until it’s just tacky, not fully hard.
- Dip your dotting tool (or toothpick/bobby pin end) into a contrasting polish color.
- Gently press the tip onto your nail to create a dot.
- Continue adding dots, spacing them evenly or creating clusters, depending on the look you want. You can use different sizes of dotting tools for varied dot sizes.
- Let the dots dry thoroughly before applying a top coat.
Pro Tip: For a super clean look, try alternating colors on different nails or creating patterns with your dots, like a smiley face or a simple flower.
3. Chic Stripes
Stripes add a sophisticated touch and can be as simple or complex as you like.
Tools: Thin nail art brush, striping tape (optional).
How To (Freehand Stripes):
- Apply base coat and your main color. Let it dry completely.
- Dip your thin nail art brush into a contrasting polish.
- Gently draw a straight line across your nail. You can go horizontally, vertically, or diagonally.
- Wipe excess polish from your brush between lines for a clean look.
- Let the stripes dry completely before adding a top coat.
How To (With Striping Tape):
- Apply base coat and your main color. Let it dry until completely hard.
- Carefully apply strips of nail art striping tape to your nail in your desired pattern.
- Paint over the tape with a contrasting color. Make sure to cover the tape with polish.
- While the polish is still wet, carefully peel off the striping tape. This creates crisp, clean lines.
- Let the polish dry completely before applying a top coat.
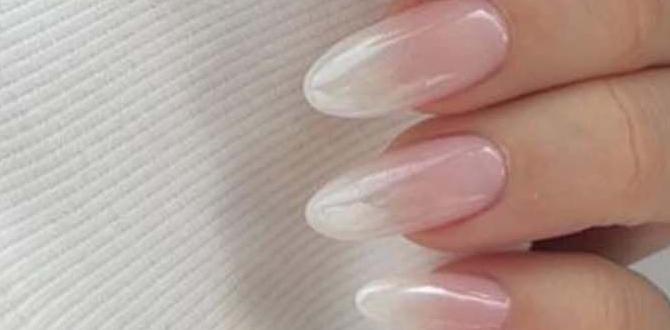
4. Easy Ombre/Gradient Nails
This technique gives a beautiful, blended effect that looks impressive but is surprisingly simple.
Tools: Makeup sponge or a textured sponge.
How To:
- Apply your base coat and let it dry.
- Paint your nails with your lightest color (or white for a brighter effect). Let it dry completely.
- On a piece of plastic wrap or a tile, apply two or three stripes of different polish colors next to each other (lightest to darkest, for example).
- Quickly dab a makeup sponge into the polish stripes, picking up the gradient color.
- Gently dab the sponge onto your nail. You might need to dab a few times to get the color to transfer well.
- Repeat for each nail. Clean up any excess polish from your cuticles with a cotton swab dipped in nail polish remover.
- Let the gradient dry, then apply a glitter polish over it for extra sparkle, or a sheer top coat to blend further. Seal with a final top coat.
5. Simple Floral Accents
Add a touch of nature with easy-to-do simple flowers.
Tools: Dotting tool, fine-tipped brush.
How To:
- Apply base coat and your main color. Let it dry completely.
- Using a dotting tool, create a small dot for the center of the flower.
- With a fine-tipped brush or another dotting tool, create small petals around the center dot. You can do this by making small dashes or dabs of polish.
- Alternatively, use a dotting tool to make 5-6 small dots in a circle, then gently drag the polish from each dot towards the center to create petal shapes.
- Let the flowers dry completely before applying a top coat.
Tip: You can also use a toothpick to create tiny three-dot flowers – two dots for petals and one for the center!
6. Glitter Fade/Half-Moon
Glitter adds instant glam, and these simple application methods are perfect for beginners.
Tools: Small brush or sponge.
How To (Glitter Fade):
- Apply base coat and your main color. Let it dry completely.
- Dip a brush or sponge into your favorite glitter polish.
- Apply the glitter polish starting from the tip of your nail, concentrating the most glitter there.
- Gently “fade” the glitter down towards the cuticle by dabbing with less pressure and fewer glitter particles.
- Let it dry, then apply a second coat if needed for more opacity.
- Finish with a top coat.
How To (Half-Moon):
- Apply base coat and your main color. Let it dry completely.
- Use a small dotting tool or a brush to apply glitter polish only to the base of your nail, creating a half-moon shape.
- Let it dry and seal with a top coat.
Nail Art Inspiration: Color Palettes & Combinations
Choosing colors is half the fun! Here are some ideas to get you inspired for your next cute nail design at home:
| Design Style | Color Palette Ideas | Vibe |
|---|---|---|
| Minimalist Dots | Nude base with black or metallic dots; Pastel pink with white dots; Navy with gold dots. | Chic, understated, modern. |
| Classic French Twist | White tips with a muted pastel base; Metallic silver tips on black; Neon tips on a nude base. | Elegant, playful, trendy. |
| Simple Stripes | Black and white horizontal stripes; Gold and navy diagonal stripes; Pastel pink and mint green vertical stripes. | Sophisticated, bold, graphic. |
| Ombre/Gradient | Pink to coral; Blue to purple; Yellow to orange; Green to teal. | Dreamy, smooth, artistic. |
| Dainty Florals | White flower on a blue background; Pink flower on a green background; Yellow flower on a purple background. | Sweet, feminine, natural. |
| Glitter Fade | Silver glitter fade on a sheer pink; Gold glitter fade on a deep red; Rainbow glitter fade on a white base. | Glamorous, festive, dazzling. |
Maintaining Your Masterpiece
To make your cute nail designs at home last, follow these simple tips:
- Always use a good base and top coat. This is non-negotiable for longevity and protection.
- Reapply top coat every 2-3 days. This refreshes the shine and seals in your design.
- Wear gloves when doing chores like washing dishes or cleaning. Water and chemicals can damage polish.
- Avoid using your nails as tools. Don’t try to open cans or scrape things off with them!
- Keep cuticle oil handy. Apply it daily to keep your cuticles moisturized and prevent hangnails, which can snag and damage designs. For more on nail health, check out resources from the American Academy of Dermatology for proper nail care.
Troubleshooting Common DIY Nail Art Issues
Even seasoned pros have off days! Here are solutions to common problems:
- Smudged Design: If a design smudges before it’s dry, gently try to smooth it with your brush or a dotting tool, or clean it up and start that nail again. If it smudges after drying, you may need to re-do the nail or embrace a more “abstract” look!
- Blobby Dots: Too much polish on your tool! Wipe off the excess before applying to the nail.
- Uneven Lines: Don’t press too hard with your brush. A firmer, steadier hand is key. For super straight lines, invest in striping tape or stencils.
- Polish Isn’t Drying: Ensure thin layers. Thick layers take much longer to dry and are prone to smudging. Consider using a quick-dry top coat or a nail drying spray.
- Polish Chipping Quickly: Make sure your nails are completely clean and dry before starting. Seal the free edge (tip) of your nail with your top coat to prevent chips.
Frequently Asked Questions About DIY Nail Designs
Q1: How long does it take to do simple nail art at home?
A: For basic designs like dots or stripes, expect to spend between 30-60 minutes from start to finish, including drying time for each coat. More intricate designs might take a bit longer.
Q2: What’s the easiest nail design for an absolute beginner?
A: The easiest design is definitely polka dots! You just need a dotting tool or even a toothpick. Another super simple one is a glitter fade, where you just dab glitter polish onto the tips of your nails.
Q3: Can I use regular craft paint for nail art?
A: While tempting, it’s best to stick to nail polish. Craft paints are not designed for nails and can contain ingredients that might irritate your skin or damage your nails. They also don’t have the same glossy finish or durability as nail polish.
Q4: How do I clean up my nail art mistakes?
A: Dip a small brush or a cotton swab into acetone-free nail polish remover. Carefully trace around your cuticles or over any smudges to clean them up. This takes a little practice, but it’s how you get those super neat edges!
Q5: How do I make my DIY nail art last longer?
A: Always use a good base and top coat, apply thin layers of polish, and let each layer dry sufficiently. Reapplying your top coat every couple of days can significantly extend the life of your manicure.
Q6: Do I need a special light for gel nail art?
A: For traditional polish nail art, you do not need a special light. Standard air-drying polish is what we’ve focused on here. If you plan to use gel polish, then yes, you will need a UV/LED lamp to cure (harden) the gel.
Conclusion: Unleash Your Inner Nail Artist!
See? Cute nail design ideas at home are totally within your reach! From simple dots and chic stripes to trendy gradients and sweet floral accents, you have the power to transform your nails into a beautiful expression of your personal style. Remember, practice makes perfect, and the most important thing is to have fun with it! Don’t be afraid to experiment with colors, tools, and techniques. Each manicure is a chance to learn and grow your skills. So grab your polishes, gather your tools, and get ready to paint your way to fabulous nails. You’ve got this! Happy polishing!

