Want cool nail designs with simple polish? Get stunning, salon-worthy looks at home using just basic polish and clever, easy-to-learn tricks. Elevate your manicure game without needing fancy tools or expensive products. Discover simple techniques that make your nails pop with personality and style!
Ever scroll through nail art inspiration and think, “There’s no way I can do that”? You’re not alone! Achieving beautiful, unique nail designs often feels out of reach, especially when you’re just starting or don’t want to invest in a ton of special tools. The good news is, you don’t need a nail tech degree or a professional salon setup to create eye-catching manicures right at home. With just a few bottles of regular nail polish and some clever tricks I’ve picked up over the years, you can transform your nails into tiny works of art.
This guide is all about unlocking the potential of simple polish. We’ll dive into genius techniques that are perfect for beginners. You’ll learn how to create stunning patterns, add pops of interest, and make your nails look utterly chic, all while keeping things easy and fun. Get ready to say goodbye to boring manicures and hello to your most creative nails yet!
The Magic of Basic Polish: Your New Best Friend
Think nail polish is just for solid colors? Think again! Your existing collection of polishes is likely more versatile than you realize. The key is to understand how to manipulate them and combine them in unexpected ways. We’re going to explore how to create depth, texture, and detailed designs using nothing more than a brush, a few polishes, and a little bit of patience. It’s about working smarter, not harder, to achieve those “wow” factor nails.
Essential Tools for Simple Polish Magic
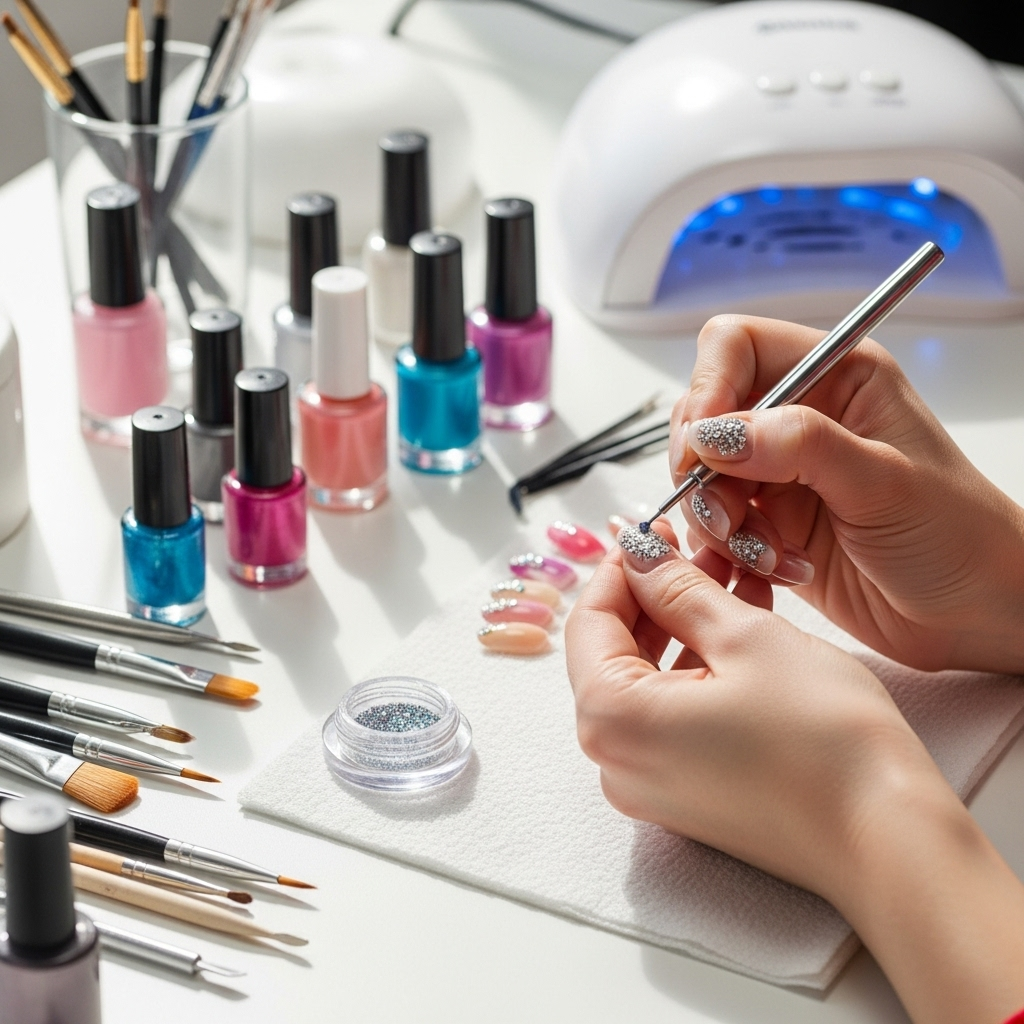
Before we dive into the fun designs, let’s make sure you have a few basic tools that can make a world of difference. You probably already have most of these items, or they are very inexpensive and easy to find. These aren’t fancy; they’re just smart additions to your nail kit that will help you execute these simple polish tricks flawlessly.
- Base Coat: This is non-negotiable for healthy nails and a smooth application. It helps polish adhere better and prevents staining.
- Top Coat: Crucial for shine, protection, and making your designs last longer. A good top coat seals everything in.
- Toothpicks or Bobby Pins: Perfect for creating dots, small lines, and even tiny floral details. They are precise and readily available.
- Scotch Tape or Painter’s Tape: Your secret weapon for crisp lines and geometric patterns. The key is to let the polish dry fully before applying tape.
- Small Dish or Palette: For mixing colors or keeping small amounts of polish handy for detailed work. An old CD or a piece of foil works too!
- Cotton Swabs (Q-tips): For cleaning up any mistakes or for dabbing on texture effects.
- Fine-Tipped Brush (Optional but Recommended): A clean, thin artist’s brush can be used for fine lines, swirls, and intricate details. You can even use an old eyeliner brush!
Genius Nail Designs with Simple Polish: Step-by-Step
Let’s get to the fun part! These techniques require minimal skill but deliver maximum impact. We’ll break them down so you can follow along easily and achieve beautiful results.
1. The Easy Gradient (Ombre) Effect
This is a timeless favorite and surprisingly simple to achieve with just sponges or even makeup applicators you might have lying around!
What You’ll Need:
- Two or three complementary nail polish colors
- A makeup sponge (a regular kitchen sponge cut into small pieces works too – make sure it’s clean and dry!) or a cosmetic wedge
- Base coat and top coat
- Optional: Petroleum jelly or a cuticle guard
Steps:
- Prep Your Nails: Apply your base coat and let it dry completely. Then, apply your lightest polish color as the base. Let this dry thoroughly. This is important for the blending to look smooth.
- Apply Polish to Sponge: On a clean, dry surface (like a piece of paper or plastic wrap), swipe your chosen colors side-by-side. Don’t be shy with the polish.
- Sponge It On: Gently dab the sponge with the polish onto your nail. You’ll want to dab from the cuticle to the tip, repeating until you achieve the desired opacity and blend. Reload the sponge with polish as needed.
- Clean Up: Use a cotton swab dipped in nail polish remover to clean up any polish that got on your skin. Applying petroleum jelly around your cuticles beforehand can make this step even easier.
- Seal the Deal: Once the polish is dry to the touch, apply a generous layer of top coat. This will meld the colors together and give it a beautiful, smooth finish.
Pro Tip: For a smoother blend, you can blow gently on the sponge as you apply the polish to the nail, which can help the colors meld together a bit more on the nail surface before they dry. For a super seamless look, consider using a dedicated ombre sponge or a makeup brush to gently blend the edges of the colors before they fully set.
2. The Chic Tape Manicure
Crisp lines and geometric patterns are surprisingly easy with a roll of tape. This is perfect for creating modern and sophisticated nail art.
What You’ll Need:
- Base coat and top coat
- Two or more polish colors
- Scotch tape or painter’s tape (painter’s tape can be a bit more forgiving)
- Small scissors or a craft knife
Steps:
- Base Color Application: Apply your base coat, followed by your first chosen polish color. Let this dry completely. This is the most critical step for clean lines. If the polish is even slightly tacky, the tape will lift it. The time it takes for this to dry can vary, so be patient! You might want to do this a few hours before you plan to finish or even the night before.
- Apply the Tape: Cut small pieces of tape and carefully apply them to your dry nail. You can create stripes, chevrons, or even abstract shapes. Ensure the tape is pressed down firmly along all edges to prevent polish from seeping underneath.
- Apply the Second Color: Paint over the tape-covered nail with your second polish color. Don’t apply too thickly, or it might smudge when you remove the tape.
- Remove the Tape: While the second color is still wet (but not completely runny), carefully peel off the tape. A pair of tweezers can help you get a good grip on the tape. Peel at an angle away from your design.
- Clean and Seal: Clean up any messy edges with a cotton swab and nail polish remover. Once everything is dry, apply a clear top coat to seal your design and add shine.
Try This Variation: Instead of a second color, use a contrasting glitter polish over the taped off sections for a pop of sparkle! For those who are comfortable, you can also use a craft knife to cut intricate shapes out of the tape before applying it, allowing for more complex designs. For a quick tip on tape removal, try to remove the tape when the polish is semi-dry to avoid lifting. If it’s too dry, you might get chipping, and if it’s too wet, it’ll smudge.
3. The Dotty Delight with Toothpicks
Polka dots are a classic for a reason, and you can create perfect dots without a special dotting tool!
What You’ll Need:
- Base coat and top coat
- One or more polish colors for the dots
- A toothpick
- A base color polish
Steps:
- Foundation First: Apply your base coat and let it dry. Then, paint your nails with your desired base color and let it dry completely.
- Dotting Time: Dip the tip of a toothpick into a dot of nail polish on your palette or on a piece of paper.
- Place Your Dots: Gently place the polish-laden tip of the toothpick onto your nail to create a dot. Don’t press too hard, just a gentle touch is needed.
- Build Your Pattern: Continue placing dots, leaving a little space between each one. You can create random patterns, neat rows, or even outlines of shapes. Re-dip your toothpick as needed, cleaning it off between colors if you’re using multiple shades.
- Finish Strong: Once your dots are dry, apply a clear top coat to seal them in and add shine.
Shape Your Dots: For different sized dots, you can use the blunt end of a bobby pin (larger dots) or even the very tip of a pen that you don’t mind getting polish on. The key is to experiment with depth and pressure when applying. For perfectly spaced dots, try using a ruler or measuring guide on your nail as you go, though freehand is part of the charm! If you find your dots aren’t perfectly round, a tiny touch of polish remover on a fine brush can help gently reshape them before they dry.
4. The Marbled Masterpiece (Waterless Method)
The water marbling technique can be tricky, but this simpler, waterless method gives a similar swirling effect with much less mess!
What You’ll Need:
- Base coat and top coat
- Two or more polish colors that look good together
- A toothpick or a fine-tipped brush
- Clear polish
Steps:
- Prime Your Nails: Apply your base coat and your main color (let it dry completely).
- Create the Swirls: On a clean surface like a plastic lid or foil, drip a small amount of your main polish. Then, drip a few drops of your accent color(s) into the main color.
- Swirl Like a Pro: Immediately insert a toothpick or fine brush into the pooled polish and gently swirl the colors together just a couple of times. Don’t overmix, you want distinct swirls, not a muddy mess.
- Transfer the Design: Carefully dip your nail into the swirled polish. You can also use a brush to gently pick up some of the swirled polish and pat it onto your nail.
- Clean Up and Shine: Clean up the edges with a cotton swab and polish remover. Once dry, apply your top coat.
Tip for the Waterless Marble: The key here is speed! Once you put the polishes onto your palette and swirl, you need to transfer them to your nail before the polish starts to thicken too much. For a more controlled marbling effect, try using a gel polish that stays wet longer, allowing more time to swirl and transfer. Some artists find it easier to apply the swirled polish using a small brush and stippling motion onto the nail rather than dipping the whole nail.
5. The Simple Stamped Look (with Household Items!)
Nail stamping plates are great, but you can achieve stamped-like effects with everyday objects.
What You’ll Need:
- Base coat and top coat
- A light colored polish for your base
- A dark or contrasting polish for your stamping pattern
- A fine-mesh strainer or a textured fabric (like lace or a clean mesh bag)
- A sponge or cotton ball
Steps:
- Get Your Base Ready: Apply base coat and let it dry. Paint your nails with your light base color and allow it to dry completely.
- Prepare Your “Stamp”: Place the fine-mesh strainer over a piece of paper. You can also lay a piece of clean lace or mesh fabric flat on your paper.
- Apply Stamping Polish: Take a sponge or cotton ball and dab it into your contrasting polish. Gently dab this sponge over the mesh strainer or fabric a few times. This will transfer the texture onto the sponge.
- Create Your Design: Gently dab the polish-soaked sponge over sections of your nail to create a textured, almost stamped effect. You can go for a full nail overlay or just accent areas. Work quickly, as the polish will dry on the sponge too.
- Finish and Seal: Clean up any smudges with a cotton swab and remover. Once dry, apply a clear top coat.
Creative Textures: Experiment with different mesh patterns if you have them. A fine sieve will give a more subtle speckled effect, while a coarser mesh or lace will create bolder patterns. For an even more intricate look, try using a very fine glitter polish over this textured base. You can also pre-apply the texture polish to a piece of tape and then press that tape onto your nail for a more controlled application of the pattern. For best results, ensure the mesh part you’re using doesn’t have a plastic coating that might melt or react with the polish.
6. The Two-Tone French Tip Reboot
Take the classic French manicure to a fun new level by using two colors for the tips!
What You’ll Need:
- Base coat and top coat
- A neutral base polish
- Two contrasting or complementary colors for your tips
- Scotch tape or painter’s tape
Steps:
- Base and First Layer: Apply base coat, then your neutral polish. Let it dry completely.
- First Tip Color: Apply a strip of tape above where you want your first color tip to be. Paint the tip with your first color. Let it dry completely.
- Second Tip Color: Now, apply another strip of tape below the first tip, aligning it with the edge of the first color. Paint this section with your second color. Let this also dry completely.
- Reveal Your Design: Carefully remove both pieces of tape. You should have two distinct color bands at the tip of your nail.
- Seal it Up: Apply a clear top coat over the entire nail to smooth out any edges and add shine.
Color Combinations: Try a classic white tip with a colored second tip, or go bold with two vibrant colors. For a modern twist, try a metallic tip with a matte finish over it (apply the matte top coat only on the second colored tip before the final clear top coat). For sharper lines, ensure each layer of polish is bone dry, and use a fine brush dipped in nail polish remover to clean up any imperfections along the tape line before removing the tape. You can also experiment with not using tape at all, and instead, use a fine-tipped brush to freehand the two-tone line, which gives a more organic look.
7. The Accent Nail Pop
Don’t want to do a full design on every nail? An accent nail is your best friend!
Choose one nail (usually the ring finger) and give it a special design, while keeping the other nails a solid, complementary color. This is a fantastic way to try out a new technique or a bold color without overwhelming your overall look. You can use any of the techniques above, like the tape manicure, dots, or even a simple gradient, on just that one nail. It’s chic, understated, and always stylish.
Protecting Your Artwork: The Importance of Top Coat
I cannot stress this enough: your top coat is your best friend when it comes to making your cool nail designs last. It’s not just for shine; it’s a protective shield. A good quality top coat will:
- Prevent Chipping: It seals the layers of polish, providing a smooth, hard surface that’s less prone to nicks and chips.
- Add Shine: It gives your manicure that beautiful, glossy finish that makes it look professionally done.
- Protect the Design: It prevents smudging and helps intricate details stay intact.
- Extend Wear Time: A well-applied top coat can add days to the life of your manicure.
If you find your polish is wearing down, don’t hesitate to reapply a thin layer of top coat every couple of days. This simple step can revive your manicure and keep it looking fresh!
Common Questions About Simple Nail Designs
Let’s tackle some of your burning questions about creating amazing nail designs with just basic polish.
Frequently Asked Questions
| Question | Answer |
|---|---|
| Can I really create cool nail designs without special tools? | Absolutely! With items like toothpicks, tape, makeup sponges, and even household items like mesh, you can achieve stunning designs without needing professional tools. It’s all about clever application. |
| What’s the best way to clean up polish mistakes? | A cotton swab (Q-tip) dipped in nail polish remover is your best friend for clean-up. For very precise fixes, a small, fine-tipped brush dipped in remover works wonders. Gently cleaning around
Related Posts |