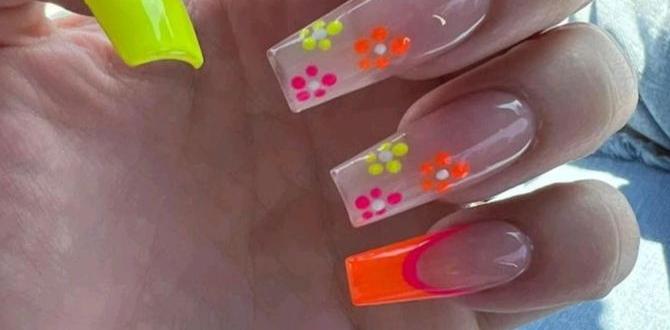
Unlock vibrant and eye-catching nails with our easy, beginner-friendly colorful nail design guide. Discover genius tips, simple techniques, and fun ideas to express your unique style and create stunning manicures at home. Get ready to paint outside the lines!
Feeling a little bored with your nails? Maybe you’re dreaming of a manicure that pops with personality, but the thought of intricate nail art feels overwhelming. You’re not alone! Many of us admire dazzling, colorful nail designs but aren’t sure where to start. It’s easy to feel intimidated by all the tutorials and fancy tools. But guess what? Creating beautiful, colorful nail designs is totally achievable for everyone, right in your own home. We’re here to show you how to ditch the dull and embrace the dazzling, with simple steps and brilliant tips that will make your nail game strong.
This guide is your friendly roadmap to a world of colorful nail artistry. No more guesswork! We’ll break down everything you need to know, from picking the perfect shades to mastering simple design techniques. Ready to transform your fingertips into mini masterpieces? Let’s dive in and get those nails looking fabulous!
Frequently Asked Questions About Colorful Nail Designs
Q1: What are the easiest colorful nail designs for beginners?
For beginners, simple designs like ombre (gradient) nails, polka dots, and accent nails with glitter or a contrasting color are fantastic starting points. You can also try a half-moon manicure or stripes using tape for clean lines. These require minimal practice and offer a big visual impact!
Q2: What basic tools do I need for colorful nail designs?
You don’t need much to get started! Essential tools include: a good quality top coat and base coat, various nail polish colors, a dotting tool (or toothpick/pen tip), striping tape or bandages, and nail polish remover for clean-ups. As you get more advanced, you might want fine-tipped brushes or nail art pens.
Q3: How can I make my colorful nail designs last longer?
The key to longevity is proper prep and finishing. Always start with a clean, dry nail. Apply a good base coat to prevent staining and help polish adhere. Use thin, even coats of polish, allowing each to dry almost completely before applying the next. Crucially, seal your design with a high-quality, quick-drying top coat. Reapply the top coat every 2-3 days to refresh the shine and protect your artwork.
Q4: My nail polish always chips quickly. What can I do?
Chipping is often caused by weak edges or not sealing the free edge. When applying polish, extend your brush stroke over the tip of your nail. This seals the edge and helps prevent lifting. Also, avoid harsh activities for at least an hour after your manicure, as polish needs time to fully harden. Consider using a ridge-filling base coat if your nails have an uneven surface.
Q5: What are the best colors to combine for a vibrant look?
For vibrant combinations, think complementary colors (opposite each other on the color wheel) like blue and orange, or yellow and purple. Analogous colors (next to each other on the wheel) like blue, teal, and green create harmonious yet colorful looks. Don’t be afraid to experiment with neons, pastels, and metallics together – contrast is key for a bold statement!
Q6: How do I clean up mistakes easily?
A small brush (like a clean makeup brush or a specialized clean-up brush) dipped in nail polish remover is your best friend! Gently use it to sweep away any polish that’s gone outside your nail lines. You can also use a cuticle pusher wrapped in a tiny piece of cotton soaked in remover. Work carefully and on dry polish for the cleanest results.
Q7: Can I use regular craft paints for nail art?
No, it’s generally not recommended to use craft paints directly on your nails unless they are specifically labeled as “water-based” and cosmetic-grade. Regular craft paints may contain ingredients that can irritate your skin or damage your nails. Always stick to nail polishes, gels, or specialized nail art paints designed for cosmetic use to ensure safety and durability.
Your Colorful Nail Design Journey: Genius Tips Anyone Can Use!
Hello, fellow nail lovers! Lisa Drew here from Nailerguy, ready to sprinkle some color and confidence onto your fingertips. If you’ve ever scrolled through Instagram and marveled at intricate, vibrant nail designs, wishing you could create something similar, you’ve come to the right place. We’ll demystify the world of colorful nail art, making it super easy and fun for you, no matter your skill level. Let’s get those nails looking as vibrant and unique as you are!
The Must-Have Essentials for Colorful Manicures
Before we dive into the fun designs, let’s make sure you have the right gear. Think of these as your trusty sidekicks for nail art adventures. You don’t need a professional salon’s worth of tools – just a few smart picks will do!
- Base Coat: This is non-negotiable! It protects your natural nails from staining (especially from dark or vibrant polishes) and creates a smooth surface for your color to grip onto. A good base coat means your manicure will look better and last longer.
- Top Coat: Your design’s best friend! A quality top coat seals in your colors and designs, adds a beautiful shine, and prevents chips. Look for quick-drying formulas to save time and frustration.
- Nail Polish Colors: Gather a rainbow! Start with a few brights, some pastels, metallics, and classic neutrals. Having a variety means you can mix and match endlessly.
- Clean-Up Tools: Mistakes happen! A small, stiff brush (like an old eyeliner or lip brush you’ve cleaned well) dipped in nail polish remover is perfect for tidying up edges. Alternatively, a cuticle stick wrapped with a tiny bit of cotton works wonders.
- Dotting Tools: These come in sets with different-sized metal balls on the end. They’re amazing for creating perfect dots, swirls, and simple floral patterns. Don’t have one? A straightened paperclip or the tip of a ballpoint pen can work in a pinch!
- Striping Tape or Thin Bandages: For crisp, clean lines and geometric patterns, striping tape is your go-to. Even thin strips cut from medical bandages can work for creating defined borders.
- Nail Separators (Optional): If you find your fingers touching while you paint, these comfy foam separators can help keep them apart, preventing smudges as you work.
- Nail Prep: Ensure your nails are clean, filed to your desired shape, and free of any oils or lotion. A quick swipe with nail polish remover on a cotton pad before you start is a pro move!
Having these basic tools will open up a world of possibilities for your colorful nail designs. Ready to get creative?
Genius Color Combination Ideas
The foundation of any great colorful nail design is a killer color palette. Don’t be shy – this is where you get to play and express yourself! Here are some ideas to get your creative juices flowing:
- Tropical Sunset: Blend shades of orange, fiery red, and vibrant pinks. Add a touch of golden yellow for depth.
- Ocean Breeze: Think cool blues, serene teals, and crisp whites. A hint of seafoam green can add an extra layer of calm.
- Berry Blast: Combine deep purples, rich magentas, and bright fuchsias. A subtle shimmer can elevate this fruity palette.
- Citrus Zing: Bright lemon yellow, lime green, and a juicy orange create a refreshing and energetic look.
- Pastel Dream: Soft lavender, baby blue, mint green, and pale pink are lovely together for a gentle, feminine vibe.
- Rainbow Pop: Don’t be afraid of the full spectrum! Red, orange, yellow, green, blue, and purple in bright, primary tones are always a win.
- Monochromatic Magic: Choose different shades and finishes of the same color. For example, a light blue, a medium blue, and a navy can create a sophisticated but colorful look.
Pro Tip: When combining colors, consider the color wheel! Complementary colors (opposite each other, like blue and orange) create high contrast and excitement. Analogous colors (next to each other, like blue and green) create a harmonious and pleasing effect. Don’t be afraid to mix and match!
Beginner-Friendly Colorful Nail Designs (Step-by-Step!)
Let’s get our hands (and nails!) busy with some super simple yet impactful colorful nail designs. These are perfect for anyone just starting out.
1. The Effortless Ombre Fade
This gradient effect looks super chic and is easier than you think!
- Apply your base coat and let it dry.
- Paint your nails your lightest color. Let it dry completely.
- Grab a makeup sponge (a clean cosmetic sponge or even a kitchen sponge cut into a small piece works!).
- Apply 2-3 stripes of different colors onto the sponge, right next to each other. For example, light blue, medium blue, navy blue.
- Quickly dab the sponge onto your nail, starting from the cuticle and rolling upwards. You might need to reapply polish to the sponge and dab a few times to build up the color.
- While the polish is still slightly wet, gently drag the sponge down the nail a couple of times to blend the colors further.
- Clean up any polish on your skin with your clean-up brush and remover.
- Once dry, apply a generous layer of top coat to smooth out the texture and seal the design.
Genius Tip: For a smoother blend, you can use a makeup wedge sponge. Press the Polish onto the sponge in clean lines, then dab it onto the nail. The texture of the sponge helps create the gradient effect.
2. Polka Dot Playfulness
Classic, cute, and customizable! Polka dots are a timeless favorite.
- Start with your base coat and let it dry.
- Paint your nails with your base color (e.g., white, black, or a pastel). Let it dry completely.
- Dip your dotting tool (or toothpick) into a contrasting polish color.
- Gently place dots onto your nail. You can make them all the same size, or mix it up! For an abstract look, place them unevenly.
- Repeat on all nails, or just use an accent finger for a subtler touch.
- Clean up any stray dots around your cuticles.
- Finish with a protective top coat.
Genius Tip: You can achieve different dot sizes by using different sized dotting tools, or by varying the amount of polish you pick up on your tool.
3. The Chic Accent Nail
This is the simplest way to add a pop of color without committing to a full design on every nail.
- Paint all your nails with a solid, chic color (e.g., classic red, deep navy, or elegant nude). Let it dry.
- Choose one nail (usually the ring finger) to be your accent.
- On that accent nail, apply a contrasting color, glitter polish, or even try a simple design like stripes or a French tip in a bold shade.
- Ensure your accent nail finish is completely dry before applying top coat over all your nails.
Genius Tip: For added flair on your accent nail, use a metallic polish or a glitter polish. It instantly elevates the look!
4. Striped for Success with Tape
Perfectly straight lines are achievable with a little help!
- Apply your base coat and let it dry.
- Paint your nails with your first color. Let it dry completely. This is crucial for crisp lines.
- Carefully apply strips of nail striping tape or thin strips of a bandage across your nail. Press them down firmly to ensure no polish seeps underneath.
- Paint over the tape with your second color. Apply a thin, even coat.
- While the second polish is still slightly wet, carefully peel off the tape. If you wait until it’s fully dry, you risk peeling the polish off with the tape.
- Let the second color dry, then apply your top coat over all nails.
Genius Tip: For a sophisticated look, try a matte top coat after your colored polish has dried but before you apply the striping tape. Then, apply a glossy top coat only over the colored stripes for a dual-finish effect.
Elevating Your Designs: Next-Level Genius Tips
Once you’ve got the basics down, it’s time to add a little extra sparkle and flair. These tips will help you create more complex-looking designs with ease.
Working with Glitter and Metallics
Glitter and metallic polishes are fantastic for adding instant glamour. They can be used as a full color, for accents, or even to create gradients!
- Full Coverage: Apply 2-3 coats for opaque coverage. A glitter polish often needs a good top coat to smooth out the uneven surface.
- Gradient Effect: Apply your base color, let it dry, then dab glitter polish starting from the tip of the nail and blending downwards towards the cuticle with a sponge or brush.
- Glitter Top Coat: Use a sheer or colored polish as your base, then layer a glitter polish on top for a subtle shimmer or a bold statement.
- Tip Placement: Use striping tape to create a clean line at the tip of your nail, then fill in with glitter polish for a dazzling French tip.
External Link: For more on the science behind nail polish and its ingredients, check out this informative resource from the U.S. Food & Drug Administration (FDA) on Cosmetics and Personal Care Products: FDA Cosmetics Regulation.
The Art of the Clean-Up Brush
A perfectly clean cuticle line makes any manicure look professional. Don’t underestimate the power of a clean-up tool!
- Choose Your Tool: A small, angled synthetic brush is ideal. You can also use a toothpick or orangewood stick with a tiny bit of cotton wrapped around the tip.
- The Technique: Dip your brush into nail polish remover. Gently wipe away any excess polish from your skin and cuticles. Re-dip and wipe your brush as needed.
- When to Act: It’s best to do this clean-up right after applying the polish or design, while the polish is still wet. For very precise clean-ups after polish has dried, use a tiny bit of remover on the brush, and be careful not to touch the polish on your nail.
Mixing Textures for Depth
Don’t be afraid to combine different finishes! A matte nail with a glossy stripe, or a creamy color with a glitter accent, adds visual interest.
- Matte Top Coat: Apply your colored polish as usual, let it dry, then apply a dedicated matte top coat. You can then go back over certain areas with a regular glossy top coat for contrast.
- Glitter vs. Cream: Combine a smooth cream polish with a sparkly glitter polish on different nails or as part of a design.
- Metallic Accents: Use a bright, opaque metallic polish to add geometric shapes, stripes, or outlines to a matte or cream base.
Mastering the Dotting Tool
Dots are just the beginning! With dotting tools, you can create flowers, swirls, even tiny abstract patterns.
- Consistent Dots: Dip your tool into polish, remove excess on


