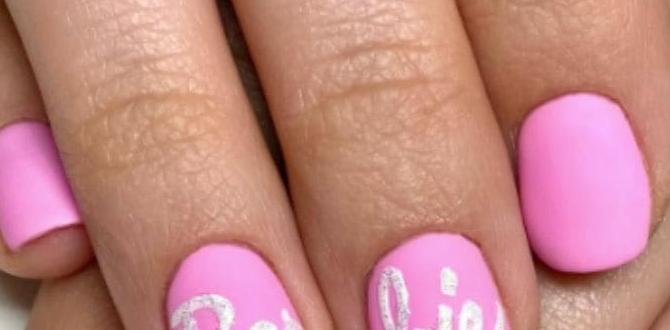
Master essential client nail designs with these stylish, easy-to-achieve looks. This guide breaks down popular trends and techniques, perfect for beginners looking to impress their clients and build their nail artistry skills. Discover simple yet stunning designs that are always in demand!
Choosing the right nail design for your clients can sometimes feel like a puzzle. You want something that’s on-trend, suits their style, and, importantly, is something you can execute beautifully. It’s easy to get overwhelmed by endless options, but focusing on a few essential, versatile designs can make all the difference. These are the styles that clients love, that are relatively simple to create, and that always leave them feeling fabulous. We’re going to explore these must-know designs, making your client nail adventures fun and successful. Get ready to add some go-to looks to your repertoire!
The Foundation: Why Essential Client Nail Designs Matter
As a nail artist, offering a curated selection of essential designs is key. It’s not just about knowing how to paint; it’s about understanding what clients are looking for and delivering polished, desirable results. These core styles are essential because they:
- Are universally flattering: They tend to suit a wide range of nail shapes and skin tones.
- Are consistently popular: Clients often request these classic or trendy looks, making them a reliable addition to your service menu.
- Are often easier to master: While practice is always key, these designs usually have a lower barrier to entry for beginners compared to highly intricate art.
- Can be customized: They provide a fantastic base for personalization, allowing you to add your unique touch.
- Build client confidence: When clients love their nails, they feel great, and that’s what we’re here for!
Think of these essential designs as your foundational tools. Once you’ve got a good grasp on them, you can start experimenting and expanding your creative horizons. Let’s dive into some of the absolute must-haves!
Essential Client Nail Design Styles You Need to Know
These designs are the workhorses of the nail world. They’re popular for a reason – they look fantastic and translate well across many client preferences.
1. The Chic Solid Color (with a Twist!)
Don’t underestimate the power of a perfect solid color. This is where many clients start, and it’s the ultimate canvas. But “solid” doesn’t have to mean boring!
Variations to Elevate a Solid Color:
- The Classic Creme: A flawlessly applied single shade. Think elegant nudes, bold reds, deep blues, or soft pastels.
- The Shimmer/Glitter Accent: Apply a beautiful creme on most nails, and add a pop of shimmer or fine glitter on one or two accent nails (like the ring finger).
- The Matte Finish: A sophisticated matte top coat can transform any regular polish color into a chic, modern look.
- The Subtle Sheen: Think sheer creams or milky whites for a clean, “my-nails but better” aesthetic.
Why Clients Love It:
- Effortlessly chic and polished.
- Versatile for any occasion, from the office to a night out.
- Easy to match with outfits.
Beginner Tip:
Perfecting your application is crucial for solid colors. Ensure smooth, even coats without streaks. For a professional finish, pay attention to cuticle work and removing any polish from the skin before curing or drying. A good base coat and top coat are non-negotiable!
2. The French Manicure (Modern Makeover)
The French manicure has had a major glow-up! Gone are the days of stark white tips that can sometimes look dated. The modern French is softer, more artistic, and incredibly popular.
Modern French Variations:
- The Classic White Tip: Still loved, but often with a softer, more rounded smile line and a sheer or milky pink or nude base.
- The Colored Tip: Swap the white for a thin, crisp line of any color – pastels, jewel tones, neons, or even black.
- The Reverse French/Half-Moon: The color is applied at the cuticle line instead of the tip.
- The “Baby Boomer” or Ombre French: A seamless fade from a sheer pink or nude base to a soft white tip.
- The Double French: Two thin lines of color, often one above the other.
Why Clients Love It:
- Timeless elegance with a contemporary edge.
- Accentuates the nail shape beautifully.
- Great for those who want definition without being overly flashy.
Beginner Tip:
Steady hands are your best friend here! Use a fine-tip brush or striping tape to create crisp lines. For ombre French designs, a makeup sponge can help create a smooth gradient. Practice makes perfect – don’t be discouraged if your first few lines aren’t perfectly straight!
3. Subtle Sparkle: Glitter and Chrome Accents
A little bit of shimmer goes a long way. Glitter and chrome are fantastic for adding a touch of glamour without overpowering a look.
Accent Nail Ideas:
- Full Glitter Nail: Cover an accent nail entirely in fine or chunky glitter.
- Glitter Fade: Apply glitter from the tip or cuticle, fading it down the nail.
- Chrome Dust/Powder: This is a super popular option! A thin layer buffed over a dark or light base creates a mirror-like, futuristic effect.
- Metallic Stripes: Use chrome powder or metallic polish to create thin stripes on a solid base.
Why Clients Love It:
- Instantly adds glamour and a festive feel.
- Chrome is incredibly eye-catching and unique.
- It’s an easy way to add personality without a full art design.
Beginner Tip:
For chrome powders, a tack-free gel top coat is essential for buffing. Make sure all other nails are perfectly finished before applying chrome, as it can be tricky to clean up. A little goes a long way with chrome powders, so don’t overdo it!
4. Geometric & Minimalist Designs
Clean lines and simple shapes are always in style. These designs appeal to clients who love a modern, understated aesthetic.
Minimalist Must-Haves:
- Single Line: A thin vertical or horizontal line down the center of the nail, or along a side edge.
- Dots: A few well-placed dots can be elegant, especially in a contrasting color or metallic.
- Simple Shapes: Small triangles, squares, or half-moons near the cuticle or tip.
- Negative Space: Incorporating sections of the natural nail or clear polish into the design.
Why Clients Love It:
- Sophisticated and chic.
- Modern and edgy without being overwhelming.
- Looks great on shorter to medium-length nails.
Beginner Tip:
Use striping tape, stencils, or very fine brushes for precision. For dotting tools, start with a basic dotting tool set, which is inexpensive and easy to use. Experiment with varying sizes of dots and the spacing between them.
5. The Sophisticated Ombre
Ombre, or gradient, nails create a beautiful blended effect. It’s a step up from solid color but still very wearable.
Ombre Techniques:
- Classic Two-Tone: A smooth blend between two complementary colors, often from cuticle to tip.
- Horizontal Ombre: Blending colors across the nail horizontally.
- Glitter Ombre: Blending glitter into a solid color for a subtle twinkle.
Why Clients Love It:
- Seamlessly transitions color for a soft, elegant look.
- Can be done in a huge range of color combinations.
- Adds visual interest without being too bold.
Beginner Tip:
The easiest way to create ombre is using a makeup sponge. Apply thin layers of your chosen polishes next to each other on the sponge, then gently dab onto the nail. Reapply the colors to the sponge as needed for a smooth blend. For gel polish, you can use a brush to blend colors directly on the nail before curing.
6. Floral & Botanical Accents
Nature-inspired designs are always a hit, bringing a touch of beauty and femininity.
Popular Botanical Designs:
- Small Floral Sprays: Delicate flowers on one or two accent nails.
- Leaf Motifs: Simple, elegant leaves in various shades.
- Vine Accents: Thin, delicate vines wrapping around a nail.
- Botanical Mix: Combining small flowers and leaves.
Why Clients Love It:
- Feminine and pretty.
- Adds a touch of artistry and detail.
- Perfect for seasons like spring and summer, but lovely year-round.
Beginner Tip:
Start simple! You can use fine brushes to paint delicate petals and leaves. Alternatively, consider floral decals or press-on nail art that can be applied under gel top coat for a professional look without requiring freehand drawing skills initially.
Essential Tools for Client Nail Designs
Having the right tools makes executing these designs so much easier and results in a much more professional finish. You don’t need a huge arsenal to start!
Must-Have Tools for Beginners:
- Fine-tip Brushes: For creating lines, details, and small shapes. Look for a variety pack with different thicknesses.
- Dotting Tools: Essential for creating perfect dots of various sizes.
- Striping Tape: For creating super crisp, straight lines or geometric patterns.
- Nail File & Buffer: For shaping and smoothing the nail surface. A smooth surface is key for any design.
- Cuticle Pusher/Orange Stick: For preparing the nail plate by gently pushing back and cleaning up cuticles.
- Manicure Tweezers: To pick up small embellishments or position decals.
- Your Favorite Polishes: Of course! A good selection of base colors, top coats (glossy and matte), and perhaps a metallic or glitter polish to start.
Table: Essential Nail Design Tools & Their Uses
| Tool | Primary Use | Beginner Tip |
|---|---|---|
| Fine-Tip Brushes | Drawing lines, small details, filling in shapes | Clean brushes thoroughly after each use to maintain their shape. |
| Dotting Tools | Creating dots of various sizes, swirling colors | Dip the ball into polish and apply with a light touch; experiment with pressure for different dot sizes. |
| Striping Tape | Creating crisp lines, geometric patterns, masking areas | Ensure polish is completely dry or cured before applying tape; peel off carefully. |
| Manicure Tweezers | Applying decals, gems, or other embellishments | Use a gel top coat to secure small elements; pick them up gently to avoid damage. |
| Matte Top Coat | Transforming glossy finishes to a smooth, modern matte look | Apply thinly and evenly, just like a regular top coat. |
Nail Prep: The Secret to Flawless Designs
No matter how intricate your design, it won’t shine if the nail isn’t properly prepped. This is the crucial first step for any professional manicure.
Steps for Perfect Nail Prep:
- Cleanse: Start by removing any old polish with a non-acetone remover (which is gentler).
- Shape: File the nails to your desired shape. Always file in one direction to avoid weakening the nail. For tips on shaping, resources from organizations like the American Academy of Dermatology can offer guidance on nail health.
- Cuticle Care: Gently push back the cuticles. Avoid cutting them unless absolutely necessary, as they protect the nail matrix. If you need to trim, use specific cuticle nippers.
- Buff: Lightly buff the nail surface to remove shine. This creates a slightly rough texture for polish to adhere to, preventing lifting and chipping. Don’t over-buff!
- Cleanse Again: Wipe away any dust with a lint-free wipe and alcohol or a nail cleanser. This ensures a clean, oil-free surface for your polish.
Proper prep ensures longevity and a smooth canvas for your artwork. Your clients will appreciate the attention to detail!
Client Nail Designs: Customization and Trends
While essential designs are your foundation, clients often want something a little unique. Customization is where true artistry shines!
How to Customize:
- Color Combinations: Suggesting different color palettes for French tips, ombres, or gradient designs.
- Placement: Varying where an accent design appears (e.g., a mini floral on the cuticle or tip).
- Mix-and-Match: Combining elements from different essential designs (e.g., solid color nails with one glitter accent and one minimalist line nail).
- Texture: Using matte top coats, textured polishes, or subtle embellishments.
Staying Trendy:
Keep an eye on what’s happening in the beauty world! Social media platforms like Instagram and Pinterest are fantastic sources. Look for inspo from nail artists, fashion magazines, and even seasonal color palettes. Some current trends that pair well with essential designs include:
- “Clean Girl” Aesthetic: Think sheer nudes, milky whites, and super-short, neat nails with minimal polish.
- Dopamine Dressing Nails: Bold, bright colors and fun, playful designs for a mood boost.
- Pearlescent Finishes: A soft, iridescent sheen that looks ethereal.
- Chocolate Brown Tones: Rich, deep browns for a sophisticated, earthy feel.
Remember to always consult with your client about their lifestyle and preferences before diving into a trendy look. What’s fashionable isn’t always practical for everyone.
Table: Popular Client Nail Design Styles & Their Appeal
| Design Style | Key Appeal | Best Suited For |
|---|---|---|
| Solid Color (Chic Creme) | Effortless elegance, versatility | All occasions, minimalists, classic look lovers |
| Modern French Manicure | Timeless with a contemporary twist, sophisticated | Professional settings, those seeking polished nails |
| Glitter/Chrome Accents | Glamour, sparkle, eye-catching detail | Special occasions, clients wanting a touch of lux |
| Geometric/Minimalist | Modern, sharp, understated | Fashion-forward clients, those who prefer clean lines |
| Ombre/Gradient | Soft color transitions, visually interesting | Clients wanting a step-up from solid color, soft aesthetic lovers |
| Floral/Botanical | Feminine, delicate, artistic | Nature lovers, those seeking pretty and detailed art |
Frequently Asked Questions (FAQ)
Q1: How do I choose the right nail shape for a client?
A: Consider their finger length, nail bed shape, and lifestyle. Almond and oval shapes tend to elongate fingers. Square or squoval shapes are often best for wider nail beds. Always discuss options with your client!
Q2: What’s the difference between gel polish and regular nail polish for designs?
A: Gel polish requires a UV/LED lamp to cure, lasts much longer (2-3 weeks), and is more durable. Regular polish air dries, is easier to remove at home, but chips more easily and typically lasts only a week. Gel is often preferred for intricate designs because it doesn’t smudge while you work.
Q3: My client wants “natural-looking” nails. What designs fit this?
A: This often means a “my-nails but better” look. Think sheer nude or pink polishes, a classic French manicure with soft tips, or a milky white shade. Focus on impeccable cuticle work and a smooth, even finish.
Q4: How can I make my solid color manicures look more professional?
A: Perfect your application technique: thin coats are better than one thick one. Ensure complete coverage without flooding the cuticle. Always use a good

