Quick Summary:
Keeping your nail art brushes clean is crucial for perfect manis! Properly cleaning them involves removing polish, washing with gentle soap, rinsing thoroughly, and drying them upright. This guide breaks down how to make your brushes last, ensuring flawless nail art every time.
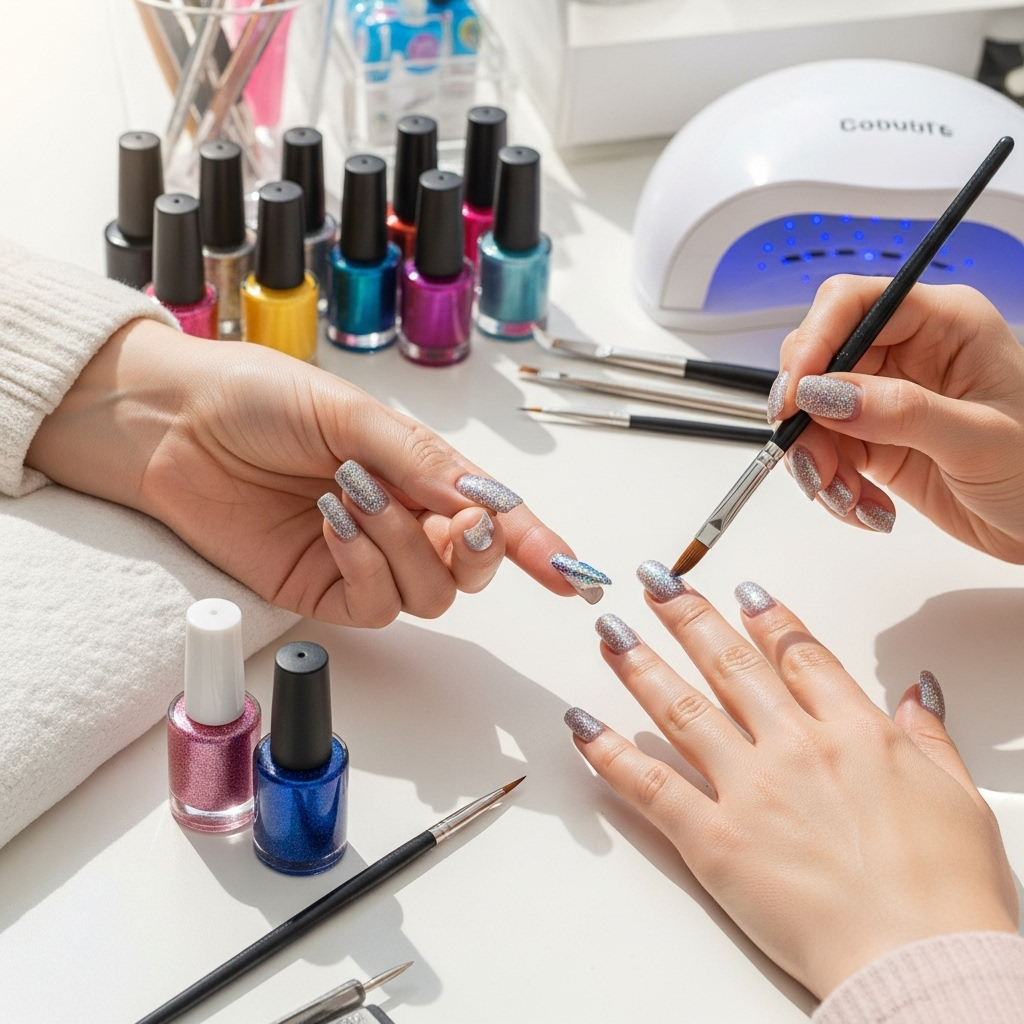
Hey nail lovers! Lisa Drew here from Nailerguy, ready to talk about a super important part of our nail art obsession: keeping those gorgeous brushes in top-notch shape. Have you ever reached for your favorite liner brush, only to find it stiff, gunky, or with dried polish ruining its delicate bristles? It’s frustrating, right? It can totally mess up your designs and even shorten the life of your tools. But don’t worry! Cleaning nail brushes properly isn’t as daunting as it seems. It’s actually a quick and easy process that makes a world of difference. Let’s dive into exactly how to wash those tiny treasures so they stay your trusty sidekicks for all your creative nail adventures. We’ll cover everything from the everyday quick clean to a deeper spa treatment for your brushes!
Why Proper Nail Brush Cleaning Matters
Think of your nail brushes like your favorite makeup brushes – they need a little TLC to work their best. When polish, gel, or acrylic residue builds up, it can:
- Stiffen the bristles, making them hard to control.
- Cause the bristles to splay or fray, ruining fine lines and intricate details.
- Lead to uneven product application.
- Harbor bacteria, which isn’t great for your nails or your art.
- Shorten the overall lifespan of your brushes, meaning you’ll have to buy new ones more often!
Regular, proper cleaning ensures your brushes are always ready for action, helping you achieve those salon-worthy looks at home without any annoying tool malfunctions. It’s all about preserving the precision and extending the life of your valuable nail art supplies.
Your Essential Nail Brush Cleaning Kit
Gathering the right supplies makes the cleaning process a breeze. You don’t need anything fancy, just these few basics:
- Non-Acetone Nail Polish Remover: This is your go-to for dissolving most nail polish and gel residues. Non-acetone removers are gentler on both your brushes and your skin.
- Rubbing Alcohol (Isopropyl Alcohol): Excellent for sanitizing and removing stubborn gel or gel polish residue. It evaporates quickly, which is a bonus!
- Mild Soap or Dish Soap: A gentle liquid soap is perfect for a final wash to remove any solvent traces and leave bristles clean and fresh.
- Paper Towels or Lint-Free Cloths: For wiping away excess product and also for drying.
- Clean Water: For rinsing.
- A Small Bowl or Cup: To hold your cleaning solutions.
- A Clean, Dry Surface: To lay brushes on while drying.
How to Clean Nail Brushes: A Step-by-Step Guide
Let’s get those brushes sparkling clean! This guide covers cleaning regular nail polish brushes. We’ll touch on gel and acrylic brushes in a bit, as they have slightly different needs.
Step 1: Remove Excess Polish
As soon as you’re done with a brush for the day (or even between colors if you’re doing a multi-color design), you need to get as much polish off as possible.:
- Grab a paper towel or lint-free cloth.
- Gently wipe the bristles against the towel, rolling the brush slightly.
- Continue wiping and rotating until no visible polish is transferring to the towel. Don’t press too hard, as this can damage the bristles.
Step 2: Soak in Remover
Now it’s time to dissolve what’s left of the polish. You’ll want to do this in a well-ventilated area!
- Pour a small amount of non-acetone nail polish remover into a clean bowl or cup. Just enough to cover the bristles.
- Dip the brush head into the remover.
- Swirl gently for a few seconds. You’ll see color start to come off onto the paper towel or into the solution.
- Wipe the brush again on a clean part of your paper towel or a fresh towel.
- Repeat the dipping and wiping process until no more color comes off.
Tip: Never let your brushes soak for too long in remover, as it can degrade the glue holding the bristles or even the handle material over time.
Step 3: Wash with Mild Soap
After removing most of the polish with remover, it’s time for a gentle cleansing wash to get rid of any lingering polish particles and the remover itself.
- Add a drop of mild liquid soap or dish soap to the palm of your hand or a small bowl.
- Wet the brush bristles with clean water.
- Gently swirl the brush in the soapy water, working up a light lather. Avoid getting the handle wet if it’s wooden or has embellishments.
- Continue swirling until the bristles feel clean and smooth, and no color residue is visible.
Step 4: Rinse Thoroughly
This is a crucial step to make sure all soap and remover residue is gone. Leftover soap can make your polish application streaky, and remover residue can weaken bristles.
- Rinse the brush under clean, lukewarm running water.
- Gently run the water through the bristles, from the ferrule (where the bristles meet the handle) down towards the tips.
- Keep rinsing until the water runs clear and you don’t feel any slipperiness from the soap.
Step 5: Reshape and Dry
Proper drying is key to maintaining the brush’s shape and preventing damage. Never lay a wet brush flat!
- Gently squeeze out excess water from the bristles with your fingers.
- Reshape the bristles back into their natural form. You can use your fingers to gently guide them.
- Place the brush upright in a cup or a dedicated brush holder, with the bristles facing UP. This prevents water from seeping into the ferrule and loosening the glue.
- Let them air dry completely. This might take a few hours or even overnight, depending on humidity.
Once completely dry, your brushes are ready for their next nail art adventure!
Special Care for Gel and Acrylic Brushes
Gel and acrylic brushes require a slightly different approach because the products used are typically UV-cured or chemically cured, not air-dried.
Curing Gel Brushes
Gel polish and gel art products are notorious for hardening brushes if left uncured. The key is to clean them immediately after use.
- Wipe Immediately: After each use, wipe the brush on a lint-free pad to remove as much gel as possible.
- Use Gel Brush Cleaner or Rubbing Alcohol: Pour a small amount of specialized gel brush cleaner or rubbing alcohol into a small dish.
- Swirl and Wipe: Dip the brush into the cleaner and swirl gently for a few seconds. Wipe on a clean lint-free pad. Repeat until no gel residue is visible.
- Sanitize: A final wipe with rubbing alcohol can help sanitize the bristles.
- Do NOT Use Water: Water can interfere with the curing process if undissolved gel is present.
- Dry Upright: Ensure they are completely dry and store them away from UV/LED light.
Many nail techs swear by a clear gel top coat for cleaning gel brushes after immediate wiping. You apply it, swirl the brush as if you were applying polish, then wipe thoroughly with a lint-free pad. The uncured gel picks up residual product, and then you wipe it all away. This method is super effective for keeping brushes pliable.
Curing Acrylic Brushes
Acrylic brushes are used with monomer (liquid) and polymer (powder) to create enhancements. These brushes need to be cleaned while the acrylic is still wet.
- Work Quickly: As soon as you’re done using the brush with acrylic, dip the bristles into a specialized acrylic brush cleaner or monomer.
- Wipe and Repeat: Swirl the brush in the cleaner and wipe it on a paper towel or lint-free pad. Continue this process until all acrylic residue is gone.
- Do NOT Use Acetone: While acetone is a strong solvent, it can dry out and damage the natural hair of acrylic brushes. Stick to monomer or dedicated brush cleaners.
- Conditioning (Optional but Recommended): Once clean and dry, you can use a nail brush conditioning oil or a specialized acrylic brush conditioner to keep the bristles soft and flexible. A tiny drop of cuticle oil can also work in a pinch.
- Dry Upright: Always dry acrylic brushes bristled-up.
For both gel and acrylic brushes, it’s important to remember that the cleaner you use should be compatible with the product. Using the wrong cleaner can actually set the product into the bristles.
Deep Cleaning Your Nail Brushes
Even with regular cleaning, sometimes your brushes might need a little extra pampering. This is especially true if a brush has become stiff or you’ve accidentally let product dry in it.
When to Deep Clean:
- When brushes feel stiff or crusty.
- If you notice uneven polish application despite regular daily cleaning.
- After using a particularly stubborn polish color or product.
- As a monthly or bi-monthly maintenance step to ensure hygiene.
The Deep Cleaning Process:
This process is similar to the regular cleaning but with a bit more soak time and attention.
- Initial Wipe: As always, wipe off excess product thoroughly with a lint-free towel.
- Soak in Remover: Pour non-acetone nail polish remover or rubbing alcohol into a clean, small bowl. Submerge only the bristles in the solution. Let them soak for about 5-10 minutes. Don’t let the liquid creep up into the ferrule.
- Gently Work Out Residue: After soaking, use a clean paper towel or a cosmetic spatula to very gently work out any loosened product from between the bristles. You can swirl the brush on the towel again.
- Repeat if Necessary: If there’s still significant residue, you can repeat the soaking and wiping process.
- Soap Bath: Once the product is mostly out, wash the brush thoroughly with mild soap and water as described in the regular cleaning steps.
- Rinse and Reshape: Rinse until all soap is gone and gently reshape the bristles.
- Dry: Air dry upright.
A properly deep-cleaned brush will feel soft, pliable, and ready to create beautiful art again!
Troubleshooting Common Nail Brush Cleaning Issues
Sometimes, things don’t go perfectly. Here are a few common problems and how to solve them:
Problem: Bristles are still stiff after cleaning.
Solution: You might not have removed all the polish or cleaner. Try another round of soaking and gentle wiping. Ensure you’re using a non-acetone remover for regular polishes. For gel or acrylic brushes, make sure you’re using the correct cleaner for that specific product.
Problem: Bristles are splayed or not holding their shape.
Solution: This can happen from aggressive wiping, soaking too long in harsh solvents, or improper drying. After washing, spend extra time gently reshaping the bristles with your fingers. Drying them upright is critical. If the damage is severe, the brush may be beyond repair, and it might be time to invest in a new one.
Problem: There’s still color staining in the bristles.
Solution: For most brushes, a little bit of color staining isn’t the end of the world, as long as the bristles are clean and flexible. However, if you want to try and remove it, some people have success with a dedicated brush cleaner or even a tiny amount of hydrogen peroxide (use with extreme caution and rinse thoroughly, as it can be harsh). Ensure it doesn’t affect the brush’s performance.
Problem: The handle feels sticky or the ferrule is loose.
Solution: This often happens when you get cleaning solutions or water on the handle or near the ferrule. Always try to keep liquids away from these areas. If the ferrule is loose, it means the glue might have weakened. Sometimes, a tiny dab of nail glue (applied carefully without touching bristles) can help, but this is often a sign the brush is nearing the end of its life.
How Often Should You Clean Nail Brushes?
The frequency of cleaning depends on how you use your brushes and what you use them for.
- After Every Use (Daily Cleaning): This is non-negotiable. Always clean your brushes immediately after you finish your nail art or application. This prevents product from hardening on the bristles.
- Deep Cleaning: Aim for a deep clean once a month, or more often if you notice your brushes aren’t performing as well as they used to.
- Sanitization: If you share brushes or are concerned about hygiene, a weekly wipe-down with rubbing alcohol can help sanitize them between deeper cleans.
Think of it like this: a quick clean after each use is like washing your plates after eating. A deep clean is like properly scrubbing your pots and pans monthly, and sanitizing is like wiping down surfaces regularly to keep things extra germ-free. Consistency is key!
The Lifespan of Nail Brushes and When to Replace Them
With proper care, your nail brushes can last for a good while! High-quality brushes, especially those made with natural hair for acrylics, can last for years. Brushes for regular polish and gel might have a slightly shorter lifespan due to the solvents and products they encounter.
Here are signs it’s time for a replacement:
- Severely Frayed or Bent Bristles: If reshaping doesn’t bring them back to their original form, fine lines and precision art will be impossible.
- Bristles Falling Out: This is often a sign of a weak ferrule or degraded glue, meaning it’s time for a new brush.
- Inability to Clean Properly: If product is stubbornly stuck and cannot be removed even with deep cleaning, the brush is likely compromised.
- Handle or Ferrule Damage: Cracks, looseness, or persistent stickiness that cannot be fixed can impact hygiene and usability.
Investing in good quality brushes from reputable brands, like those found at Beyond Polish, can also make a big difference in their durability and how well they hold up to cleaning.
Maintaining Your Brush Collection: Storage Tips
Proper storage is just as important as cleaning for the longevity of your nail brushes. Here’s how to keep them in their best condition:
- Store Upright: As mentioned, always store brushes upright in a cup or holder with the bristles facing UP. This prevents dust from settling on the bristles and protects them from damage.
- Keep Away from Direct Sunlight and Heat: Intense light or heat can degrade the brush materials and cause them to dry out or warp.
- Use Brush Caps: Many nail brushes come with plastic caps. Use these when traveling or storing them to protect the bristles from bending and getting damaged. Make sure the brush is completely dry before capping.
- Organize: Keep your brushes organized by size and type. This makes it easier to find the right brush for the job and prevents them from being tangled or crushed.
- Ventilation: Ensure the storage area is well-ventilated, especially if you store them after a wash or a deep clean.
A well-organized and properly stored collection means your tools will always be ready and in perfect condition for your next creative masterpiece.
FAQ: Your Nail Brush Cleaning Questions Answered
Got more questions about keeping those brushes clean? You’re in the right spot!
Q1: Can I use acetone to clean my nail brushes?
It’s generally not recommended to use acetone on a regular basis, especially for brushes made with natural hair (like acrylic brushes). Acetone is a very strong solvent that can break down the natural oils and proteins in hair, making them brittle, dry, and prone to breakage over time. Non-acetone removers or rubbing alcohol are safer alternatives for most nail art brushes. For acrylic brushes, monomer is the preferred cleaner.
Q2: My brushes still feel a bit rough after cleaning. What else can I do?
If your brushes feel rough, it might mean they are a bit dry. After cleaning and drying, you can try applying a tiny drop of cuticle oil or a specific nail brush conditioner to the bristles. Gently work it in and then wipe off any excess. This helps to restore flexibility. Make sure to only use a minuscule amount so it doesn’t affect polish application!