Classy nail art for office provides a polished, professional, and subtly stylish look that complements your work attire. These essential styles are easy to achieve, boost confidence, and showcase your personality without being distracting. Focus on clean lines, sophisticated colors, and minimalist designs for an effortlessly chic office-ready manicure that truly makes a statement in professionalism and personal flair.
Navigating the world of office-appropriate beauty can sometimes feel tricky. You want to express your style and feel put-together, but also maintain a professional image. Your nails are a fantastic way to do this! Many people worry that nail art is too bold or distracting for a work environment. But what if I told you that you can rock stunning, elegant nail art that actually enhances your professional look? You can! It’s all about choosing the right designs and keeping them chic and subtle. Let’s dive into how you can achieve sophisticated and office-friendly nail art that will make you feel confident and polished every single day!
The Art of Office-Appropriate Elegance: Understanding Classy Nail Art
Classy nail art for office is all about striking a perfect balance. It’s sophisticated, understated, and professional, yet still allows for a touch of personal flair. Think less about loud patterns and more about elegant details that enhance your natural beauty and complement your work attire. The goal is to look polished and put-together, not to draw unwanted attention to your fingertips. This type of nail art embraces minimalism, clean lines, and a refined color palette, making it suitable for almost any professional setting, from creative agencies to corporate law firms.
It’s a way to showcase creativity and attention to detail without compromising professionalism. When done right, office-appropriate nail art can be a subtle yet powerful confidence booster, signaling that you’re someone who pays attention to the finer details – a valuable trait in any career. It’s about creating a manicure that speaks volumes about your professionalism and personal aesthetic, all while being entirely office-friendly.
Why Opt for Classy Nail Art at Work?
Let’s be honest, our hands are often in motion while we’re at work – typing, presenting, or even just shaking hands. Having well-maintained, stylish nails can make you feel more confident and capable. Here’s why leaning into classy nail art for the office is a fantastic idea:
- Boosts Confidence: A polished manicure can instantly make you feel more put-together and ready to tackle your day. It’s a small detail that can have a big impact on your self-assurance.
- Professional Polish: Subtle nail art demonstrates attention to detail and a refined sense of style, which are positive attributes in any professional environment.
- Personal Expression: It allows you to express your personality and creativity in a way that is still appropriate for your workplace.
- Enhances Attire: A sophisticated nail design can act as the finishing touch to your professional outfits, tying your look together seamlessly.
- Subtle but Memorable: Classy nail art is noticeable in a good way, projecting an image of modern elegance and competence.
Essential Elements of Classy Nail Art for Office
So, what exactly makes a nail art design “classy” and “office-appropriate”? It boils down to a few key principles:
1. Sophisticated Color Palettes
The foundation of any great office nail art is a classic and elegant color choice. These shades are universally flattering and exude professionalism:
- Neutrals: Think soft beiges, creamy nudes, pale taupes, and sophisticated grays. These are your workhorses for a clean, understated look.
- Muted Pastels: Soft blushes, baby blues, mint greens, and lavender can be beautiful and gentle, especially in the spring and summer months.
- Deep, Rich Tones: Burgundy, deep navy, forest green, and classic black can be incredibly chic and professional, particularly in cooler weather.
- Timeless Reds: A classic, true red or a deep berry red can be surprisingly office-appropriate if kept on a single accent nail or used in a clean, solid color application.
2. Minimalist Designs
Less is definitely more when it comes to office nail art. Opt for designs that are subtle and don’t overwhelm the nail:
- Negative Space: Utilizing the natural color of your nail as part of the design is incredibly modern and elegant.
- Geometric Accents: Simple lines, dots, or tiny triangles in a contrasting or complementary color can add a touch of flair.
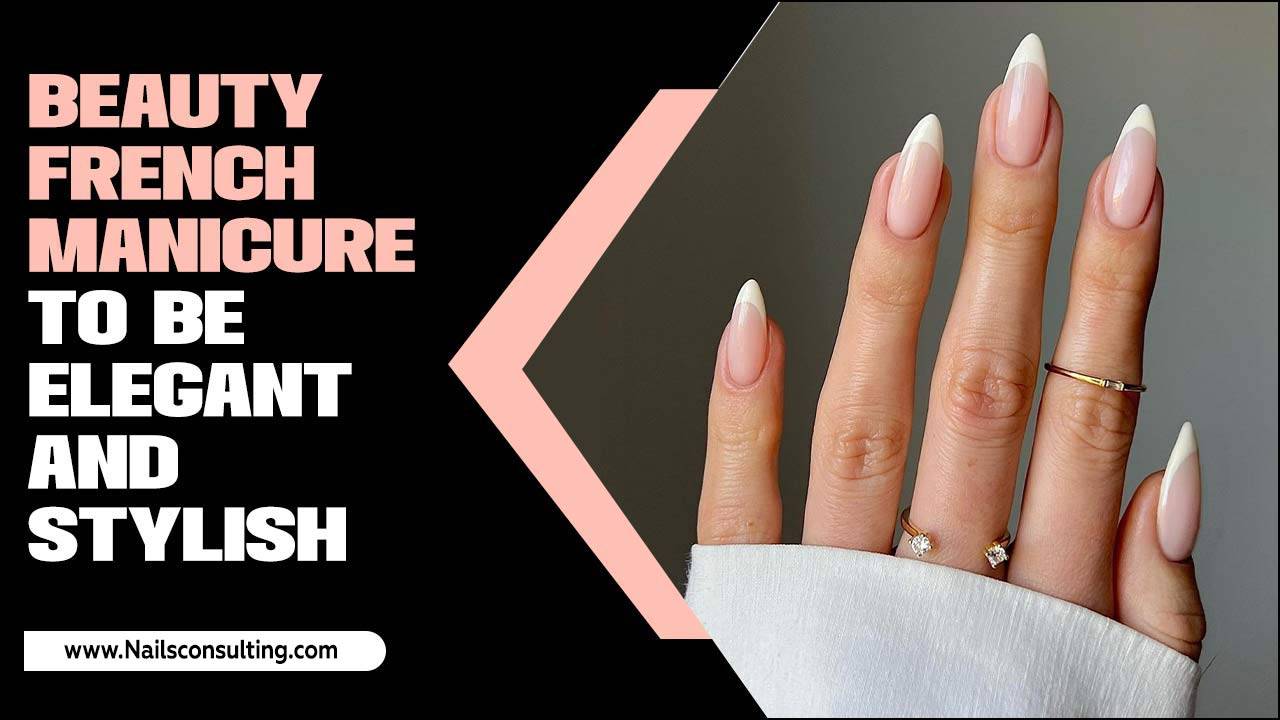
- French Manicure Variations: A classic French tip never goes out of style, but you can update it with colored tips or a thin metallic line.
- Subtle Glitter or Shimmer: A touch of fine glitter on an accent nail or a shimmering polish can add a hint of glamour without being flashy.
- Single Accent Nail: Focus your design on just one nail (usually the ring finger) while keeping the others simple and solid-colored.
3. Cleanliness and Shape
No matter how sophisticated your design, the overall presentation matters. Ensure your nails are impeccably clean, shaped, and filed:
- Shape: Almond, squoval, or short oval shapes are generally considered the most professional and elegant.
- Cuticles: Well-maintained cuticles are essential. Push them back gently and trim any excess skin.
- Length: Keep your nails at a manageable length that doesn’t interfere with your daily tasks.
Beginner-Friendly Classy Nail Art Ideas for the Office
Ready to try these concepts? Here are some simple, step-by-step ideas that any beginner can master. We’ll focus on designs that require minimal tools and techniques.
Idea 1: The Chic Neutral Gradient
A gradient, or ombre, effect can be surprisingly subtle and sophisticated, especially when done with neutral tones. This design gives a smooth, blended look that’s modern and stylish.
What You’ll Need:
- Base coat
- Two to three neutral polishes (e.g., light beige, creamy taupe, soft white)
- Makeup sponge (a clean, dry cosmetic sponge works best)
- Top coat
- Optional: Cuticle protector (like liquid latex or chapstick)
Steps:
- Prep Your Nails: Start with clean, dry nails. Apply a base coat to protect your nail beds and help the polish adhere.
- Apply Base Color: Paint a light, neutral color (like a pale beige) on each nail. Let it dry completely.
- Prepare the Sponge: Cut a small section of your makeup sponge. You can apply a bit of cuticle protector around your nail to avoid staining your skin, or just be very careful.
- Apply Polish to Sponge: Carefully paint horizontal stripes of your polishes onto the sponge, starting with the lightest shade and ending with the darkest. Work relatively quickly!
- Create the Gradient: Gently dab the sponge onto your nail, rocking it slightly from side to side to blend the colors. You might need to reapply polish to the sponge and dab again to build up the color intensity and blend.
- Clean Up Edges: Use a small brush dipped in nail polish remover to clean up any polish that got on your skin.
- Seal with Top Coat: Once the gradient is dry, apply a generous layer of top coat to seal the design and add shine.
Idea 2: The Minimalist Dot Accent
This is perhaps the easiest way to add a touch of art to your nails. Simple dots are elegant, modern, and can be customized in countless ways.
What You’ll Need:
- Base coat
- Your chosen neutral or pastel polish
- A contrasting polish for the dots (e.g., black, white, metallic gold or silver)
- A dotting tool or a toothpick
- Top coat
Steps:
- Prep & Base: Apply base coat and let it dry. Then, apply one or two coats of your chosen nail polish color (your main nail color). Let it dry completely until it’s no longer tacky.
- Choose Your Accent Nail: Decide which nail(s) will have the dots. The ring finger is a popular choice.
- Apply Polish to Tool: Dip the tip of your dotting tool (or toothpick) into the contrasting polish. You only need a small amount.
- Create the Dots: Gently press the polished tip onto your accent nail to create a perfect dot. You can place a single dot, a few scattered dots, or create a simple pattern. For a classic look, try a single dot near the cuticle or tip.
- Repeat: Continue adding dots as desired. Reload your tool with polish as needed.
- Top Coat: Once you’re happy with your dots and they’ve had a moment to set slightly, apply a clear top coat over the entire nail to protect the design.
Pro Tip: If you don’t have a dotting tool, the rounded head of a bobby pin or even the tip of a ballpoint pen (clean, of course!) can work in a pinch!
Idea 3: The Subtle Outline or Line Art
Adding a thin line or outline can transform a simple solid color into a chic, modern design. This works beautifully with negative space or solid bases.
What You’ll Need:
- Base coat
- Your chosen nail polish color
- A fine-tipped detail brush or striping tape
- A contrasting polish (optional, for outlines) or the same color for a subtle effect
- Top coat
Steps:
- Prep & Base Polish: Apply base coat, then one or two coats of your main polish color. Ensure it’s completely dry.
- Option A: Using a Detail Brush:
- Dip your fine-tipped detail brush into the contrasting (or same) polish. Wipe off any excess on a piece of paper.
- Carefully paint a thin line along the tip of your nail (like a modern French tip) or along the cuticle. You can also create small abstract shapes with the brush.
- Option B: Using Striping Tape:
- Apply your base polish and let it dry THOROUGHLY. You can even let it cure for a few more hours or overnight if you’re worried about smudges.
- Carefully place strips of nail art striping tape onto your nail to create your desired pattern (e.g., a line near the tip, a diagonal line across the nail).
- Paint over the tape with your contrasting color.
- While the polish is still wet, carefully peel off the striping tape using tweezers. This leaves a clean, sharp line.
- Finish: Once your line art is dry, carefully apply a top coat to seal it in.
External Resource: For more inspiration on minimalist line art and brush techniques, the National Institute of Standards and Technology (NIST) has resources on surface engineering that, while technical, highlight the precision involved in creating fine, controlled details, a concept transferable to nail art.
Idea 4: The Polished Metallic Accent
A touch of metallic polish is sophisticated and catches the light beautifully without being over-the-top. Think gold, silver, rose gold, or bronze.
What You’ll Need:
- Base coat
- Your chosen everyday nail polish color
- A metallic polish
- Thin brush or striping tape (optional, for precision)
- Top coat
Steps:
- Prep & Base Color: Apply base coat, then one or two coats of your main polish color. Let it dry completely.
- Option A: Metallic Tip:
- Carefully apply the metallic polish only to the very tips of your nails, like a modern French tip. A detail brush can help with precision.
- Option B: Metallic Stripe:
- Use a detail brush or striping tape to add a thin metallic line across your nail – either horizontally, vertically, or diagonally.
- Option C: Full Metallic Accent Nail:
- Paint one accent nail (e.g., ring finger) entirely with the metallic polish.
- Clean Up & Seal: Clean up any mistakes with a brush dipped in remover. Once dry, apply a top coat to give it a glossy finish and protect the metallic shine.
Tools and Products for Office Nail Art Success
You don’t need a whole salon setup to create beautiful office nail art. A few key items will make a huge difference:
- Quality Nail Files: Essential for shaping your nails correctly. Look for glass or fine-grit files for a smooth finish.
- Cuticle Pusher and Nippers: For neatening up the cuticle area. Gentle pushing is often enough!
- Base Coat: Protects your natural nails and makes polish last longer.
- Good Quality Polish: Invest in polishes with good formulas that apply smoothly and have good color payoff.
- Top Coat: Seals the design, adds shine, and prevents chipping. A quick-dry top coat is a lifesaver!
- Dotting Tools: Inexpensive and easy to use for creating perfect dots. They come in various tip sizes.
- Fine-Tipped Detail Brush: For creating thin lines, outlines, and intricate details.
- Makeup Sponges: Great for creating gradient effects. Clean, dense-cell sponges work best.
- Nail Polish Remover: For tidying up edges and correcting mistakes.
- Small Brush for Cleanup: An old, clean makeup brush or a specific cleanup brush works wonders for precision removal of stray polish.
Maintaining Your Office Manicure
Even the classiest nail art needs a little upkeep to stay looking its best throughout the work week. Here’s how to keep yours pristine:
- Reapply Top Coat: A quick swipe of top coat every couple of days can refresh the shine and add an extra layer of protection against daily wear and tear.
- Be Mindful: Avoid using your nails as tools – try to open cans, scrape things, or pry items open.
- Moisturize: Keep your hands and cuticles hydrated with hand cream and cuticle oil. Dryness can lead to chips and peeling.
- Touch-Ups: For minor chips, you can try carefully applying a bit of your base polish color and re-applying top coat. For more significant damage, it might be time for a refresh.
When is Nail Art Not Office Appropriate?
While we’re advocating for classy office nail art, it’s also important to recognize when a design might cross the line. Generally, any design that is:
- Overly long or sharp: Nails that are excessively long or have sharp, dagger-like shapes can be seen as unprofessional and even unsafe.
- Extremely bright or neon colors: While fun, these can be too distracting for a conservative workplace.
- Busy, complex patterns: Heavy patterns, cartoon characters, or intricate, multi-colored designs can be overwhelming.
- Excessive 3D embellishments: Rhinestones, charms, or anything that sticks out significantly can be impractical and unprofessional.
- Chipping or poorly maintained: A chipped manicure, no matter how simple the design, always looks unprofessional.
When in doubt, always err on the side of caution and choose something more understated.
Classy Nail Art Inspiration Table
Here’s a handy table to quickly reference some popular and office-friendly classy nail art ideas:
| Design Idea | Description | Best For | Difficulty Level | Color Palette Suggestion |
|---|---|---|---|---|
| Solid Chic Neutrals | A single, flawless coat of a sophisticated neutral polish. | Everyday wear, all industries. | Beginner | Nude, beige, taupe, soft grey, muted pink. |
| Subtle French Tip | A modern take on the classic, with a thin, clean line at the tip in a neutral or metallic shade. | Classic professional settings. | Beginner-Intermediate (precision required) | White/cream tip, nude/pink base. Metallic tip optional. |
| Negative Space Geometric | Using clear polish or the natural nail as part of a simple geometric design (lines, dots). | Creative and modern workplaces. |


