Quick Summary:
Embrace the fall season with classic burgundy nail designs! Discover elegant, easy-to-create looks perfect for autumn, from solid shades to simple accents. These essential fall looks are beginner-friendly and will elevate your style.
As the leaves turn golden and a crisp breeze fills the air, our wardrobes naturally shift towards richer, warmer tones. And what better way to mirror this cozy transformation than with our nails? Burgundy is the quintessential fall shade – it’s sophisticated, versatile, and instantly adds a touch of autumn magic. If you’ve ever felt a little intimidated by intricate nail art or struggled to find designs that truly capture the season’s vibe, you’re in the right place. This guide is all about making classic burgundy nail designs accessible and fun for everyone, no matter your skill level. Get ready to fall in love with your nails all over again!
Why Burgundy is a Fall Nail Essential
Burgundy, a deep, rich red with hints of brown or purple, is more than just a color; it’s a mood. It embodies the warmth of crackling fires, the indulgence of mulled wine, and the earthy beauty of autumn foliage. Its versatility is a huge plus. It suits almost every skin tone, looking both bold and elegant. Whether you prefer a minimalist look or a touch of sparkle, burgundy can be adapted to fit your personal style.
Think about it: burgundy pairs beautifully with autumnal textures like cozy knits, soft leathers, and even the muted tones of flannel. It’s a shade that feels both classic and contemporary, making it a go-to for this time of year. Plus, compared to some brighter or more complex trends, a beautiful burgundy manicure often feels effortless yet impactful.
Essential Tools for Your Burgundy Manicure
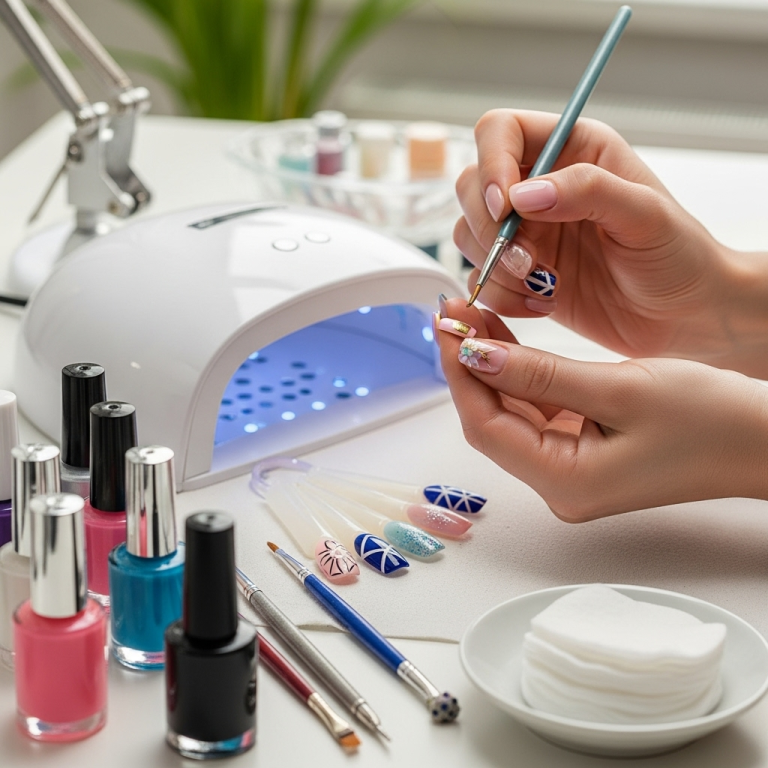
Before we dive into the designs, let’s gather your nail toolkit! Being a beginner doesn’t mean you need a professional salon’s worth of tools. A few key items will set you up for success. Having the right tools makes the process smoother and the results much more polished. Remember, practice makes perfect, and good tools can be your best friends along the way!
- Nail Polish Remover: Essential for cleaning up mistakes and prepping nails. Acetone-based removers are usually more effective for tougher polishes.
- Cotton Balls or Pads: For applying remover and cleaning up polish.
- Nail File: To shape your nails. A fine-grit file is best for natural nails to avoid damage.
- Nail Buffer: To smooth out ridges and add a natural shine.
- Cuticle Pusher or Orange Stick: To gently push back your cuticles for a clean canvas.
- Base Coat: Crucial for protecting your natural nails from staining and helping your polish adhere better.
- Top Coat: Seals your manicure, adds shine, and helps prevent chips.
- Burgundy Nail Polish: The star of the show! Choose a shade you love – from deep wine to a brighter berry.
- Optional: Dotting Tool or Toothpick: For creating simple accent designs.
- Optional: Nail Art Brush: For more intricate lines or details.
Getting Started: Prepping Your Nails
A flawless manicure starts with perfectly prepped nails. This step is often overlooked, but it makes a huge difference in how your polish applies and how long your design lasts. Taking a few extra minutes here will save you frustration later!
- Remove Old Polish: Start by removing any existing nail polish using nail polish remover and cotton pads. Ensure all traces are gone.
- Shape Your Nails: Gently file your nails into your desired shape. It’s best to file in one direction to avoid weakening the nail. Whether you love a classic square, a soft squoval, or a chic almond, shape them consistently.
- Buff for Smoothness: Lightly buff the surface of your nails with a nail buffer. This smooths out any ridges and creates a nice, even surface for polish to cling to. Don’t over-buff; a few gentle strokes are enough.
- Push Back Cuticles: Using a cuticle pusher or an orange stick, gently push back your cuticles. Be very gentle; you’re just tidying them up, not cutting them. Healthy cuticles frame your nails beautifully.
- Cleanse: Wash your hands thoroughly to remove any dust or oils from the filing and buffing process. Make sure your nails are completely dry before proceeding.
Classic Burgundy Nail Designs: Fall Runway to Real Life
Now for the fun part! These designs are all about celebrating the rich, warm tones of autumn. We’re focusing on simplicity and elegance, making them perfect for anyone looking to easily elevate their fall style. These looks are achievable with just a little patience and the right tools!
1. The Effortless All-Over Matte Burgundy
Sometimes, the simplest look is the most stunning. A perfectly applied, solid color can be incredibly chic. Burgundy is a shade that commands attention on its own.
Why it’s great for fall:
- It’s sophisticated and timeless.
- The matte finish adds a trendy, velvety texture that feels very autumnal.
- It pairs with everything!
How to achieve it:
- Apply a thin layer of your chosen base coat and let it dry completely.
- Apply one coat of your favorite burgundy polish. Let it dry for a few minutes.
- Apply a second coat of burgundy polish. This ensures smooth, opaque coverage.
- Once the color is dry to the touch, apply a matte top coat. Be sure to cover the entire nail to lock in that velvety finish.
Pro Tip: For an extra sleek finish, ensure each layer of polish is applied thinly. Thicker coats can lead to streaky or uneven drying, especially with darker shades.
2. Glossy Burgundy with a Golden Touch
Add a touch of glamour to your classic burgundy with a simple pop of gold. This design feels elevated and perfect for fall evenings.
Why it’s great for fall:
- The metallic gold accent adds warmth and a festive feel.
- It’s subtle enough for everyday wear but special enough for occasions.
- Combines two of fall’s most luxurious colors.
How to achieve it:
- Prep your nails and apply base coat.
- Apply two thin coats of your burgundy nail polish, allowing each to dry.
- Once the burgundy polish is completely dry, you have a few options for the gold accent:
- Gold Glitter Top Coat: Apply a sheer gold glitter polish over one or two nails (like an accent finger) or just on the tips.
- Gold Foil: Carefully apply gold foil to the nail after your top coat is slightly tacky (or use foil glue). Gently press and peel to transfer the foil.
- Gold Polish Line: Use a fine nail art brush or a striping tape to add a thin gold line across the tip or base of a nail.
- Once your accent is in place and dry, apply a generous layer of glossy top coat over all nails to seal everything and provide a beautiful shine.
External Resource: For more on nail art techniques and tools, the Nailymania Nail Art Tools Guide offers a helpful overview of brushes, dotting tools, and more.
3. Subtle Burgundy French Tips
A twist on the classic French manicure, this design uses burgundy for the tips, offering a sophisticated and modern update. It’s a great way to incorporate fall colors without being too overpowering.
Why it’s great for fall:
- It’s an elegant way to wear burgundy.
- It’s subtle and professional, suitable for any setting.
- A modern update on a timeless manicure style.
How to achieve it:
Option A: Using a French Tip Guide
- Apply base coat and one or two coats of a sheer nude or natural-toned polish to your whole nail. Let it dry.
- Place a French tip guide sticker across your nail, just above the free edge where you want the tip to start.
- Carefully apply your burgundy polish over the exposed tip of the nail, ensuring it goes over the edge of the sticker.
- While the burgundy is still wet, gently peel off the sticker. This creates a clean line.
- Let the polish dry completely, then apply a clear or glossy top coat to seal the design.
Option B: Freehand (Requires a steady hand!)
- Apply base coat and one or two coats of a sheer nude or natural-toned polish. Let it dry.
- Using a fine nail art brush dipped in burgundy polish, carefully paint a curved line across the tip of each nail. Practice on a piece of paper first!
- Once dry, apply a glossy top coat.
Beginner’s Tip: If you’re new to freehanding, don’t worry about perfection! Embrace the slight imperfections; they add character. You can also use a small brush dipped in nail polish remover to clean up any wobbly lines.
4. Burgundy Gradient (Ombre) Effect
The gradient or ombre effect is beautiful in deep tones. Transitioning from a lighter shade to a deep burgundy on each nail, or from one nail to the next, creates a stunning visual.
Why it’s great for fall:
- It looks intricate and luxurious.
- It showcases the depth of burgundy shades beautifully.
- It’s a softer way to wear a bold color.
How to achieve it (using a sponge):
- Apply base coat and let it dry.
- Paint your nails with a lighter complementary color, like a soft beige or a lighter berry shade. Let it dry completely.
- For the gradient on each nail:
- On a makeup sponge (a clean, dry makeup sponge works best), paint two stripes of color side-by-side: your lighter base color and your deep burgundy.
- Quickly dab the sponge onto the nail. You want to transfer the color gradient.
- Repeat this process a few times, reapplying color to the sponge as needed, until you achieve your desired blend.
- Clean up any stray polish around your nails with a brush dipped in nail polish remover.
- Once dry, apply a layer of glossy top coat.
Advanced Tip: For a smoother gradient, some people apply a layer of liquid latex or balm around their nails to easily remove the excess polish from the skin.
5. Minimalist Burgundy Accent Nail
If a full burgundy mani feels too bold, try making just one nail an accent! This is a chic and subtle way to embrace the trend.
Why it’s great for fall:
- Perfect for beginners or those who prefer minimalist style.
- It’s a stylish compromise for wearing a deep color.
- Focuses attention on one feature, making it stand out.
How to achieve it:
- Paint all your nails (except your accent nail) with a neutral color like nude, beige, or a soft grey. Apply two coats and let dry completely.
- On your chosen accent nail (usually the ring finger), apply one or two coats of your deep burgundy polish. Let it dry completely.
- For an extra touch, you can add a simple design on the accent nail using the burgundy polish, like a small dot near the cuticle with a dotting tool, or a thin line along the tip.
- Apply a top coat to all nails to seal and add shine.
6. Burgundy with Negative Space
Negative space manicures are super trendy and surprisingly easy to achieve. They involve leaving parts of your natural nail visible, creating a modern, layered look.
Why it’s great for fall:
- It’s stylish and modern while still embracing burgundy.
- The “see-through” effect adds a unique dimension.
- It looks polished without needing perfect full coverage.
How to achieve it:
- Apply base coat.
- Use nail art tape or striping tape to create geometric shapes or lines on your nail. Ensure the tape is pressed down firmly to prevent polish from bleeding underneath.1
- Paint the areas around the tape with your burgundy polish. You can do one coat or two, depending on how opaque you want it. Avoid flooding tape.
- While the polish is still wet, carefully peel off the tape to reveal the negative space underneath.
- Let the polish dry completely, then apply a clear top coat over the entire nail.
Note on Tape Application: Applying tape over fully dried polish can sometimes lift the polish. If you’re painting over an existing color, wait until it’s bone dry. For negative space over bare nail, ensure the tape adheres well to prevent leakage.
Color Pairing Ideas with Burgundy
Burgundy is a fantastic base, but it also looks stunning when paired with other colors, especially for fall. Here are a few pairings to inspire you:
| Pairing Color | Vibe | Design Idea |
|---|---|---|
| Gold/Rose Gold | Luxurious, Festive | Gold glitter tips, metallic accent line, or foil details. |
| Cream/Ivory | Sophisticated, Soft | Burgundy base with cream minimalist dots or stripes. |
| Deep Green (Emerald, Forest) | Earthy, Rich | Alternating burgundy and green nails, or a burgundy base with a subtle forest green accent detail. |
| Nude/Beige | Understated, Chic | Burgundy accent nail on a nude base, or a subtle burgundy French tip over nude. |
| Black | Edgy, Dramatic | Half-and-half color block, or black detailing over a burgundy base. |
| Mustard Yellow | Warm, Cozy | Color blocking or a simple stamped pattern in mustard over burgundy. |
Maintaining Your Burgundy Manicure
Keeping your gorgeous burgundy nails looking fresh is key. Here’s how to make them last:
- Reapply Top Coat: Every 2-3 days, swipe a fresh layer of top coat over your nails. This re-seals the polish and adds shine, helping to prevent chips.
- Wear Gloves: When doing chores, washing dishes, or anything involving prolonged water or harsh chemicals, wear rubber gloves. This is one of the biggest factors in preventing chips and wear.
- Moisturize: Keep both your nails and cuticles hydrated. Use cuticle oil daily and hand cream regularly. Dry, brittle nails are more prone to breaking and chipping.
- Avoid Using Nails as Tools: Resist the urge to open cans or scrape labels with your nails. They are decorations, not tools!
- Touch-Ups: For minor chips, you can carefully dab a tiny bit of polish onto the chipped area and then apply a top coat.
Frequently Asked Questions (FAQ)
Q1: How do I prevent burgundy nail polish from staining my nails?
A1: Always use a good quality base coat! This creates a protective barrier between your natural nail and the pigment of the polish. Ensure you apply it evenly and let it dry before adding your color coats. Also, make sure to remove polish completely before applying your next manicure.
Q2: My burgundy polish is streaky. What can I do?
A2: Streaky polish is often caused by applying it too thinly or too thickly, or by not letting coats dry sufficiently. Try applying the polish in thinner coats and allow each coat to dry for a few minutes before applying the next. A good top coat can also help even out minor streakiness.
Q3: Can I combine matte and glossy finishes in one design?
A3: Absolutely! This is a fantastic way to add depth and interest to your manicure. For example, you could paint your nails with a glossy burgundy and then use a matte top coat just on the tips for a unique French manicure effect.
Q4: What’s the easiest way to create clean lines for burgundy nail art?
A4: For beginners, nail art tape or stencils are your best friends! They help create sharp, clean lines. For freehand lines, use a very fine brush and practice patience. You can also clean up any stray lines with a small brush dipped in nail polish remover.
Q5: How long does a burgundy manicure typically last?
A5: With proper application and maintenance (like reapplying top coat and wearing gloves for chores), a classic manicure can last anywhere from 5-10 days. The longevity depends on your nail type, daily activities, and the quality of products used.
Q6: Is burgundy a good color for all skin tones?
A6: Yes! Burgundy is incredibly versatile and generally looks flattering on all skin tones. Deeper, richer burgundies tend to complement warmer skin tones, while those with bluer undertones can look stunning in more purplish-based burgundies. Experiment to find your perfect shade!
Conclusion
Burgundy nails are an undeniable fall staple, offering a rich depth and sophisticated charm that perfectly complements the season. From the simplicity of a flawless matte or glossy finish to elegant touches of gold or modern negative space designs, there’s a classic burgundy look to suit every style and skill level. By preparing your nails properly and using a few simple techniques, you can easily create salon-worthy manicures right at home. Embrace the cozy, luxurious vibes of autumn and let your nails be your ultimate fall accessory. Happy painting!
-
National Center for Education Statistics. (n.d.). Visualizing Data: Using Tables and Graphs. Retrieved from https://nces.ed.gov/pubsearch/pubsinfo.asp?pubid=2009440 via example link. ↩


