Chrome powder nail designs are a dazzling way to add a futuristic, high-shine finish to your manicure. They’re surprisingly easy to achieve at home with the right tools and a little practice, transforming your nails into mirror-like masterpieces.
Ever looked at super-glossy, almost metallic nails and thought, “Wow, how did they do that?” You’re not alone! Achieving that stunning, reflective finish can seem like magic, but it’s totally within your reach. Many of us struggle to get that perfect, seamless shine, often ending up with patchy or dull results. Don’t worry; this guide is here to demystify the process. We’ll break down exactly how to create gorgeous chrome powder nail designs right at home, making your nails the envy of everyone you meet. Get ready to become a chrome queen!
What is Chrome Powder and Why Are You Seeing It Everywhere?
Chrome powder, also known as mirror powder or holographic powder, is a finely milled cosmetic pigment that, when applied correctly over a specific base coat, creates an incredible, true mirror-like or iridescent effect on your nails. Gone are the days of just matte or glossy finishes; chrome powder has revolutionized nail art, offering a sleek, modern, and eye-catching look that’s surprisingly versatile.
It’s become a massive trend because it’s:
- Eye-Catching: The reflective quality is unlike any other nail finish.
- Versatile: It can be applied over any base color to create different effects.
- Modern: It gives a futuristic and sophisticated vibe.
- Achievable: With a few key products and techniques, anyone can achieve it.
The Essential Toolkit for Stunning Chrome Powder Nails
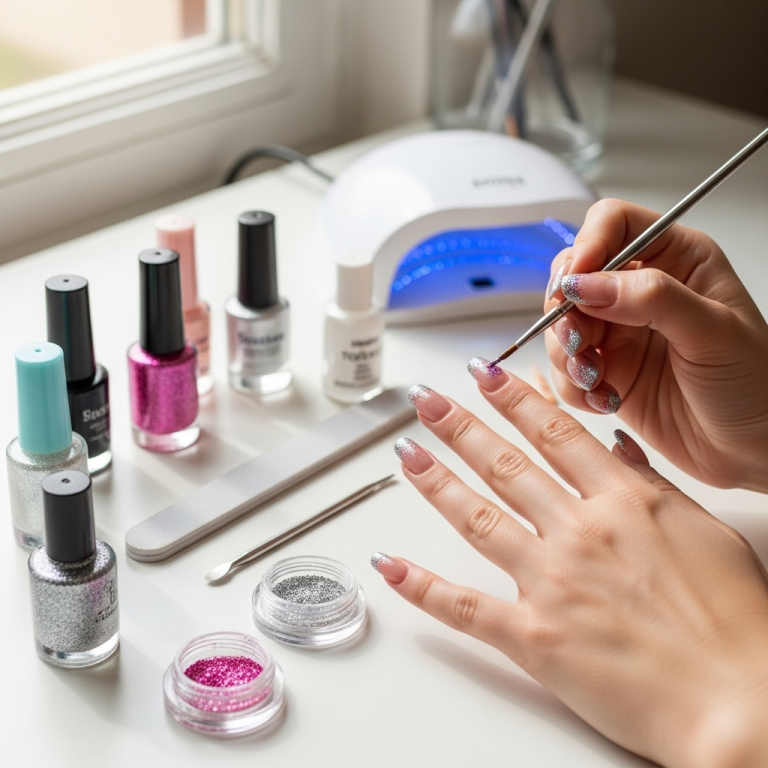
Before we dive into the how-to, let’s gather your supplies. Having the right tools makes all the difference in achieving that flawless, salon-worthy finish. Don’t worry, most of these are readily available online or at your local beauty supply store.
What You’ll Need:
- Base Coat: This is crucial! You’ll need a specific No-Wipe Gel Top Coat. Regular top coats won’t work because the powder needs something sticky to adhere to.
- Chrome Powder Kit: These usually come with the powder and an applicator. You can find them in various colors – silver, gold, iridescent, pink, blue, and more!
- UV/LED Nail Lamp: Gel polish and no-wipe top coats need to be cured under a lamp to harden.
- Buffer or Fine-Grit Nail File: To smooth the nail surface.
- Alcohol Wipes or Rubbing Alcohol: To clean and prep the nails.
- Optional: Regular Nail Polish (for colored chrome): If you want a colored chrome effect, you’ll apply this as your base color.
- Optional: Cuticle Oil: To rehydrate your skin after the process.
Step-by-Step Guide to Achieving Flawless Chrome Powder Nails
Ready to transform your fingertips? Follow these simple steps for a dazzling chrome finish. Remember, patience and practice are your best friends here!
Step 1: Prep Your Nails for Perfection
Just like any manicure, starting with clean, well-prepped nails is key. This ensures your chrome powder adheres properly and lasts longer.
- Start with clean, dry nails. Remove any old polish.
- Gently push back your cuticles using a cuticle pusher.
- Lightly buff the surface of your nails with a fine-grit file or buffer. This helps the base coat adhere better. Don’t over-file; you just want to remove the shine.
- Wipe your nails with an alcohol wipe or a cotton pad soaked in rubbing alcohol to remove dust and oils.
Step 2: Apply Your Base (The Foundation for Shine)
This is where the magic begins to set up. Your choice of base will determine the final look. You have a couple of options:
Option A: Classic Mirror Chrome (Silver/Gold)
For the quintessential mirror effect, you’ll want to go directly over your gel top coat without a colored polish underneath.
- Apply a thin, even layer of your chosen gel polish color (if you want a colored base) or skip this step for a pure silver/gold mirror if using a sheer or clear gel base. If you’re using a dark color like black, it will give a deeper, more intense chrome effect.
- Cure this layer under your UV/LED lamp according to the polish manufacturer’s instructions (usually 30-60 seconds).
- Now, apply a thin, even layer of your No-Wipe Gel Top Coat. This is the crucial step. Make sure it’s smooth and covers the entire nail.
- Cure the No-Wipe Gel Top Coat under the UV/LED lamp. This is critical! The surface needs to be fully cured but still slightly tacky to grip the powder. Typically, this is around 60 seconds. (Check your lamp and top coat instructions).
Option B: Colored Chrome Effect
Want a holographic pink chrome or a shimmering blue mirror? Start with a colored gel polish!
- Apply one or two thin coats of your desired colored gel polish.
- Cure each coat under the UV/LED lamp as per the polish instructions.
- Apply a thin, even layer of your No-Wipe Gel Top Coat over the colored gel.
- Cure the No-Wipe Gel Top Coat under the UV/LED lamp. Again, ensure it’s fully cured but still has a bit of tackiness.
Step 3: Apply the Chrome Powder (The Big Reveal!)
This is the fun part where you see that amazing shine appear!
- Dip your applicator sponge (or your fingertip if you’re brave and have a good connection with your nails!) into the chrome powder.
- Gently rub the powder onto the cured no-wipe gel top coat. Use small circular motions. You’ll see the mirror effect start to develop as you rub.
- Cover the entire nail surface. Don’t be afraid to use a little pressure, but don’t scrub aggressively.
- Continue rubbing until the entire nail has an even, metallic sheen.
Step 4: Seal in the Shine (Locking it Down)
You’ve achieved the chrome look, but now you need to make sure it lasts. This step is just as important as the powder application.
- Brush away any excess powder from around your cuticle and nail edges with a soft brush.
- Apply another thin, careful layer of the No-Wipe Gel Top Coat over the chrome powder. This layer protects the chrome effect and seals it in. Be sure to cap the free edge (the tip of your nail) to prevent lifting.
- Cure this final top coat under your UV/LED lamp for the recommended time (usually 60 seconds).
Step 5: Finishing Touches
Almost done! A little tidying up goes a long way.
- Once cured, the surface might feel a little sticky from residual powder, but the no-wipe formula should mean it’s fully set. If there’s any slight tackiness, you can wipe it VERY gently with an alcohol wipe, but usually, it’s not necessary with a true no-wipe top coat.
- Apply cuticle oil around your nails to moisturize your skin.
- Admire your stunning, high-shine chrome powder nail design!
Exploring Different Chrome Powder Effects
Chrome powder isn’t just about one type of shine. The magic lies in how you use it and what you pair it with. Here are some popular variations:
Holographic Chrome
This type of powder contains iridescent particles that create a rainbow-like shimmer when light hits them. It’s stunning over black for a psychedelic effect or over lighter colors for a more subtle sparkle.
Iridescent Chrome
Similar to holographic, but usually with a more pronounced shift between two or three specific colors. Think pearly pinks, blues, and greens.
Duochrome Chrome
This powder shifts dramatically between two distinct colors depending on the viewing angle. It’s like having multiple nail colors in one!
Colored Chrome
As mentioned in the steps, applying chrome powder over a colored gel base completely transforms the resulting shade and depth of your chrome finish. A silver powder over blue will still look blue, but with that sharp, metallic shine.
Pro Tips for Nail Pros and DIY Dynamos
Even with clear instructions, a few expert tricks can elevate your chrome game from good to absolutely breathtaking. These subtle adjustments make a big difference in the final outcome.
- Less is More: When applying the no-wipe top coat, always aim for thin, even layers. Too thick, and it might not cure properly, leading to smudging.
- The “Tackiness” Factor: The key to chrome powder application is the slight tackiness of the cured no-wipe gel. If your gel lamp is too strong or you cure for too long, the surface might become completely hard and dry, and the powder won’t adhere. If it’s not cured enough, it will be too sticky and smudge. It’s a delicate balance! If you find your powder isn’t sticking, try slightly reducing your cure time. If your gel coat feels too hard, try slightly increasing it.
- Clean Application: Use a dedicated silicone tool or a makeup sponge applicator for smooth application. Clean off excess powder with a soft brush before top coating to avoid a gritty texture.
- Don’t Skip the Seal: The final top coat isn’t just for shine; it’s what prevents your beautiful chrome from chipping or rubbing off.
- Experiment with Bases: Try applying chrome powder over different colors. Black is a popular choice for a deep, intense effect, but white can give a more pastel or opalescent look.
- Tool Hygiene: Keep your applicators clean. If you’re reusing a sponge, gently clean it after use, or use the disposable end of the applicator.
- Practice Makes Perfect: If your first attempt isn’t flawless, don’t get discouraged! Nail art takes a little practice. Try it on a nail tip first before committing to your full manicure.
Troubleshooting Common Chrome Powder Problems
Even with the best intentions, sometimes things don’t go as planned. Here’s a quick guide to fixing common chrome powder mishaps.
| Problem | Possible Cause | Solution |
|---|---|---|
| Powder Not Sticking/Rubbing Off | No-wipe top coat not cured correctly (too short). | Increase cure time slightly. Ensure the top coat is a dedicated “no-wipe” formula. |
| Patchy or Uneven Finish | Not enough powder used, or not rubbed in thoroughly. | Apply more powder, rubbing in circular motions with gentle pressure until the entire surface is covered. |
| Dull or Matte Finish Instead of Mirror | Using a regular gel top coat instead of a no-wipe version. | Ensure you are using a specific “No-Wipe Gel Top Coat.” Regular top coats will cure hard and the powder won’t adhere. |
| Chrome Smudged During Top Coat Application | Top coat applied too thickly or not cured correctly. | Apply a thin, even layer of top coat. Cure for the full recommended time. |
| Lines or Streaks in the Chrome | Rough application of the powder or applicator marks. | Ensure the no-wipe top coat is smooth before applying powder. Use gentle, circular motions with the applicator. Brush away excess powder carefully. |
The Longevity and Maintenance of Your Chrome Nails
One of the best things about gel-based chrome nails is their durability. When applied correctly over a gel base, your chrome powder designs can last for two to three weeks, just like a regular gel manicure.
How to Make Them Last:
- Avoid Harsh Chemicals: Prolonged exposure to cleaning agents or certain solvents can dull the shine or weaken the gel. Wear gloves when doing chores!
- Gentle Filing: When you eventually need to remove or change your manicure, file off the top coat gently. Avoid aggressive filing that could damage your natural nail. For removal, soaking in acetone designed for gel polish is usually effective, as recommended by resources like the U.S. Food and Drug Administration’s advice on cosmetic products.
- Touch-Up Potential: While a full redo is best, if a tiny spot loses its shine, you might be able to carefully reapply a thin layer of no-wipe top coat and a tiny bit of powder, then cure again. However, this can be tricky to blend seamlessly.
When it’s time to remove your gel polish, proper technique is important to keep your natural nails healthy. You can find detailed removal steps on reputable beauty blogs or professional nail technician resources.
Frequently Asked Questions About Chrome Powder Nails
Q1: Can I use regular nail polish with chrome powder?
A1: No, standard nail polish won’t work with chrome powder. You absolutely need a gel-based system, specifically a gel no-wipe top coat and a UV/LED lamp, for the powder to adhere and create that mirror effect.
Q2: Do I need a special base coat for chrome powder?
A2: Yes! The most critical element is a “no-wipe” gel top coat. This unique formula cures with a slightly tacky surface that allows the finely milled powder to bind to it, creating the mirror effect.
Q3: How long do chrome powder nails last?
A3: When applied correctly with a gel polish system, chrome powder nails can last for 2-3 weeks, similar to a regular gel manicure. Proper application and sealing are key to longevity.
Q4: Is chrome powder safe for my nails?
A4: When used as directed with proper application and removal techniques, chrome powders are safe. It’s the gel system itself that requires curing under a lamp. Always follow safe nail care practices and ensure you’re using cosmetic-grade pigments.
Q5: Can I achieve chrome nails without a UV/LED lamp?
A5: Unfortunately, no. The specific gel no-wipe top coat required for chrome powder application needs to be cured under a UV or LED lamp to set properly. Air-drying nail polishes will not create the correct surface for the powder to adhere.
Q6: What’s the difference between mirror powder and holographic powder?
A6: Mirror powder typically provides a true, solid metallic shine, like a mirror. Holographic powder has iridescent particles that refract light into a rainbow spectrum, creating a shimmery, multi-colored effect when light hits it. Many kits blend these properties!
Q7: Can I use my own eyeshadow brushes to apply chrome powder?
A7: While some makeup brushes might work in a pinch, it’s best to use dedicated silicone tools or makeup sponge applicators designed for nail art. These are typically denser and easier to clean, ensuring a smoother application and preventing contamination of your makeup brushes.
Conclusion: Embrace Your Inner Shine with Chrome Nails
See? Achieving those dazzling chrome powder nail designs is totally achievable! With the right tools, a bit of patience, and these step-by-step instructions, you can absolutely create stunning, mirror-like manicures that will turn heads. Whether you’re going for a classic silver mirror, a futuristic iridescent hue, or a vibrant colored chrome, the process is fun and rewarding.
Don’t be afraid to experiment with different base colors and powder shades to find your signature chrome look. Remember, nail art is all about self-expression and having fun. So go ahead, gather your supplies, and get ready to shine. Your nails are your canvas, and with chrome powder, you can create a masterpiece!


