Get the ultimate mirror-shine chrome nails at home with this genius, step-by-step tutorial! Perfect for beginners, we’ll show you exactly how to achieve that stunning, futuristic look using essential tools and simple techniques. Discover the easiest way to master this must-have nail trend.
Chrome Nail Design Tutorial: Genius, Essential for That Mirror Shine!
Ever scrolled through your feed and stopped dead at those impossibly shiny, mirror-like nails? We’ve all been there! Achieving that flawless chrome finish can seem like a high-tech salon secret, but guess what? It’s totally doable right in your own home, even if you’re just starting out. Don’t worry about complicated steps or expensive gadgets; this guide breaks down the magic of chrome nails into super simple, achievable steps. Get ready to dazzle with your own DIY masterpiece. Let’s dive in!
This tutorial is designed to make you feel like a pro, even if you’ve never tried nail art before. We’ll cover everything from the basic tools you’ll need to the exact application techniques that guarantee that coveted, futuristic shine. Prepare to transform your nails from everyday to extraordinary!
Why Chrome Nails Are a Must-Have
Chrome nails have taken the beauty world by storm, and it’s easy to see why! Their high-impact, futuristic sheen is undeniably eye-catching. They offer a sleek, modern twist on traditional manicures, making a bold statement without being over the top. Whether you’re heading to a special event or just want to add a touch of glam to your daily look, chrome nails deliver. They’re versatile too – think vibrant, metallic rainbows or sophisticated, single-color mirror finishes. Plus, with the right technique, they can be surprisingly durable and long-lasting.
This trend is perfect for anyone looking to elevate their nail game. It’s all about effortless cool and sophisticated shine. And the best part? You can achieve this salon-worthy look with a few key products and this easy-to-follow guide. Let’s embrace the shine!
Essential Tools for Your Chrome Nail Journey
Getting that perfect chrome effect relies on having the right tools. Think of these as your secret weapons for achieving that mirror-like finish. Don’t worry, most of these are standard nail supplies you might already have, and the specialized ones are well worth the investment for the amazing results they produce. Here’s what you’ll need:
- Base Coat: A good quality base coat is crucial. It protects your natural nail and provides a smooth canvas for your polish.
- Gel Polish Color (Optional but Recommended): While chrome powder can be applied over regular polish, it adheres best and lasts longest over a gel polish color base. Choose a dark color like black or navy for the most dramatic chrome effect.
- No-Wipe Gel Top Coat: This is key! A special no-wipe top coat is essential for the chrome powder to adhere properly. Regular top coats will prevent the powder from sticking.
- Chrome Nail Powder: These come in various beautiful colors – silver and gold are classics, but holographic, rose gold, and iridescent shades are also popular.
- Silicone Applicator Tool or Sponge: This is how you’ll buff the powder onto your nails. Silicone tools are fantastic for a smooth, even application. Cosmetic eyeshadow applicators with a sponge tip also work well.
- UV/LED Nail Lamp: If you’re using gel polish and a no-wipe top coat, you’ll need a lamp to cure (harden) the gel.
- Rubbing Alcohol or Cleanser: To clean your nails and remove any residue after curing.
- Buffer and Nail File: For shaping and preparing your nails.
- Optional: Top Coat (Regular or Gel): For an extra layer of protection after the chrome is applied, though your no-wipe top coat will likely suffice.
Making sure you have these items prepared will make the entire process go much smoother. It’s always better to have everything ready before you start!
Step-by-Step Chrome Nail Design Tutorial
Ready to get that mirror shine? Follow these simple steps, and you’ll be sporting gorgeous chrome nails in no time. Remember, practice makes perfect, so don’t get discouraged if your first attempt isn’t flawless. The results are so worth it!
Step 1: Prepare Your Nails
This is the foundation for any perfect manicure. Start by cleaning your nails thoroughly. Shape them with a nail file to your desired length and form. Gently buff the surface of your nails to remove any shine. This helps your base coat and polish adhere better. Finally, use rubbing alcohol or a nail cleanser to remove any dust or oils. A clean canvas is a happy canvas!
Step 2: Apply Base Coat and Color (Optional but Recommended for Gel)
Apply a thin layer of your base coat and cure it under your UV/LED lamp according to the manufacturer’s instructions. If you’re using gel polish, apply your chosen color – dark shades like black or deep purple work wonders for a dramatic chrome effect. Apply one or two coats, curing each layer under the lamp. If you’re not using gel, apply regular nail polish and let it dry completely. Gel polish typically offers a more durable and vibrant base for chrome.
Step 3: Apply the No-Wipe Gel Top Coat
This is a CRUCIAL step for gel users. Apply a thin, even layer of your no-wipe gel top coat over your colored polish. Ensure you cap the free edge of your nail to prevent chipping. Cure this layer under your UV/LED lamp. Do NOT wipe off any sticky residue, as there shouldn’t be any with a true no-wipe top coat. If using regular polish, let it dry completely but avoid a glossy top coat as it might interfere with the powder adhesion.
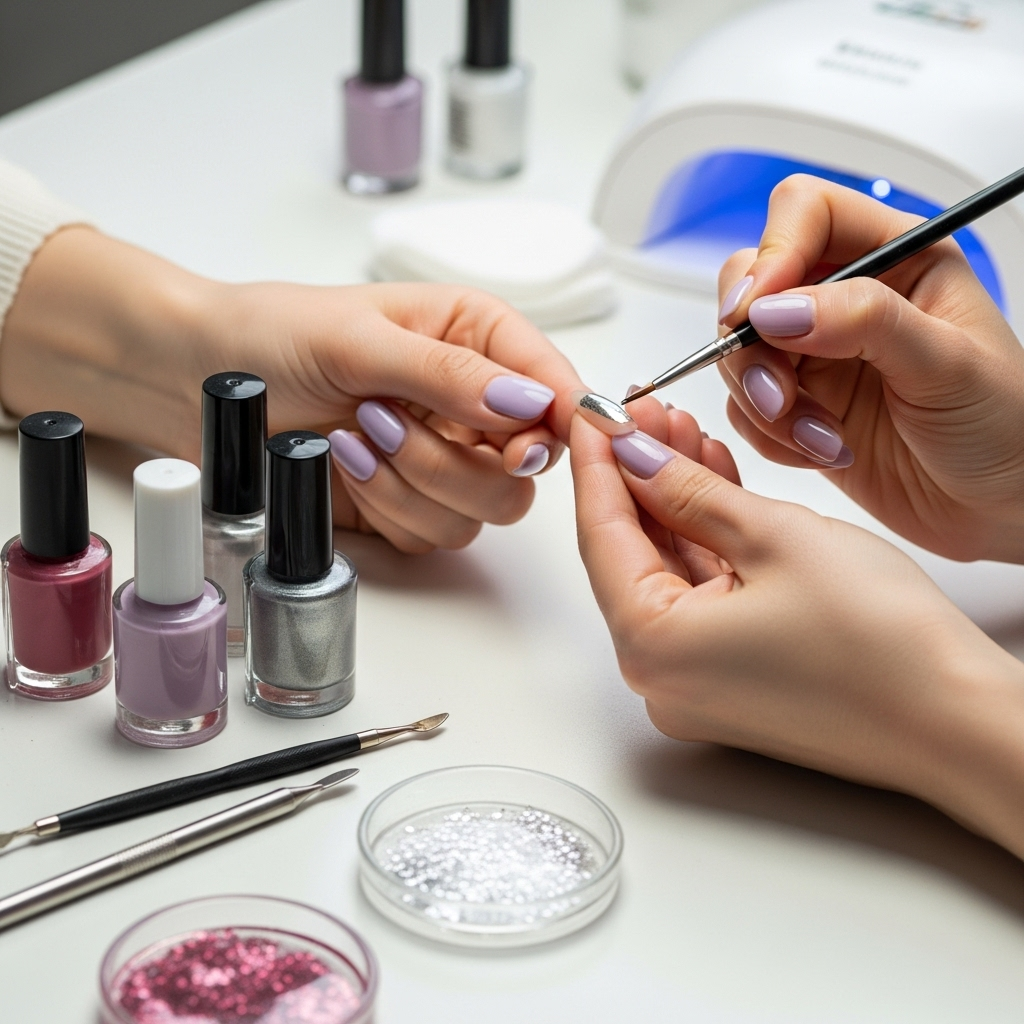
Step 4: Apply the Chrome Powder
Open your chrome nail powder. Using your silicone applicator tool or sponge applicator, gently pick up a small amount of powder. Begin to lightly and evenly rub the powder onto the cured no-wipe top coat. You’ll see the mirror effect start to appear as you buff. Work in circular or back-and-forth motions to ensure full coverage and a smooth, shiny finish. Don’t press too hard; gentle buffing is key.
This is where the magic happens! Continue buffing until the entire nail surface has a uniform, high-shine chrome appearance. Make sure to cover the entire nail, including the edges you “capped” with the top coat.
Step 5: Brush Off Excess Powder
Once you’re satisfied with the shine and coverage, use a soft brush (like a clean makeup brush or fan brush) to gently sweep away any loose chrome powder from your nail and surrounding skin. Be thorough, but avoid touching the buffed surface with your fingers. This ensures a clean finish and prevents the powder from looking dusty.
Step 6: Apply a Top Coat (Optional but Recommended)
For extra durability and to seal in that mirror shine, apply another layer of a gel top coat (either no-wipe or a regular one if you want to seal it with a final cure) or a high-quality regular top coat. Cap the free edge again. Cure the top coat under your UV/LED lamp if you used gel, or let it air dry if you used a regular top coat. This final layer protects your beautiful chrome finish.
Step 7: Final Touches and Clean Up
Once everything is cured and dry, you can clean up any stray powder or polish around your cuticles with a brush or cotton swab dipped in rubbing alcohol. Admire your stunning, mirror-like chrome nails!
Troubleshooting Common Chrome Nail Issues
Even with the best tutorials, sometimes things don’t go perfectly the first time. Don’t sweat it! Here are some common problems and how to fix them:
- Powder not sticking evenly: This usually means your no-wipe top coat wasn’t fully cured, or you picked up too much powder at once. Ensure your top coat is fully cured (check lamp time!), and try picking up less powder with your applicator for step 4.
- Patchy or dull finish: You might not have buffed the powder in thoroughly enough, or there might be an uneven layer of top coat. Gently buff the powder again, focusing on patchy areas. If it’s still not working, you might need to reapply the no-wipe top coat and try again.
- Powder rubbing off: This is almost always a top coat issue. Make sure you used a true no-wipe top coat if using gel, and ensure it was properly cured. A final protective top coat also helps seal everything in.
- Chrome looks streaky: This can happen if you’re applying too much pressure when buffing. Use a light, feathery touch and build up the coverage gradually.
- My chrome powder isn’t shiny: Double-check that you’re using a quality chrome powder and that your base polish and top coat are compatible. Sometimes, very old or low-quality powders can be tricky.
Remember, patience is key! Each application helps you understand the product better.
Types of Chrome Powders and Their Effects
The world of chrome isn’t just silver! Different powders give you a stunning array of finishes. Knowing your options can help you choose the perfect look for any occasion. Here’s a quick rundown:
| Powder Type | Description | Best For |
|---|---|---|
| Classic Silver/Mirror Chrome | The original and most popular. Offers a true, highly reflective mirror finish. | Creating a classic, futuristic, or minimalist look. Pairs well with everything. |
| Holographic Chrome | Reflects a rainbow of colors when light hits it. Can be subtle or intensely prismatic. | Adding a fun, vibrant, and magical element to nails. Great for parties or creative styles. |
| Rose Gold Chrome | A beautiful, warm metallic pink-gold shade. Soft yet glamorous. | Achieving an elegant, trendy, and romantic aesthetic. Wonderful for everyday wear or special occasions. |
| Gold Chrome | A classic, rich metallic gold. Adds instant luxury and sophistication. | Creating a high-fashion, opulent, or classic glamour look. Also great for seasonal designs. |
| Colored Chromes (Blue, Pink, Purple, etc.) | These powders deposit a solid metallic color with a high shine. | Making a bold color statement while maintaining the chrome effect. Ideal for matching outfits or themes. |
| Iridescent/Opal Chrome | Shifts colors slightly depending on the angle and light, creating a pearlescent glow. Less intensely reflective than mirror chrome. | Achieving a subtle, ethereal, and unique glow. Offers a softer take on the chrome trend. |
Choosing the right powder often comes down to personal preference and the overall look you’re aiming for. Don’t be afraid to experiment! For the most intense mirror effect, classic silver or gold are your best bet. For something more playful, holographic or colored chromes are fantastic.
Why a No-Wipe Top Coat is Essential
You’ve probably heard me mention the “no-wipe gel top coat” a few times, and there’s a good reason for that. It’s not just a special name; it’s the key ingredient for achieving smooth, streak-free chrome nails when using gel polish products. Here’s why:
- Adhesion: Chrome powders are essentially fine pigments that need a slightly tackier surface to adhere to. A standard gel top coat cures to a completely dry and non-tacky surface. A no-wipe top coat, however, cures in a way that leaves a minuscule amount of tackiness (often called residual inhibition layer, though much less than regular gel polish) that is absolutely perfect for the chrome powder to bond with.
- Smooth Finish: Because the powder adheres directly to this slightly tacky layer, it creates a seamless, smooth, and highly reflective surface. If you were to use a regular top coat, the powder would just slide off or create a dull, patchy mess.
- Prevention of Streaks: Applying chrome over a sticky layer from a regular gel top coat would result in uneven application and streaks because the powder would get caught in the stickiness. The no-wipe formula provides an even canvas for buffing.
- Durability: The bond created between the no-wipe top coat, the chrome powder, and subsequent top coat layers (if you add one) results in a durable manicure that is less likely to chip or peel.
When shopping for your no-wipe top coat, always look for that specific label! It’s a small detail that makes a monumental difference in your chrome nail results. You can find reputable brands on sites like Nailite.com, which offers insights into why these specific formulations are crucial for intricate nail art.
Chrome Nails vs. Other Metallic Finishes
It’s easy to get metallic nail finishes mixed up! While chrome nails are a type of metallic finish, they stand out from traditional metallic polishes or foils due to their unique “mirror” effect. Let’s break down the differences:
| Feature | Chrome Nails | Metallic Polish | Foil Transfer |
|---|---|---|---|
| Finish Quality | Ultra-high reflectivity, true mirror-like shine. | Satin or metallic sheen; can be reflective but not a true mirror. | Varies by foil, can be very shiny but often has a visible adhesive layer. |
| Application Process | Buffing fine powder onto a cured no-wipe top coat. | Standard polish application. | Applying adhesive, pressing foil onto adhesive, then sealing. |
| Durability | High, especially with gel application. | Moderate, depends on quality and base/top coats. | Can be prone to lifting or peeling if not perfectly applied. |
| Effect | Sophisticated, futuristic, seamless metallic surface. | A colored, shiny surface. | Often has a distinct “layered” or patterned look from the foil. |
| Versatility | Works over any color base for different effects; comes in many colors. | Limited by the shades of polish available. | Limited by the designs and colors of available foils. |
The key differentiator for chrome is that impeccable, unbroken mirror reflection across the entire nail surface. It’s a level of shine that traditional polishes simply can’t replicate without the specialized powder and application technique.
Maintaining Your Chrome Nails
You’ve perfected your chrome look, and now you want it to last! Proper care will keep those nails looking dazzling for as long as possible. Here are some tips:
- Be Gentle: Avoid using your nails as tools for scraping or prying. This can chip away at the finish or top coat.
- Wear Gloves: When doing household chores, especially those involving water or harsh cleaning chemicals (like dishwashing or cleaning bathrooms), wear rubber gloves. Chemicals and prolonged water exposure can degrade the top coat and the chrome finish over time.
- Moisturize: Keep your hands and cuticles moisturized with cuticle oil and hand lotion. Healthy cuticles meld seamlessly with your manicure and prevent lifting at the base.
- Avoid Harsh Products: Steer clear of acetone-based removers if you need to remove polish from another nail, as they can sometimes affect the surrounding chrome finish. Opt for gentle, non-acetone removers when possible.
- Reapply Top Coat (If Needed): If you notice any dulling or minor wear after a week or two, you can carefully reapply a layer of top coat (and cure if it’s gel) to refresh the shine and protection.
By following these simple maintenance tips, you can extend the life of your beautiful chrome manicure and keep them looking freshly done!
Frequently Asked Questions About Chrome Nails
Q1: Can I achieve chrome nails with regular nail polish?
A: While you can apply chrome powder over regular polish, it won’t achieve the true mirror-like finish without using a gel base and a no-wipe gel top coat. The powder adheres best to the cured gel surface.
Q2: How long does a UV/LED lamp take to cure gel polish?
A: Cure times vary depending on the lamp’s wattage and the specific gel product. Always follow the manufacturer’s instructions for your lamp and gel polish, but typically, it’s between 30 seconds to 2 minutes for LEDs and longer for UV lamps.</