Cherry blossom nail designs offer a delicate and beautiful way to adorn your nails, perfect for spring or any time you want a touch of floral elegance. These designs range from simple accent nails to full artistic masterpieces, all achievable with basic tools and techniques. Learn how to create your own stunning cherry blossom manicures with this beginner-friendly guide.
Dreaming of pretty pink blooms on your fingertips? Cherry blossom nail art is a timeless favorite, evoking feelings of spring, renewal, and delicate beauty. But if you’re new to nail design, the idea of painting tiny flowers might seem a bit daunting. Don’t worry! Creating stunning cherry blossom nail designs is totally achievable, even for beginners. We’ll break down the simple steps, essential tools, and gorgeous looks you can recreate at home. Get ready to unleash your inner nail artist and bring a touch of nature’s artistry to your nails!
Why Cherry Blossom Nails Are Blooming Popular
Cherry blossom nail designs have a natural charm that resonates with many. They are versatile, adaptable to any nail length or shape, and offer a sophisticated yet sweet aesthetic. Whether you prefer a minimalist single bloom or a full cascade of petals, these designs add a touch of elegance to any look. Their popularity also stems from their association with springtime, new beginnings, and the fleeting beauty of nature, making them a symbolic and visually appealing choice.
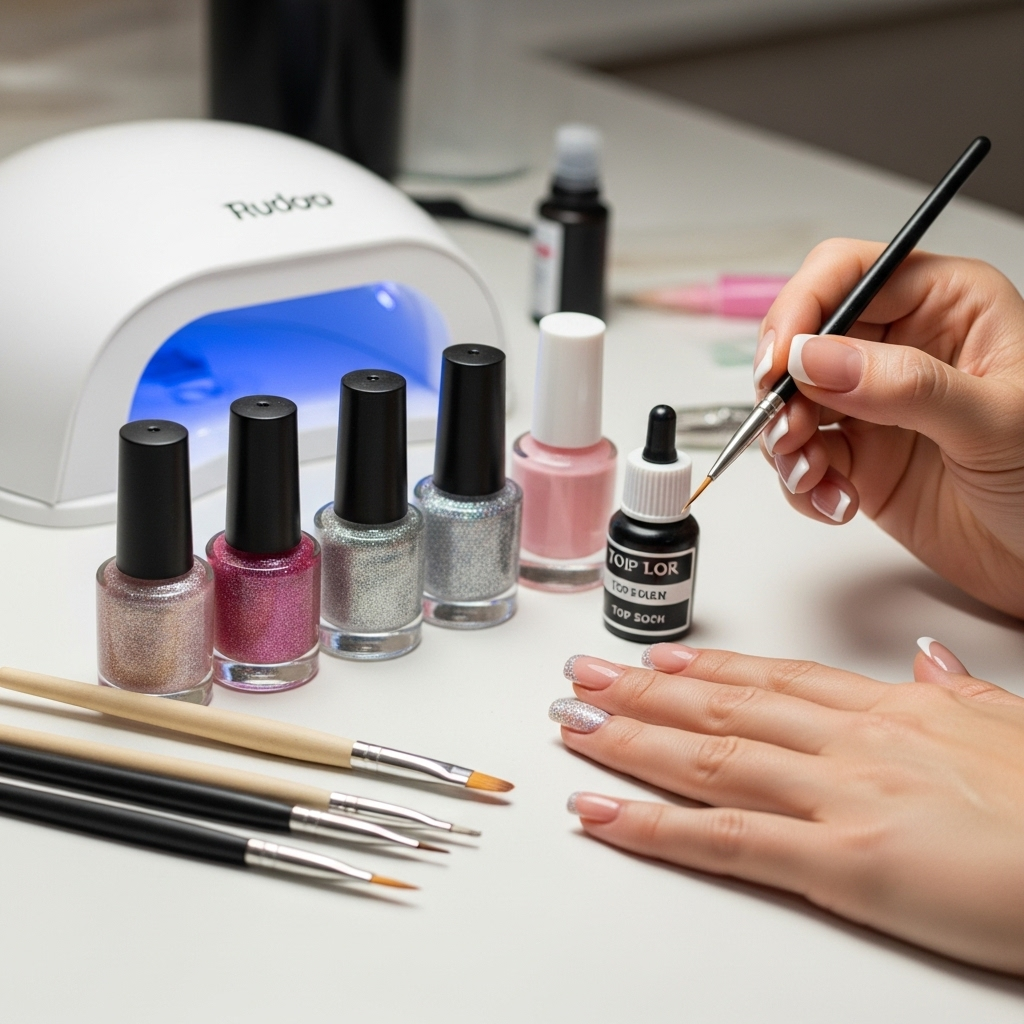
Essential Tools for Your Cherry Blossom Nail Art Journey
Before we dive into the fun part, let’s gather our supplies. You don’t need a professional salon setup to create gorgeous cherry blossom nails. Here are the basics that will make your design process smooth and enjoyable:
- Base Coat: Protects your natural nails and creates a smooth canvas for your design.
- Top Coat: Seals your design, adds shine, and helps your manicure last longer.
- Nail Polish Colors:
- A light pink or blush for the petals.
- A deeper pink or red for accent petals or shading.
- White for highlights or softer petal edges.
- Green or brown for tiny stems and leaves (optional).
- A neutral base color (like nude, pale pink, or white) for the nail itself.
- Fine-Tipped Nail Art Brush: This is your main tool for painting the delicate petals and details. A brush with synthetic bristles is ideal for holding polish well.
- Dotting Tool: Perfect for creating small dots that form the center of the blossoms or for adding small accents.
- Toothpick or Orangewood Stick: Useful for cleaning up edges or spreading small amounts of polish.
- Nail Polish Remover: For correcting any mistakes.
- Cotton Swabs or Pads: To apply the remover for clean-up.
Having these essentials will set you up for success. Remember, practice makes perfect, and even slight imperfections add to the charm of handmade nail art!
Beginner-Friendly Cherry Blossom Nail Design Tutorials
Ready to create your own beautiful cherry blossoms? Here are a few easy-to-follow designs perfect for beginners. We’ll start with the simplest and work our way up!
Design 1: The Single Blossom Accent Nail
This is the easiest way to incorporate cherry blossoms. Paint one or two nails with a single, beautiful bloom, and keep the rest simple.
- Prep Your Nails: Start with clean, dry nails. Apply a base coat and let it dry completely.
- Apply Base Color: Paint your nails your chosen neutral color (nude, pale pink, or white). Apply two thin coats for full coverage and let them dry thoroughly.
- Create the Blossom Shape: Take your fine-tipped brush and dip it into your light pink polish. On the accent nail, create three to five small, slightly curved strokes or “petal” shapes that meet at a central point. Imagine drawing small raindrops or slightly squashed “U” shapes coming together.
- Add Depth (Optional): Once the light pink is slightly tacky or dry, use a tiny bit of deeper pink or red on your brush to add a touch of shading along the edges of a few petals. This gives the blossom dimension.
- Center Dot: Use a dotting tool or the tip of your brush dipped in white or a slightly darker pink to add a small dot in the center where all the petals meet.
- Highlight (Optional): With a tiny bit of white polish on the very tip of your brush, add a minuscule dot or a very fine curved line to one or two petals for a highlight effect.
- Seal It In: Once everything is dry, apply a generous layer of top coat. Be sure to cap the free edge of your nail to prevent chipping.
Design 2: The Scattered Petal Look
This design is even more forgiving! Instead of perfect blossoms, you’ll be painting loose petals scattered across your nails.
- Prep and Base Coat: As always, start with a clean nail, base coat, and one or two coats of your chosen neutral polish. Let it dry completely.
- Paint Scattered Petals: Dip your fine-tipped brush into the light pink polish. On various nails, paint small, irregular petal shapes. Think of them as single petals floating down. Some can be slightly curved, others more like rounded dashes. Don’t worry about them looking like a full flower.
- Add Variations: Use a slightly deeper pink for some petals to add visual interest. You can also use white to create a few lighter petals or to outline some pink ones for a subtle pop.
- Tiny Centers (Optional): If you like, add a minuscule dot of white or darker pink to the center of a few petals where they look like they’re starting to form a bloom.
- Add Greenery (Optional): With a very fine brush and green polish, add a few tiny leaves or a hint of a stem near a cluster of petals for a more natural look.
- Top Coat: Once dry, seal your scattered petals with a protective top coat.
Design 3: The Gradient Blossom French Tip
This is a chic twist on the classic French manicure, incorporating cherry blossoms into the tip design.
- Prep and Base: Apply base coat and your neutral polish. For a French tip, it’s best to have a clean, smooth nail surface.
- Create the Gradient Tip: For a soft transition, use a makeup sponge or a dedicated French tip applicator. Apply your light pink polish to the sponge. Gently dab it onto the tips of your nails, creating a soft pink gradient. You can layer a touch of deeper pink for more intensity. Let this dry.
- Paint the Blossoms: Using your fine-tipped brush and light pink polish, paint small cherry blossom clusters or single blossoms directly onto the pink gradient tip. Focus these towards the free edge of the nail.
- Add Details: Use white for highlights on the petals and a dotting tool for the center. You can also use a light green to add a few delicate leaves peeking out from behind the blossoms.
- Clean Up: Use a fine brush dipped in nail polish remover to sharpen the line between the gradient tip and the base color if needed.
- Seal: Apply a final layer of top coat.
Tips for Perfect Petals and Flawless Flowers
Achieving delicate cherry blossom designs is all about practice and technique. Here are some pro tips to help you:
- Work on Dry Layers: Always ensure your base color and any previous design layers are completely dry or at least “tacky” before adding new polish. This prevents smudging.
- Thin Coats are Key: Apply nail polish in thin, even coats rather than one thick, gloopy layer. This dries faster and looks more professional.
- Brush Control: For fine details, hold your brush lightly and use the tip. For larger strokes, angle the brush slightly to create the petal shape.
- Dip Sparingly: Only dip the very tip of your nail art brush into the polish. Too much polish will result in bulky, messy designs.
- Clean Your Brush: After each use, clean your nail art brush with nail polish remover to keep it in good condition and prevent colors from mixing unintentionally.
- Mistake Correction: Have a fine-tipped brush or toothpick dipped in nail polish remover handy. Lightly touch up any stray marks or wobbly lines immediately.
- Start Simple: Don’t try the most complex design first. Master the single petal and simple bloom before moving on to intricate patterns.
- Experiment with Placement: Cherry blossoms can be placed on the cuticle, along the free edge, scattered across the nail, or blooming from one corner.
Cherry Blossom Nail Design Variations & Inspirations
Once you’ve got the basics down, you can explore a world of stunning variations. Here are some ideas to inspire your next manicure:
Color Play
While traditional cherry blossoms are pink, don’t be afraid to experiment! Try these color twists:
- White Cherry Blossoms: Classic and elegant, white flowers on a pastel or dark background pop beautifully.
- Red or Deep Pink Accents: Use these for pops of color within a pink blossom or for a bolder statement.
- Ombre Petals: Create a gradient effect within each petal for a more realistic look.
- Pastel Palettes: Combine soft blues, purples, or yellows with pinks for a whimsical, spring-inspired look.
Style & Placement
Think about where and how you want your blossoms to appear:
- Full Bloom Overload: Cover all nails with dense clusters of blossoms for a maximalist statement.
- Minimalist Branches: Paint a single delicate branch with a few blossoms on one or two nails.
- Water Marble Blossoms: Achieve ethereal, diffused petal effects using water marbling techniques.
- 3D Blossoms: For the adventurous, use acrylic or gel to create raised, dimensional flowers.
Adding Extra Sparkle
Elevate your cherry blossom nails with a touch of glamour:
- Glitter Accents: A touch of fine pink or holographic glitter on the tips or as a gradient can add shimmer.
- Rhinestone Centers: Place a tiny rhinestone or pearl in the center of a few blossoms for a sophisticated touch.
- Metallic Details: Use a fine gold or silver brush to add subtle outlines or delicate stems.
For more visual inspiration, explore art and design principles. Understanding color theory and composition can help you create balanced and beautiful nail art. The National Gallery of Art offers fantastic resources on the elements and principles of design that can be translated into any visual art, including nail design!
Cherry Blossom Nail Design: Pros and Cons
Like any trend, cherry blossom nail designs have their advantages and potential drawbacks. Understanding these can help you decide if it’s the right look for you.
| Pros | Cons |
|---|---|
| Aesthetic Appeal: Naturally beautiful, delicate, and feminine. Evokes spring and renewal. | Time-Consuming: Intricate designs can take time to perfect, especially for beginners. |
| Versatile: Can be adapted to any nail length, shape, and color scheme. | Requires Practice: Achieving delicate details demands patience and some dexterity. |
| Beginner-Friendly Options: Simple versions are easy to achieve with basic tools. | Potential for Smudging: Incomplete drying can lead to errors that are difficult to fix without starting over. |
| Symbolic Meaning: Represents beauty, transience, and new beginnings. | Durability of Fine Details: Very thin lines or tiny dots can wear off with vigorous activity. |
| Customizable: Endless possibilities for color, placement, and embellishments. | Tool Investment: While basic tools are affordable, specialized brushes can be an added cost. |
Maintaining Your Cherry Blossom Manicure
To keep your beautiful cherry blossom nails looking fresh, follow these simple care tips:
- Reapply Top Coat: Every 2-3 days, add another thin layer of top coat to reinforce the design and add shine.
- Use Gloves: When doing chores, washing dishes, or using cleaning products, wear rubber gloves to protect your nails and the design from harsh chemicals.
- Moisturize: Keep your cuticles and skin hydrated with cuticle oil or hand lotion. Healthy nails are less prone to breaking and peeling, which can damage your art.
- Avoid Using Nails as Tools: Don’t use your nails to scrape, pry, or open things. This is a sure way to chip your polish.
- Gentle Filing: If you need to file your nails, use a fine-grit file and file in one direction to avoid tearing the polish or nail edge.
Frequently Asked Questions About Cherry Blossom Nail Designs
Q1: How do I make my cherry blossom nail art look realistic?
To make them look more realistic, focus on creating soft, rounded petal shapes and add subtle shading. Using a slightly deeper pink or even a hint of purple can create depth. A tiny white highlight on one or two petals can also add dimension. Remember that real blossoms aren’t always perfectly symmetrical, so slight variations add to the natural look.
Q2: Can I do cherry blossom nails on short nails?
Absolutely! Cherry blossom designs work wonderfully on short nails. For shorter nails, focus on smaller blossoms and avoid overcrowding. A single, well-placed blossom on an accent nail or a few scattered petals can look absolutely lovely and elongates the nail visually.
Q3: My nail art brush is leaving thick lines. What am I doing wrong?
This often happens when there’s too much polish on the brush. Try dipping just the very tip of your brush into the polish. You can also gently wipe off any excess on the neck of the polish bottle. Practice drawing light, feathery strokes, and remember that thin coats are better than one thick one.
Q4: How long does a cherry blossom nail design typically take to do?
For a complete set of nails, a beginner might take anywhere from 45 minutes to 1.5 hours, depending on the complexity and how quickly the polish dries. The single blossom accent nail design can be done in about 20-30 minutes once you get the hang of it.
Q5: Is it okay to use regular nail polish for cherry blossom designs?
Yes, absolutely! Regular nail polish works perfectly for cherry blossom designs. You don’t need special art polish for these looks. Ensure you use a good quality fine-tipped brush for the detail work. For added durability, always finish with a quality top coat. You can explore how different types of polish affect your application on resources like NailCareHQ to understand their properties.
Q6: How do I clean up mistakes without ruining the whole nail?
The best way is to use a small, stiff brush (like an old concealer brush or a dedicated cleanup brush) or a toothpick dipped in nail polish remover. Gently trace around the design to remove excess polish or correct smudges. Do this while the polish is still wet for easier cleanup, or be very careful if it’s dry.
Conclusion: Bloom Beautifully!
There you have it – your guide to creating stunning cherry blossom nail designs! From the simple joys of a single bloom on an accent nail to the charm of scattered petals, these designs are a beautiful way to express your style and embrace the beauty of nature. Remember, nail art is a form of self-expression, so don’t be afraid to experiment with colors, placements, and your own creative touches. Gather your tools, take a deep breath, and enjoy the process. With a little practice, you’ll be painting exquisite cherry blossoms that will have everyone admiring your fingertips. Happy painting, and may your nails bloom beautifully!