Want stunning celebrity nail designs without the salon price tag? This guide breaks down 10 dazzling celebrity-inspired looks, perfect for beginners. Learn simple techniques and essential tools to recreate star-worthy manicures at home, boosting your confidence and personal style with every polish.
Hey nail lovers! Ever scrolled through Instagram or Pinterest and swooned over those incredible celebrity manicures? You know, the ones that just scream “glam” and “diva”? Finding the perfect nail design can sometimes feel a little overwhelming, especially when you’re just starting out with nail art. You might think these looks are only achievable by professional nail techs. But guess what? They’re not! With a few easy-to-follow steps and some fun inspiration, you can totally rock these fabulous celebrity nail designs yourself. We’re going to dive into 10 amazing options that are both trendy and surprisingly doable for beginners. Get ready to unleash your inner nail artist and make your fingertips shine like a star!
Why Celebrity Nail Designs Are So Inspiring
Celebrities are constantly setting trends, and their nails are no exception! Whether it’s a red carpet event, a casual outing, or a social media post, their manicures often capture our attention and spark our creativity. These designs can range from minimalist and chic to bold and elaborate, offering a wide spectrum of inspiration for us to play with. They prove that nails can be a powerful form of self-expression, adding that perfect finishing touch to any look.
Tools You’ll Need for DIY Celebrity Nails
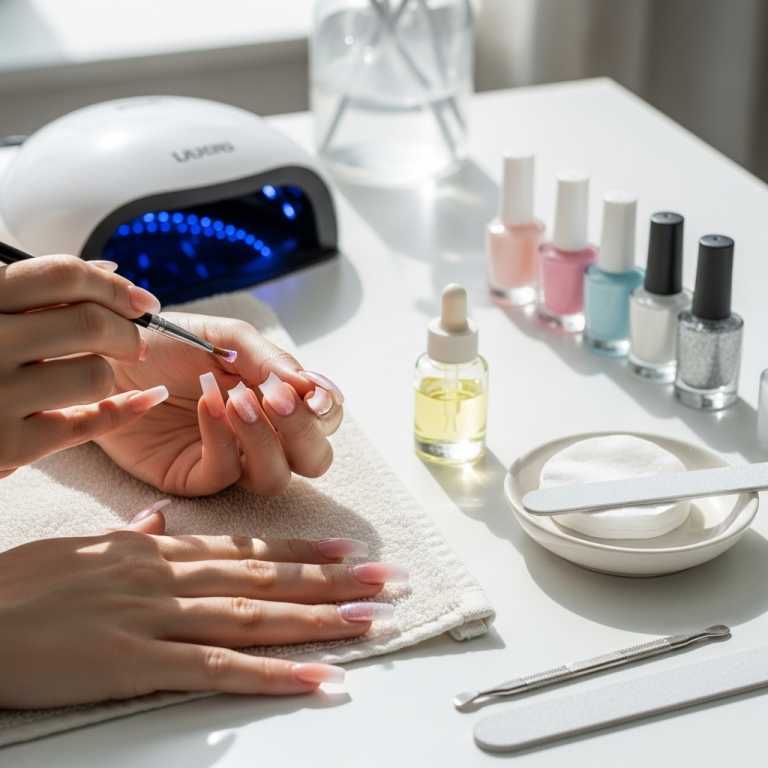
Before we jump into the dazzling designs, let’s gather our essential toolkit. You don’t need a professional salon’s worth of equipment to create amazing looks at home. Here are some basics that will help you nail these celebrity-inspired designs:
- Nail Polish Remover: Essential for correcting mistakes and starting with a clean slate.
- Cotton Pads/Balls: For applying polish remover.
- Nail File: To shape your nails to perfection.
- Nail Buffer: For smoothing the nail surface and adding shine.
- Base Coat: Protects your natural nails and helps polish adhere better.
- Top Coat: Seals your design, adds shine, and helps it last longer.
- Various Nail Polish Colors: The stars of the show!
- Thin Nail Art Brushes: For detailed lines, dots, and patterns.
- Dotting Tools: Perfect for creating polka dots and small accents.
- Toothpicks: A surprisingly handy tool for fine details or cleaning up edges.
- Dotting Wheel or Swirl Stick (Optional): For creating intricate patterns and French tips.
- Nail Glue (for applying gems): If your designs involve embellishments.
- Tweezers (for gems): For precise placement of tiny rhinestones or glitter.
A great resource for learning about nail care basics and tool usage can be found on reputable cosmetic science sites. For instance, the Cosmetic Ingredient Review or The FDA’s stance on cosmetic products can offer insights into the safety and composition of nail products.
10 Stunning Celebrity Nail Designs for Beginners
Let’s get inspired! Here are 10 celebrity nail designs that are surprisingly easy to recreate and will have your nails looking runway-ready.
1. The Classic French Manicure (Updated)
Who doesn’t love a classic French? Celebrities wear it for a reason – it’s timeless and elegant. The modern twist? Think a slightly wider white tip or even a hint of color.
How to get the look:
- Start with a clean, shaped nail and apply a sheer nude or pink base coat.
- Once dry, use a nail art brush or tip guide to paint a crisp white (or colored) line across the tip of your nail.
- For a cleaner line, you can use a small brush dipped in polish remover to perfect the edges.
- Apply a glossy top coat for that signature shine.
2. Dainty Gold Accents
This is all about subtle sophistication. Think a thin gold strip along the cuticle or a tiny gold dot on an accent nail. It’s a minimalist’s dream and incredibly chic.
How to get the look:
- Paint your nails your favorite nude, blush, or soft neutral shade.
- Once completely dry, use a fine-tip gold nail art pen or a thin brush with gold polish.
- Carefully draw a thin line parallel to your cuticle, or place a tiny dot near the base.
- Seal with a clear top coat.
3. Bold Solid Color Statement
Sometimes, simplicity is the ultimate statement. A perfectly applied, bold solid color can be incredibly impactful, just like many celebrities sport. Think vibrant reds, deep blues, or even a chic vampy shade.
How to get the look:
- Ensure your nails are filed and buffed.
- Apply a good base coat.
- Apply two thin, even coats of your chosen bold color. Allow each coat to dry thoroughly.
- Clean up any smudges around the cuticles with a brush and nail polish remover.
- Finish with a high-shine top coat.
4. The Subtle Glitter Fade (Ombre)
This design is a showstopper without being over the top. It’s a gentle gradient of glitter that starts at the tip or base and fades upwards.
How to get the look:
- Paint your nails with your desired base color (nude, pink, or even a sheer white works well).
- Once dry, take a cosmetic sponge. Apply a bit of glitter polish to the sponge.
- Gently dab the sponge onto the tip of your nail, building up the glitter gradually.
- You can also do this from the cuticle. Feather the edges with a clean brush to create a smooth fade.
- Apply a top coat to smooth out the glitter texture.
5. Negative Space Manicure
This trendy design leaves parts of your natural nail visible. It’s chic, modern, and surprisingly easy to achieve with tape or stencils.
How to get the look:
- Apply a base coat and let it dry.
- Apply your chosen polish color over the entire nail, or just in a specific shape (like half the nail).
- Once that polish is completely dry, carefully place pieces of striping tape or adhesive stencils on your nails to create geometric shapes.
- Paint over the taped areas with another color or a contrasting polish.
- While the second color is still wet, carefully peel off the tape or stencil.
- Once dry, apply a top coat.
6. Micro-Pearls or Tiny Studs
Celebrities often add a touch of subtle bling. Micro-pearls or tiny metallic studs placed strategically can elevate a simple mani to something super sophisticated.
How to get the look:
- Paint your nails your desired color and let them dry.
- Apply a dot of nail glue or a dab of top coat where you want to place a pearl or stud.
- Using tweezers, carefully pick up the embellishment and place it onto the wet glue/top coat.
- Let it dry completely before applying a thin layer of top coat, being careful not to cover the embellishment completely if you want it to pop.
7. Milky White Nails
This soft, ethereal white shade has been a huge celebrity favorite. It’s clean, chic, and perfect for a polished look. It’s essentially a translucent, milky version of white.
How to get the look:
- Start with a good base coat.
- Apply 2-3 thin coats of a “milky” or “jelly” white polish. These polishes are more sheer than opaque whites.
- Ensure each coat is dry before applying the next to build up the soft opacity.
- Finish with a glossy top coat.
8. Two-Tone Color Blocking
This is a fun and graphic way to wear color. Think two contrasting or complementary colors separated by a clean line.
How to get the look:
- Apply your base coat and let it dry.
- Paint your nails with your first color (e.g., the bottom half). Let it dry completely.
- Use striping tape to create a clean dividing line.
- Paint the remaining section of your nail with the second color.
- While the second color is still wet, carefully peel off the tape.
- Once dry, apply a top coat.
9. Subtle Swirls or Marbling
Abstract art on your nails! This involves creating delicate swirls or marbled patterns. It looks complex but can be simplified with a few tools.
How to get the look:
- Apply your base color (a neutral or white works well). Let it dry.
- On a palette or piece of foil, place a drop of your base color and a drop of a contrasting color (e.g., gold, black, or a pastel).
- Use a thin nail art brush or a toothpick to gently swirl the two colors together without over-mixing.
- Carefully pick up some of the swirled mixture with your brush and gently tap or dab it onto your nail, creating a marbled effect.
- Alternatively, use a dotting tool to create small dots and then drag them with a fine brush to create swirls.
- Apply a top coat.
10. Chrome Accents
Holographic or metallic chrome has been HUGE in celebrity nail trends. You can easily add this shine with a simple accent.
How to get the look:
- Apply your base polish color and top coat, but don’t let the top coat fully dry – it should be tacky.
- Dip an eyeshadow applicator or a silicone tool into your chrome powder.
- Gently rub the powder onto the tacky top coat. The more you rub, the more intense the chrome effect.
- Gently brush off any excess powder.
- Apply another layer of top coat to seal it in.
***
Let’s do a quick comparison of some popular celebrity nail trends and their DIY difficulty:
| Celebrity Nail Design | DIY Difficulty (Beginner-Friendly) | Key Elements | Estimated Time to Recreate |
|---|---|---|---|
| Classic French Manicure (Updated) | Easy | White tips, neutral base | 15-20 minutes |
| Dainty Gold Accents | Very Easy | Gold polish/pen, fine lines/dots | 10-15 minutes |
| Bold Solid Color Statement | Very Easy | Single, opaque color | 10-15 minutes |
| Glitter Fade (Ombre) | Easy | Glitter polish, sponge | 15-20 minutes |
| Negative Space Manicure | Medium (requires tape/stencils) | Visible nail parts, geometric shapes | 20-30 minutes |
| Micro-Pearls/Tiny Studs | Easy-Medium (precision needed) | Adhesive embellishments | 15-25 minutes |
| Milky White Nails | Easy | Sheer, translucent white polish | 10-15 minutes |
| Two-Tone Color Blocking | Medium (requires tape) | Two colors, clean lines | 20-25 minutes |
| Subtle Swirls/Marbling | Medium (practice helps) | Abstract patterns, swirling technique | 20-30 minutes |
| Chrome Accents | Medium (requires powder & tacky top coat) | Metallic powder, shine | 15-25 minutes |
Tips for Achieving Flawless Celebrity Nails at Home
Prep Work is Key: Always start with clean, dry, and shaped nails. Push back your cuticles gently.
Base Coat is Your Best Friend: This protects your nails from staining and helps polish adhere evenly.
Thin Coats are Better: Avoid thick, gloopy layers of polish. Two thin coats are almost always better than one thick one.
Let Them Dry!: Patience is a virtue, especially with nail art. Allow each layer to dry enough before adding the next.
Clean Up Crew: Keep an angled brush or cleanup tool handy with nail polish remover to fix any wobbly lines or smudges.
Top Coat for Triumph: A good top coat seals your design, adds shine, and makes your manicure last longer.
* Practice Makes Perfect: Don’t get discouraged if your first attempt isn’t magazine-worthy. The more you practice, the better you’ll become!
Frequently Asked Questions About Celebrity Nail Designs
Q1: Can I really do these celebrity nail designs without professional tools?
A1: Absolutely! Many celebrity-inspired designs are all about clever application of common polishes and basic tools like fine brushes, dotting tools, or even toothpicks. For intricate effects like chrome, you might need a specific powder, but the application is still beginner-friendly.
Q2: My nail polish always chips quickly. How can I make my DIY manicures last longer?
A2: The secret is in the prep and finish! Ensure your nails are clean and dry, use a good base coat, apply thin layers of polish (letting them dry between coats), and seal everything with a high-quality, quick-drying top coat. Reapply top coat every few days if needed.
Q3: What’s the best way to get a clean line for a French tip or color blocking?
A3: You have a few options! For precise lines, the best tools are striping tape or nail stencils. Apply them firmly to your nail, paint over them, and then carefully peel them off while the polish is still wet. A fine-tipped brush dipped in nail polish remover can also help clean up edges.
Q4: I have short nails. Can I still do these designs?
A4: Definitely! Many celebrity nail designs, like minimalist accents, solid colors, and subtle glitter fades, look fantastic on short nails. Negative space designs and color blocking can also be adapted to work beautifully on shorter nail lengths. Focus on clean application and chic color choices.
Q5: How do celebrities get their nails to look so shiny and perfect?
A5: It’s a combination of factors: professional application, high-quality polishes, and often, a fantastic top coat. For that extra pop, many use gel polishes that are cured under a UV/LED lamp, which gives an incredibly durable and glossy finish. However, a good quality quick-dry top coat can approximate that shine for at-home manicures.
Q6: Where can I find inspiration for new celebrity nail designs?
A6: Social media platforms like Instagram and Pinterest are goldmines! Search for hashtags like #celebritynails, #nailart, #manicuretrends, and specific celebrity names. Also, check out fashion magazines and celebrity style blogs for the latest nail moments.
Q7: How do I apply glitter polish evenly without it looking chunky?
A7: The key is often through dabbing with a sponge for an ombre effect or using glitter polishes that have a finer glitter base. For full coverage, apply thin coats and use your top coat strategically to smooth out any texture. Some glitter polishes are designed to lie flatter than others.
Conclusion
See? Recreating those stunning celebrity nail designs isn’t as daunting as it might seem! With a little bit of practice, the right basic tools, and this guide, you’re well on your way to achieving polished, glamorous nails that you might have only seen on red carpets before. Whether you’re a complete beginner or looking to level up your nail game, these 10 designs offer a fantastic starting point. Don’t be afraid to experiment with colors, play with patterns, and most importantly, have fun with it! Your nails are a canvas for self-expression, so go ahead and let your creativity shine. With these tips and tricks, your fingertips will be turning heads for all the right reasons. Happy polishing!


