Broken glass nail art is a dazzling technique that mimics the shimmering, fractured look of shattered glass on your nails. It’s surprisingly easy to master, even for beginners, and creates a truly eye-catching, iridescent effect that adds a unique flair to any manicure. Get ready to transform your nails into tiny works of art!
Hey nail lovers! Lisa Drew here from Nailerguy, and I’m so excited to dive into a nail art trend that totally wowed me: the broken glass nail art technique. Ever look at those incredibly shiny, almost holographic manicures and wonder how they’re made? You’re not alone! It looks super intricate, but trust me, it’s much simpler than it appears. This technique can make your nails look like they’re covered in tiny, iridescent jewels. If you’ve ever felt a little intimidated by complex nail art, this is the perfect place to start. We’ll break it down step-by-step so you can achieve stunning results right at home. Get ready to sparkle!
What is Broken Glass Nail Art?
Broken glass nail art, also known as “shattered glass nails” or “mosaic nails,” is a creative manicure technique that uses small, irregular pieces of iridescent film or foil to create a unique, fractured, and shimmering effect on the nail surface. When light hits these tiny fragments, it refracts, giving the illusion of shattered glass, but with all the magic of a rainbow. It’s a modern, glamorous twist on traditional nail decoration, offering a sophisticated and eye-catching look that stands out from the crowd.
This trend gained immense popularity for its dazzling, multi-dimensional shine and its ability to transform a simple polish into a statement piece. The beauty of this technique lies in its versatility; you can use it to create a subtle shimmer across your whole nail, add a highlight to a French tip, or craft intricate geometric patterns. It’s an accessible way to experiment with advanced-looking nail art without needing a professional artist’s skill.
Why is Broken Glass Nail Art So Genius and Essential?
The genius of the broken glass nail art technique lies in its simplicity, affordability, and incredible visual impact. It’s also “essential” because it allows for a high degree of personalization and can be adapted to virtually any nail shape, color, or occasion.
- Visually Stunning: The iridescent shimmer creates an almost holographic effect that’s incredibly eye-catching and glamorous.
- Beginner-Friendly: Despite its complex look, it’s one of the easier advanced nail art techniques to master.
- Customizable: You control the size, shape, and placement of the “glass” shards.
- Long-Lasting: When applied correctly with a good top coat, the design can last as long as a regular manicure.
- Affordable: The materials needed are relatively inexpensive and readily available.
- Versatile: Works beautifully over any base color or even on bare nails for a subtle shimmer.
In the world of nail art, this technique offers a perfect blend of artistry and accessibility. It elevates a standard manicure into something truly special, making it a go-to for those who want to express their style with a touch of dazzling sophistication.
Essential Tools and Materials You’ll Need
Gathering the right supplies is the first step to mastering the broken glass nail art technique. Don’t worry, most of these are easily found online or at your local beauty supply store!
Tools:
- Nail File and Buffer: For shaping and smoothing your nails.
- Base Coat: To protect your natural nails and help polish adhere.
- Your Chosen Nail Polish Color(s): This will be the background for your glass effect.
- Top Coat: Crucial for sealing and protecting the design, and for that high-gloss finish. A non-wipe or ‘gel effect’ top coat is often recommended.
- Tweezers or a Wax Pencil: For picking up and placing the small pieces of foil. Tweezers offer precision, while a wax pencil can be easier for beginners.
- Scissors or a Craft Knife: For cutting the iridescent film into small pieces.
- A Small Dish or Palette: To hold the cut pieces of foil for easy access.
Materials:
- Iridescent Nail Film or Foil: This is the star of the show! It comes in various colors and can be smooth, holographic, or glitter-infused. Look for “broken glass nail foil,” “shattered glass nail art film,” or “iridescent transfer foil.”
Having these items ready will make the application process smooth and enjoyable. Remember, good tools make for a better outcome!
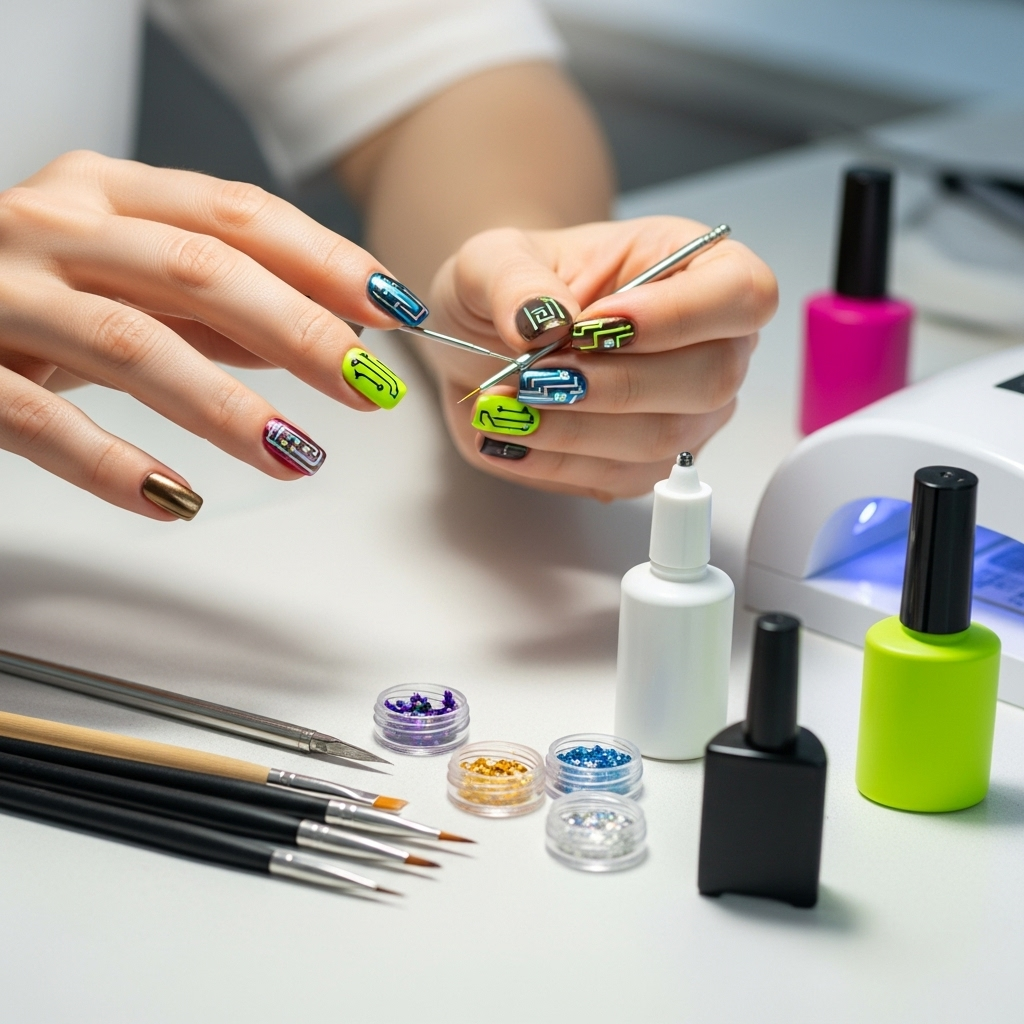
Step-by-Step Guide to Creating Broken Glass Nails
Ready to get creative? Follow these easy steps to achieve that stunning broken glass effect. We’re going to keep it simple and achievable for everyone!
Step 1: Prep Your Nails
Start with clean, dry nails. Gently push back your cuticles and file your nails to your desired shape. Buff the surface lightly to remove any natural oils and shine, which helps polish adhere better. Apply a good quality base coat and let it dry completely. This prepares your nails for the polish and protects them.
Step 2: Apply Your Base Color
Paint your nails with your chosen base color. You can go for a solid color, a gradient, or even a sheer nude for a more subtle look. Apply one or two thin coats, allowing each to dry thoroughly. The drier the polish, the better the foil will adhere.
Step 3: Cut Your “Glass” Shards
This is where the magic begins! Take your iridescent nail film or foil. Using sharp scissors or a craft knife, cut it into small, irregular shapes resembling tiny shards of glass. Aim for pieces that are roughly 1-3mm in size. You can cut them all the same size or a mix for a more realistic shattered look. Place these pieces in a small dish or on a palette so they’re easy to grab.
Tip: Don’t cut too many pieces at once; you can always cut more as needed. This prevents them from sticking together.
Step 4: Apply the Shards
Once your base color is completely dry and hard, it’s time to place the shards. Dip your tweezers or wax pencil into your chosen foil piece. Carefully place each piece onto your nail. You can arrange them closely together for a dense, glittery effect, or space them out for a more subtle sparkle. Let your creativity flow! Cover the entire nail, or just a section you want to highlight.
It’s easier to place them if you lightly press them onto a slightly tacky surface. If your polish is too dry, you might need to add a thin layer of clear polish or a specialized foil glue where you want the shards to stick, but often, as the color polish is still a little tacky, it works well. For a more secure hold, you can also gently press the pieces into a thin layer of gel base coat before curing.
Step 5: Seal the Deal with Top Coat
Once all your shards are in place and you’re happy with the design, it’s time to seal everything. Apply a generous, but not overly thick, layer of top coat. Make sure the top coat covers all the foil pieces and smooths over the nail surface. The top coat will lock the shards in place and give your nails a beautiful, glossy finish. If your shards feel very bumpy, you might need two layers of top coat to create a smooth surface, allowing the first layer to dry slightly before applying the second.
A good tip is to use a good quality, quick-drying top coat. Ensure you cap the free edge of your nail to prevent chipping. For a super smooth finish, some people opt for a gel top coat, which cures hard and eliminates any texture created by the foil pieces. If you’re using traditional polish, allow ample drying time.
Step 6: Final Touches
Once the top coat is completely dry, marvel at your work! Clean up any polish smudges around your cuticles with a cleanup brush dipped in nail polish remover. You can also apply cuticle oil to rehydrate your skin after the process.
And there you have it – your stunning broken glass nails are ready to shine!
Tips and Tricks for Perfect Broken Glass Nails
To elevate your broken glass nail art game from good to amazing, here are some pro tips and tricks that will help you achieve flawless results every time:
- Start with quality foil. Not all iridescent foils are created equal. Look for ones that are thin enough to lay flat but also have a strong shimmer.
- Experiment with colors. The broken glass effect looks incredible over dark colors like black, navy, or deep purple, but it also pops beautifully on lighter shades like pink, white, or even clear polish for a subtle shimmer.
- Don’t over-apply. Too many shards can look messy and may not adhere properly. Focus on strategic placement for the best impact.
- Use the right tweezers. Fine-tipped, angled tweezers are excellent for picking up tiny pieces. If you find them too fiddly, a slightly sticky wax pencil can be a game-changer.
- Smooth application is key. Gently press down on each shard as you place it to ensure it adheres well to the polish or adhesive.
- Smooth with top coat. If your shards create a bumpy surface, don’t worry! A couple of careful layers of top coat will smooth everything out. A good builder gel or a thick, glossy top coat can be your best friend here.
- Work in thin layers. For both the base color and the top coat, thin layers are always better and dry more evenly.
- Patience is a virtue. Ensure each layer is dry before moving to the next. Rushing the process is the quickest way to a smudged disaster!
- Consider foil glue. If you’re finding it hard to get the foil to stick, especially on very dry polish, a specialized foil glue or a thin layer of gel adhesive that’s cured under a lamp can offer extra hold. For non-gel users, a tacky clear polish layer can work in a pinch.
- Check for texture. Before the final top coat, run a finger gently over the shards. If you feel any sharp edges or bumps, add more top coat to smooth them down.
These little tips can make a big difference in the final look of your nails, ensuring they look professionally done. Remember, practice makes perfect, and the more you play with this technique, the better you’ll become!
Broken Glass Nail Art vs. Other Foil Techniques
The broken glass nail art technique is a fascinating variation within the broader world of nail foils. While all these techniques involve applying foil to the nail, they differ in the type of foil used, the application method, and the final effect.
Here’s a quick comparison:
| Feature | Broken Glass Nail Art Technique | Standard Nail Foil Application (e.g., Transfer Foils) | Nail Stickers/Decals |
|---|---|---|---|
| Foil Type | Iridescent, holographic film cut into irregular shards. | Smooth, uniformly patterned or colored metallic foil designed to transfer a complete image or color. | Pre-designed stickers or decals, sometimes with holographic or metallic finishes, that adhere to the nail. |
| Application Method | Small pieces of film are individually placed onto a tacky base (polish or adhesive). | A larger piece of foil is pressed onto a tacky base and then peeled off, leaving the metallic design behind. | Peel and stick directly onto the nail. |
| Final Effect | Shimmering, fragmented, multi-dimensional “shattered glass” look. | A solid, metallic, or patterned finish with a distinct design or color. | A flat, printed design or pattern. |
| Difficulty Level | Beginner to Intermediate. Requires precision in cutting and placement. | Beginner. Mostly involves pressing and peeling. | Beginner. Very easy to apply. |
| Customization | High. You control shard size, shape, and placement. | Limited to the pattern/color of the chosen foil. | Limited to the pre-designed options available. |
| Texture | Can be slightly textured before top coat. | Generally very smooth after application. | Usually flat, but some can have a slight raised texture. |
The broken glass technique offers a unique textural and light-reflecting quality that sets it apart. Unlike standard transfer foils that give a smooth, uniform metallic finish, or stickers that are essentially decorative adhesive, broken glass art creates a dynamic interplay of light across fragmented surfaces. This makes it a standout choice for those seeking a truly distinctive nail art statement.
Troubleshooting Common Issues
Even with the best intentions, you might run into a snag or two. Here’s how to tackle common problems with broken glass nail art:
Issue: Shards Won’t Stick
- Cause: Your base polish is too dry, or you’re not using enough adhesive.
- Solution: Ensure your base color is still slightly tacky before applying the shards. If it’s fully dry, apply a thin layer of clear polish or nail foil glue specifically designed for this purpose. For gel manicures, ensure your base gel is cured but still sticky, or use a thin cured gel layer as adhesive.
Issue: Bumpy or Uneven Surface
- Cause: The foil pieces are too thick, or they weren’t laid down smoothly.
- Solution: Apply your top coat in slightly thicker, yet careful, layers. The top coat will fill in the gaps and smooth the surface. Ensure each layer of top coat is fully dry before applying the next, or use a gel top coat for a perfectly smooth, hard finish.
Issue: Shards Lifting or Peeling
- Cause: The top coat wasn’t applied correctly or didn’t seal the edges.
- Solution: Make sure you are generously coating the entire nail, paying special attention to the edges and tips. Capping the free edge with your top coat is crucial for longevity. If you notice any lifting before sealing, carefully press it back down and apply more top coat.
Issue: Cutting the Foil is Difficult
- Cause: The foil is too thin and tears, or your scissors/knife aren’t sharp enough.
- Solution: Use very sharp cuticle scissors or a craft knife. If the foil is too flimsy, try cutting it slightly thicker at first, or practice cutting on a less delicate part of the foil sheet. You can also try layering two pieces of film loosely together before cutting if yours is very thin.
Issue: The Shimmer Isn’t Bright Enough
- Cause: The foil quality is low, or the base color is too dark and opaque, dulling the shine.
- Solution: Invest in higher-quality iridescent or holographic foils. Experiment with different base colors; a sheer or lighter base color can sometimes make the shimmer pop more dramatically. Ensure your top coat is also high-gloss and doesn’t have a matte finish.
Don’t get discouraged if your first attempt isn’t perfect. Nail art is all about practice, and these troubleshooting tips should help you overcome any hurdles. You’ve got this!
Frequently Asked Questions (FAQ)
Q1: What kind of foil is best for broken glass nail art?
A: The best foil is iridescent or holographic transfer film that is cut into small, irregular pieces. Look for “broken glass nail foil” or “shattered glass nail art film” online. It should be thin enough to lay flat but have a vibrant, multi-dimensional shimmer.
Q2: Can I use regular nail polish for this technique, or do I need gel?
A: You can absolutely use regular nail polish! The key is ensuring your base color is completely dry and still slightly tacky when you apply the foil pieces. Gel polish offers a more durable and often smoother finish, but regular polish works wonderfully for a DIY approach.
Q3: How long does broken glass nail art last?
A: When applied correctly with a good base and top coat, broken glass nail art can last as long as a regular manicure, typically 1-2 weeks. Proper sealing with enough top coat is essential for longevity.
Q4: Can I create a smooth surface with broken glass nails?
A: Yes! While the foil pieces can create texture, several layers of a good, glossy top coat (or a gel top coat) will smooth out the surface, making it feel like a regular polished nail. Always check for texture before your final top coat application.
Q5: What are the best base colors for broken glass nail art?
A: