Bridal Nail Design Ideas for Wedding Day: Proven Ideas for Your Perfect “I Do” Look. Discover chic, simple, and stunning nail designs perfect for your special day, from classic French tips to romantic pastels and subtle sparkle.
Planning your wedding day is all about the little details, and your nails are no exception! They’ll be in photos, holding your bouquet, and showing off that gorgeous new ring. But with so many beautiful options, choosing the perfect bridal nail design can feel a little overwhelming. Don’t worry, we’re here to make it simple and fun! Let’s find a look that makes you feel absolutely radiant and perfectly “you” for your walk down the aisle. Get ready to discover some amazing ideas that will make your hands wedding-ready!
Your Ultimate Guide to Bridal Nail Design Ideas for Wedding Day
Hello lovely readers, Lisa Drew here from Nailerguy! Weddings are such magical events, and I know how much thought goes into every single element. Your bridal nail design is a fantastic way to express your personal style and tie your whole look together. Whether you’re a minimalist bride or love a bit of glamour, there’s a perfect design waiting for you. We’re going to dive into some of the most popular, elegant, and totally achievable bridal nail design ideas that are proven winners. Think timeless classics, romantic touches, and just the right amount of sparkle.
Choosing your wedding day nails should be as enjoyable as picking your dress. It’s a small detail that makes a big impact. We’ll explore everything from the best nail shapes to color palettes, and of course, plenty of gorgeous design inspiration. By the end of this guide, you’ll feel confident and inspired to choose a bridal nail design that you’ll adore in your wedding photos for years to come. Let’s get those fingers wedding-ready!
The Foundation: Choosing Your Perfect Nail Shape
Before we get to the fun designs, let’s talk about shape! The shape of your nail can really enhance the overall look of your manicure. It’s also important to consider what works best for your hands and lifestyle.
Here are some popular nail shapes that look beautiful on most brides:
- Square: A classic choice with straight side walls and a straight free edge. It’s chic and modern.
- Squoval (Soft Square): Similar to square, but with rounded corners. This is a very popular and practical option.
- Round: Follows the natural curve of the fingertip. It’s a low-maintenance and universally flattering shape.
- Almond: Tapers to a rounded point. This shape can elongate the fingers and looks very elegant.
- Oval: Similar to almond but less pointed, offering a sophisticated look.
- Stiletto: A dramatic, sharply pointed shape. Best for brides who want a bold statement and have strong natural nails or use extensions.
- Coffin/Ballerina: Tapers to a square tip. Very trendy and chic, especially with acrylics or gel extensions.
Your nail technician can help you choose the best shape based on your nail bed and desired aesthetic. If you have shorter nails, round or squoval shapes are often best. For longer nails, almond or coffin shapes can look stunning.
Color Me Bride: Popular Bridal Nail Hues
The color of your wedding day nails sets the tone for your entire manicure. While white and cream are traditional, there are many beautiful shades that complement a bridal look.
Here’s a breakdown of popular bridal nail colors and what they convey:
- Classic White: Crisp, clean, and timeless. It pops beautifully against most skin tones and in photos.
- Ivory/Cream: A softer, warmer alternative to stark white. It offers a sophisticated and romantic feel.
- Sheer Nudes/Blush Pinks: The ultimate in understated elegance. These shades create a “my nails but better” look, elongating fingers and adding a hint of color. Perfect for a minimalist bride.
- Pale Pastels (Baby Blue, Mint Green, Lavender): If your wedding has a color theme or you’re a bride looking for a subtle pop of color, soft pastels are a charming choice. They add a touch of personality without being overpowering.
- Champagne/Soft Gold: Adds a touch of subtle glamour and warmth. Looks especially beautiful for fall or winter weddings.
- Light Gray: A modern and chic option that offers a neutral yet sophisticated alternative to traditional nudes.
When choosing your color, consider your wedding dress color, your skin tone, and your overall wedding theme. It’s always a good idea to test a few shades on your nails before the big day to see how they look in different lighting.
Top Bridal Nail Design Ideas for Wedding Day: A Curated Collection
Now for the exciting part – the designs! We’ve rounded up some of the most sought-after and beautiful bridal nail design ideas that are perfect for your wedding day.
1. The Timeless French Manicure (with a Twist!)
The French manicure is a classic for a reason. It’s elegant, clean, and works with any wedding style. But why not give it a modern update?
- Classic French: Crisp white tips on a sheer nude or pink base.
- Modern French: A colored tip instead of white. Think soft gold, blush, or even a subtle metallics.
- Reverse French (Half-Moon): The color is applied to the cuticle area, creating a chic contrast.
- Glitter French: A subtle line of glitter at the tip or the moon.
How-to Guide for a Classic French Manicure:
- Start with a clean, prepped nail. Apply a base coat and let it dry completely.
- Apply 1-2 coats of a sheer nude or pink polish to the entire nail. Let dry.
- Using a fine-tip brush or nail art pen, carefully paint a thin white line across the tip of each nail. For straighter lines, you can use nail guides.
- Alternatively, for a cleaner French, use a makeup sponge or stencil. Apply white polish to the sponge/stencil and press it onto the tip of the nail.
- Clean up any mistakes with a small brush dipped in nail polish remover.
- Apply a top coat for shine and longevity.
The French manicure is a fantastic canvas for subtle nail art. You can add a tiny dot of sparkle at the base of the nail or a delicate line of glitter.
2. Elegant “My Nails But Better” (MNBB) and Minimalist Designs
For the bride who prefers subtlety and sophistication, the MNBB look is perfect. It’s all about enhancing your natural nail with a sheer, luminous polish and perhaps a touch of shimmer.
- Sheer Polish: A single coat of a high-quality sheer nude, pink, or milky white polish.
- Subtle Shimmer: A very fine, almost undetectable shimmer added to a sheer base.
- Single Accent Nail: All nails have a sheer polish, but one accent nail has a delicate detail like a tiny pearl or a thin gold line.
- Matte Finish: A soft matte top coat over a sheer polish can give a modern, understated look.
These designs are incredibly flattering, always chic, and require minimal upkeep. They focus on healthy-looking nails and a polished appearance.
3. Subtle Sparkle and Glamour
Who says you can’t have a little sparkle on your wedding day? A touch of bling can elevate your bridal nail design beautifully.
- Glitter Accent Nail: One or two nails are covered in a subtle, fine-grain glitter polish (champagne, silver, or rose gold are popular).
- French Tips with Glitter: Replace the white tip with a delicate glitter line.
- Rhinestone Accents: A single, small crystal or a few tiny gems strategically placed on an accent nail. Always ensure these are securely attached!
- Ombré Glitter: A gradient of glitter from the tip or cuticle fading into the sheer base.
When it comes to sparkle, aim for refinement rather than being over-the-top. Think delicate shimmer, not disco ball.
4. Romantic Floral and Delicate Details
Adding delicate floral motifs or artistic details can bring a touch of romance and personality to your bridal nails.
- Tiny Floral Decals: Small, pre-made floral stickers applied over a nude or pastel base.
- Hand-Painted Petals: A skilled nail artist can paint tiny, delicate flowers, vines, or leaves on an accent nail.
- Dot Art: Small, strategically placed dots of complementary colors can create a subtle, artistic pattern.
- Pearls: Tiny pearls adhered to the nail, often near the cuticle or along the edge.
These designs are best suited for brides who love intricate details and a softer, more whimsical aesthetic.
5. Milky White and Soft Undertones
For a chic, modern bride, the milky white manicure is a dream. It’s a softer, more opaque version of sheer polish, offering a clean, even, and luxurious look.
- Opaque Milky White: A solid, opaque white that’s not stark but has a creamy, smooth finish.
- Milky with a Hint of Pink/Peach: This variation adds a touch of warmth, making it even more flattering for various skin tones.
- Milky French: Using a white milky polish for the tips of a French manicure.
This design feels very contemporary and high-fashion. It’s incredibly versatile and looks stunning in all wedding settings.
6. Subtle Geometric Designs
If you’re a bride who loves clean lines and modern aesthetics, minimalist geometric designs can be your perfect match.
- Thin Gold/Silver Lines: A single metallic line running vertically or horizontally on an accent nail.
- Small Geometric Shapes: A tiny triangle, square, or dot placed near the cuticle or tip.
- Negative Space Designs: Portions of the natural nail are left bare, creating a modern, artistic look with geometric elements.
These designs are about precision and understatement, adding a point of interest without being distracting.
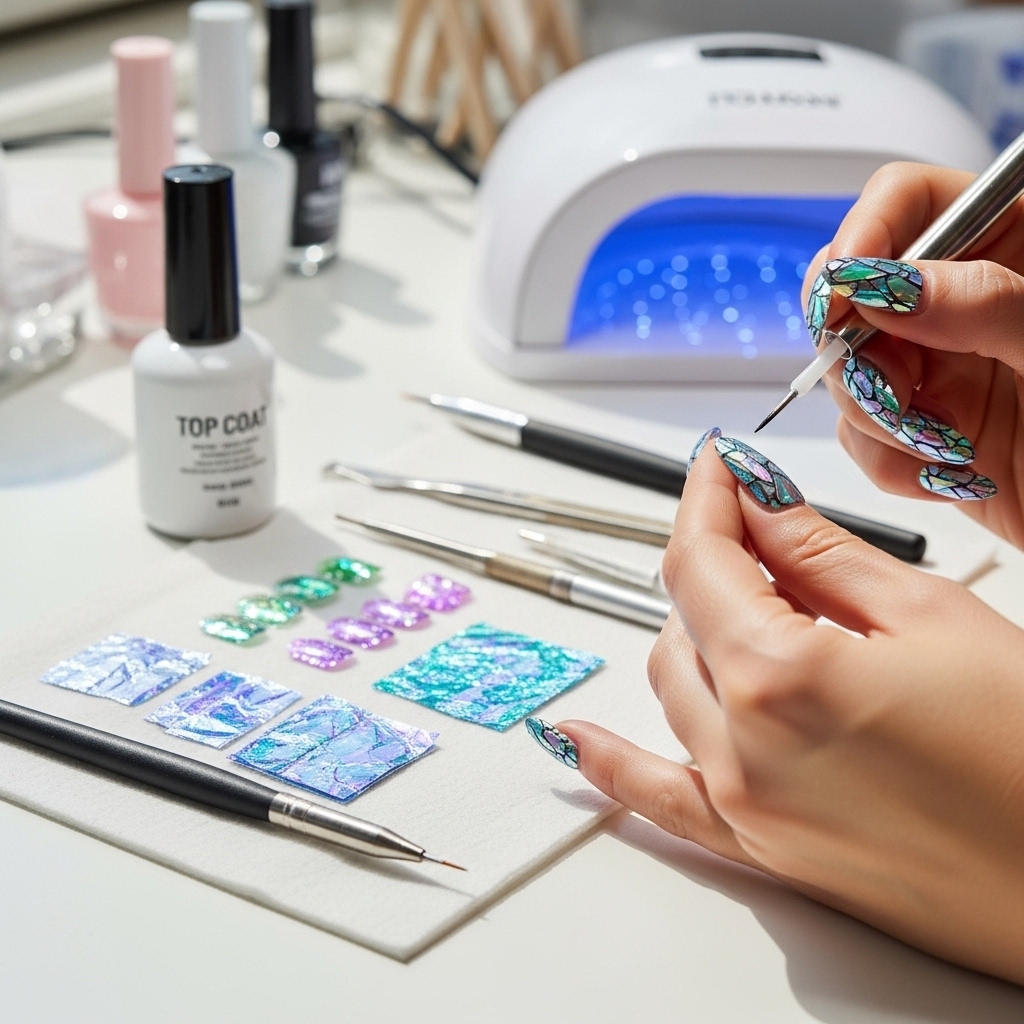
Bridal Nail Design Tools & Tips for Beginners
Even if you’re planning a professional manicure, knowing a bit about the tools and basic techniques can be helpful. If you’re a DIY bride, these are essential!
Essential Tools for Home Manicures:
- Nail File: Metal or emery boards to shape your nails. Emery boards are generally gentler.
- Nail Buffer: A multi-sided block used to smooth ridges, shine, and prepare the nail surface.
- Cuticle Pusher/Orange Stick: To gently push back cuticles. Never cut your cuticles at home, as this can lead to infection.
- Base Coat: Protects your natural nail and helps polish adhere.
- Top Coat: Seals the polish, adds shine, and prevents chipping.
- Nail Polish Remover: Acetone-based removers are stronger for glitter, while non-acetone is gentler.
- Fine-Tip Brush or Nail Art Pen: For detailed designs.
- Tweezer: For precise placement of gems or decals.
- Nail Glue: For securing rhinestones or nail art elements.
According to the American Academy of Dermatology Association, proper nail care includes keeping nails clean and dry to prevent bacteria from growing underneath them.
Tips for a Flawless Application:
- Prep is Key: Start with clean, dry nails. Remove all old polish.
- Buff Gently: Lightly buff the nail surface to create a smooth canvas for polish. Don’t over-buff, as this can weaken nails.
- Apply Thin Coats: 2-3 thin coats of color polish are better than one thick coat, as they dry more evenly and are less prone to smudging.
- Leave a Small Gap: Avoid painting polish all the way to the cuticle. Leaving a tiny gap helps prevent polish from getting on the skin, which can cause peeling.
- Use a Top Coat: Apply a generous top coat and cap the free edge (paint along the tip of the nail as well!) to seal in the color and prevent chips.
- Allow Drying Time: Be patient! Let each layer dry sufficiently before applying the next. This also means letting your final coat dry completely before doing anything strenuous.
Understanding Nail Extensions
Many brides opt for nail extensions to achieve a desired length or shape. The most common types are gels and acrylics.
Here’s a quick comparison:
| Feature | Gel Nails | Acrylic Nails |
|---|---|---|
| Composition | Gel polish that cures (hardens) under a UV/LED lamp. | A powder and liquid monomer mixture that hardens on its own. |
| Appearance | Often more natural-looking, flexible, and glossy. | Can be thicker, harder, and more durable. Offers more strength for extensions. |
| Application | Professional application required, cured under a lamp. | Professional application is best; can be applied at home with practice. |
| Removal | Soaked off with acetone or filed away. | Soaked off with acetone; can sometimes be easier to remove than gels. |
| Pros for Brides | Natural look, high shine, less prone to chipping. | Stronger, can create significant length, good for intricate 3D designs. |
| Cons for Brides | May not add as much length as acrylics; can be more expensive. | Can look less natural if not applied well, potential for damage if removed incorrectly. |
Both gels and acrylics can be used to create stunning bridal nail designs. The best choice depends on your natural nail health, desired look, and how much length you want to add. Always consult with a qualified nail technician for extensions.
Bridal Nail Design Inspiration: Matching Your Manicure to Your Gown
Your wedding dress is a huge part of your bridal style, so it makes sense to coordinate your nails with it!
For the Classic Ballgown Bride:
A timeless ballgown calls for equally timeless nails. Think:
- Classic French Manicure
- Sheer Nude or Blush Pink with a subtle pearl accent
- Soft Milky White
For the Modern Minimalist Bride:
Clean lines and sleek silhouettes pair beautifully with understated elegance:
- Opaque Milky White
- Subtle Geometric Line on an accent nail
- Sheer polish with a matte top coat
- Light Gray or soft nude
For the Romantic Bohemian Bride:
Flowy fabrics and a free-spirited vibe allow for a bit more artistic expression:
- Delicate floral decals or hand-painted flowers
- Soft pastel shades (lavender, pale blue)
- Pearls and subtle shimmer
- Almond or oval shape with a softer color
For the Glamorous Bride:
Sequins, lace, and statement pieces need nails that can keep up:
- Glitter accent nail (rose gold, champagne)
- Subtle rhinestones on an accent nail
- French tips with a metallic shimmer
- Deep jewel tones for a statement (if it suits your theme) or classic nudes with intense shine
Remember, these are just suggestions! The most important thing is that your chosen bridal nail design makes you happy and feel beautiful.
Frequently Asked Questions About Bridal Nail Designs
Q1: When is the best time to get my wedding day manicure?
It’s usually best to get your wedding day manicure 1-2 days before your wedding. This gives the polish time to set and allows for minor touch-ups if needed. If you’re getting gel or acrylics, 2-3 days is ideal.
Q2: Should I coordinate my nail color with my wedding theme or bridesmaids’ dresses?
While it’s lovely to have everything coordinate, your bridal nail color should primarily complement your dress and your personal style. A neutral or sheer shade will always work. If you want color, choose a shade that looks good on you and subtly ties into your theme.
Q3: How do I prevent my wedding day nail polish from chipping?
Start with a good base coat, apply thin layers of polish, cap the free edge with your top coat, and use a high-quality, quick-drying top coat. Avoid using your hands for strenuous tasks immediately after your manicure and try to avoid prolonged exposure to hot water.
Q4: Can I do my own wedding day manicure, or should I go to a professional?
Both are perfectly fine! If you’re skilled at doing your own nails and want a simple design, DIY is a great budget-friendly option. However, for intricate designs, extensions, or if you want complete peace of mind, a professional nail technician is highly recommended. They