Bold animal print nail designs are stunning, achievable, and a fantastic way to express your wild side! Learn the essential tools, simple steps, and pro tips to create eye-catching leopard, zebra, and cheetah prints at home, even if you’re a total beginner. Get ready to unleash your inner artist!
Feeling a little… plain? Want to add some serious pizzazz to your look without going overboard? Bold animal print nail designs are your secret weapon! They’re a little fierce, a lot fabulous, and surprisingly easy to achieve once you know the basics. Don’t you worry if you’ve never tried nail art before; we’re going to break it down so you can rock these stunning designs with total confidence. Get ready to turn heads and express your unique style, one claw at a time!
Unleash Your Wild Side: The Allure of Bold Animal Prints
Animal prints have been a fashion staple for decades, and for good reason! They add instant texture, personality, and that little bit of daring edge to any outfit. When translated to our nails, these patterns become miniature works of art. Think of the sleek lines of a zebra, the spotted charm of a leopard, or the classic spots of a cheetah – each brings its own vibe. Bold animal print nail designs aren’t just trendy; they’re a way to celebrate your confidence and individuality. Plus, they’re incredibly versatile. A subtle touch can elevate a professional look, while a full-on mani can be the star of a night out.
For beginners, the thought of recreating intricate patterns might seem daunting. But here’s the secret: nail art doesn’t have to be perfect to be beautiful. The beauty of many animal prints lies in their natural, organic look. We’ll focus on simple techniques that deliver maximum impact, making these bold designs accessible to everyone. Ready to dive into the wild world of animal print nails?
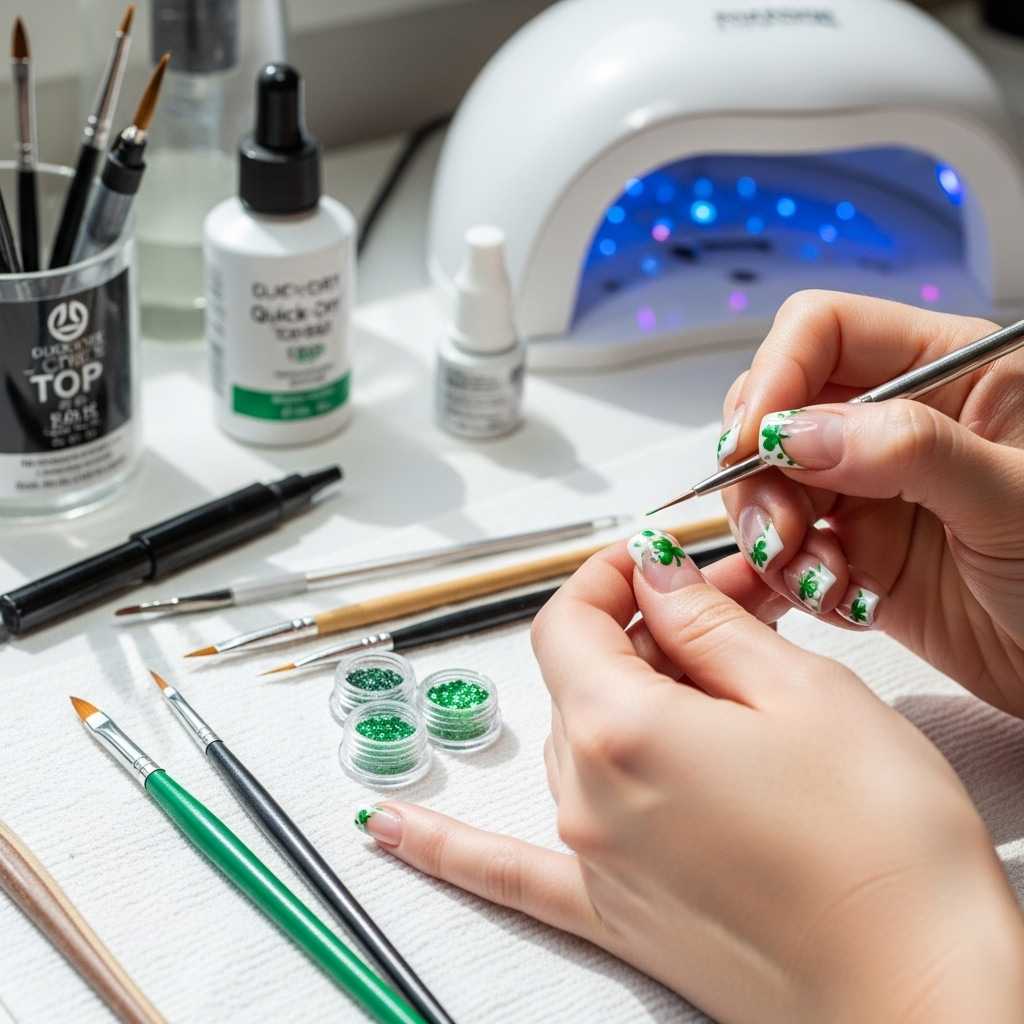
Essential Tools for Your Bold Animal Print Nail Kit
Before we get our hands messy (in the best way possible!), let’s gather our supplies. Don’t worry, you don’t need a professional nail studio. A few key items will have you creating stunning designs in no time.
Polished Perfection: Your Base and Top Coats
- Base Coat: This is crucial! It protects your natural nails from staining (especially with darker polishes) and creates a smooth canvas for your design.
- Color Polish: Choose your background colors. Neutrals like white, cream, beige, or black are classic for animal prints, but don’t be afraid to experiment with bold brights!
- Design Colors: For leopard, you’ll need black or dark brown. For zebra, black or dark brown. For cheetah, black or dark brown. You might also want a contrasting color for accents.
- Top Coat: The shiny finish! A good top coat seals your design, adds gloss, and helps your manicure last longer. Look for a quick-dry formula to save time.
Artistic Arsenal: Your Design Tools
This is where the magic happens! You don’t need a steady hand like a surgeon. These tools are designed for ease of use.
- Dotting Tool: This is your best friend for creating spots and dots. They come with different-sized ball tips. A medium-sized tip is perfect for most animal prints.
- Fine-Tip Nail Art Brush: For drawing lines (like zebra stripes) or creating the irregular crescent shapes in leopard spots. Look for brushes with very thin, precise bristles.
- Toothpick: A budget-friendly alternative to a dotting tool or fine brush. You can use the point for small details or the side for thicker strokes.
- Stencil/Stamper (Optional): For truly effortless patterns, nail art stamping plates or stencils can be a lifesaver. You’ll need a stamper and scraper for plates.
Prep and Polish Precision: Accessorize Your Artistry
- Nail Polish Remover: For any oopsies or cleaning up edges.
- Cotton Balls/Pads: To apply remover.
- Cuticle Pusher/Orange Stick: To gently push back cuticles for a clean nail bed.
- Nail File & Buffer: To shape your nails and create a smooth surface.
- Small, Flat Surface (like a plastic lid or tile): To practice your strokes and create your “palette” for polish.
Step-by-Step Guide: Crafting Your Bold Animal Print Nail Designs
Let’s get painting! We’ll cover three popular bold animal prints: leopard, zebra, and cheetah. Remember, practice makes progress, and your first try might not be salon-perfect, but it will be uniquely yours!
1. Leopard Print: Fierce & Fun Spots
Leopard print is all about irregular spots and crescent shapes. It’s playful and chic!
- Prep Your Nails: Start with clean, dry nails. Push back your cuticles and file them to your desired shape. Apply a base coat and let it dry completely.
- Apply Base Color: Paint your nails with your chosen base color (e.g., a creamy beige, a soft peach, or even a bold pink!). Apply two thin coats for full opacity and let them dry thoroughly. This is key to preventing smudging.
- Create the Spots: Take your dotting tool (or toothpick) and dip it into your black or dark brown polish. Randomly dab small-to-medium sized irregular shapes onto your nails. Don’t aim for perfect circles; think blobs and squiggles. Cover about 60-70% of the nail surface.
- Add the Outline/Crescents: Now, take a fine-tip brush or the smallest dotting tool. Dip it into the same dark polish. Carefully outline some of your spots with a thin, irregular line. For a more authentic look, create crescent moon shapes or C-shapes around some of the spots, leaving parts of the spot uncovered. This creates depth.
- Optional Accent: For an extra pop, use a little bit of a lighter brown or even a metallic gold polish to dab small dots inside some of the outlined spots.
- Seal the Deal: Once everything is completely dry (wait at least 5 minutes!), apply a generous coat of top coat. This will smooth out any texture and give your leopard spots a beautiful shine.
2. Zebra Print: Sleek Stripes with an Edge
Zebra stripes are all about clean, bold lines. Perfect for a graphic, modern look.
- Prep Your Nails: As always, start with clean, dry nails, pushed-back cuticles, and a base coat.
- Apply Base Color: White or black are classic for zebra stripes. Apply two thin coats of your chosen color and let them dry completely.
- Draw the Stripes: Using a fine-tip nail art brush and your contrasting color (if your base is white, use black; if base is black, use white or a dark grey), start drawing vertical or slightly curved lines down your nail. Don’t worry about making them perfectly straight or evenly spaced. The beauty is in the imperfection! Vary the thickness of the stripes for a more realistic and dynamic look.
- Add Variation: For a more layered effect, go back with your brush and add thinner, more jagged lines in between or alongside some of your thicker stripes. You can even add a few diagonal stripes for an extra flair.
- Accent Nail (Optional): Consider leaving one accent nail completely solid with your base color, or try a French manicure with zebra stripes on the tips.
- Top Coat Touches: Once your stripes are bone dry, apply a good layer of top coat to protect your design and add a glossy finish.
3. Cheetah Print: Chic and Subtle Spots
Cheetah print is similar to leopard but often has smaller, more defined spots and fewer crescent shapes. It feels a little more refined!
- Prep Your Nails: Clean, dry nails, pushed cuticles, and a base coat are your starting point.
- Apply Base Color: A nude, beige, tan, or even a soft pink works beautifully as a base for cheetah print. Apply two thin coats and ensure they are completely dry.
- Create the Spots: Using a dotting tool or the tip of a toothpick with black or dark brown polish, create small, irregular dots randomly across the nail. Aim for smaller spots than you would with leopard print.
- Add the Outline: This is where cheetah differs. Instead of full crescent shapes, use a fine-tip brush with black or dark brown polish to draw a thin, incomplete outline around some of the dots. Think of it as a tiny “C” or a broken circle. The key is to leave gaps. You don’t need to outline every single spot.
- Subtle Shading (Optional): For extra dimension, you can use a slightly lighter shade of brown or tan and dab a tiny bit inside a few of the outlined spots with your dotting tool. This mimics natural variation.
- Seal with Shine: After everything is dry to the touch, apply your trusty top coat to lock in the design and give it that professional gleam.
Pro Tips for Flawless Animal Print Nails
Even seasoned pros have tricks up their sleeves! Here are some tips to elevate your animal print game:
- Practice on Paper (or a plastic bag!): Before you commit to your nails, draw your patterns on a piece of paper or even a plastic Ziploc bag using nail polish. This helps you get a feel for the tools and the patterns.
- Work in Thin Coats: Thick polish is more prone to smudging and takes longer to dry. Always opt for thin, even coats of base color and design colors.
- Let It Dry Between Steps: This is the MOST important tip! Impatience is the enemy of nail art. Ensure each layer is completely dry before adding the next.
- Clean Up Your Edges: Dip a small, angled brush (or even a business card) into nail polish remover and carefully clean up any polish that got onto your skin around the nail. This makes your manicure look super neat.
- Don’t Aim for Symmetry: Nature isn’t perfect! Animal prints have natural variations. Embrace the slightly-off dots and uneven lines – that’s what makes them look authentic.
- Experiment with Colors: While classic neutrals work wonders, try neon pink with black spots, or a cobalt blue with white zebra stripes. The possibilities are endless!
- Matte Top Coat Magic: For a different vibe, try a matte top coat instead of a glossy one. It can give your animal prints a sophisticated, velvety finish.
Choosing Your Animal Print Style: A Quick Guide
Each animal print has a distinct feel. Here’s a quick rundown to help you decide which one suits your mood:
| Print Type | Key Features | Best For | Beginner Friendliness |
|---|---|---|---|
| Leopard | Irregular spots, crescent shapes, clusters | A bold, fun, and playful statement | High – imperfection is part of the charm |
| Zebra | Bold, clean stripes, varying thickness | A graphic, chic, and modern look | Medium – requires a steadier hand for lines |
| Cheetah | Smaller, more defined spots; incomplete outlines | A refined, subtle, and sophisticated vibe | Medium – dots are easy, but outlining takes care |
Where to Find Quality Nail Art Supplies
Getting the right tools makes a huge difference. You can find great supplies at:
- Drugstores & Supermarkets: Most carry basic nail polishes, dotting tools, and fine-tip brushes.
- Beauty Supply Stores: Chains like Ulta or Sephora often have a dedicated nail art section with a wider variety of tools and polishes.
- Online Retailers: Amazon, eBay, and specialized beauty e-commerce sites offer an extensive selection of nail art tools, stamping plates, and unique polishes. Websites like Elsevier’s “Research for Beginners” section, while not about nails, offers insights into clear, structured writing that we aim for here!
Caring for Your Bold Animal Print Manicure
Once you’ve perfected your wild design, you want it to last! Here’s how:
- Reapply Top Coat: Every 2-3 days, add another thin layer of top coat to help seal and protect your design, especially if you notice the shine fading or edges starting to lift.
- Moisturize: Keep your hands and cuticles hydrated with cuticle oil and hand lotion. Dryness can lead to peeling and chipping.
- Wear Gloves: When doing chores like washing dishes or cleaning, wear rubber gloves to protect your hands and your manicure from harsh chemicals and prolonged water exposure.
- Be Gentle: Avoid using your nails as tools (e.g., to open cans or scrape things).
Troubleshooting Common Animal Print Nail Issues
Every artist faces a few hiccups! Here are solutions to common problems:
- Smudged Design: This usually means you didn’t let the previous layer dry long enough. Gently try to smooth it out with a damp brush if it’s wet, or carefully remove and redo that section or nail if it’s dry. Next time, be patient!
- Spots/Stripes Too Thick: Use less polish on your tool and focus on lighter strokes. You can often go over a thicker line with a clean brush and a tiny bit of base color to refine it.
- Unevenness: Embrace it! If it really bothers you, you can try adding more spots or lines to balance it out, or simply start over on that nail.
- Polish Not Drying: Ensure you are using thin coats. You can also try a quick-dry top coat or a nail drying spray to speed up the process.
Frequently Asked Questions About Bold Animal Print Nail Designs
Q1: Can I really do bold animal print nails at home if I’m a beginner?
A1: Absolutely! The beauty of animal prints is their natural, organic look. Imperfection often adds to the charm, making them very forgiving for beginners. Focusing on the basic steps and using the right tools will set you up for success.
Q2: What are the easiest animal prints for beginners?
A2: Leopard print and cheetah print are generally easier than zebra because slight variations in spot size and placement are expected and look natural. Zebra stripes require a bit more control with lines, but with practice, it’s very achievable!
Q3: How long does a bold animal print nail design usually take to do?
A3: For a beginner, set aside about 30-60 minutes for a full set. This includes nail prep, painting, design time, and drying. As you get faster, you can likely do them in 20-30 minutes.
Q4: What if I don’t have a dotting tool?
A4: No problem! A regular toothpick works wonderfully as a substitute for a dotting tool. For lines, a fine-tipped eyeliner brush (that you only use for nails!) or even the edge of a thin business card can help create stripes.
Q5: How can I make my animal print nails last longer?
A5: The key is a good base coat, at least two thin coats of color, and a high-quality, glossy top coat applied generously. Reapplying top coat every few days also helps extend the life of your manicure.
Q6: Can I mix different animal prints on my nails?
A6: Definitely! For a truly wild and unique look, you could do leopard on one hand and zebra on the other, or even alternate accent nails with different prints. Just ensure your color palettes complement each other.
Q7: How do I clean up messy edges after painting?
A7: The best way is to use a small, angled brush (like an eyeshadow or makeup brush you don’t use anymore), dip it lightly into nail polish remover, and carefully swipe around the edges of your nails to remove any stray polish from your skin. This makes a huge difference in the finished look.
Conclusion: Your Wildest Nails Await!
There you have it – your essential guide to rocking bold animal print nail designs! We’ve covered the tools, the techniques for leopard, zebra, and cheetah prints, and shared pro tips to ensure your DIY manicures look stunning. Remember, the most important ingredient is your creativity and willingness to have fun.
Don’t be afraid to experiment with colors, patterns, and even combinations. These designs are a fantastic way to show off your personality and