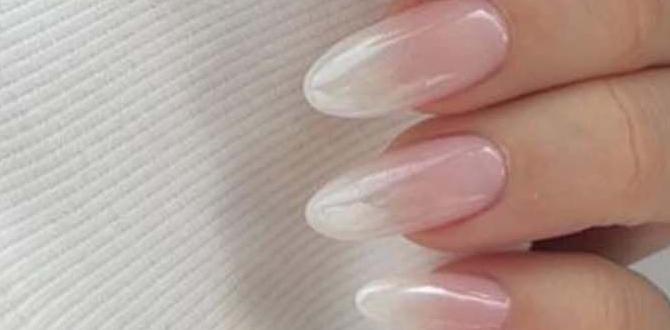
Blush white accent nails offer a chic and versatile look with a subtle pop of color. Perfect for beginners, these designs combine the elegance of white with a soft blush tone for a sophisticated, eye-catching manicure that elevates any outfit. Learn how to create them easily at home!
Dreaming of nails that are both sophisticated and a little bit playful? Blush white accent nails are your answer! They’re the perfect way to add a touch of elegance to your everyday look. If you’ve ever felt intimidated by nail art, or just want a simple yet stunning design, you’re in the right place. We’ll break down exactly how to get this trendy manicure. Get ready to fall in love with your fingertips!
Why Blush White Accent Nails Are a Must-Try
Blush white accent nails have taken the nail world by storm, and for good reason! They’re incredibly versatile, fitting seamlessly into any season or occasion. Think of them as the little black dress of nail art – timeless, chic, and always appropriate. The gentle combination of soft blush and crisp white creates a look that’s both delicate and noticeable.
The Perfect Blend of Subtle and Statement
What makes this trend so special? It’s the perfect balance. The white provides a clean, classic base, while the blush adds a warm, feminine touch without being overpowering. This means you can rock these nails for a formal event, a casual brunch, or even a day at the office. They’re sophisticated enough to impress but subtle enough to keep things understated.
Beginner-Friendly Charm
Perhaps the best part? Blush white accent nails are surprisingly easy to achieve, even if you’re new to DIY manicures. You don’t need a steady hand capable of intricate details. Simple techniques can yield beautiful results, making this trend accessible to everyone. We’ll show you how to achieve a salon-worthy look right at home.
Essential Tools for Your Blush White Accent Nails
Before we dive into the creative part, let’s gather what you’ll need. Having the right tools makes the process smoother and the results so much better!
Here’s a quick checklist of essentials:
- Base Coat: This protects your natural nails and helps your polish adhere better.
- Top Coat: This seals your design, adds shine, and prevents chipping.
- White Nail Polish: A good quality opaque white is key.
- Blush Nail Polish: Choose a soft pink or peachy shade you love.
- Dotting Tool or Toothpick: For creating simple accent designs.
- Nail File and Buffer: To shape and smooth your nails.
- Cuticle Pusher: To gently tidy up your cuticles.
- Nail Polish Remover and Cotton Pads: For clean-up.
- Optional: Nail Art Brush: For more detailed accents if you’re feeling adventurous!
Understanding Your Tools
Let’s talk a little more about a couple of these key items. A base coat isn’t just an extra step; it’s vital for nail health. It prevents staining and creates a smooth canvas. Similarly, a top coat is your design’s best friend, giving it longevity and that beautiful glossy finish. For the accent part, a dotting tool is fantastic. They come with different sized balls on the end, perfect for creating dots of varying sizes. If you don’t have one, a clean toothpick will work in a pinch!
Step-by-Step Guide: Creating Blush White Accent Nails
Ready to get started? This guide breaks down how to create stunning blush white accent nails. We’ll focus on a popular, easy design: a white base with blush accents.
Step 1: Prepare Your Nails
Cleanliness is key! Start by removing any old polish. Then, gently push back your cuticles. Shape your nails using a nail file. Aim for a smooth edge. Finally, buff your nails lightly. This creates a slightly rough surface for the polish to grip onto, improving wear time. Wash your hands thoroughly afterward to remove any dust.
Step 2: Apply Base Coat
Apply a thin layer of your base coat to all nails. Let it dry completely. This step is crucial for protecting your nails and ensuring a smooth application of color.
Step 3: Apply White Nail Polish
Apply two thin coats of your white nail polish to all nails except your accent nail(s). Let each coat dry fully before applying the next. A thin coat dries faster and looks smoother than one thick coat. Ensure full opacity for a clean, bright white.
Pro Tip: For a perfectly opaque white, consider a gel polish or a high-quality cream formula. If you don’t have an opaque white, you might need three thin coats.
Step 4: Design Your Accent Nail(s)
This is where the magic happens! For a classic blush white accent nail, you’ll typically paint your accent nail(s) with the blush color. Here are a few popular beginner-friendly ideas:
- Solid Blush Accent: Simply paint your chosen accent nail(s) with your blush polish. Apply two thin coats, just like you did with the white polish.
- White Base with Blush Dots: Paint your accent nail(s) with the blush polish. Once dry, use your dotting tool or toothpick dipped in white polish to create a pattern of dots. You can make them random, form a line, or create a cluster.
- Blush Base with White Dots: Paint your accent nail(s) with white polish. Once dry, use your dotting tool or toothpick dipped in blush polish to create white dots.
- Abstract Swirls: Apply your blush polish to the accent nail(s). While it’s still slightly wet (or after it dries, layering thin coats), use a fine nail art brush or the edge of your polish brush to create simple, abstract swirls in white.
For this guide, let’s assume we’re doing a solid blush accent nail for simplicity, and one or two nails on each hand as your “accent.” You can choose your ring finger, or mix it up!
Step 5: Apply Top Coat
Once your polish is completely dry – and this is important, especially on the accent nail – apply a generous layer of top coat to all your nails. Make sure to cap the free edge of your nails by running the brush along the tip. This seals everything in and adds that beautiful shine. Let it dry thoroughly.
Step 6: Clean Up Edges
Use a small brush or a toothpick dipped in nail polish remover to clean up any polish that got onto your skin. This gives your manicure a professional, polished look.
Variations to Elevate Your Blush White Accent Nails
Once you’ve mastered the basic blush white accent nail, don’t be afraid to experiment! Nail art is all about creativity and expressing your unique style.
Table: Blush White Accent Nail Design Ideas for Beginners
| Design Idea | Description | Difficulty Level | Tools Needed (Beyond Basics) |
|---|---|---|---|
| Simple Dotting | White or blush base with contrasting dots on the accent nail. | Easy | Dotting tool or toothpick. |
| Half Moon/French Tip Combo | Blush polish on the nail bed (half moon shape) and white tips, or vice versa. | Easy to Medium | Small brush or guide stickers (optional). |
| Ombre Fade | A subtle gradient blend of blush and white on the accent nail. | Medium | Makeup sponge or fine brush. |
| Minimalist Lines | Thin white or blush lines drawn across the accent nail. | Easy to Medium | Fine nail art brush or steady hand. |
| Heart Accent | A simple heart shape in blush or white on a contrasting base. | Medium | Dotting tool or fine brush. |
Adding a Touch of Sparkle
For an evening out or just when you want some extra glam, consider adding a touch of glitter! You can apply a glitter top coat over your accent nail, or place a few fine glitter particles strategically with a brush.
Playing with Finishes
Don’t limit yourself to glossy finishes! A matte top coat can give your blush white accent nails a sophisticated, velvety look. Try alternating between glossy and matte finishes for an extra stylish touch.
Exploring Different Shapes
The shape of your nails can also change the look! Almond, squoval, or stiletto nails can all work beautifully with blush white accent designs. Consider what shape best complements your hands and lifestyle.
Nail Care Tips for Lasting Manicures
To keep your beautiful blush white accent nails looking their best, proper nail care is essential. It’s not just about the polish; it’s about healthy nails underneath!
- Hydrate, Hydrate, Hydrate: Keep your cuticles and the skin around your nails moisturized. Cuticle oil is your best friend! Applying it daily can prevent dryness and hangnails, making your manicure look cleaner for longer.
- Be Gentle: Avoid using your nails as tools. Don’t pry things open or scrape surfaces. This can lead to chips and breaks.
- Reapply Top Coat: If you notice your top coat starting to lose its shine after a few days, apply another thin layer. This can refresh the look and add extra protection, extending the life of your manicure.
- Proper Removal: When it’s time to change your polish, use a good quality nail polish remover. Avoid peeling or picking at the polish, as this can damage your nail surface.
- Consider Nail Strengtheners: If your natural nails tend to be weak or brittle, a nail strengthener can be beneficial. Apply it as directed by the product, often alternating with your base coat.
The Science Behind Nail Health
Did you know that your nails are primarily made of a protein called keratin? According to the National Institutes of Health (NIH), keeping your body hydrated and nourished supports overall keratin production. Ensuring you’re getting essential nutrients like biotin can also contribute to stronger, healthier nails over time. Good nail care isn’t just cosmetic; it’s about supporting the body’s natural processes.
Troubleshooting Common Issues
Even with the best intentions, sometimes things don’t go as planned. Here are some common issues and how to fix them:
Issue: Streaky White Polish
Solution: This usually happens with one thick coat. The key is multiple thin coats! Let each coat dry properly before the next. If it’s still streaky, try a different brand or use a UV gel polish for a smoother finish. For non-gel options, a good squoval or rounded nail shape can minimize the appearance of streaking.
Issue: Smudged Polish
Solution: Patience is crucial! Ensure each layer of polish, especially the top coat, is completely dry before touching anything. If a smudge occurs, try to gently smooth it out with a bit of excess polish from the brush or use a clean-up brush with remover. For minor smudges and imperfections, a careful application of top coat can sometimes help to meld the smudge into the finish.
Issue: Polish Not Lasting Long
Solution: Make sure you used a base coat and a top coat! Capping the free edge of your nail with your top coat is also very important, as this is where most chips begin. Avoid exposing wet nails to hot water, which can soften the polish and make it prone to damage.
Issue: Bubbles in Polish
Solution: Bubbles can form if you shake your polish bottle vigorously (stir it gently instead!) or if you apply coats too thickly. They can also be caused by applying polish over a base that isn’t fully dry. Ensure thin coats and proper drying times.
Frequently Asked Questions About Blush White Accent Nails
Q1: Can I do blush white accent nails with regular nail polish, or do I need gel?
A: You can absolutely create beautiful blush white accent nails with regular nail polish! Begin with a good base coat, apply thin, even layers of your white and blush polishes, and finish with a durable top coat. For longer-lasting results, gel polish is an option, but it’s not required to achieve this elegant look.
Q2: How do I make my blush white accent nails last longer?
A: To maximize the lifespan of your manicure, always start with a base coat, and finish with a quality top coat, making sure to cap the free edge of your nails. Avoid harsh activities that could chip your nails, and keep your hands and cuticles moisturized. Applying an extra layer of top coat every 2-3 days can also help refresh the shine and add protection.
Q3: What’s the easiest way to create accent designs?
A: For beginners, dotting tools or even a toothpick are excellent for creating simple accent designs like dots. You can also use thin nail art brushes to draw lines or simple shapes. Sometimes, just painting one or two nails a solid contrasting color (like blush on a white base, or vice versa) is the easiest and most effective accent!
Q4: How do I get a clean line between the white and blush colors if I mix them?
A: For crisp lines, consider using nail art guide stickers or tape. Apply your first color, let it dry completely, then apply the sticker. Paint your second color over it and carefully peel off the sticker while the polish is still slightly wet. If doing freehand, using a very fine brush and a steady hand is key.
Q5: Can I use different shades of blush?
A: Absolutely! The beauty of blush white accent nails is their adaptability. Experiment with different shades of pink, peach, or even a soft coral blush to complement your skin tone and personal style. There’s no single “correct” shade of blush.
Q6: My white polish looks streaky. What can I do?
A: Streaky white polish is often a sign of applying it too thinly or not allowing layers to dry properly. Try applying three thin coats of opaque white polish, allowing each to dry for at least a minute before the next. A good quality, highly pigmented white polish will make a big difference!
Conclusion
Blush white accent nails are a fantastic choice for anyone looking to add a touch of understated elegance and personal style to their look. They’re surprisingly simple to achieve, making them perfect for nail art beginners, and they offer endless possibilities for customization. Whether you opt for a solid blush accent, playful dots, or chic lines, this trend is sure to make your hands look polished and on-point.
Remember to gather your essential tools, prep your nails properly, and take your time with each step. Don’t forget the importance of nail care to keep your manicure looking its best. With a little practice and creativity, you’ll be rocking stunning blush white accent nails that are uniquely you!


