Blush nude geometric nails are the perfect blend of subtle elegance and modern chic, offering a versatile and sophisticated nail art style that’s easy to achieve for beginners. This trend pairs the soft, flattering tones of blush and nude with clean, minimalist geometric designs.
Feeling a little lost when it comes to trendy yet wearable nail art? You’re not alone! Sometimes, the most glamorous looks can feel intimidating, but creating stunning nails at home is totally within reach. If you’re dreaming of nail art that’s both chic and understated, then blush nude geometric nails are your answer. Think of it as your go-to manicure that works for everything from coffee dates to important meetings. This style merges soft, pretty pastel hues with sharp, modern geometric patterns, creating a look that’s both sophisticated and unique. Ready to transform your nails into a work of art, the easy way? Let’s dive in and create some magic together!
Why Blush Nude Geometric Nails Are Your Next Must-Try
These nails are a true chameleon in the world of nail art. They’re not too loud, not too plain, but strike that perfect balance that designers and nail artists rave about. The soft blush and nude shades are incredibly flattering on virtually every skin tone, making them universally appealing. They exude a sense of calm sophistication and understated luxury. Whether you’re heading to a job interview, a wedding, or just a regular Tuesday, these nails say “I’ve got it all together” without shouting it. Plus, the geometric element adds a modern, edgy twist that keeps them from being boring. It’s a style that’s both timeless and current, making blush nude geometric nails an essential addition to your beauty repertoire.
The Allure of Blush Nude
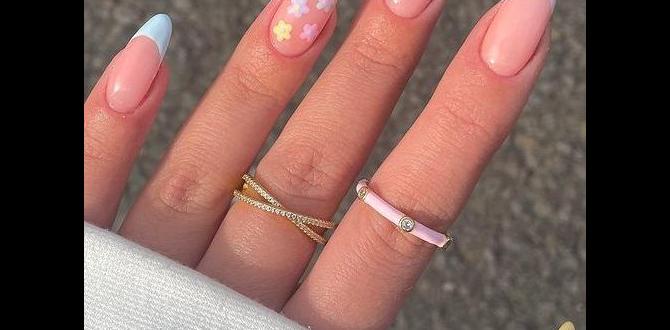
The charm of blush nude shades lies in their versatility and universally pleasing aesthetic. These colors aren’t just “pink” or “beige”; they are nuanced palettes that mimic the natural tones of healthy skin with a hint of delicate color. They create an illusion of longer, more elegant nails when applied. This makes them perfect for anyone who desires a polished look without the drama of bold colors. Think of shades ranging from soft, milky pinks to warm, peachy nudes, and even subtle, muted rosy tones. They are the epitome of “your nails, but better.”
The Power of Geometric Designs
Geometric nail art, with its clean lines, sharp angles, and precise shapes, injects a contemporary and artistic flair. It’s a style that appeals to our appreciation for order and symmetry. For blush nude geometric nails, the beauty lies in the contrast: the soft, organic color palette against the crisp, deliberate lines of shapes like triangles, squares, stripes, and chevrons. This juxtaposition creates a visually engaging manicure that is both eye-catching and refined. Geometric designs can range from a single minimalist accent line to intricate patterns covering the entire nail, offering endless possibilities for personalization.
Essential Tools and Materials for Your Geometric Masterpiece
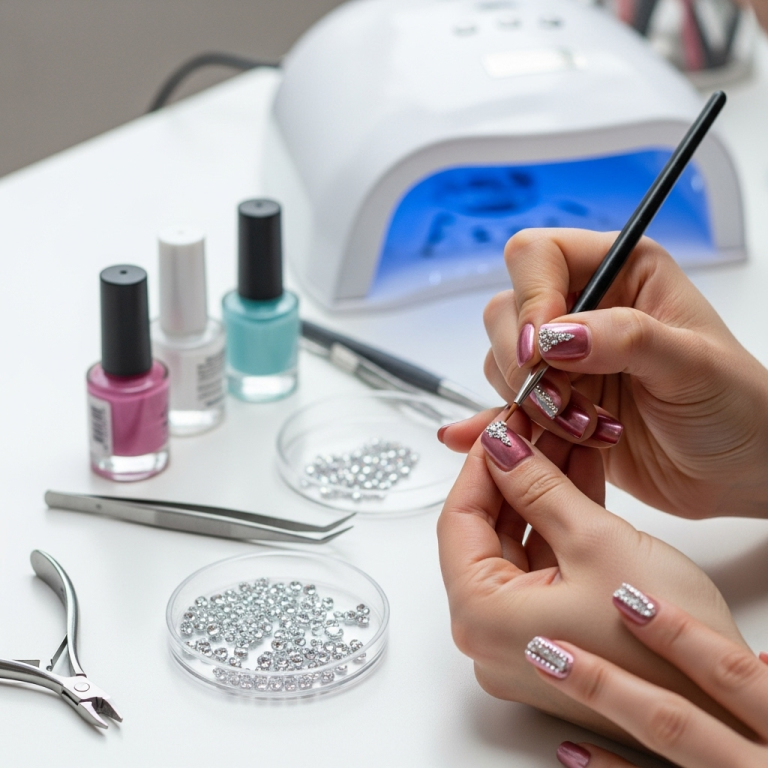
Getting those perfect lines and shapes doesn’t require a professional setup. With a few key items, you can create stunning blush nude geometric nails right at home. Here’s what you’ll need to have on hand:
The Nail Prep Essentials
Before any polish or design, proper nail prep is crucial for a long-lasting and beautiful manicure. It’s the foundation of great nail art!
- Nail File and Buffer: For shaping your nails and smoothing the surface. An untreated nail surface can prevent polish from adhering well.
- Cuticle Pusher/Orange Stick: To gently push back cuticles, creating a clean canvas for polish and design.
- Nail Polish Remover and Cotton Pads: To cleanse the nail plate of any natural oils or previous product. Even a tiny bit of oil can affect polish adhesion.
- Base Coat: This is a non-negotiable! It protects your natural nails from staining and helps your polish adhere better, preventing chips.
- Top Coat: Seals your design, adds shine, and protects against chipping.
The Color Palette and Design Tools
This is where the fun really begins! Gathering the right colors and tools will make creating your geometric patterns a breeze.
- Blush and Nude Nail Polishes: Choose a few shades that complement each other. For a subtle look, stick to similar undertones. For a bit more contrast, mix warm and cool tones.
- Detail Brushes or Dotting Tools: These are your secret weapons for precise lines and small details. A fine-tipped brush allows for drawing thin lines, while dotting tools can create small dots that can be connected into shapes.
- Striping Tape or Nail Art Stickers: For the cleanest, sharpest lines, striping tape is gold. Peel-and-stick geometric nail art stickers are a fantastic shortcut for beginners.
- Tweezers: Essential for precisely placing striping tape or nail art stickers.
- Clean-up Brush: A small, flat brush (you can use an old, thoroughly washed makeup brush or a dedicated nail brush) dipped in nail polish remover. This is for cleaning up any mistakes around the cuticle and nail edges.
Step-by-Step Guide to Creating Blush Nude Geometric Nails
Ready to get your hands on this fabulous trend? Follow these simple steps, and you’ll have gorgeous geometric nails in no time. We’ll focus on a popular and achievable design: a blush nude base with simple accent lines and shapes. Don’t worry if you’re new to nail art; we’ll break it all down!
Step 1: Prep Your Canvas
This is the most important step for a manicure that lasts! Start by thoroughly washing and drying your hands. Then:
- Shape Your Nails: Use a nail file to shape your nails to your desired length and style. A gentle, one-way motion is best to avoid weakening the nail.
- Push Cuticles: Gently push back your cuticles using a cuticle pusher or an orange stick. This gives you more nail surface to work with and a neater appearance.
- Buff the Surface: Lightly buff your nail surface with a nail buffer. This smooths out any ridges and creates a slightly rougher texture for the polish to grip.
- Cleanse: Wipe each nail with nail polish remover on a cotton pad to remove any dust or oils. Make sure your nails are completely dry before proceeding.
Step 2: Apply Base Coat
Apply a thin, even layer of your favorite clear base coat to each nail. This step is vital to prevent staining from the colored polishes and to create a smooth surface for your polish. Let it dry completely, which usually takes about 30-60 seconds.
Step 3: Lay Down the Blush Nude Base
Now for the color! Choose your favorite blush or nude polish. Apply two thin, even coats. Why two? Because one coat often looks streaky, and two thin coats are better than one thick, gloopy coat for a smooth finish and good coverage. Make sure to cap the free edge of your nail by running the brush lightly along the tip of your nail. This helps prevent chipping from the tip.
Allow each coat to dry thoroughly. A good test is to gently tap two nails together; if they stick, they aren’t dry enough. Waiting a few minutes between coats is ideal.
Step 4: Create Your Geometric Design (Option 1: Using Striping Tape)
Striping tape is your best friend for crisp, clean lines. This is where the magic happens!
- Ensure Base is Dry: Your blush nude base color must be completely dry (and I mean completely – waiting 5-10 minutes is recommended) before applying tape. If it’s even slightly tacky, the tape will lift the polish.
- Apply the Tape: Using tweezers, carefully place your metallic striping tape onto the nail. You can create simple lines, create division for accent colors, or form geometric shapes like triangles or squares. For a minimalist look, a single diagonal line or a small triangle in a corner is super chic.
- Press Down Firmly: Once positioned, press the tape down firmly all along its edges. This ensures a clean separation between the tape and the polish.
- Paint Over the Tape: Using a contrasting polish (e.g., a metallic gold, silver, or a darker nude/blush shade), carefully paint over and around the striping tape. Make sure to get good coverage over the tape itself.
- Peel Off the Tape: This is the most satisfying part! While the contrasting polish is still wet, carefully and slowly peel off the striping tape using your tweezers. Pull it away at an angle. If you wait for it to dry, you risk pulling off the new polish or leaving jagged edges.
- Let it Dry: Allow the new polish to dry completely before moving on to the top coat.
Step 5: Create Your Geometric Design (Option 2: Using Nail Art Stickers)
If painting lines feels daunting, nail art stickers are a fantastic and easy alternative!
- Ensure Base is Dry: Just like with tape, your blush nude base color needs to be fully dry before applying stickers.
- Select Your Sticker: Choose your desired geometric nail art sticker. There are tons of options available, from simple lines to intricate patterns.
- Apply the Sticker: Carefully peel the sticker from its backing using tweezers and place it onto your nail. Smooth it down, ensuring there are no air bubbles.
- Seal the Edges: Gently press down the edges of the sticker, especially near the free edge of your nail, to help it adhere smoothly.
Step 6: Add a Splash of Another Color (Optional)
Want to add a bit more depth? You can use a fine-tipped nail art brush or a dotting tool to add small accents, like dots along a line or small geometric shapes within larger ones. For example, after applying striping tape and painting over it, you could add tiny dots in a complementary color along one edge of the line or fill in a triangle you created with the tape.
Step 7: Apply Top Coat
Once your geometric design is completely dry, it’s time for the final seal!
- Apply Generously: Apply a thick, even layer of your favorite shiny top coat over your entire nail, making sure to cover the polish and any designs. Don’t forget to cap the free edge again.
- Smooth Out Texture: If any part of your design feels slightly raised (especially the striping tape edges), a good top coat will help smooth it out and make it look seamless.
- Let it Cure: Allow the top coat to dry completely. This might take a few minutes, so be patient!
Step 8: Clean Up Mistakes
Use your clean-up brush dipped in nail polish remover to carefully clean up any polish that may have gotten on your skin around the nail. This makes the whole manicure look much more professional and polished.
Blush Nude Geometric Nail Art Variations
The beauty of blush nude geometric nails lies in their customizability. Here are a few popular variations to inspire your next manicure:
Minimalist Lines
This is all about subtle sophistication. Think a single thin metallic line on one or two nails, a pair of parallel lines across a nail, or a small, clean triangle in the corner of each nail. This design is incredibly easy to achieve and looks effortlessly chic.
Color Block Geometrics
Use striping tape to divide your nail into sections and fill each section with a different complementary shade. For instance, a blush nude base could be divided with tape, with one section filled with a soft coral, another with a light grey, or even a deeper berry shade. This adds a bit more visual interest while staying within the sophisticated palette.
Chevron and Triangle Accents
Chevrons (V-shapes) and triangles are classic geometric motifs. They can be painted or created with striping tape. A single chevron at the tip of the nail, or small triangles accenting the cuticle area, can add a modern, sharp edge.
Negative Space Designs
This is a trendy variation where parts of the nail are left unpolished (or polished with just a clear top coat) to create geometric shapes or patterns. For example, you could paint your entire accent nail in a nude shade, then use tape to create a geometric design and remove sections of the nude polish, leaving the negative space (your natural nail or clear coat) to form part of the pattern. This looks incredibly artistic and chic.
Dot and Line Art
Using a fine-tipped nail art brush or dotting tool, create delicate lines and small dots. You can connect dots to form shapes, or create a series of dots that gradually get larger or smaller. These can form subtle geometric patterns or act as accent details on top of your base color.
Maintaining Your Gorgeous Geometric Nails
Once you’ve perfected your blush nude geometric nails, you’ll want them to last as long as possible! Here are some tips to keep them looking fresh and fabulous:
- Wear Gloves: When doing chores that involve water or harsh chemicals (like washing dishes or cleaning), wear rubber gloves. Water and cleaning products can break down the polish and weaken the natural nail.
- Reapply Top Coat: Every 2-3 days, apply an extra layer of top coat. This refreshes the shine and adds another protective layer, helping to prevent chips and wear.
- Avoid Using Nails as Tools: Resist the urge to use your nails to open cans, pry things open, or scratch surfaces. This is a sure way to damage your manicure and potentially your natural nails.
- Moisturize: Keep your hands and cuticles hydrated with a good hand cream or cuticle oil. Healthy cuticles and skin make your whole manicure look better.
- Be Gentle: Treat your nails with care. Avoid excessive filing or buffing, and don’t pick at your polish or cuticles.
Troubleshooting Common Geometric Nail Art Issues
Even the most experienced nail artists encounter hiccups! Don’t get discouraged if things aren’t perfect the first time. Here are some common problems and how to fix them:
| Problem | Solution |
|---|---|
| Polish Was Lifted by Tape/Sticker | This usually means the base color wasn’t dry enough. If it’s a minor lift, you might be able to carefully press it back down. For bigger issues, you might need to remove the polish and start that nail over. Always ensure the base is bone dry and peel tape/stickers off while the overlaying polish is still wet. |
| Jagged Lines from Tape Removal | This can happen if the tape wasn’t pressed down fully, or if the lacquer was already dry when you removed the tape. Go over the jagged edge with your clean-up brush dipped in nail polish remover to tidy it up, or carefully use a fine-tipped brush to draw a thin line of contrasting polish right along the edge to disguise the imperfection. |
| Uneven Nail Polish Application | Apply polish in thin coats rather than one thick one. If streaks are still an issue, try adding a drop of nail polish thinner (never acetone!) to your bottle and shaking well, or use a higher-quality polish known for good coverage. A good base and top coat also help smooth out imperfections. |
| Bubbles in Polish | Bubbles are often caused by shaking the polish bottle vigorously (which incorporates air) or applying thick coats. Instead of shaking, roll the bottle between your hands. Apply polish in thin coats, and let each coat dry adequately before applying the next. Ensure you’re not in a drafty spot when applying polish. |
| Design Smudging Before Drying | Patience is key! Ensure each layer of design polish is completely dry before applying more product or your top coat. If you’re using quick-dry drops, make sure they are fully integrated into the polish. Also, avoid touching anything with your nails until they are fully dry. |


