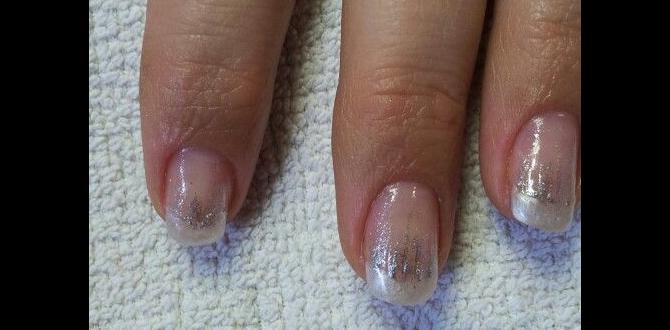
Blue Ocean Nail Design offers a splash of serene, effortless beauty, perfect for beginners wanting a chic, water-inspired look. Achieve stunning, calming blue nails with simple steps and readily available tools, transforming your fingertips into a mini-getaway.
Dreaming of nails that capture the tranquil beauty of the ocean? Maybe you’ve seen those gorgeous blue hues and intricate patterns and thought, “I could never do that!” Well, guess what? You absolutely can! Creating a blue ocean-inspired nail design is easier than you think, even if you’re just starting out. Forget complex techniques and expensive tools. We’re diving into a world of simple steps and beautiful results that will make your nails look like they’ve been kissed by the sea.
Get ready to learn how to create your own ocean-inspired masterpiece. We’ll guide you through everything you need, from picking the perfect shades of blue to simple application tips that guarantee a fabulous finish. Let’s make some waves on your fingertips!
Dive Into Blue Ocean Nail Design: Your Beginner’s Guide
The allure of the ocean – its vastness, its calming hues, its gentle rhythm – is something many of us wish we could bottle up and carry with us. Why not wear it on your nails? A blue ocean-inspired nail design is more than just a pretty manicure; it’s a mood, a feeling, a mini-vacation for your fingertips. This trend is incredibly versatile, allowing for everything from subtle ombré washes to more detailed, wave-like textures. And the best part? You don’t need to be a nail art pro to achieve stunning results. We’re talking about simple, achievable beauty that anyone can do.
Whether you’re heading to the beach, attending a special event, or just want to bring a little bit of calm into your everyday, these designs are perfect. Plus, the blues and whites of ocean-inspired nails are universally flattering and suit almost any outfit. Ready to create your own slice of paradise?
Why Choose a Blue Ocean Nail Design?
Let’s talk about why this design choice is a total win, especially for beginners:
- Effortless Serenity: Blue is a color known for its calming properties. Wearing ocean-inspired nails can genuinely make you feel more relaxed and centered. It’s like a little piece of tranquility at your fingertips!
- Versatile Beauty: From deep oceanic blues to soft sky blues, the possibilities are endless. You can go for a solid color, a gradient, or even add subtle textures.
- Beginner-Friendly: Many ocean-inspired designs rely on blending, layering, and simple lines, which are forgiving techniques for those new to nail art.
- Year-Round Appeal: While perfect for summer, the cool tones of blue and white are beautiful any time of year. They offer a refreshing change and can brighten any season.
- Customizable: You can tailor the shades and intensity to your personal style and the look you’re trying to achieve. Want a deep, mysterious ocean or a bright, tropical lagoon? You decide!
Essential Tools for Your Blue Ocean Manicure
You don’t need a professional salon to create beautiful ocean nails. Here’s a basic kit to get you started. Most of these are items you might already have or can easily find at your local drugstore or online beauty retailer.
- Base Coat: Crucial to protect your natural nails and help polish adhere. Look for a good quality, chip-resistant one.
- Top Coat: Seals your design, adds shine, and prevents chipping. A quick-dry formula is a lifesaver!
- Nail Polish in Shades of Blue: Choose at least two blues – a lighter shade (like sky blue or turquoise) and a deeper shade (like navy or sapphire).
- White Nail Polish: Essential for creating foam effects, highlights, or simple wave patterns.
- Optional: Glitter Polish: A fine iridescent or silver glitter can mimic the sparkle of sunlight on water.
- Thin Nail Art Brush or Toothpick: For drawing fine lines or waves.
- Sponge (Cosmetic or Nail Art Specific): For creating gradient or textured effects. A regular makeup sponge can work in a pinch!
- Cuticle Oil: To keep your nail beds moisturized and healthy after polishing.
- Nail Polish Remover and Cotton Pads: For clean-up mistakes.
Step-by-Step: Creating Your Blue Ocean Nail Design
We’ll focus on a popular and easy technique: a gradient effect with a touch of wave detail. This method looks intricate but is surprisingly simple.
Step 1: Prep Your Nails
First things first, let’s get your nails ready for their aquatic makeover. This step is crucial for a smooth, long-lasting manicure.
- Cleanse: Remove any old nail polish with a good nail polish remover. Wash your hands with soap and water and dry them thoroughly.
- Shape: File your nails to your desired shape. A rounded or squoval shape tends to look very natural and fits the ocean vibe.
- Cuticle Care: Gently push back your cuticles using an orange stick or cuticle pusher. You can apply a bit of cuticle oil if they feel dry.
- Buff (Optional): Lightly buff the surface of your nails to smooth any ridges. This helps polish adhere better. Wipe away any dust with a dry cloth or a remover-soaked cotton pad.
Step 2: Apply Base Coat
Apply one thin layer of your base coat. This protects your nails from staining and provides a smooth surface for your polish. Let it dry completely, which usually takes about 30-60 seconds.
Step 3: Create the Blue Gradient
This is where the ocean magic begins! We’ll use a sponge to blend our blue shades.
- Prepare Your Sponge: Cut a small piece of your cosmetic or nail art sponge. You want it to be manageable.
- Apply Polish to Sponge: On a clean, flat surface (like a piece of paper or aluminum foil), paint a few stripes of your lighter blue polish and immediately next to it, a stripe of your darker blue polish. If you have a third shade, add it next to the darker one. The key is to do this quickly so the polish doesn’t dry before you get to the sponge.
- Dab Onto Nails: Gently dab the sponge onto your nail, pressing down lightly. You want to transfer the blended colors onto your nail. It might take a few dabs to get the desired intensity.
- Repeat: Reload your sponge with polish if needed and repeat on all nails. Don’t worry about perfection at this stage; we can clean up edges later. For a more natural look, you can use your lighter blue on tips and blend downwards, or vice-versa.
Step 4: Add White Wave Details
Now, let’s add that beautiful frothy sea foam or subtle wave effect.
- Dip Your Brush/Toothpick: Dip your thin nail art brush or toothpick into the white nail polish. Wipe off any excess on a paper towel so you don’t get huge blobs.
- Create Waves: Lightly trace a shallow, wavy line near the tips of your nails, or wherever you’d like foam to appear. Think gentle curves, like the edge of a breaking wave. You can also place small dots and then gently drag them with the brush to create a frothy look.
- Blend (Optional): If you want a softer look, you can use a very slightly damp brush (e.g., dipped in clear polish or nail polish remover and blotted dry) to gently smudge or blend the white lines a little. Be very subtle!
Step 5: Add Glitter (Optional)
For a touch of sparkle, apply a thin layer of glitter polish over your blue gradient. Focus on the tips or just a light dusting over the top to mimic sunlight on water.
Step 6: Clean Up Edges
This is a super important step to make your manicure look professional. Dip a small, flat brush (an old makeup brush works great!) or a toothpick into nail polish remover. Carefully trace around the edges of your nails to remove any polish that got onto your skin.
Step 7: Apply Top Coat
Once all the polish is completely dry (give it at least 5-10 minutes, longer if possible, especially over sponge gradients), apply a generous layer of your clear top coat. This seals everything in, adds incredible shine, and makes your design last much longer. Ensure you cap the free edge of your nail (paint a little bit on the very tip) to prevent chipping.
Step 8: Hydrate
After your top coat has hardened (use a quick-dry spray if you have one!), apply a bit of cuticle oil around your nails. This nourishes your skin and makes your manicure look even more polished and complete.
Variations and Tips for Your Blue Ocean Nails
Want to explore beyond the basic gradient and wave? Here are some ideas to elevate your blue ocean nail game:
Ombre Blues:
Instead of a two-tone gradient, blend three or more shades of blue, from lightest to darkest, to create a deep, mesmerizing ocean effect. You can also do a reverse ombré, starting with dark at the cuticle and fading to lighter at the tip.
Textured Waves:
For a more dramatic, 3D effect, try using a thicker white polish or a white gel polish and a fine brush to create more pronounced, raised wave lines. You can even add a touch of iridescent pigment powder over the wet white for an extra shimmer.
Starfish or Shell Accents:
Use nail art stickers, 3D nail art charms, or hand-paint a small starfish or shell onto one or two accent nails for an extra touch of beachy flair. Keep it simple to maintain the effortless feel.
Matte Finish:
If high gloss isn’t your style, switch your top coat to a matte finish. A matte blue ocean design can look incredibly sophisticated and unique, resembling sea glass or smooth pebbles.
Glitter Tides:
Use a finer silver or holographic glitter polish to draw subtle lines that mimic the movement of water, or apply a more concentrated glitter near the tips for a sparkly shoreline effect.
Using Dotting Tools:
For delicate foam patterns, use a small dotting tool dipped in white polish. Place tiny dots close together along the nail tip or in curved patterns. This gives a softer, more diffused frothy look than a brush.
The Sponge Technique Cheat Sheet
For the best sponge gradient results, remember these key points:
| Tip | Explanation | Benefit |
|---|---|---|
| Work quickly | Apply polish to the sponge immediately after painting it onto your palette. | Prevents polish from drying on the sponge, allowing for smooth blending. |
| Gentle dabbing | Press the sponge lightly and evenly onto the nail. Avoid hard scrubbing. | Transfers the color smoothly and creates a seamless gradient without streaks. |
| Reapply often | Don’t be afraid to reapply polish to your sponge and dab multiple times. | Builds up color intensity and smooths out any patchy areas. |
| Clean sponge edges | Wipe excess polish off the sponge between applications if needed. | Ensures clean lines and prevents smudging onto your skin. |
The “Why” Behind Proper Nail Prep
You might be tempted to skip nail prep, especially when you’re eager to get to the fun part! But proper preparation is the secret to a manicure that looks salon-perfect and lasts. According to the American Academy of Dermatology Association, keeping nails healthy involves proper care and preventing damage. This includes ensuring your nails are clean and free from oils and residues before applying polish. A clean surface allows the base coat and polish to adhere properly, reducing the chances of lifting and chipping. It’s the foundation for any great nail art! Think of it like preparing a canvas before painting – it makes all the difference.
FAQ: Your Blue Ocean Nail Design Questions Answered
Have more questions bubbling up? Here are some common ones for beginner nail artists looking to dive into blue ocean designs.
Q1: What shades of blue are best for an ocean look?
A1: The beauty of ocean-inspired nails is their variety! For a classic look, try pairing a Caribbean turquoise with a deep navy or sapphire. Lighter sky blues, aquas, and even seafoam greens can also be incorporated. Don’t be afraid to mix and match 2-4 shades for a more realistic gradient.
Q2: How do I avoid getting polish all over my skin?
A2: The trick is to clean up after you’ve applied the polish. Once your polish is mostly dry, use a small, flat brush or an orangewood stick dipped in nail polish remover to carefully trace around your cuticle line. Regular, thin coats also help prevent excessive flooding. Some people also swear by applying a liquid latex or cuticle barrier around their nails beforehand, but careful cleanup is often just as effective for beginners.
Q3: Can I do this with regular nail polish, or do I need special tools?
A3: You absolutely can use regular nail polish! The sponge technique works well with most standard polishes. While specialized nail art brushes are helpful, a toothpick or a fine-tipped brush from an old makeup kit can be used for the wave details. A good base and top coat are key, but they don’t need to be high-end. The key is technique and patience!
Q4: My gradient looks streaky. What did I do wrong?
A4: Streaky gradients usually happen when the polish on the sponge has started to dry, or when you’re dabbing too hard. Try applying the polish to your palette and sponge more quickly. Use lighter, more frequent dabbing motions. You can also try layering: do a light first pass, let it dry slightly, and then go over it again with more color on the sponge. A good top coat will also help meld the colors together.
Q5: How long will this type of nail design last?
A5: With proper prep, at least 3-5 days, and potentially up to a week! The most important factors are using a good base coat, allowing each layer to dry adequately, and sealing everything with a high-quality, durable top coat. Capping the free edge of your nail with the top coat is also a pro tip for preventing chips.
Q6: Can I add real sand or shells to my nails?
A6: While tempting for a super beachy look, adding real sand or shells can be quite difficult to apply, prone to falling off, and can be rough. For a safer and more durable option, stick to nail art stickers, charms, or glitter that mimic sand or shell textures. These are designed to adhere well and be sealed under polish.
Q7: Is there a simpler way to get an ocean vibe without a sponge?
A7: Definitely! A beautiful single coat of your favorite blue polish, topped with a shimmery blue-toned clear polish or a fine iridescent glitter polish, can evoke the ocean. Alternatively, a simple ombré using just two shades of blue, painted directly onto the nail and blended with a brush, can also achieve a lovely water effect without a sponge.
Conclusion: Embrace Your Inner Ocean Artist
As you can see, creating a beautiful blue ocean-inspired nail design is entirely within your reach, no matter your experience level. You’ve learned how to prep your nails for a flawless finish, master the easy sponge gradient technique, add those charming wave details, and even explored fun variations to make the look your own. Remember, nail art is all about self-expression and having fun!
Don’t be discouraged if your first attempt isn’t “perfect.” Every manicure is a learning experience, and each time you try, you’ll get a little better. The beauty of these designs lies in their natural, fluid feel – a little imperfection can actually add to the charm! So, gather your blues, grab that sponge, and get ready to transform your nails into a serene, captivating ocean escape. Go ahead, dive in and let your creativity flow!

