Quick Summary: **Master a stunning blue nail design tutorial with these easy steps! Perfect for beginners, this guide shows you how to create effortless, stylish blue nails that express your unique personality. Elevate your at-home manicure game in no time!
Feeling a little ‘blue’ about your nail game? Or maybe you’re just craving a fresh, sophisticated look that’s surprisingly simple to achieve? You’re in the right place! Blue nails are a fantastic way to add a pop of color and personality to your style, whether you’re heading to work, a special event, or just want to feel fabulous. But sometimes, the idea of intricate nail art can seem a bit daunting, right? Don’t worry! Today, we’re diving into a super easy, step-by-step blue nail design tutorial designed for everyone, especially those new to the nail art scene. Get ready to discover how effortless chic can be!
Blue nail designs offer a world of possibilities. From deep, enigmatic navy to bright, cheerful sky blue, there’s a shade for every mood and occasion. We’ll walk you through everything you need to know, from choosing your colors to applying the final touches, ensuring you get beautiful, salon-worthy results without leaving your home. Prepare to be amazed at what you can create!
Why Blue Nails Are Always a Good Idea
Blue is more than just a color; it’s a feeling. It can evoke calmness, stability, and sophistication, much like the vast ocean or the endless sky. This versatility makes blue a perfect choice for almost any outfit and any situation. Plus, who doesn’t love a classic yet modern look? Blue nails effortlessly blend timeless appeal with a contemporary edge.
Think about it: a crisp navy can be incredibly professional and chic, while a soft pastel blue feels serene and pretty. A vibrant turquoise adds a playful, tropical vibe. The possibilities are practically endless! And the best part? You don’t need to be a professional nail artist to rock these looks. We’re focusing on designs that are beginner-friendly and deliver maximum style impact with minimal effort.
Getting Started: Your Blue Nail Design Toolkit
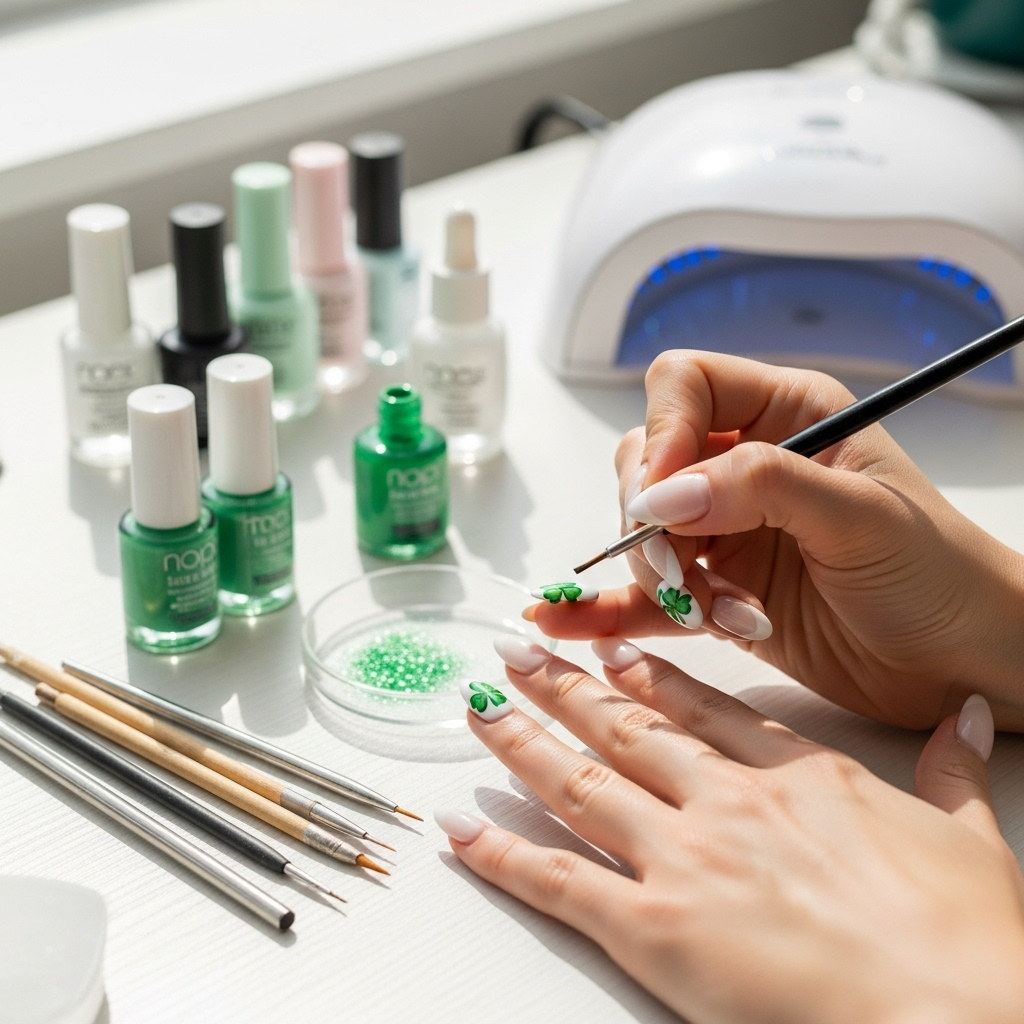
Before we jump into the fun part – creating beautiful blue nail art – let’s make sure you have the essentials. Gathering your tools beforehand will make the whole process smooth and enjoyable. Think of this as your personal nail artist’s kit!
Must-Have Nail Polishes & Supplies
- Base Coat: This is crucial for protecting your natural nails from staining and helping your polish last longer.
- Top Coat: Adds shine, protects your design from chipping, and gives your manicure that professional finish.
- Blue Nail Polish: Your star player! Choose one or two shades of blue you love. Think about whether you want a creamy finish, a shimmer, or a glitter.
- Accent Color Polish (Optional): White, silver, gold, or even a contrasting color can add dimension.
- Nail Art Brush or Toothpick: For adding details or creating simple patterns. A fine-tipped brush is great for lines, while a dotting tool or toothpick is perfect for dots.
- Nail Polish Remover: For cleaning up mistakes and prepping your nails.
- Cotton Pads or Balls: To apply the remover.
- Nail File: To shape your nails.
- Buffer: To smooth the nail surface.
Pro-Tip: Choosing Your Blue
Consider your skin tone when selecting a blue. Deeper blues like navy or cobalt often look stunning on a wide range of skin tones. Lighter blues like sky or baby blue can be particularly beautiful on fairer complexions, while brighter, more vibrant blues can pop against warmer or deeper skin tones. Don’t be afraid to experiment! You can also check out resources like Pantone’s Color of the Year for trending shades that might inspire you.
Effortless Blue Nail Design Tutorial: The Ombre Fade
The ombre effect is incredibly popular and surprisingly easy to achieve at home. It gives a sophisticated, blended look that’s perfect for a chic blue nail design. This tutorial focuses on a simple gradient using two blue shades.
What You’ll Need:
- Light blue nail polish
- Dark blue nail polish
- Base coat
- Top coat
- Cosmetic sponge or makeup sponge
- Nail polish remover (for cleanup)
- Optional: A clean surface to dab excess polish before sponging
Step-by-Step Guide:
- Prep Your Nails: Start with clean, dry nails. File them to your desired shape and gently buff the surface. Apply a thin layer of your base coat and let it dry completely.
- Apply the Base Blue: Paint your nails with the lighter shade of blue polish. Apply one or two thin coats, depending on opacity, and let each coat dry thoroughly. This will be the base color of your ombre.
- Prepare the Sponge: Cut a small piece from your cosmetic sponge. You can dab a little polish remover onto the sponge to remove any loose bits, but make sure it’s dry before applying polish.
- Create the Gradient on the Sponge: On a clean, flat surface (like a piece of paper or a nail polish cap), swipe a line of your dark blue polish next to a line of your light blue polish. You want the lines to touch or slightly overlap.
- Apply to Nail: Immediately after creating the gradient on your surface, gently press the sponge onto your nail, concentrating the color blend where you want it. You might need to dab a few times to get an even application. The sponge will pick up the blended colors and transfer them to your nail.
- Reapply Polish to Sponge: You’ll likely need to reapply the polish lines to the sponge for each nail, or even multiple times per nail, to build up the color and blend.
- Seamless Transition (Optional): If the lines look too harsh, you can use a clean part of the sponge or a very slightly damp sponge to gently blend the edges downwards.
- Let it Dry: Allow the ombre polish to dry completely. It might feel a bit rough due to the sponge texture.
- Clean Up Edges: Use a small brush dipped in nail polish remover to carefully clean up any polish that got onto your skin around the nail. This step makes a huge difference in the final look!
- Apply Top Coat: Once everything is dry, apply a generous layer of your top coat. This will smooth out the texture from the sponge and seal your design.
For an even smoother finish, you can apply a second coat of top coat after the first one has dried a bit. This ombre design is fantastic because it looks intricate but is totally achievable for beginners. You can play with different color combinations, like navy fading into a pastel blue, or even adding a touch of glitter blue!
Creative Blue Nail Design Tutorial: Polka Dots & Stripes
Polka dots and stripes are timeless nail art motifs that, when done in shades of blue, look incredibly chic and modern. Let’s explore how to create a simple yet stylish design featuring both.
What You’ll Need:
- A base blue polish (e.g., navy, royal blue)
- A contrasting blue polish (e.g., sky blue, teal) OR a white/silver polish for accents
- Base coat
- Top coat
- Dotting tool or toothpick
- Thin nail art brush (for stripes)
- Nail polish remover for cleanup
Step-by-Step Guide:
- Prep and Base Coat: As always, start with clean, shaped nails and apply your base coat. Let it dry.
- Apply Main Color: Paint all your nails with your chosen base blue polish. Apply one or two coats for full coverage and let it dry completely.
- Dotting Time: Dip your dotting tool (or the tip of a toothpick) into your contrasting polish (or white/silver). Gently dot onto your nails. You can create a pattern – maybe a diagonal line of dots, or dots covering your whole nail for a fun look. For this tutorial, let’s place a few well-spaced dots on the accent nail (like your ring finger).
- Stripe It Up: On another nail (or all of them!), use your thin nail art brush. Dip it into the contrasting color. Carefully paint a straight line across your nail. For a simple look, try a single stripe down the center or one near the tip. You can also do multiple thin parallel stripes if you’re feeling steady!
- Cleanup: Use your brush dipped in nail polish remover to neaten any wobbly lines or stray dots.
- Add Details (Optional): If you used white for dots and stripes, you could add a thin metallic stripe (gold or silver) over the top of a blue stripe for extra flair.
- Top Coat Seal: Once all your designs are completely dry, apply a generous layer of top coat to lock everything in.
This blue nail design is fantastic because it’s so customizable. You can alternate between a dotted accent nail and a striped accent nail, or do a full nail of dots and a full nail of stripes. The key is clean lines and well-placed accents to keep it looking sophisticated rather than messy. For those wanting to practice their lines, consider using nail vinyls or tape for perfectly straight stripes.
Blue Abstract Swirls Tutorial
Abstract designs are forgiving and incredibly trendy. A blue abstract swirl can look effortlessly artistic, even if you’re just starting out!
What You’ll Need:
- A base polish (e.g., white, light grey, sheer nude)
- Two to three shades of blue polish (e.g., navy, teal, sky blue)
- Base coat
- Top coat
- Thin nail art brush
- Nail polish remover for cleanup
Step-by-Step Guide:
- Prep & Base: Start with clean nails, apply your base coat, and let it dry.
- Apply Base Color: Paint all nails with your chosen neutral or light base color. Let it dry completely.
- Load Your Brush: Dip your thin nail art brush into your darkest blue polish.
- Create the Swirl: Gently draw a loose, wavy line or swirl across your nail. Don’t aim for perfection; organic shapes are key here.
- Add More Colors: Without cleaning the brush entirely, dip it into your second blue shade and draw another swirl that overlaps or intertwines with the first. Repeat with your third blue shade if desired. The idea is to layer and blend the colors naturally on the nail.
- Blend & Refine: If the colors look too distinct, you can sometimes gently swirl them together with the brush, or even use a clean part of the brush to create lighter, softer lines.
- Whitespace is Good: Don’t feel like you need to cover the entire nail. Leaving some of the base color peeking through adds to the artistic, airy feel.
- Cleanup: Carefully clean up the edges with a brush dipped in nail polish remover.
- Seal It: Apply a good layer of top coat once everything is dry.
Abstract swirls are fantastic because each nail can be slightly different, adding to the unique, artistic charm. This design looks especially chic with a mix of matte and glossy finishes – you could use a matte top coat for a modern look, or a high-gloss top coat for a more dramatic effect. For more inspiration on abstract art, explore the techniques used in modern abstract painting tutorials to get a feel for color and composition.
Caring for Your Blue Nail Designs
Once you’ve perfected your blue nail design, you want it to last! Proper care will keep your manicure looking fresh and chip-free for as long as possible.
Key Tips for Longevity:
- Avoid Harsh Chemicals: Whenever possible, wear gloves when doing chores like washing dishes, cleaning, or gardening. Exposure to strong cleaning products can weaken polish and cause chipping.
- Moisturize Regularly: Keep your hands and cuticles hydrated. Dry cuticles can lead to hangnails, which can ruin even the prettiest manicure. Use a good cuticle oil or hand cream daily.
- Be Gentle: Try not to use your nails as tools to open things or scrape surfaces. This is a surefire way to chip or break them.
- Touch-Ups: If you notice a tiny chip, you can sometimes carefully dab a bit of top coat over it to seal it and prevent further damage. For more noticeable chips, a fresh coat of top coat over the entire design can sometimes revive it.
- Proper Removal: When it’s time to change your polish, use a good quality nail polish remover. Avoid acetone if your nails are prone to dryness, opting instead for an acetone-free formula. Soak a cotton pad and hold it on the nail for a few seconds to let the remover work its magic, then wipe gently.
Remember, even the best manicures have a lifespan. But with a little care, you can extend the beauty of your blue nail designs and enjoy them for days!
Blue Nail Design Inspiration: Beyond the Basics
While ombre, dots, stripes, and abstract swirls are fantastic starting points, the world of blue nail designs is vast. Here are a few more ideas to inspire your next manicure:
Trendy Blue Nail Design Ideas
- Celestial Blues: Think starry nights with navy or deep blue bases, accented with tiny white dots (stars), silver glitter (moon dust), and perhaps a crescent moon accent.
- Ocean Vibes: Use various shades of blue and green with a fine brush to create wave-like patterns. Add white tips for a foamy sea effect.
- Geometric Blues: Combine different shades of matte and glossy blue with clean, sharp lines and shapes. Think color-blocking or minimalist geometric accents.
- Glitter Gradient: Start with a sheer or light blue polish at the base and layer blue glitter polish towards the tips for a dazzling effect.
- Monochrome Magic: Use five different shades of blue, from the lightest sky blue to the darkest navy, and paint each nail a different shade for a sophisticated monochrome look.
Don’t be afraid to mix and match these ideas! You could have a glitter gradient on one nail and a simple stripe on another. The goal is to have fun and express your personal style. For more visual inspiration, you can explore platforms like Pinterest or Instagram by searching for hashtags like #bluenails, #nailarttutorial, or #diynails.
Common Questions About Blue Nail Designs
Q1: How can I prevent my blue nail polish from staining my nails?
A: Always use a good quality base coat before applying any colored polish, especially darker shades like blue. The base coat acts as a protective barrier. Ensure your base coat is completely dry before applying your blue polish. If you notice any staining after removal, try soaking your nails in lemon juice or using a whitening toothpaste paste.
Q2: My nail polish chips quickly. What can I do?
A: Make sure your nails are completely clean and free of oils before starting. Apply thin coats of polish – thick coats tend to chip more easily. Always cap the free edge of your nail with both your color polish and your top coat (paint a tiny bit along the edge of the nail tip). Reapply top coat every few days.
Q3: I’m not good at painting straight lines. How can I achieve clean stripes?
A: You can use nail vinyls or striping tape for perfect lines. Apply your base color, let it dry completely, then place the vinyl/tape onto the nail. Paint over it with your accent color, then carefully peel off the vinyl/tape while the Polish is still slightly wet. Alternatively, use a very fine nail art brush and steady your hand by resting your pinky fingers together.
Q4: Can I mix gel polish with regular nail polish?
A: It’s generally not recommended to mix gel polish and regular (traditional) nail polish. They have different drying mechanisms and formulations. Gel polish needs a UV/LED lamp to cure, while regular polish air dries. Mixing them can result in poor adhesion, premature chipping, or a finish that never properly dries.
Q5: How do I get a smoother finish on my ombre nails after using a sponge?
A: After the ombre polish is dry, the sponge texture can feel rough. Apply a generous, smooth coat of your shiny top coat. This will help fill in the texture and create a glass-like finish. For an even smoother feel, wait for the first top coat to dry and apply a second one.
Q6: What tools are essential for beginner nail art?