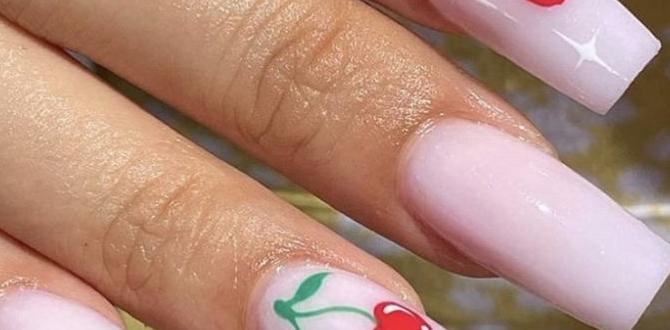
Looking for the perfect birthday nail design? This beginner-friendly guide offers stunning, easy-to-recreate ideas from glitzy and glamorous to chic and minimalist. Discover essential tools, simple techniques, and inspiration to make your nails party-ready and celebrate in style!
Getting your nails just right for your birthday can feel like a big task, right? You want something special, something that screams “celebration!” without being too complicated to do yourself. Whether you’re a total beginner or just looking for some fresh ideas, finding that perfect birthday nail design can be a little tricky. But don’t worry, I’m here to help you nail it! We’ll dive into some gorgeous, totally achievable looks that will have your nails looking as fabulous as you feel. Get ready to discover your next favorite birthday mani!
Why Your Birthday Nails Matter
Your birthday is a time to shine and express yourself! Your nails are like the finishing touch to your whole party outfit. They’re small, but they can make a big statement. A great birthday nail design can boost your confidence and add an extra sparkle to your special day. Think about all the photos you’ll take, from blowing out candles to clinking glasses. You’ll want your nails looking picture-perfect and totally you!
Essential Tools for Your Birthday Mani
Before we jump into the fun designs, let’s gather the right tools. Having these on hand will make your DIY birthday nail design experience so much smoother. You don’t need a whole professional kit; just a few basics will do wonders!
- Nail Polish Remover: For a clean slate and any oopsies.
- Cotton Pads/Balls: To apply the remover.
- Nail File: To shape your nails perfectly.
- Nail Buffer: For a smooth surface and shine.
- Base Coat: Protects your natural nail and helps polish adhere better.
- Top Coat: Seals your design, adds shine, and prevents chipping.
- Tweezers: For picking up small embellishments like glitter or gems.
- Dotting Tools (various sizes): For creating dots, flowers, and delicate patterns.
- Thin Nail Art Brushes: For fine lines, swirls, and intricate details.
- Clear Nail Polish: Can be used as a sticky base for glitter and small gems.
- Optional Embellishments: Glitter, rhinestones, confetti, stickers – whatever sparks your celebratory mood!
Beginner-Friendly Birthday Nail Design Inspiration
These designs are all about making you feel special and looking amazing, with minimal fuss. We’ll focus on techniques that are easy to learn and yield stunning results. Let’s get inspired!
1. The Glamorous Glitter Bomb
Glitter is synonymous with celebration, and what better day than your birthday to go all out? This is super simple and always looks festive.
How to Create the Glitter Bomb:
- Start with a clean, filed nail. Apply a thin layer of your favorite colored base polish. Let it dry completely.
- Apply a generous layer of clear polish or a clear glitter topcoat over your colored base.
- While the clear polish is still wet, dip your nail into a pot of fine or chunky cosmetic glitter. Alternatively, use tweezers to place glitter strategically.
- Gently tap off any excess glitter.
- For a super smooth finish, apply one or two thick layers of a clear top coat over the glitter. This sandwiches the glitter and prevents it from snagging.
Pro Tip: For a more subtle glitter look, use a glitter topcoat over a solid color. For maximum impact, try a glitter gradient or a full glitter accent nail!
2. The Chic Confetti Party
Confetti nails are fun, festive, and surprisingly easy to achieve. They look like little bursts of joy right on your fingertips!
How to Create the Confetti Party:
- Paint your nails with your desired base color (a white, black, or pastel shade works beautifully). Let it dry completely.
- Apply a thin layer of clear nail polish or top coat to one nail.
- Using tweezers, carefully pick up small pieces of nail art confetti (available online or at craft stores) and press them into the wet polish. Arrange them in a desired pattern – scattered, clustered, or in a line.
- Once you’re happy with the placement, allow the clear polish to dry thoroughly.
- Apply one or two layers of glossy top coat over the confetti to seal and smooth the nail surface.
Beginner’s Secret: If you don’t have confetti, you can create a similar effect with tiny dots of different colored polishes, using a thin brush or a dotting tool.
3. The Elegant French Mani Twist
The classic French manicure gets a birthday makeover! Instead of plain white tips, we’re adding a touch of sparkle or color.
How to Create the Elegant French Twist:
- Apply a sheer nude or pink base coat and let it dry.
- Paint the tips of your nails. For a classic look with a twist, use a metallic polish (gold, silver, rose gold) or a jewel tone. You can use a fine brush or a French tip guide sticker for a clean line.
- Option A (Glitter Tip): Apply a strip of glitter polish along the edge where the colored tip meets your base color, or paint the entire tip with glitter.
- Option B (Gem Accent): Place a tiny rhinestone or stud at the base of the nail or on your cuticle line for a touch of bling.
- Finish with a high-shine top coat.
Tip for Straight Lines: If freehanding the tip is difficult, use tape! Apply thin strips of tape across your nail, leaving the tip exposed. Paint the tip, remove the tape while the polish is still slightly wet, and let it dry before applying top coat.
4. The Minimalist Dotting Delight
Sometimes, less is more. A few well-placed dots can be incredibly chic and celebratory without being overwhelming.
How to Create the Dotting Delight:
- Choose a sophisticated base color – a deep navy, a classic red, or even a soft grey.
- Using a dotting tool (or the rounded end of a bobby pin!), dip it into a contrasting polish color (think gold on navy, or white on red).
- Create a few dots on each nail. You can center them, place them near the cuticle, or arrange them in a simple arc.
- For an extra birthday feel, use a metallic or glitter polish for your dots.
- Seal with a clear top coat.
Easy Variations: Try scattering different-sized dots across your nail for a “starry night” effect, or create a simple line of dots along the side of your nail.
5. The Sparkle Ombre
An ombre (or gradient) effect is beautiful and trending. Adding glitter to an ombre makes it perfect for a birthday!
How to Create the Sparkle Ombre:
- Apply your base color. Let it dry.
- Apply a second, lighter color (or a metallic shade) on the tips of your nails.
- While the second color is still wet, use a makeup sponge (a tiny piece works best) to gently dab and blend the color down towards the cuticle, creating a gradient effect. Repeat if needed for more intensity.
- Now, for the sparkle! While the gradient polish is still slightly wet or after applying a layer of clear polish, use a sponge or brush to dab fine glitter onto the tips, blending it down.
- Alternatively, apply a glitter polish as your top coat, focusing more glitter on the tips and less towards the cuticle.
- Seal everything with a generous layer of top coat to smooth any texture.
Tip for Longevity: A good base and top coat are key here! They protect your natural nail and help your gorgeous ombre last longer.
Birthday Nail Design Inspiration Table
Here’s a quick comparison of some popular birthday nail designs to help you choose!
| Design Style | Difficulty Level (Beginner) | Key Features | Best For |
|---|---|---|---|
| Glitter Bomb | Easy | Full coverage sparkle, festive, glamorous | Any party, evening events, making a statement |
| Confetti Party | Easy | Fun, colorful flecks, playful, unique | Daytime parties, casual celebrations, adding a pop |
| Elegant French Twist | Medium (with practice) | Classic shape, modern twist with metallic/glitter tips | Semi-formal events, sophisticated celebrations, chic look |
| Minimalist Dotting Delight | Easy | Simple dots, elegant, subtle charm | Everyday wear, understated elegance, quick touch-ups |
| Sparkle Ombre | Medium | Smooth color fade with glitter accent | Glamorous events, trendy look, eye-catching |
Nail Prep for a Perfect Birthday Manicure
No stunning design will last if your nails aren’t prepped correctly. Think of it as getting your canvas ready!
- Clean Up: Remove any old polish thoroughly.
- Shape Up: File your nails to your desired shape. Always file in one direction to prevent splitting. For a clean look, consider straight lines or a gentle curve.
- Smooth Surface: Gently buff your nails with a nail buffer to create a smooth surface for polish application. This also helps remove any ridges. Be gentle; don’t over-buff.
- Cuticle Care: Gently push back your cuticles using an orange stick or a cuticle pusher. Hydrate your cuticles with oil or lotion afterwards. Healthy cuticles make a big difference!
- Clean Again: Wash your hands to remove any dust or oil from the buffing and cuticle work.
A good base coat is crucial here. It fills in any tiny imperfections on the nail plate and prevents staining, especially with darker polishes.
Choosing Your Birthday Polish Colors
Color is everything when it comes to nail design! For your birthday, consider:
- Metallics: Gold, silver, rose gold, bronze – perfect for instant glam.
- Jewel Tones: Emerald green, sapphire blue, ruby red, amethyst purple – rich and sophisticated.
- Pastels: Soft pinks, blues, lavenders – for a sweet and feminine vibe.
- Classic Reds & Nudes: Timeless and always elegant.
- Black or White: Bold and versatile, great for creating contrast.
Think about your birthday outfit, the venue, and the overall vibe you’re going for. Metallics are always a safe bet for a celebratory feel!
Adding a Little Extra Sparkle: Embellishments
Sometimes, a touch of 3D is just what your birthday nails need!
- Rhinestones & Gems: From tiny crystals to larger rhinestones, these add instant bling. Use a dot of clear polish or nail glue as adhesive and tweezers to place them.
- Glitter: As we’ve seen, glitter is a birthday must-have! Chunky, fine, iridescent – the options are endless.
- Stickers & Decals: For super-easy details, look for nail art stickers or water decals. They can range from tiny stars and hearts to intricate patterns.
When using embellishments, remember the rule of thumb for longevity from nail health experts: “Apply your base coat, then attach your embellishment to a layer of wet polish or glue, and always seal with a generous top coat.” This helps prevent them from falling off too soon.
Taking Care of Your Birthday Nails
You’ve got your fabulous birthday nails on, and you want them to last! Here are some tips:
- Reapply Top Coat: Every 2-3 days, apply a fresh layer of top coat to refresh the shine and add protection.
- Wear Gloves: When doing chores, washing dishes, or gardening, wear gloves to protect your manicure from harsh chemicals and prolonged water exposure.
- Avoid Using Nails as Tools: Don’t use your nails to pick, scrape, or pry. This is a quick way to chip or break them.
- Hydrate: Keep your cuticles and hands moisturized. Dry, brittle nails are more prone to chipping.
FAQ: Your Birthday Nail Design Questions Answered
Q1: How can I make my nail polish dry faster for my birthday?
A1: While it’s not foolproof, try applying polish in thin coats, avoiding thick layers. You can also use a quick-dry top coat or a nail drying spray. For a quick fix, dip your nails into a bowl of ice water for a minute after the polish has set slightly; this hardens the polish from the bottom up.
Q2: I’m a total beginner. Which birthday nail design is easiest?
A2: The Glitter Bomb or Minimalist Dotting Delight are fantastic starting points! They require very few tools and are forgiving if you’re not perfectly precise. A simple glitter topcoat over a solid color is also incredibly easy and effective.
Q3: Can I do nail art with short nails for my birthday?
A3: Absolutely! Short nails are great for nail art. Simple dots, glitter accents, or even a mini French tip can look super chic on shorter lengths. The key is neat application. Short nails are also often less prone to breakage.
Q4: My nail polish always chips quickly. What can I do?
A4: Ensure your nails are completely clean and oil-free before starting. Always use a base coat and a good quality top coat. Crucially, cap the free edge of your nail by running your top coat brush horizontally across the tip at the end of your manicure. Reapplying top coat every couple of days also helps.
Q5: What are the best colors for a birthday if I want something elegant?
A5: For elegance, consider classic jewel tones like deep emerald, sapphire, or ruby red. Metallic shades like rose gold or champagne are also very sophisticated. Alternatively, opt for a chic nude or a soft, sophisticated grey. A French manicure with a metallic tip or a subtle sparkle accent works wonders too.
Q6: Where can I find nail art confetti and other embellishments?
A6: You can find a wide variety of nail art confetti, rhinestones, studs, and other embellishments at most beauty supply stores, drugstores with a beauty section, and online retailers like Amazon, Etsy, or specialized nail art websites. Craft stores also have a good selection.
Conclusion
There you have it – a whole host of stunning, beginner-friendly birthday nail design inspiration! From dazzling glitter bombs to chic, minimalist dots, your nails can be a true reflection of your celebratory spirit. Remember, the most important thing is to have fun with it and choose a design that makes you feel confident and beautiful. Don’t be afraid to experiment with colors, textures, and even a few well-placed embellishments. Your birthday is your day to shine, and with these simple essentials and ideas, your nails will be party-ready. So grab your polish, pick your favorite design, and get ready to make a statement. Happy birthday and happy painting!

