Barbie-inspired pink nail designs offer a fun, vibrant way to express your personal style with a splash of quintessential Barbie glamour. From subtle accents to full-on fuchsia fantasies, these genius ideas cater to every skill level, ensuring you can achieve a chic, playful manicure that’s perfect for any occasion.
Channel Your Inner Barbie: Genius Pink Nail Design Ideas
Dreaming of a manicure that’s as iconic and fun as Barbie herself? You’ve come to the right place! Pink is more than just a color; it’s a mood, a statement, and a whole lot of joy. Whether you’re looking to dip your toes into the trend with a simple touch of pink or go all out with a dazzling design, we’ve got you covered. This guide is packed with genius Barbie-inspired pink nail design ideas that are surprisingly easy to achieve, even if you’re just starting out. Get ready to transform your nails into tiny works of art that scream confidence and playful elegance!
We’ll break down everything you need to know, from picking the perfect shade of pink to simple techniques that yield professional-looking results. Say goodbye to boring nails and hello to a world of dazzling pink possibilities. Let’s dive in and unleash your creativity!
Why Pink Nails Are Always a Good Idea
Pink is incredibly versatile! It can be soft and romantic, bold and sassy, or sweet and dreamy. Barbie, the original trendsetter, has shown us over decades how pink can be sophisticated, fun, and empowering. For anyone wanting to add a pop of color and personality to their look, pink nails are a fantastic choice. They brighten your mood, complement almost any outfit, and are perfect for both everyday wear and special events. Plus, with the resurgence of all things pink thanks to recent pop culture moments, there’s never been a better time to embrace this fabulous hue on your fingertips.
Essential Tools for Your Barbie-Inspired Manicure
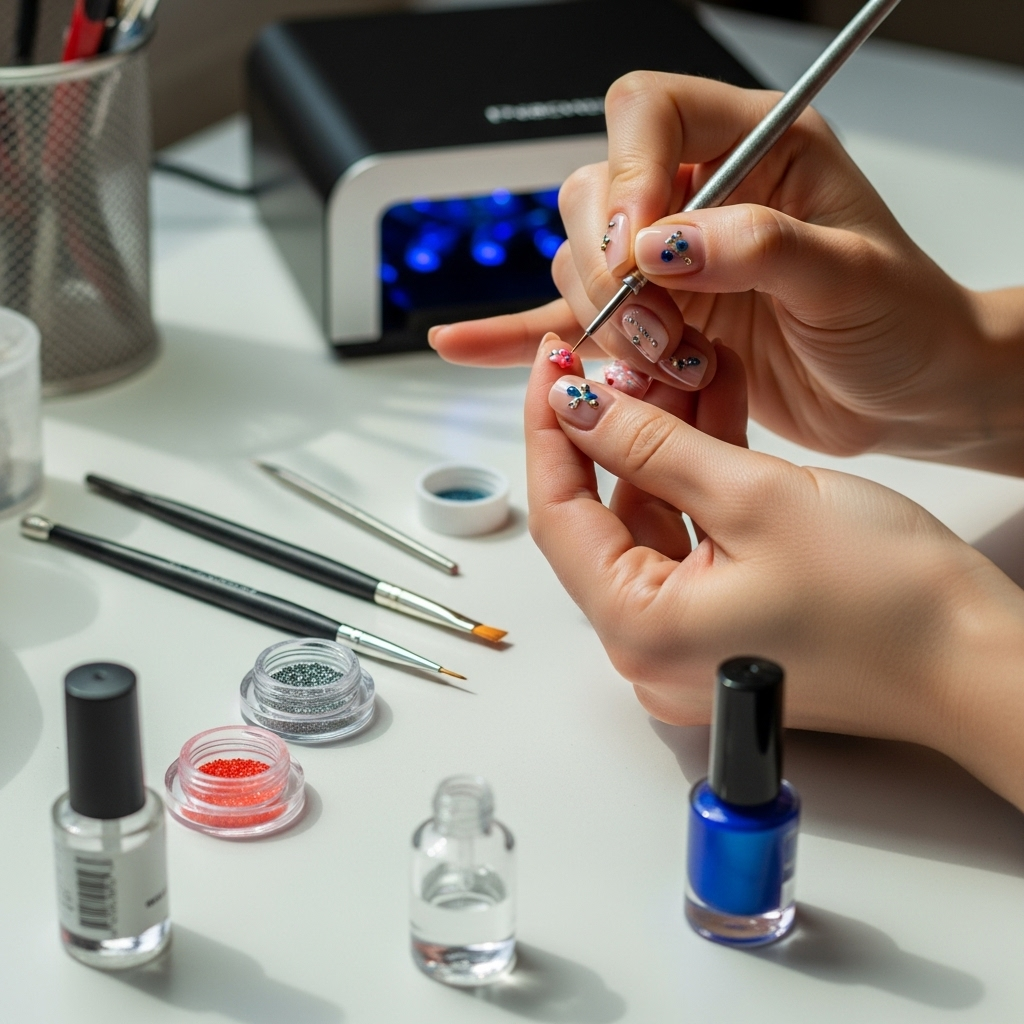
Before we get into the fun designs, let’s gather your superstar toolkit! You don’t need a professional salon setup to create gorgeous Barbie-inspired nails. Here’s what you’ll want to have on hand:
- Nail File and Buffer: For shaping nails and smoothing the surface.
- Cuticle Pusher/Manicure Stick: To gently push back cuticles for a clean canvas.
- Base Coat: Essential for protecting your natural nails and helping polish adhere.
- Top Coat: Seals your design, adds shine, and prevents chipping.
- Your Chosen Pink Nail Polishes: Think classic bubblegum, vibrant fuchsia, soft blush, and even glittery options!
- Dotting Tools: Perfect for creating polka dots and small accents.
- Thin Nail Art Brush: For delicate lines, swirls, and details.
- Dotting Pen/Ballpoint Pen (for simple designs): A household item that can double as a dotting tool in a pinch!
- Toothpick or Orange Stick: Useful for picking up small embellishments or cleaning up edges.
- Nail Polish Remover and Cotton Pads: For mistakes and cleaning up polish around the cuticles.
- Optional Embellishments: Glitter, rhinestones, or small charms can add extra sparkle.
Your Barbie Pink Nail Design Journey: Step-by-Step
Let’s break down how to achieve some of these fabulous looks. Most designs start with the same prep steps, so we’ll cover that first and then jump into specific ideas.
The Foundation: Perfect Prep
A flawless manicure starts with well-prepared nails:
- Cleanse: Ensure your nails are free of old polish and oils. Wash your hands with soap and water.
- Shape: Using your nail file, gently shape your nails to your desired length and style (e.g., square, round, almond). Always file in one direction to prevent splitting.
- Cuticle Care: Apply a cuticle remover or oil, then gently push back your cuticles with a cuticle pusher. Avoid cutting cuticles unless absolutely necessary, as they protect your nail bed.
- Buff: Lightly buff the surface of your nails to create a smooth base for the polish.
- Base Coat: Apply one thin layer of your base coat and let it dry completely. This step is crucial for a long-lasting manicure and to prevent staining.
Genius Barbie-Inspired Pink Nail Design Ideas
Now for the fun part! Here are some brilliant ways to bring Barbie’s signature style to your nails:
1. The Classic Barbie Pink Solid Color
Concept: Sometimes, all you need is a perfectly executed solid shade of pink. This is timeless, chic, and undeniably Barbie.
Shades to Consider:
- Bubblegum Pink: The iconic, vibrant pink synonymous with Barbie.
- Hot Pink/Fuchsia: For a bolder, more modern statement.
- Dusty Rose/Blush Pink: A softer, more muted, yet still very Barbie-esque option.
How-To:
- After your base coat is dry, apply two thin coats of your chosen pink polish.
- Allow each coat to dry for a couple of minutes before applying the next.
- Finish with a generous layer of top coat for shine and protection.
2. Pink French Tips with a Twist
Concept: Elevate the classic French manicure by using different shades of pink for the tips.
How-To:
- Paint your nails with a sheer pink or nude base.
- Once dry, use a thin nail art brush or a French tip guide sticker to paint the tips in a bright pink or fuchsia.
- For extra flair, try alternating tip colors on different fingers or even using a glitter pink for the tips.
- Seal with a top coat.
3. Barbie’s Polka Dots
Concept: Playful, retro, and incredibly easy to achieve. Polka dots are a quintessential Barbie accessory!
How-To:
- Paint your nails in your base pink color (e.g., hot pink).
- Let the polish dry completely.
- Dip a dotting tool (or the end of a pen/pencil) into a contrasting pink polish (e.g., white or a lighter pink).
- Create dots in a pattern on your nails. You can make them uniform or scattered.
- For a different look, use a medium pink base and white or light pink dots.
- Apply top coat once dry.
4. Glitter Bomb Barbie
Concept: Add some serious sparkle! Glitter is a perfect way to embody Barbie’s glamorous side.
How-To Options:
- Full Glitter: Apply two coats of a pink glitter polish over a base coat.
- Glitter Accent Nail: Paint all nails in your chosen solid pink, then apply glitter polish to just one or two accent nails.
- Glitter Gradient: Paint nails solid pink. While the last coat is still wet, use a sponge or brush to dab pink glitter onto the tips, fading it down the nail.
- Glitter French: Apply a solid pink base and use glitter polish for the tips.
Pro Tip: For opaque glitter coverage, you might need to use a sponge to dab the glitter polish onto your nails instead of brushing.
5. The Chic Pink Ombre
Concept: A soft, blended look that’s sophisticated and modern. Ombre nails are a touch of elegance.
How-To:
- Apply a base coat and a sheer nude or light pink polish as your base.
- Take a makeup sponge (the kind used for eyeshadow works well) and dab on two shades of pink polish – perhaps a lighter pink at the cuticle fading into a bolder pink at the tip.
- Gently dab the sponged color onto your nail, layering as needed until you achieve the desired blend.
- Clean up any excess polish around your cuticles with a brush and remover.
- Seal with a top coat.
6. Barbie’s Accent Nail Art
Concept: Keep it simple and stylish by adding a touch of art to just one or two nails.
Ideas:
- A Single Heart: Paint nails in a solid pink and use a fine brush or dotting tool to add a small white or contrasting pink heart on one accent nail.
- Chevrons/Stripes: Use tape or a thin brush to create simple angled lines in a contrasting pink or white on an accent nail.
- Tiny Crown: If you’re feeling ambitious, a small, delicate crown design done in gold or white on an accent nail is pure Barbie royalty.
7. Pink and White Contrast
Concept: Combine classic light pink or blush with crisp white for a clean, fresh look that still pops.
How-To:
- Paint all nails with a classic light pink or blush polish.
- On one accent nail per hand (usually the ring finger), create a simple design using white polish. This could be
- A few strategic white dots.
- A delicate white swirl.
- A simple white stripe or V-shape at the tip.
- Seal with top coat.
8. Rhinestone Sparkle
Concept: For ultimate Barbie glamour, add a few strategically placed rhinestones or gems.
How-To:
- Prepare your nails with your base pink polish and let it dry completely.
- Apply a small dot of top coat or a specialized nail gem glue where you want to place a rhinestone.
- Using tweezers or a fine-tipped orangewood stick, pick up the rhinestone and carefully place it onto the wet top coat/glue.
- Popular spots include the base of the nail, along the cuticle, or as a cluster on an accent nail.
- Seal around the gems without covering them with top coat if possible, or apply a careful layer over the entire nail once the glue is dry.
9. Marble Effect Pink
Concept: A sophisticated take on pink nails, mimicking the elegant swirls of marble.
How-To:
- Apply a base coat and two thin coats of a light pink or white polish. Let dry completely.
- On a clean palette or piece of foil, add drops of two contrasting pink polishes (e.g., hot pink and a medium pink, or white and a blush pink).
- Use a thin nail art brush or toothpick to swirl the colors together slightly – don’t overmix them, you want visible streaks.
- Gently dab this marbled mixture onto your nails, focusing on creating organic, swirling patterns.
- While the marbling is still slightly wet, you can use a toothpick to gently drag or blend lines further.
- Clean up edges and seal with a clear top coat.
10. The “Barbiecore” Gradient
Concept: A bold and trendy way to use multiple shades of pink, blending from light to dark or vice versa.
How-To:
- Apply a base coat.
- On a makeup sponge, apply stripes of several pink polishes, from lightest to darkest.
- Gently dab the sponge onto the nail, starting at the tip and moving down towards the cuticle, rocking the nail slightly to blend the colors.
- Repeat the sponging process lightly if needed for increased opacity or blend.
- Clean up any excess polish around the skin.
- Finish with a generous top coat.
Choosing Your Perfect Pink Shade
The world of pink is vast! To nail your Barbie-inspired look, consider these:
| Pink Shade | Vibe | Best For |
|---|---|---|
| Bubblegum Pink | Classic, playful, iconic | Overall Barbie look, French tips, polka dots |
| Hot Pink/Fuchsia | Bold, vibrant, modern, energetic | Solid color nails, ombre, accent nails |
| Blush Pink/Dusty Rose | Soft, romantic, sophisticated, subtle | Ombre, French tips, minimalist designs, base color |
| Neon Pink | Edgy, summery, eye-catching | Solid color, graphic elements, bold accents |
| Pastel Pink | Sweet, delicate, dreamy | Gradient, subtle dots, baby Barbie look |
| Pink Glitter | Glamorous, festive, sparkly | Accent nails, full glitter mani, French tips |
Making Your Manicure Last: Tips & Tricks
Want your gorgeous Barbie nails to stay looking fabulous? Here are some essential care tips:
- Always Use a Top Coat: This is your best friend for preventing chips and giving a glossy finish. Reapply every 2-3 days for extended wear.
- Thick Polish Coats = Ruined Nails: Always opt for thin, even coats of polish. They dry faster and are less likely to bubble or smudge.
- Give Polish Time to Dry: Patience is key! Allow each coat to dry for at least 2-3 minutes before applying the next, and give the final top coat ample time (15-30 minutes for full hardening).
- Protect Your Nails: Wear gloves when doing household chores like washing dishes or cleaning. This protects both your skin and your manicure from harsh chemicals and excessive water exposure.
- Moisturize: Keep your cuticles and hands hydrated with a good cuticle oil and hand cream. Healthy cuticles make for a neat and tidy nail appearance. For more on nail health, the NHS offers great advice on general nail care.
- Avoid Using Nails as Tools: Resist the urge to scrape, pry, or open things with your nails. Treat them gently!
When Things Go Wrong: Quick Fixes
Oops! A little smudge or a misplaced dot happens to everyone. Don’t stress! Here’s how to salvage your Barbie-inspired masterpiece:
- Smudged Polish: If it’s a small smudge while the polish is still wet, you can often gently smooth it over with the brush in your top coat. For a larger smudge or if it’s already dried, you might need to carefully dab a bit more polish over the area or even restart that nail.
- Polish on Skin: Dip a fine-tipped brush or a lint-free cotton swab into nail polish remover and carefully clean up the edges around your nail. Do this gently to avoid removing polish from your nail itself.
- Uneven Dots/Lines: If the polish is still wet, you might be able to nudge a dot into place with a wet brush. For dried polish, it’s often best to cover the mistake with another design element (like glitter or a small sticker) or clean it up and reapply.
- Bubbles: Bubbles usually happen when polish is applied too thickly or when the polish is old. Clean the nail, apply a thin new coat, and ensure your polish isn’t too old. Sometimes a layer of top coat can help mask minor bubbles.
Frequently Asked Questions About Barbie-Inspired Pink Nail Designs
Q1: What’s the easiest Barbie pink nail design for beginners?
A1: The easiest is a classic solid color in a vibrant or soft pink. Alternatively, simple polka dots using a dotting tool or even a pen tip are very beginner-friendly and super cute!
Q2: Can I use different shades of pink in one manicure?
A2: Absolutely! Mixing shades of pink is encouraged for the Barbie look. You can do a gradient using multiple pinks, or use a light pink on some nails and a bright fuchsia on others.
Q3: How do I make my pink nail polish look shiny and not dull?
A3: Always finish your manicure with a high-quality, glossy top coat. Applying it in a thick, even layer will give you