Ballerina nail design ideas offer a sophisticated, chic silhouette by shaping nails into a soft, tapered rectangle with a rounded tip. They’re essential for a polished look, complementing any style and providing a perfect canvas for stunning nail art. Discover simple ways to achieve this elegant shape and explore beautiful design inspiration!
Are you looking for a nail shape that’s both elegant and on-trend? Ballerina nails, also known as coffin nails, are a fantastic choice! They offer a chic, sophisticated look that can make your hands appear longer and more slender. But don’t worry if you’re new to nail shapes; achieving them is simpler than you might think. This guide will walk you through everything you need to know, from how to get the perfect ballerina shape right at home to a treasure trove of stunning design ideas you’ll absolutely love. Get ready to elevate your manicure game!
What Exactly Are Ballerina Nails?
Ballerina nails, affectionately nicknamed “coffin nails” due to their resemblance to a coffin shape, are characterized by their straight, tapered sides that meet a rounded, blunt tip. Think of a ballet slipper – hence the name “ballerina”! This popular nail shape offers a modern and elegant aesthetic. It’s a great way to add a touch of glamour to your look, whether you prefer short, natural nails or dramatic, long extensions.
The beauty of the ballerina shape lies in its versatility. It looks fantastic on fingers of all lengths and can be achieved with both natural nails and artificial enhancements like acrylics or gel extensions. The straight sides and flat tip create a clean, sharp line that frames the nail bed beautifully, making it an ideal canvas for various nail art designs.
This shape is especially flattering for those with slender fingers, as the straight lines tend to elongate them further. However, don’t let that deter you if you have shorter or wider fingers! With the right length and styling, ballerina nails can look stunning on everyone. It’s all about finding what makes you feel fabulous!
Why Choose Ballerina Nails? The Essential Appeal
Ballerina nails aren’t just a fleeting trend; they’ve become a staple in the nail world for several compelling reasons. Their essential appeal lies in their ability to blend sophistication with a touch of boldness.
- Elegance and Sophistication: The clean lines and tapered silhouette exude a refined charm that instantly elevates your style. They’re perfect for both everyday wear and special occasions.
- Flattering Silhouette: The straight edges and blunt tip can create an illusion of longer, more slender fingers, making your hands look graceful.
- Versatile Canvas: This shape is a dream for nail artists! It provides ample flat surface area that’s perfect for intricate designs, bold colors, and sparkling embellishments.
- Modern Aesthetic: Ballerina nails offer a contemporary edge, setting you apart with a chic and fashion-forward look.
- Durability (with care): While the defined tip requires a bit of attention, the overall shape is surprisingly sturdy, especially when achieved with enhancements like gel or acrylics.
Whether you’re aiming for a minimalist chic look or a statement-making manicure, ballerina nails provide that perfect foundation.
How to Achieve the Perfect Ballerina Nail Shape at Home
Getting that coveted ballerina shape at home is totally achievable! It just takes a little patience and the right tools.
Tools You’ll Need
Before you start filing, gather your essentials:
- Nail clippers
- A good quality nail file (a 180-grit file is great for shaping natural nails, and a 240-grit file is good for refining)
- A buffer block (optional, for smoothing)
- Cuticle pusher or orange wood stick
- Nail nippers or cuticle scissors (if needed)
- Top coat, base coat, and your chosen polish colors
Step-by-Step Guide to Shaping Your Nails
- Prep Your Nails: Start with clean, dry nails. Remove any old polish. Gently push back your cuticles with a cuticle pusher. If needed, carefully trim any excess cuticle, but be gentle – healthy cuticles are key!
- Trim to Length: If your nails are long, use nail clippers to trim them down to your desired starting length. It’s easier to shape from a shorter base than to file down a very long nail.
- Start Filing the Sides: This is where the magic happens! Imagine a straight line from the top of your cuticle towards the free edge of your nail. File each side with your nail file, moving in one direction, to create that straight, tapered edge. Aim for gentle, consistent strokes.
- Shape the Tip: Once you have your tapered sides, use your file to gently create the blunt, squared-off tip. Hold the file perpendicular to the edge you’ve just created and file across the tip until it’s flat and blunt. Don’t make it too sharp; a slightly rounded blunt edge is key to the true ballerina look.
- Smooth and Refine: Go over your nails again with the file to ensure both sides are even and the tip is perfectly straight and blunt. You can use a buffer block to smooth out any rough edges and the surface of your nail.
- Polish Time: Apply a base coat, then your favorite polish color(s). Finish with a durable top coat to seal the deal and add shine!
Remember to file gently and in one direction to avoid weakening your natural nails. If you’re working with acrylics or gel extensions, your nail technician will expertly sculpt this shape for you.
Stunning Ballerina Nail Design Ideas for Every Style
Now for the fun part! Ballerina nails are a fantastic canvas for creativity. Here are some dazzling design ideas to inspire your next manicure:
1. Classic & Elegant Nudes
Nude shades are timeless for a reason. On ballerina nails, a soft nude or beige elongates the fingers further, creating an understated yet incredibly chic look. This is your go-to for a polished, sophisticated vibe that goes with absolutely everything.
- Shades: Think milky beige, creamy blush, soft taupe, or even a pale peachy-nude.
- Finish: A glossy finish is classic, or try a chic matte for a modern twist.
- Subtle Accents: Add a tiny gold foil strip at the cuticle, a single rhinestone on one nail, or a delicate French tip in a slightly lighter nude.
This look is perfect for professional settings or when you want your nails to complement rather than dominate your outfit.
2. Bold & Beautiful Solid Colors
Don’t underestimate the power of a single, vibrant color! Ballerina nails really make solid colors pop, giving a strong and confident statement.
- Deep Jewel Tones: Emerald green, sapphire blue, deep ruby red, or amethyst purple look incredibly luxurious.
- Classic Reds & Blacks: A perfect crimson or a sultry dark shade never goes out of style.
- Trendy Pastels: Soft lavender, mint green, baby blue, or pale pink are dreamy for spring and summer.
- Brights: Think electric blues, hot pinks, or sunny yellows for a personality-packed look.
The straight lines and blunt tip amplify the impact of these strong colors.
3. Chic French Tips with a Twist
The French manicure gets a modern update on ballerina nails. Move beyond the classic white!
- Reverse French: Instead of the tip, paint a fine line along the cuticle.
- Color Blocking: Use two complementary colors – one for the nail bed and one for the tip.
- Glitter Tips: Swap white for a shimmering glitter for a festive feel.
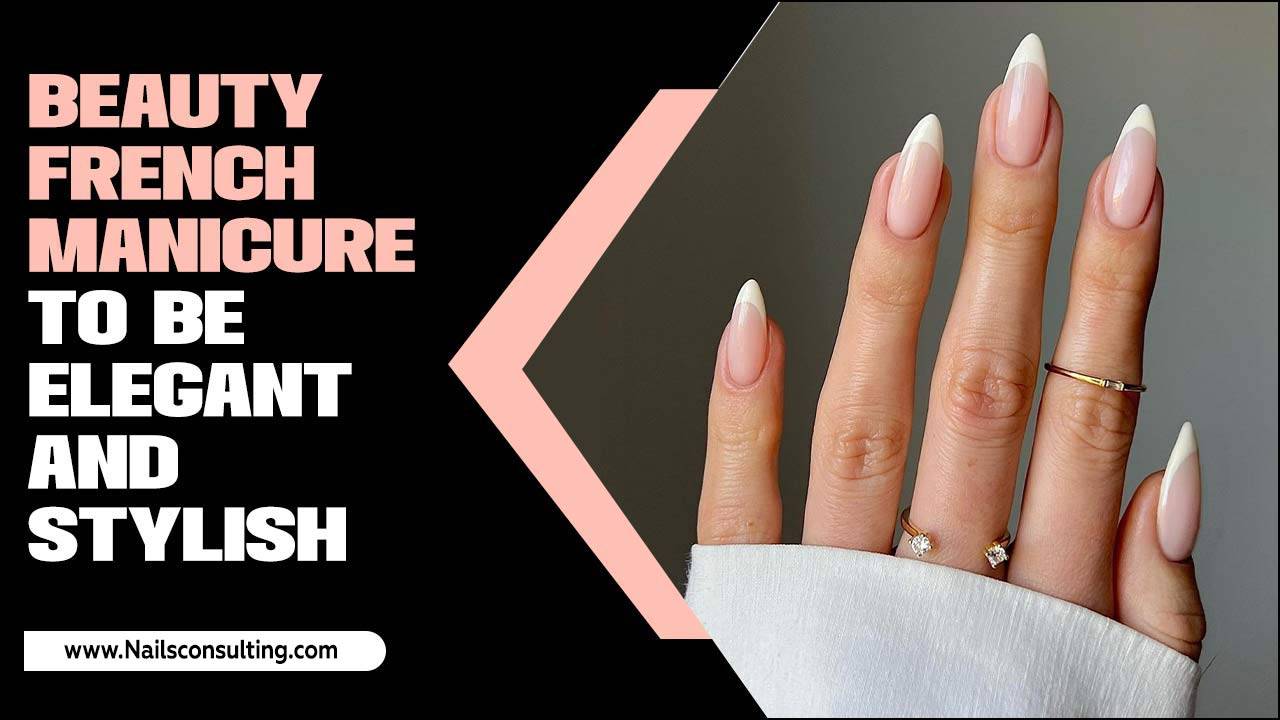
- Micro French: A super-fine line of color on the very edge of the tip for subtle elegance.
- Ombre French: A gradient of color fading into the tip.
These variations add a playful yet sophisticated touch.
4. Glamorous Glitter & Sparkle
Ballerina nails are the perfect stage for all things sparkly! Whether it’s a full glitter nail or strategically placed accents, sparkle is always a good idea.
- Full Glitter Coverage: Opt for a full nail of dazzling glitter in silver, gold, rose gold, or any color you love.
- Glitter Ombre: Start with a solid color at the cuticle and blend glitter upwards to the tip.
- Accent Nail: Dedicate one or two nails to a full glitter design while keeping the others solid.
- Glitter Stripes: Add thin or thick stripes of glitter across the nail.
This is perfect for parties, holidays, or whenever you need a little extra shine.
5. Sophisticated Marble and Swirls
Marble and abstract swirl designs offer an artistic and luxurious feel that looks stunning on the clean lines of ballerina nails.
- Classic White & Grey Marble: Timeless and elegant.
- Colored Marble: Experiment with pink and gold, blue and white, or black and marble.
- Abstract Swirls: Use fine brushes to create intricate, flowing lines in contrasting colors.
- Gold Leaf Accents: Add delicate flecks of gold leaf over a marble or solid base for extra luxe.
These designs add a unique, artistic flair to your manicure.
6. Minimalist Geometric Accents
Sometimes, less is more! Geometric designs add a modern, minimalist touch that perfectly complements the shape.
- Single Line: A thin vertical or horizontal line in metallic gold or silver.
- Half-Moon/Cut-Out: A small circle or half-moon shape at the cuticle or on the nail.
- Simple Shapes: Tiny dots, triangles, or squares placed strategically.
- Negative Space: Designs that incorporate the natural nail or polish-free areas.
These subtle details make a big impact.
7. Pretty Pastels & Floral Motifs
Pastel shades paired with delicate floral designs create a soft, romantic, and very feminine look.
- Floral Decals: Easy-to-apply stickers or water decals featuring small flowers.
- Hand-Painted Flowers: If you’re artistic, try painting tiny blossoms, leaves, or vines.
- Ombre Pastels: A gentle gradient of soft colors across the nail.
- Pearlescent Finish: A shimmery, iridescent finish over pastels adds ethereal beauty.
This is a fantastic choice for spring and summer, or for anyone who loves a touch of sweetness.
Ballerina vs. Almond Nails: What’s the Difference?
It’s easy to confuse ballerina and almond nails because they both feature tapered sides. However, there’s a key difference:
- Ballerina/Coffin Nails: Have straight tapered sides that end in a blunt, squared-off tip.
- Almond Nails: Have curved tapered sides that end in a sharp, pointed tip.
Think of it this way: ballerina nails are structured and sharp-edged, while almond nails are softer and more rounded at the very tip. Both are incredibly chic, but they offer slightly different aesthetics.
Maintaining Your Ballerina Nails
To keep your ballerina nails looking their best and to prevent breakage, especially if you have them on natural nails:
- Moisturize: Keep your cuticles and hands hydrated with cuticle oil and hand cream. This is crucial for nail health.
- Be Gentle: Avoid using your nails as tools to pry or scrape. The blunt tips can still catch on things.
- Touch-Ups: File any snags or rough edges promptly to prevent them from worsening.
- Protective Top Coat: Reapply a clear top coat every few days to refresh the shine and strengthen the nail.
- Consider Enhancements: If you love the shape but find your natural nails too weak, acrylics or gel extensions can provide the necessary strength and durability.
Regular maintenance will ensure your beautiful ballerina nails stay strong and gorgeous.
FAQs About Ballerina Nails
Can I get ballerina nails on short nails?
Yes, you absolutely can! While the shape is often associated with longer nails, you can create a shorter, more subtle ballerina shape. File the sides straight and then just slightly blunt the tip. It adds a touch of polish even to shorter lengths.
Are ballerina nails difficult to maintain?
They require a bit more care than a squoval shape, especially if your natural nails are thin. The key is to be gentle and avoid using your nails as tools. A strong top coat and regular moisturizing will help. If you often break nails, consider gel or acrylic enhancements.
Which nail polish colors look best on ballerina nails?
Almost any color looks fantastic! Bold, dark colors like deep reds, blues, and purples show off the shape beautifully. Nudes and pastels offer an elegant, elongated look. Metallics and glitter are perfect for glam! It really depends on your personal style.
Do ballerina nails make fingers look longer?
Yes, generally they do! The straight, tapered sides create an illusion of length and slenderness, making fingers appear more graceful. This effect is usually more pronounced on longer ballerina nails.
How often should I get infills for acrylic ballerina nails?
For acrylic or gel extensions in the ballerina shape, you’ll typically need infills every 2-3 weeks. This is when your nail technician will fill in the gap between your natural nail and the extension as your nail grows out, ensuring the strength and shape are maintained.
Is it better to get ballerina nails done at a salon or DIY?
For the perfect, sharp, and symmetrical shape, especially with extensions, a salon is recommended. If you have steady hands and good quality files, you can achieve a lovely ballerina shape on natural nails at home. Just take your time and be precise!
Conclusion
Ballerina nails are more than just a shape; they’re a style statement. Their elegant lines and modern silhouette make them a versatile and stunning choice for anyone looking to enhance their manicure. From chic nudes and bold solids to intricate marble and sparkling glitter designs, the possibilities are endless. Whether you’re shaping them yourself at home or visiting your favorite nail tech, embracing the ballerina nail trend is a fantastic way to show off your personal style and add a touch of sophistication to your look. So go ahead, file those sides straight, blunt those tips, and get ready to rock some seriously beautiful nails!


