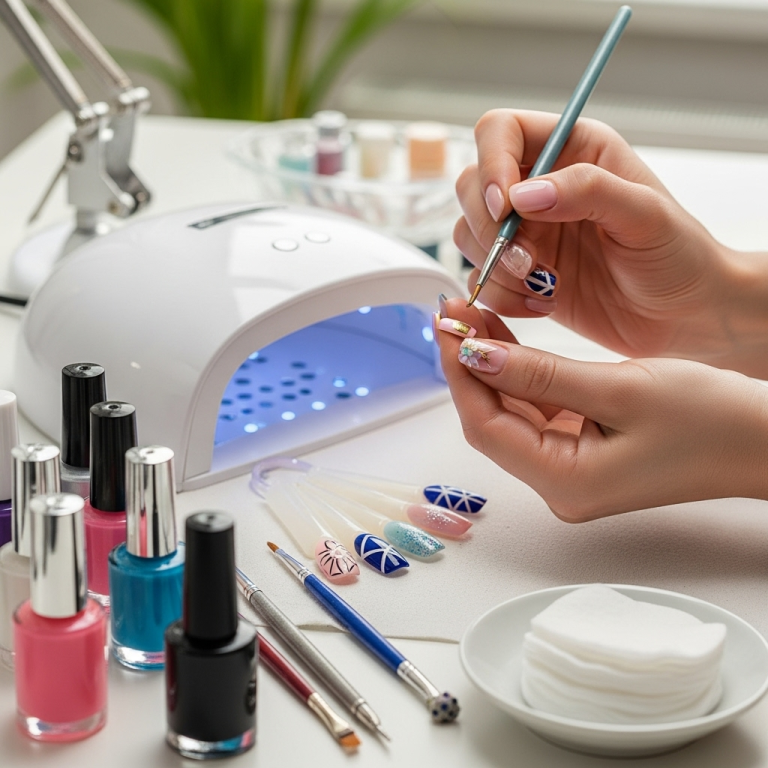
Discover the prettiest baby shower nail designs! From soft pastels to shimmering neutrals, find stunning colors and easy ideas to make your nails look amazing for the celebration. Learn how to create a chic, celebratory manicure that perfectly complements the joyous occasion.
Planning a baby shower is such a special time, full of excitement and anticipation! You want everything to be just perfect, and that includes your nails. But figuring out the right baby shower nail design can feel a little overwhelming. What colors are best? What style feels festive yet elegant? Don’t worry, I’m here to help you find the most beautiful and easy-to-achieve looks. We’ll dive into gorgeous color palettes and simple design ideas that will make your hands the prettiest accessory at the party!
Why Your Baby Shower Nails Matter
Think about all those photos and sweet moments during the shower! Your hands will be holding gifts, cradling a new baby’s items, and clapping for the parents-to-be. Having lovely nails adds a touch of polish and celebration to these memories. It’s a small detail that can make you feel extra special and put-together during a big event. Plus, choosing the right baby shower nail design is a fun way to express your personal style and get into the celebratory spirit!
Top Baby Shower Nail Color Palettes Revealed
The colors you choose for your baby shower nail design can really set the tone. For these joyous occasions, soft, pretty, and calming colors are usually the stars. They look elegant, photograph beautifully, and often tie into the gentle theme of a new arrival.
1. The Soft Pastel Dream
Pastel colors are a timeless favorite for a reason! They’re delicate, cheerful, and evoke a sense of sweetness. Think of colors like baby blue, soft pink, mint green, lavender, and creamy yellow. These shades are perfect for almost any baby shower theme and look stunning on all skin tones.
Shades to Embrace:
- Baby Blue: Classic and serene, perfect for a boy or a gender-neutral theme.
- Soft Pink: Sweet and tender, ideal for a girl’s shower or a generally feminine look.
- Mint Green: Fresh and calming, a lovely choice that’s a bit unexpected.
- Lavender/Lilac: Elegant and dreamy, adding a touch of sophistication.
- Peach/Coral: Warm and inviting, bringing a gentle pop of color.
- Butter Yellow: Cheerful and bright, like a ray of sunshine.
2. The Elegant Neutrals
Sometimes, simple is best! Neutral colors offer a sophisticated and understated look that’s always in style. Think beyond basic beige – we’re talking creamy whites, soft nudes, delicate grays, and even subtle shimmers.
Chic Neutral Options:
- Creamy White: A clean, sophisticated option that’s brighter than plain white.
- Soft Nudes: Shades that match or complement your skin tone create a “your nails but better” look.
- Light Gray: A modern and chic alternative to black, offering a bit of edge without being overpowering.
- Champagne/Rose Gold Shimmer: Adds a touch of subtle sparkle and glamour.
- “Milky” Tones: Translucent, milky finishes in white or pastel hues are very on-trend and delicate.
3. The Gentle Ombré Effect
Ombré, where colors blend smoothly into one another, is a beautiful and popular choice. For baby showers, opt for ombré using pastels or neutrals. Imagine a soft pink fading into a creamy white, or a gentle gradient of blues.
Ombré Inspirations:
- Pink-to-White: A classic, romantic look.
- Blue-to-White/Gray: Serene and sophisticated.
- Peach-to-Nude: Warm and natural.
- Multi-color Pastel Gradient: A playful and vibrant, yet soft, effect.
4. The Subtle Sparkle & Shine
A little bit of shimmer can elevate any baby shower nail design. This doesn’t mean full-on glitter bombs (unless that’s your vibe!). Think delicate holographic flakes, a fine iridescent shimmer topcoat, or a single accent nail with a subtle glitter polish.
Sparkle Ideas:
- Iridescent Topcoat: Apply over any base color for a pearly, color-shifting effect.
- Fine Glitter Polish: Use as an accent nail or a sheer wash of sparkle.
- Pearlescent Finishes: These give a soft, luminous glow without harsh glitter.
- Holographic Flakes: Tiny flakes that catch the light for a magical, understated shimmer.
Easy & Stunning Baby Shower Nail Designs to Try
Now that we’ve covered the colors, let’s talk designs! You don’t need to be a nail art pro to create beautiful looks for a baby shower. Here are some simple yet stunning ideas:
1. The Classic French Manicure Upgrade
The French manicure is elegant and timeless. For a baby shower twist, swap the stark white tip for a soft pastel color or a shimmery shade. Or, try a “reverse French” where the color is at the cuticle line!
How to Achieve It:
- Apply a sheer nude or soft pink base coat.
- Using a thin brush or nail polish pen, carefully paint a delicate line of your chosen pastel or shimmer color on the tip of each nail.
- Alternatively, for a reverse French, paint a curved line along the cuticle.
- Let dry completely and seal with a shiny top coat.
2. The Accent Nail Wonder
This is one of the easiest ways to add a little something extra. Paint all your nails one lovely color (like a soft blue or creamy white), and then make one nail on each hand special. This could be with a subtle glitter polish, a delicate floral sticker, or a sprinkle of tiny rhinestones.
Accent Nail Ideas:
- Glitter Accent: Paint one nail with elegant champagne glitter.
- Sticker Accent: Use a tiny, cute baby-themed sticker (like a pacifier or baby footprint) on one nail. Ensure they are designed for nails!
- Minimalist Dot: Place a single, small pearl or rhinestone near the cuticle of an accent nail.
- Stripe/Geometric Accent: Paint a thin vertical or horizontal line in a contrasting pastel on your accent nail.
3. The Delicate Dotting Detail
Tiny dots are incredibly chic and surprisingly simple to create. Use a dotting tool (or the tip of a bobby pin!) to place small dots along the cuticle, at the tip of the nail, or scattered across the nail bed.
Dotting Techniques:
- Cuticle Dots: Place a few small dots in a row just above your cuticles.
- Tip Accent: Add a few dots to the very edge of your nail tips.
- Scattered Dots: Randomly place small dots across the nail for a whimsical look.
- Color Play: Use a slightly darker or lighter shade of your base color for the dots.
4. The Gradient (Ombré) Fingertips
A soft ombré effect transitions beautifully from one color to another. You can achieve this at home with a makeup sponge!
DIY Ombré Steps:
- Paint your nails with a light base color (like white or nude).
- Apply two complementary pastel colors side-by-side onto a small makeup sponge or textured paper.
- Gently dab the sponge onto the tip of your nail, allowing the colors to blend. Repeat until you achieve the desired gradient.
- Clean up any excess polish around your nails with a brush dipped in nail polish remover.
- Seal with a glossy top coat.
For a more professional look and easier application, you can also find specific ombré polishes or topcoats that create the effect with fewer steps.
5. The Polka Dot Pop
Polka dots are playful and sweet, perfect for a baby shower vibe. You can make them small and dainty or a bit bolder.
Polka Dot Tips:
- Start with a solid pastel base color.
- Use a dotting tool or the end of a pencil eraser dipped in a contrasting color to create your dots.
- Aim for evenly spaced dots or a more random, scattered pattern depending on your style.
- A small, single polka dot placed strategically on an accent nail can also be very charming.
6. The “Barely There” Sheer Polish
Sometimes, the most elegant look is the simplest. A beautifully applied sheer polish in a milky white, soft pink, or neutral tone can look incredibly chic and sophisticated. It’s about healthy-looking, polished nails.
Why It Works:
- Universally Flattering: Looks good on everyone.
- Effortless Chic: Gives a clean, polished appearance.
- Easy to Maintain: Small chips are less noticeable.
- Perfect Base: Great for adding subtle details like a tiny metallic stripe at the cuticle.
DIY Baby Shower Nail Design: Essential Tools
You don’t need a professional setup to create beautiful baby shower nails at home. Here are some basic tools that will make the process much easier and give you salon-worthy results:
| Tool | Purpose | Why It’s Great for Baby Shower Nails |
|---|---|---|
| Nail File & Buffer | Shaping nails and smoothing the surface. | Essential for a neat base. A smooth nail makes any polish look better. |
| Cuticle Pusher/Orange Stick | Gently pushing back cuticles. | Clean cuticles make your nails look longer and more refined. |
| Base Coat | Protects natural nails and helps polish adhere. | Crucial for nail health and a smooth, long-lasting manicure. |
| Top Coat | Adds shine and protects polish from chipping. | Keeps your baby shower nail design looking fresh throughout the event. A glossy finish enhances pastel colors beautifully. |
| Dotting Tools (or Toothpicks/Bobby Pins) | Creating dots and small details. | Perfect for simple dot designs or adding tiny accents. Many dotting tool sets are inexpensive. |
| Thin Nail Art Brush | Creating fine lines, outlines, or small patterns. | Ideal for French tips, delicate stripes, or outlining simple shapes. |
| Clean-up Brush (or Angled Brush) | Cleaning excess polish from around the nail. | Makes your manicure look neat and professional, even if you’re a beginner. |
| Makeup Sponge/Sponge Applicator | Creating ombré or gradient effects. | A simple household item that can create beautiful blended color looks. |
Step-by-Step: Achieving a Simple Pastel Ombré Baby Shower Nail Design
Let’s walk through creating a beautiful, soft pastel ombré look. This design is achievable for beginners and looks incredibly elegant!
Before You Start: Nail Prep
Good prep makes a big difference! Ensure your nails are clean, dry, and free of old polish. Gently push back your cuticles and shape your nails with a file to your desired length and shape. A smooth surface is key for polish to adhere well and look its best. If you have any rough spots, a gentle buffing can help.
Materials You’ll Need:
- Base Coat
- Two complementary pastel polishes (e.g., light pink and creamy white)
- A makeup sponge (a dense, fine-pored one works best)
- Scissors (to cut the sponge)
- Top Coat
- Clean-up brush and nail polish remover
The Ombré Application:
- Apply Base Coat: Paint one thin coat of your base coat over each nail. Let it dry completely. This protects your natural nails and gives the polish something to grip onto, helping your manicure last longer.
- Apply First Polish Color: Paint your nails with the lighter pastel color all over. Let this dry completely. This lighter shade will act as the base for your blend.
- Prepare the Sponge: Cut a small piece from your makeup sponge – about an inch wide and long enough to cover the tip of your nail.
- Load the Sponge: Apply lines of your two chosen pastel polishes side-by-side onto the cut edge of the sponge. Don’t overload it; a couple of good swipes should do.
- Create the Gradient: Gently press and dab the sponge onto the tip of your nail. You want to transfer the polish from the sponge to your nail, allowing the colors to blend where they meet. Press lightly and lift. Avoid harsh scrubbing.
- Repeat for Intensity: You might need to dab the sponge onto the nail a few times to build up the color intensity and blend. You can reapply polish to the sponge as needed.
- Clean Up: Once the ombré is applied to all nails, it’s time for cleanup. Dip your clean-up brush into nail polish remover and carefully trace around your nails to remove any excess polish that got onto your skin. This step is crucial for a professional finish.
- Apply Top Coat: Once the polish is completely dry, apply a generous coat of shiny top coat over all your nails. This seals in the design, adds a beautiful glaze, and helps prevent chips and smudges, making your beautiful baby shower nail design last.
This technique might take a little practice, but the result is a soft, blended effect that’s perfect for a gentle celebration. For more tips on nail care and polishing techniques, resources like the National Center for Biotechnology Information (NCBI) offer insights into nail health and safety, which are always good to remember.
Nail Care Tips for a Lasting Manicure
Want your beautiful baby shower nail design to last through all the festivities? A little extra care goes a long way!
- Moisturize Regularly: Keep your hands and cuticles hydrated. Dryness can lead to hangnails and make polish chip more easily. Use a good hand cream and cuticle oil daily.
- Wear Gloves: When doing chores like washing dishes or cleaning, wear rubber gloves. Water and harsh cleaning products are the enemies of nail polish.
- Avoid Using Nails as Tools: Resist the urge to use your nails to pry things open or scratch surfaces. This is a quick way to chip or break polish.
- Touch Up As Needed: If you notice a tiny chip, a quick dab of top coat might save it for a bit longer.
- Gentle Removal: When it’s time to remove your polish, use an acetone-free remover if possible, especially if your nails are prone to dryness. Soak a cotton ball, press it onto the nail for a few moments, and then gently wipe away.
Baby Shower Nail Design Trends for 2024
While pastels and neutrals are always in, here are some fresh trends you might see emerging for 2024 baby shower nail designs:
- “Milky” Finishes: Translucent, soft polishes that look like you’ve layered a sheer glaze over your natural nail.
- Subtle Chrome Accents: Not full chrome nails, but perhaps a delicate chrome line at the cuticle or a soft pearlescent chrome shimmer over a pastel.
- Minimalist Florals: Tiny, delicate hand-painted flowers in soft watercolors on an accent nail.
- Pearlescent Sheens: Polishes with a soft, iridescent sheen rather than chunky glitter.
- “Clean Girl” Nails: This trend emphasizes healthy-looking, perfectly groomed nails with a sheer or nude polish, plus a shiny topcoat.
Frequently Asked Questions
Q1: What are the most popular nail colors for a baby shower?
A1: Soft pastels like baby blue, pink, mint, and lavender are very popular. Elegant neutrals like creamy whites, soft nudes, and subtle shimmers are also excellent choices. The key is to choose gentle, pretty, and calming shades.
Q2: Can I do a baby shower nail design myself at home?
A2: Absolutely! Simple designs like solid colors, accent nails with glitter, basic dotting, or even a DIY ombré are very achievable for beginners with just a few basic tools.</p


