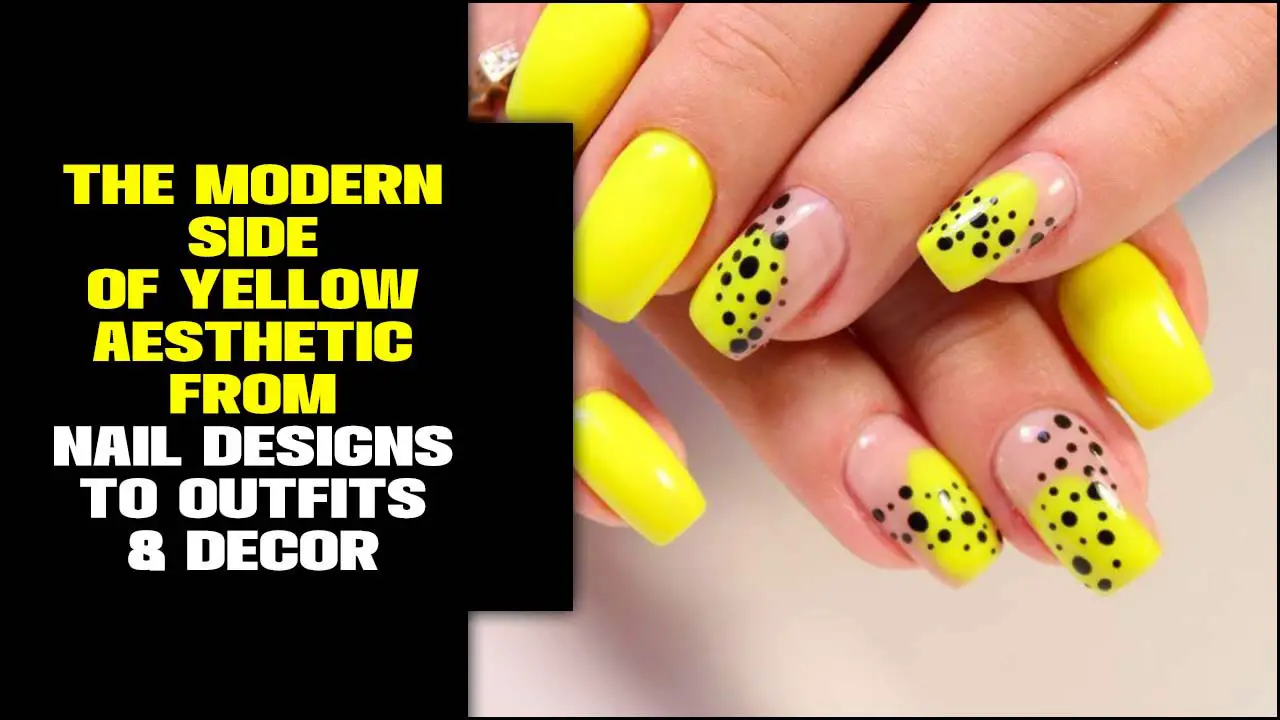
Aesthetic nail designs are all about expressing your personal style with beautiful, eye-catching looks. Discover simple, elegant, and easy-to-achieve essential designs perfect for any beginner wanting to up their nail game. Get ready to create stunning manicures that feel uniquely you!
Hey there, nail enthusiasts! Are your nails feeling a little… plain? Do you scroll through Pinterest and Instagram, dreaming of those gorgeous, artistic manicures, but thinking, “I could never do that!”? It’s totally common to feel that way! But guess what? Creating beautiful, “aesthetic” nail designs isn’t just for professionals or super-talented artists. It’s for everyone who wants to add a little sparkle, color, and personality to their fingertips. We’re going to break down some genius, essential looks that are totally achievable, even if you’re just starting out. Get ready to unleash your inner nail artist and discover how easy it can be to create stunning manicures that make you feel amazing!
Frequently Asked Questions About Aesthetic Nail Designs
What exactly are “aesthetic nail designs”?
Aesthetic nail designs are manicures that focus on creating a visually pleasing and stylish look. They often incorporate trending colors, patterns, shapes, and finishes to express a certain vibe or personal style. Think elegant, minimalist, a bit whimsical, or bold – whatever feels “you”!
Are aesthetic nail designs difficult for beginners?
Not at all! While some designs can be intricate, many aesthetic looks are surprisingly simple. This guide focuses on easy-to-learn techniques and designs that are perfect for beginners. You’ll be surprised at what you can create with a few basic tools and a little practice!
What are the essential tools I need for DIY aesthetic nails?
For most beginner-friendly designs, you’ll need nail polish in your chosen colors, a good base coat and top coat, nail polish remover, cotton pads, and possibly a few simple dotting tools or a thin brush. We’ll go into more detail about these later!
How can I make my DIY nail designs last longer?
Proper preparation is key! Always start with clean, dry nails. Apply a good quality base coat to help polish adhere and prevent staining. Finish with a generous layer of a durable top coat, ensuring you cap the free edge (paint a little on the tip of your nail) to seal it. Reapply top coat every few days if needed.
Where can I find inspiration for aesthetic nail designs?
Social media platforms like Pinterest and Instagram are fantastic resources! Search for hashtags like #aestheticnails, #nailartbeginners, #simplenails, or #diynails. You can also find inspiration in fashion, art, nature, or even your favorite patterns and colors.
Can I achieve smooth, professional-looking finishes at home?
Yes! While practice makes perfect, you can achieve great results. Using a quality top coat is crucial for shine. For a super smooth finish, ensure your base coats and color coats are applied thinly and evenly. Letting each layer dry properly also makes a big difference.
What Makes a Nail Design “Aesthetic”?
Simply put, an “aesthetic nail design” is one that looks intentional, stylish, and pleasing to the eye. It’s about creating a mood or a vibe on your fingertips. Think of different aesthetics like:
- Minimalist: Clean lines, neutral colors, simple shapes.
- Chic: Elegant colors, subtle sparkle, sophisticated patterns.
- Trendy: Incorporating current popular colors, textures, or motifs.
- Personalized: Reflecting your unique interests, hobbies, or favorite art styles.
The best part? An aesthetic nail design is less about following rigid rules and more about expressing your personal sense of beauty. What one person finds aesthetic, another might too, or they might have their own beautiful interpretation!
Your Essential Nail Art Toolkit for Beginners
You don’t need a whole nail salon in your bathroom to create awesome designs. Here are the basics that will get you started:
1. Base Coat and Top Coat
These are non-negotiable! A good base coat protects your natural nails from staining and helps polish adhere better. A strong top coat seals your design, adds incredible shine, and helps prevent chips. Think of them as the invisible guardians of your manicure’s beauty and longevity.
2. Nail Polish in Your Chosen Colors
Start with a few core colors you love. Neutrals like beige, cream, and soft grays are super versatile. Then add some pops of color or metallics that match your style. Don’t forget the power of white and black for creating contrasts and art!
3. Precision Tools (Optional but Helpful!)
While you can do a lot with a regular polish brush, a few simple additions can elevate your designs:
- Dotting Tools: These have little metal balls on the end, perfect for creating dots, swirls, and tiny flowers.
- Thin Nail Art Brush: Great for drawing fine lines, French tips, or delicate details.
- Tweezers: Useful for picking up small embellishments like glitter or tiny rhinestones.
You can find these online or at most beauty supply stores. For beginners, a basic dotting tool set is a fantastic investment.
4. Clean-Up Supplies
Mistakes happen, and that’s okay! Have these on hand:
- Nail Polish Remover: Your go-to for fixing smudges.
- Cotton Pads or Swabs: For applying remover precisely.
- An Old Small Brush: A clean, inexpensive makeup brush dipped in remover can work wonders for cleaning up polish around your cuticles.
Genius, Essential Aesthetic Nail Looks for Beginners
Ready to dive into some super-achievable yet totally chic nail designs? These are perfect for flexing your creative muscles without feeling overwhelmed.
The Chic French Twist (Modern French Tips)
The classic French manicure gets a modern makeover! Instead of just white tips, we play with color and shape.
- Vibe: Sophisticated, clean, a touch playful.
- Colors: Pair a sheer nude or pastel base with a contrasting color for the tip (think lavender, sage green, or a metallic).
- How-To:
- Apply a base coat and let it dry completely.
- Apply one or two thin coats of your sheer base color. Let dry.
- Carefully paint a thin line of your contrasting color across the tip of each nail. Don’t worry if it’s not perfectly straight – that’s part of the charm! For a cleaner line, you can use a thin brush.
- Let the tip color dry thoroughly.
- Apply a generous top coat to seal everything in and add shine.
- Pro Tip: Try a gradient French tip by blending two colors where the tip meets the nail bed, or create a “V” shaped tip instead of a straight line.
The Elegant Dots
Dots are incredibly versatile and add a touch of whimsy or geometric precision, depending on how you place them.
- Vibe: Playful, minimalist, or geometric.
- Colors: Use a single color polish with a contrasting dot color, or use multiple colors.
- How-To:
- Apply base coat and your main polish color. Let dry completely.
- Dip a dotting tool into your contrasting polish color.
- Gently press the tip of the dotting tool onto your nail to create a dot.
- Place dots sparsely for a minimalist look, or closer together for a more dynamic pattern. You can make a single statement dot, a string of them, or cover the whole nail.
- Let the dots dry, then apply a top coat.
- Pro Tip: Use different sized dotting tools for variation. Try placing dots near the cuticle for a “half-moon” effect or along the tip.
The Subtle Swirl
A gentle swirl can add a beautiful, organic touch to your nails.
- Vibe: Artistic, bohemian, calming.
- Colors: Works beautifully with pastels, earth tones, or monochromatic schemes.
- How-To:
- Apply base coat and your main polish color. Let it dry thoroughly.
- Using a thin nail art brush or the tip of a toothpick dipped in a contrasting color, draw a simple swirl. Start from one edge or corner and guide the brush/toothpick in a curved motion.
- Don’t aim for perfection! The slightly imperfect, hand-drawn quality is part of the charm.
- Let it dry completely, then apply your top coat.
- Pro Tip: For a softer look, use a slightly lighter or darker shade of your base color for the swirl.
The Minimalist Line
Sometimes, less is more. A single, clean line can be incredibly chic.
- Vibe: Modern, sleek, edgy.
- Colors: Black, white, gold, or silver lines on a nude, sheer, or bold base color are stunning.
- How-To:
- Apply base coat and your chosen nail polish color. Let it dry fully.
- Using a very thin nail art brush or a striping tool, carefully draw a single, straight line. You can place it vertically in the center of the nail, horizontally across the tip, or diagonally.
- For extra definition, you can outline a nail with a thin line of a metallic polish.
- Allow the line to dry completely before applying a top coat.
- Pro Tip: Use nail guides or tape (carefully applied and removed when polish is tacky) for extra-straight lines, especially when starting out.
Playing with Color and Finishes
Beyond patterns, the colors and finishes you choose play a huge role in the aesthetic of your nails. Here are some ideas to explore:
Understanding Color Theory (The Easy Way!)
You don’t need a degree to pick great color combos. Here are some simple ideas:
- Monochromatic: Different shades of the same color (e.g., light blue, navy, and teal).
- Complementary: Colors opposite each other on the color wheel, like blue and orange, or purple and yellow. Use these for bold, striking designs.
- Analogous: Colors next to each other on the color wheel, like blue, blue-green, and green. These create harmonious, calming looks.
- Neutrals: Black, white, gray, beige, and pastels are your best friends for a sophisticated, easy-to-match aesthetic.
Finish Matters: Beyond Gloss
Don’t underestimate the power of a finish! While glossy is classic, consider these:
- Matte Top Coat: Instantly transforms any color into a sophisticated, velvety finish.
- Glitter: From fine shimmers to chunky glitters, these add instant sparkle and glam.
- Chrome/Mirror Powders: These create an almost metallic, futuristic look that’s truly eye-catching. Application can be a bit trickier, so you might want to try this once you’re comfortable with basic designs. You can find tutorials from reputable sources, like Nailpro’s guide to chrome powder to learn the technique.
- Holographic Top Coat: Adds a rainbow shift effect that’s simply magical.
Step-by-Step Nail Prep for Lasting Beauty
No matter how gorgeous your design, it won’t last without proper prep. Follow these steps for a manicure that stays flawless:
- Clean and Dry: Start with clean, dry nails. Remove any old polish completely. Wash your hands to remove oils.
- Shape Them Up: File your nails to your desired shape. Always file in one direction to avoid weakening the nail. For healthy nail filing tips, check out resources from the American Academy of Dermatology Association: AAD Nail Care Guide.
- Cuticle Care (Gentle!): Gently push back your cuticles with an orange stick or cuticle pusher. Avoid cutting them unless absolutely necessary and you are experienced, as it can lead to infection.
- Buffing (Lightly!): Lightly buff the surface of your nails with a fine-grit buffer. This removes any ridges and helps polish adhere better. Don’t over-buff, as it can thin your nails.
- Clean Again: Wipe each nail with nail polish remover or rubbing alcohol on a cotton pad to remove any dust or oils.
- Base Coat is Key: Apply a thin, even layer of your base coat. Let it dry completely. This protects your nails and gives your polish something to grip.
Application Techniques: Tips for a Smooth Finish
Even the simplest designs look better with clean application.
Thin Coats Are Best
Resist the urge to slather on thick coats of polish. Multiple thin coats dry faster, look smoother, and are less likely to chip or wrinkle. Let each thin coat become mostly dry before applying the next.
The Three-Stroke Method
For your main color coats, aim for three strokes: one down the center, then one down each side. This helps distribute the polish evenly without flooding the cuticle area.
Clean Up As You Go
If you get polish on your skin or cuticle, don’t wait for it to dry! Dip a small brush or cotton swab in nail polish remover and carefully trace around your cuticle line to clean up any mistakes immediately.
Capping the Edge
This is a game-changer for longevity! After applying your color and before your top coat (or with your top coat), run the brush thinly along the very edge (free edge) of your nail. This seals the polish and helps prevent chipping.
Next Steps: Easy Touches for More Advanced Aesthetics
Once you’ve mastered the basics, these simple additions can take your aesthetic nails to the next level without a huge learning curve:
Simple Geometric Shapes
Beyond dots and lines, try simple squares, triangles, or half-moons. You can freehand these with a thin brush or use small pieces of tape as guides (apply tape to dry polish, paint over it, remove tape when design is still slightly tacky for crisp lines).
| Shape | Aesthetic Effect | How to Achieve |
|---|---|---|
| Half-Moon/Lunula | Retro, elegant, chic | Use the base of your cuticle as a guide. Paint a curved line from one side of the cuticle to the other. Or use a small circular sticker as a guide. |
| Diagonal Line | Modern, edgy | Draw a straight line from one side of the nail tip to the opposite side of the cuticle, or simply across the nail from edge to edge. |
| Accent Geometric (Quadrant) | Bold, abstract | Use fine lines to divide one nail (or accent nail) into 2-4
|

