Mastering acrylic nail designs is surprisingly accessible! This guide breaks down essential techniques, popular trends, and easy-to-follow steps for creating stunning, salon-worthy looks at home. Discover beginner-friendly tips, tool recommendations, and creative inspiration to elevate your manicure game.
Thinking about diving into the world of acrylic nails? You’re not alone! Many of us see gorgeous, sculpted nails and wonder if it’s something we can achieve ourselves. It’s easy to feel overwhelmed by the options and techniques. But guess what? With a little guidance, you can absolutely create beautiful acrylic nail designs that express your unique style. This guide is here to make it fun and simple. We’ll walk through everything you need to know, from the absolute basics to some dazzling design ideas. Get ready to unleash your inner nail artist – it’s easier than you think!
Your Acrylic Nail Design Journey Starts Here!
Acrylic nails offer a fantastic canvas for creativity. They can add length, strength, and a durable base for all sorts of stunning designs. Whether you’re aiming for a classic look or something bold and unique, acrylics are your best bet. But where do you even begin? Don’t worry, I’m here to guide you every step of the way! We’ll cover the essentials like choosing the right products, preparing your nails, and mastering basic application. Then, we’ll jump into some super cool design ideas that are perfect for beginners and seasoned pros alike.
What You’ll Need: Your Acrylic Nail Toolkit
Before we get our hands messy with acrylic, let’s gather our supplies. Having the right tools makes a huge difference, ensuring a smoother application and a more professional finish. You don’t need a whole salon’s worth of gear to get started. Here’s a breakdown of the essentials:
- Acrylic Powder: This is the building block you’ll mix with the monomer liquid. It comes in various colors, including clear, pink, and white, often used for the French manicure base.
- Acrylic Liquid (Monomer): This is the special liquid that, when combined with the powder, creates a workable dough. Choose an MMA-free formula for better safety and a less strong odor. You can learn more about the differences and safety considerations of nail liquid formulations on the FDA’s website regarding cosmetics.
- Nail Forms or Tips: Nail forms are stickers you place under your natural nail edge to build the acrylic extension. Tips are pre-shaped plastic extensions you glue onto your natural nail.
- Dappen Dishes: Small glass or ceramic dishes to hold your monomer liquid and to create the acrylic balls.
- Nail Files: Various grit files are crucial. A coarser grit (e.g., 100-150) for shaping and removing bulk, and a finer grit (e.g., 180-240) for smoothing and finishing.
- Buffer Block: A multi-sided block used to smooth the nail surface before and after acrylic application, and to give a natural shine if not applying polish.
- Cuticle Pusher & Nippers: To gently push back and trim excess cuticles for a clean nail bed.
- Nail Dehydrator/Primer: These products help remove natural oils from the nail plate, ensuring better adhesion of the acrylic. A dehydrator cleans and dries the nail, while a primer creates a slightly sticky surface for the acrylic to bond to.
- Top Coat & Base Coat: Essential for protecting your design and adding shine and longevity. Gel top coats offer superior durability and shine if you have a UV/LED lamp.
- Dust Brush or Fan: To gently sweep away nail dust after filing.
- Manicure Scissors or Cuticle Trimmers: For precise trimming of the cuticle area.
- Alcohol Wipes or Cleanser: To clean the nail surface before and after, and to remove any sticky residue from gel products.
Preparing Your Natural Nails: The Foundation of Great Acrylics
A flawless acrylic design starts with well-prepped natural nails. This step is non-negotiable for ensuring your acrylics adhere properly and last longer. Let’s get your canvas ready!
- Cleanse and Sanitize: Start by washing your hands thoroughly with soap and water. Then, use an alcohol wipe to disinfect your nails and cuticles.
- Push Back Cuticles: Gently use a cuticle pusher to push back the cuticles. Don’t cut them aggressively; you want to create a clean nail plate, not cause damage.
- Trim Excess Cuticle (Optional): If you have stubborn bits of cuticle that are lifting, you can carefully trim them with cuticle nippers. Be very gentle.
- Buff the Nail Surface: Lightly buff the surface of your natural nail with a fine-grit file (around 240 grit). This “roughens up” the shine, creating a better surface for the acrylic to grip onto. Don’t over-file; you just want to remove the natural oils and shine.
- Apply Dehydrator: Brush on a nail dehydrator. This removes any remaining oils and moisture from the nail plate, preventing lifting. Let it air dry completely for about 30-60 seconds.
- Apply Primer: Follow up with a nail primer. Apply a thin layer, especially to the free edge and cuticle area. This creates a strong bond between your natural nail and the acrylic. Let it air dry.
Acrylic Application 101: Building the Base
This is where the magic happens! Don’t be intimidated. Practice makes perfect, and even your first attempts can look great with a little patience. We’ll cover using nail forms, which are great for beginners as they allow you to build the extension from scratch.
Using Nail Forms:
- Apply the Nail Form: Carefully slide a nail form under the free edge of your natural nail. Fold the sides so it creates a stable platform, ensuring it’s snug against your nail and the surrounding skin. It should feel secure.
- Create the Acrylic Bead: Dip your acrylic brush into the monomer liquid, then gently touch the tip of the brush to the acrylic powder. The powder will absorb the liquid, creating a moist bead. You want a bead that’s not too wet (will spread too much) or too dry (will be lumpy and hard to work with). Aim for a consistency that looks like thick, wet toothpaste.
- Apply the First Bead (Overlay): Place the bead onto the nail plate, about halfway down from the cuticle. Gently use the side of your brush to pat and smooth the acrylic, moving towards the cuticle area. “Feather” the edges so there are no harsh lines. The goal here is to cover your natural nail smoothly.
- Apply the Second Bead (Extension): Dip your brush for another bead. This bead will be used to create the extension. Place it at the free edge where you want to start your length. Use your brush to gently pull and shape the acrylic down the form, creating the desired length and shape of your nail extension.
- Shape and Refine: Work quickly but carefully. Use your brush to blend the two beads together and ensure the acrylic is smooth and even. Think about creating an “arch” in the middle of the nail for strength.
- Allow to Cure: Let the acrylic harden completely. This usually takes about 2-3 minutes. It will turn matte and feel hard.
- Remove the Form: Gently peel away the nail form.
- Shape and File: Once hardened, use your nail files to refine the shape of the acrylic extension and smooth any imperfections. Start with a coarser file to define the shape, then move to finer grits to smooth.
- Buff and Clean: Use a buffer block to smooth the entire nail surface. Brush away all dust.
Using Nail Tips:
- Select and Size Tips: Choose nail tips that fit the width of your natural nail bed perfectly.
- Apply Glue: Apply a thin, even layer of nail glue inside the “well” of the tip.
- Attach the Tip: Press the tip firmly onto your natural nail, holding it for about 10-15 seconds until it’s secure. Aim for a seamless transition at the contact point.
- Cut and Shape: Once the glue is dry, use nail tip cutters to trim the tip to your desired length. Then, use your files to shape it.
- Create a “Well” (if needed): If the tip has a thick well area, you can gently file it down to create a smoother transition with your natural nail.
- Apply Acrylic (Overlay): Follow steps 2-11 from the “Using Nail Forms” section, applying acrylic over the natural nail and tip to create a cohesive, strong overlay.
Essential Acrylic Nail Design Techniques
Now that you’ve mastered the basics of application, let’s explore some popular and beginner-friendly design techniques. These will give you endless creative possibilities!
1. The Classic French Manicure
A timeless favorite that looks chic and sophisticated. It’s also a fantastic way to practice your precision!
- Base: Apply a thin layer of pink or nude acrylic to the entire nail, extending it slightly past the free edge to create the base color.
- Smile Line: Using a thin brush dipped in white acrylic (or a colored acrylic for a twist), carefully paint a clean “smile line” across the free edge of the nail. This line separates the pink/nude from the white tip.
- Refine: Once the white is dry, you can go back with a small amount of clear or white acrylic to sharpen the smile line if needed.
- Finish: File and shape the nail. Apply a top coat for shine and protection.
2. Ombre Nails (Gradient Effect)
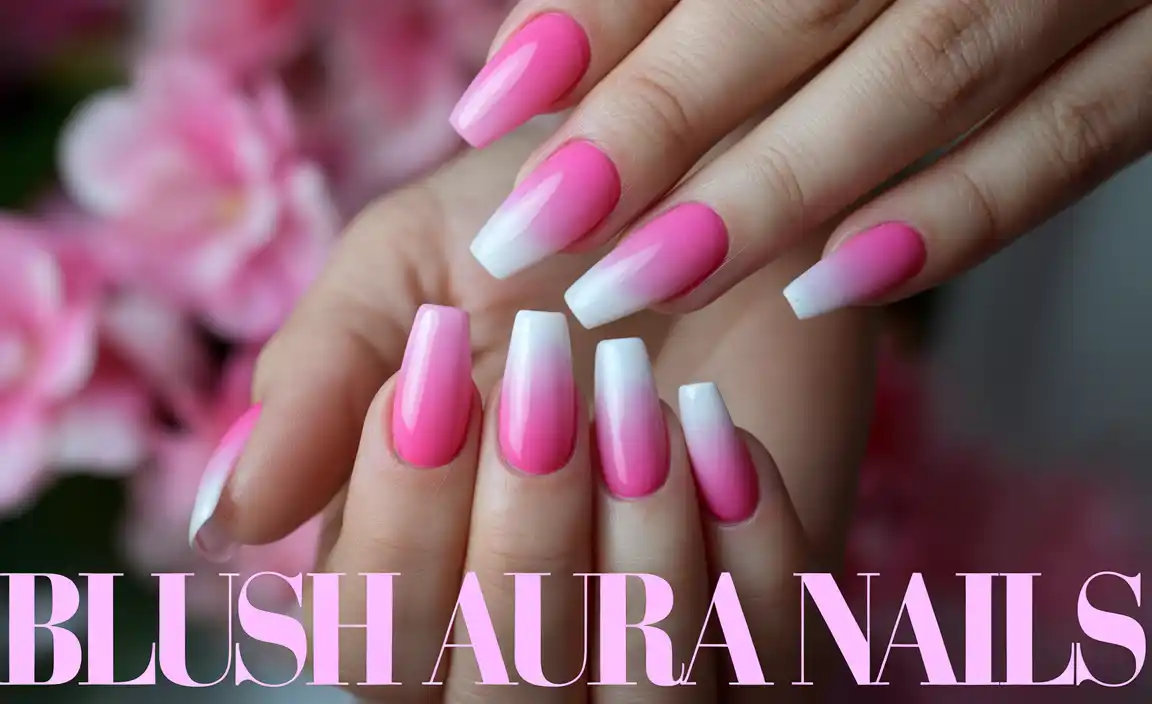
Ombre creates a beautiful, seamless blend of two or more colors. It’s surprisingly easy to achieve with acrylic!
- Base Colors: Apply your chosen colors of acrylic side-by-side on the nail, leaving a small gap between them.
- Blend: While the acrylic is still wet, use your brush to gently blend the colors together where they meet. Work from the cuticle to the tip, carefully patting and sweeping the acrylic to create a smooth gradient.
- Add More Acrylic (if needed): You may need to add another small bead of acrylic in the middle to help blend the colors further.
- File and Finish: Once dry, file and shape as usual, then apply a top coat.
3. Glitter Accents
Glitter adds instant sparkle and glam! You can incorporate it in many ways.
- Full Glitter Nail: Mix glitter with clear acrylic powder before applying it to the nail. Alternatively, apply a bead of clear acrylic, then sprinkle glitter onto it while it’s still wet, pressing it in with your brush.
- Glitter Fade: Create an ombre effect with glitter. Start with glitter at the cuticle or free edge and blend it into a solid color with clear acrylic, or vice versa.
- Glitter Accent Nail: Reserve one nail for a full glitter design, or create a simple stripe or shape of glitter on a solid colored nail.
4. Color Blocks and Geometric Designs
Play with different colors and shapes for a modern, artistic look.
- Two-Tone: Apply one color of acrylic to the nail. Once dry, use a fine-grit file to create a clean line where you want your next color to start, then apply a different colored acrylic.
- Geometric Shapes: Use fine brushes and colored acrylics to paint sharp lines and shapes. Think stripes, triangles, or even abstract patterns.
- Inlaid Designs: Place thin layers of colored acrylic or even small pieces of glitter or foils onto the nail and cap them with clear acrylic for a design that’s sealed within the nail.
5. Embedding Objects (Foil, Charms, Dried Flowers)
This is where you can really get creative and add unique elements to your nails.
- Foil Designs: Apply a thin layer of clear acrylic. While it’s still damp, gently press small pieces of transfer foil onto the acrylic to create metallic or holographic effects. Cap with another layer of clear acrylic to seal it.
- 3D Charms: Glue small 3D nail charms onto finished acrylic nails using strong nail glue or gel adhesive.
- Dried Flowers: Place tiny, dried flowers onto a wet bead of clear acrylic or onto a cured acrylic surface, then seal them completely with another layer of clear acrylic.
Popular Acrylic Nail Shapes (and How to Achieve Them)
The shape of your acrylic nails can dramatically change their appearance. Here are some popular options:
| Shape | Description | Achieved By |
|---|---|---|
| Square | Straight sides with a blunt, squared-off free edge. | File straight down the sides and across the tip. |
| Squoval | A softer version of the square, with rounded edges. | File straight sides and a slightly rounded tip. |
| Round | Follows the natural curve of the fingertip, soft and circular. | File into a gentle curve on the sides and a rounded tip. |
| Almond | Tapered sides that meet at a rounded, pointed tip. | File sides to gently converge to a soft point. |
| Stiletto | Tapered sides meeting at a sharp, pointed tip. | File sides to a sharp point. |
| Coffin/Ballerina | Tapered sides with a flat, squared-off tip. | File sides to a point and then file the tip straight across. |
Acrylic Nail Care and Maintenance
To keep your acrylics looking fabulous and healthy, a little regular care goes a long way!
- Avoid Harsh Chemicals: Wear gloves when doing chores involving water or cleaning supplies, as prolonged exposure can weaken the acrylic and surrounding skin.
- Don’t Use Nails as Tools: Avoid picking, prying, or scraping with your acrylics, as this can cause them to break or lift.
- Fill Appointments: Acrylics grow out with your natural nail. You’ll typically need a fill appointment every 2-3 weeks. This involves filling the new growth area with acrylic and reshaping the nail.
- Moisturize: Keep your cuticles and hands moisturized with cuticle oil and hand lotion. This prevents dryness and keeps your nails looking healthy.
- Be Gentle: While acrylics are strong, they can still be damaged. Be mindful of your hands and nails.
Acrylic vs. Gel Nails: What’s the Difference?
You might be wondering about gel extensions. While both offer beautiful, durable nails, they have key differences:
| Feature | Acrylic Nails | Gel Nails |
|---|---|---|
| Application | Two-part system: liquid monomer + powder polymer create a chemical reaction that hardens at room temperature. | A pre-mixed gel formula that requires a UV/LED lamp to catalyze the hardening process. |
| Durability | Very strong and durable. Can be prone to chipping if applied too thin. | Flexible and less prone to breaking than acrylics, but can sometimes peel if not applied correctly. |
| Removal | Soaked off using acetone. | Soaked off using acetone or filed off, depending on the type of gel. |
| Look & Feel | Can sometimes look thicker or feel harder than gel. | Often thinner and more flexible, with a high-gloss finish. |
| Odor | Can have a strong chemical odor during application (especially with older MMA formulas). | Generally odorless or has a very mild scent. |
| Repair | Easier to repair chips or breaks with more acrylic. | May require a full reapplication depending on the damage. |
Troubleshooting Common Acrylic Nail Issues
Even with the best intentions, you might run into a few bumps. Here’s how to tackle them:
- Lifting: This happens when the acrylic separates from the natural nail. Ensure proper nail prep (dehydrator, primer) and a good seal at the cuticle.


