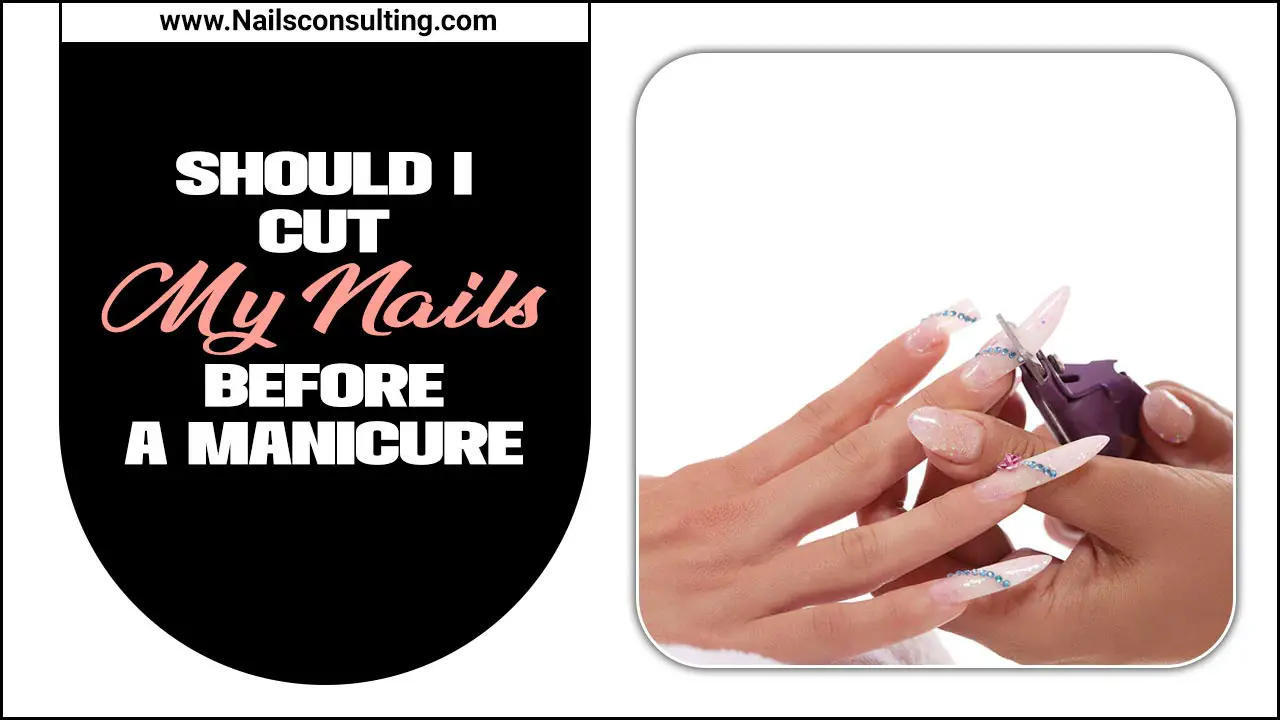
Get dazzling acrylic coffin nail designs with bling that are easy to achieve! Learn essential tips, stunning ideas, necessary tools, and simple steps to create gorgeous, eye-catching manicures at home. Shine bright with these fabulous and beginner-friendly techniques.
Welcome, nail lovers! Are you ready to add some serious sparkle to your nails? Coffin nails, also known as ballerina nails, are super popular for their chic, elongated shape. When you add acrylics and a touch of bling, you get a manicure that really turns heads. But maybe you think it looks too complicated? Don’t worry! Creating stunning acrylic coffin nail designs with bling at home is totally doable, even if you’re just starting out. We’ll walk you through everything you need to know, from the basic tools to breathtaking design ideas. Get ready to unleash your inner nail artist!
Why Are Acrylic Coffin Nails So Popular?
Coffin nails have taken the nail world by storm, and it’s easy to see why! Their sharp, elegant silhouette makes hands look longer and more slender. When combined with the strength and versatility of acrylics, you have a canvas ripe for creativity. Adding bling takes them from beautiful to absolutely show-stopping!
Essential Tools for Your Blingy Acrylic Coffin Nails
Before we dive into the fun designs, let’s gather your supplies. Having the right tools makes all the difference. Don’t be intimidated; most of these are readily available online or at your local beauty supply store!
For the Acrylic Application:
- Acrylic Powder: This is the core of your acrylics. Comes in various colors, but a clear or natural pink is a great starting point.
- Acrylic Liquid (Monomer): This, mixed with the powder, creates the workable acrylic dough.
- Dappen Dish: A small glass dish to hold your liquid and form your acrylic bead.
- Nail Forms or Tips: To build the length and shape of your coffin nail. Tips are easier for beginners!
- Nail Glue: For attaching tips if you’re using them.
- Nail File (various grits): You’ll need coarser files for shaping and finer ones for smoothing. A good starting point is 100/180 grit.
- Buffer Block: To smooth the nail surface before and after application.
- Cuticle Pusher/Orange Stick: To gently push back your cuticles.
- Lint-Free Wipes: Essential for cleaning and dehydrating the nail.
- Rubbing Alcohol or Nail Dehydrator: To prep the natural nail.
- Top Coat & Base Coat: For a lasting, glossy finish.
For the Bling & Design:
- LED/UV Gel Lamp: Needed if you’re using gel top coats or specific gel polishes for your design. (While many acrylics cure with air, gel products for design elements will need this.)
- Tweezers or Wax Pencil: For picking up tiny rhinestones and charms.
- Rhinestones & Gems: A variety pack is perfect for beginners! Look for flat-back rhinestones in different sizes and colors.
- Nail Glue (stronger, gel-based is best for gems): For securely attaching larger or heavier embellishments.
- Dotting Tools: For precise placement of small gems or creating small dots.
- Fine-Tip Brush: Useful for applying gel or sticky bases under gems.
- Nail Art Gems/Charms: Think tiny bows, hearts, or pearls.
Step-by-Step Guide: Creating Acrylic Coffin Nails with Bling
Ready to get your hands on some gorgeous nails? Let’s break down the process. Remember, practice makes perfect, so be patient with yourself!
Step 1: Prep Your Natural Nails
Proper prep is key for any manicure, especially acrylics. This ensures longevity and a smooth finish.
- Sanitize: Wash your hands thoroughly.
- Push Back Cuticles: Gently push back your cuticles using a cuticle pusher or an orange stick.
- Shape Natural Nails: File your natural nails into your desired length and shape. This helps the acrylic adhere better.
- Buff the Surface: Lightly buff the surface of your natural nails with a fine-grit file or buffer. This removes shine and creates a surface for the acrylic to grip.
- Dehydrate/Cleanse: Apply a nail dehydrator or rubbing alcohol to remove any oils and dust. Let it air dry completely.
Step 2: Apply Nail Tips (if using)
Nail tips are a fantastic shortcut for beginners to achieve the perfect coffin shape and length.
- Select Tips: Choose nail tips that fit the width of your natural nails.
- Apply Glue: Apply a thin layer of nail glue to both the natural nail and the well of the tip.
- Attach Tip: Carefully place the tip onto your natural nail, pressing firmly for about 30 seconds to ensure a secure bond.
- Shape the Tip: Once the glue is dry, use your nail file to shape the tip into the desired coffin shape. You can also trim the length now.
Step 3: Apply Acrylic
This is where the magic happens! Work with a small bead of acrylic at a time.
- Prepare Your Station: Place your dappen dish with liquid and your acrylic powder nearby. Have your brush ready.
- Create a Bead: Dip your brush into the monomer, then lightly tap it into the acrylic powder. You want a moist, pliable bead, not too dry or too wet.
- Apply to Nail: Gently deposit the bead onto the nail surface (or tip). Use your brush to pat and shape the acrylic, moving it towards the free edge to build the length and the coffin shape. Start closer to the cuticle area and work your way out.
- Build the Apex: Ensure you create a slight apex (the highest point of the nail) for strength. This is crucial for preventing breaks.
- Repeat for All Nails: Apply acrylic to all nails, letting them air dry and harden completely. This usually takes a few minutes.
Step 4: Shape and Refine
Once the acrylic is hard, it’s time to perfect the shape.
- File the Shape: Use a medium-grit file (around 100 grit) to refine the overall coffin shape, smooth out any bumps, and ensure consistent length and sidewalls.
- Smooth the Surface: Use a finer grit file (180 grit) or a buffer block to smooth out any rough patches or ridges left by the coarser file.
- Clean Up: Dust off all nail filings.
Step 5: Apply Color or Base Design (Optional)
If you’re not going for a clear acrylic look, now’s the time to add color!
- Gel Polish: Apply your favorite gel polish colors. You may need 2-3 thin coats, curing each layer under your LED/UV lamp according to the product instructions.
- Regular Polish: If using regular polish, apply thin coats and let them dry completely between applications.
Step 6: Add the Bling!
This is the most exciting part! Get creative with your gemstones and charms.
- Plan Your Design: Decide where you want your bling. Will it be one statement accent nail, a full-coverage sparkle, or a delicate accent along the cuticle?
- Apply Adhesive: For individual rhinestones, a small dab of nail glue or a sticky gel (like a builder gel or a top coat applied in a small area) works well. For larger gems, use a stronger nail glue.
- Place Embellishments: Use your tweezers or dotting tool to carefully place your rhinestones, gems, or charms. Start with larger stones and fill in gaps with smaller ones.
- Secure Larger Items: For heavier charms or stones, you might want to encapsulate them in a clear gel or acrylic to ensure they stay put. Apply a small amount of clear gel over the gem and cure, or carefully apply a small bead of clear acrylic.
Step 7: Seal and Shine
The final step ensures your design stays put and your nails have that beautiful, glossy finish.
- Apply Top Coat: Apply a generous layer of a good quality gel top coat over the entire nail, making sure to cap the free edge. If you used any gel polish for color, this is where you’ll use a gel top coat.
- Cure: Cure your nails under your LED/UV lamp as directed by the top coat manufacturer.
- Cleanse (if needed): If your gel top coat has a sticky inhibition layer, wipe it gently with rubbing alcohol on a lint-free wipe.
- For non-gel users: If you used regular polish and opted for a non-UV top coat, ensure it’s completely dry before touching anything.
Gorgeous Acrylic Coffin Nail Design Ideas with Bling
Let’s get inspired! Here are some fantastic ideas to try for your next acrylic coffin nail set with bling.
Classic Elegance: French Tip Sparkle
The Look: A twist on the classic French manicure. Instead of a white tip, use a nude or pink base and a white or rose gold tip. Then, add a line of tiny rhinestones along the smile line where the tip meets the base.
Why it Works: It’s sophisticated, chic, and instantly adds glamour without being overwhelming.
Bold & Beautiful: Full Bling Accent Nail
The Look: Choose one or two nails (usually the ring finger) to cover entirely in rhinestones. Mix different sizes and colors of gems for texture and depth. You can even embed a small charm like a heart or a pearl in the center.
Why it Works: It’s a statement! Perfect for special occasions or when you just want to feel extra fabulous.
Subtle Sparkle: Cuticle Embellishments
The Look: Keep the rest of the nail clean or a solid color, and adorn the cuticle area with a delicate line or a small cluster of rhinestones.
Why it Works: This is a more understated way to wear bling. It adds a touch of polish and glamour that’s perfect for everyday wear or a professional setting.
Ombre Glamour: Blended Colors with Gems
The Look: Create a beautiful ombre effect with two or more colors (e.g., pink fading to white, or nudes for a natural look). Then, strategically place larger gems or charms on one or two nails where the colors blend.
Why it Works: The soft transition of colors is alluring, and the added gems give it that extra pop.
Metallic Magic: Chrome & Stones
The Look: Use a chrome powder for a futuristic, reflective finish on all nails. Then add a scattering of rhinestones in a contrasting or matching metallic shade on accent nails.
Why it Works: Chrome is already a huge trend. Pairing it with bling amplifies its modern, edgy vibe.
Pearl Perfection: Classic Romance
The Look: Use pearl-shaped gems in various sizes, arranged elegantly along the free edge or scattered across the nail. A milky white or soft pink base complements this look beautifully.
Why it Works: Pearls exude timeless elegance and a romantic feel.
Choosing the Right Rhinestones and Gems for Your Design
Not all bling is created equal! Here’s what to consider:
| Type of Bling | Best For | Application Tip |
|---|---|---|
| Flat-Back Rhinestones (Acrylic/Resin) | General sparkle, filling areas, creating patterns. Available in glass, resin, and plastic. | Use nail glue or a gel adhesive. Start with smaller ones and build up. |
| Pre-Set Gems/Charms (Metal/Acrylic) | Statement pieces, adding 3D elements, specific shapes (hearts, bows). | Require a stronger nail glue or encapsulation with gel/acrylic. |
| Pearls (Plastic/Resin) | Elegant accents, creating a romantic or sophisticated look. | Can be applied with glue or gel. |
| Glitters (Fine, Chunky) | All-over sparkle, embedded within acrylic, or applied over gel polish. | Use sparingly or encapsulate for a smooth finish. |
Tips for Long-Lasting Blingy Coffin Nails
You’ve put in the effort, let’s make it last!
- Proper Adhesion: Ensure you’re using the right glue for the job and pressing gems firmly for adequate time.
- Encapsulation: For heavier gems or charms, consider encapsulating them with a layer of clear acrylic or gel. This provides a protective barrier and extra security.
- Avoid Harsh Chemicals: Try to limit exposure to harsh cleaning solvents, as they can break down adhesives and polish. Wear gloves when doing chores!
- Be Gentle: While acrylics are strong, the added embellishments can be delicate. Avoid picking at them or using your nails as tools.
- Top Coat is Your Friend: A good quality top coat seals everything in. Make sure to cap the edges of your nails.
Understanding Acrylic Nail Care
Looking after your acrylics is crucial for maintaining their beauty and your nail health.
Maintenance Schedule:
- Fill Appointments: Typically needed every 2-3 weeks, depending on your natural nail growth. This involves filling the gap that appears at the cuticle as your natural nail grows out.
- Regular Check-ups: Keep an eye out for any lifting, chipping, or signs of infection under the acrylic.
Home Care Tips:
- Keep nails moisturized, especially around the cuticle area, with cuticle oil.
- Avoid using your nails to pry open things or scrape surfaces.
- Wear gloves for household chores involving water or chemicals.
Dealing with Lifting or Chipping:
- Don’t try to pick off lifting acrylic, as this can damage your natural nail.
- Minor chips can sometimes be filed smooth and sealed with a top coat if they aren’t too severe.
- For significant damage, it’s best to visit a nail technician for a repair or removal. A great resource for understanding nail health is the American Academy of Dermatology’s section on common nail conditions.
Frequently Asked Questions About Acrylic Coffin Nails with Bling
How do I make my rhinestones stay on acrylic coffin nails?
The key is proper adhesion! Use a strong nail glue specifically for gems, or apply a small amount of gel (like a builder gel or top coat) where the gem will go, place the gem, and then cure it. For added security, you can gently encapsulate larger gems with a thin layer of clear acrylic or gel.
Are acrylic coffin nails bad for my natural nails?
When applied and removed correctly by a trained professional, acrylics are generally safe. The potential damage comes from improper application, rough removal techniques, or picking at the acrylic. Proper aftercare and leaving them on until a fill or removal is needed is vital.
How long do acrylic coffin nails with bling typically last?
With good care, a well-applied set of acrylic coffin nails can last 2-4 weeks. The lifespan of the bling depends heavily on the adhesive used and how well you protect them from damage. Expect small gems to last longer than larger, more prominent charms.
Can I do acrylic coffin nails at home if I’m a beginner?
Yes, you absolutely can! While it takes practice, starting with nail tips for shape and length is easier. Focus on mastering basic acrylic application before diving into complex designs. There are tons of beginner-friendly tutorials available!
What’s the easiest way to add bling to my nails?
For beginners, using a variety pack of flat-back rhinestones with a good nail glue or a sticky gel is the easiest. Tweezers or a wax pencil make placement much simpler. You can create simple lines, clusters, or even just a single gem accent.
How do I remove acrylic coffin nails safely?
The safest way is to soak them in acetone. You can file off the top coat layer to help the acetone penetrate better, then soak cotton balls in acetone, place them on the acrylic, wrap with foil, and let them sit for 10-20 minutes. The acrylic should then soften and be gently pushed off with an orange stick. Never force or peel acrylic off.


