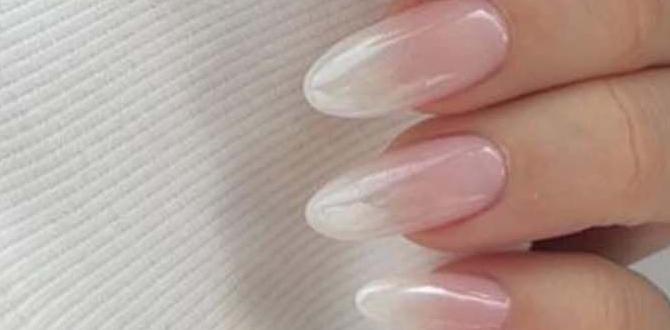
Abstract nail designs using essential pastel shades are a chic and gentle way to express your style. These looks are perfect for beginners, offering a soft, artistic touch that’s easy to achieve. Learn how to blend colors and create unique patterns for beautiful, on-trend nails!
Dreaming of nails that are a work of art but feel a little intimidated? You’re not alone! Abstract nail designs can sometimes seem super complicated, leaving you thinking you need a professional artist’s hand. But what if I told you that with just a few simple techniques and the magic of pastel colors, you can create stunning, unique looks right at home? Pastel abstract nails are the perfect way to dip your toes into nail art. They’re soft, pretty, and incredibly forgiving. So, let’s ditch the stress and get ready to fill your nails with gorgeous, easy-to-achieve art!
Why Pastel Abstract Nail Designs are Perfect for Beginners
Pastel colors are like a gentle hug for your nails. Their soft hues are less about sharp lines and perfect symmetry and more about blending, texture, and dreamy vibes. This makes them super forgiving for beginners. If a line isn’t perfectly straight or a color bleeds a little, it often just adds to the abstract charm! Plus, pastels are incredibly versatile, pairing beautifully with almost any outfit and suitable for any occasion, from a casual day out to a wedding.
- Soft & Mellow: Pastels create a gentle, soothing aesthetic that’s easy on the eyes.
- Forgiving Colors: Blending and slight imperfections are often part of the abstract appeal.
- Versatile Style: They work for any season and occasion, adding a touch of elegance.
- Easy to Achieve: Simple techniques can yield stunning, professional-looking results.
Essential Tools for Your Pastel Abstract Nail Journey
Before we dive into creating art, let’s gather your supplies. You don’t need a whole arsenal of fancy gadgets to get started. These are the basics that will help you achieve beautiful abstract pastel nail designs:
Must-Have Tools:
- Nail Polish in Pastel Shades: Choose 3-4 complementary colors (e.g., baby pink, mint green, lilac, sky blue, pale yellow).
- Base Coat: Protects your natural nails and helps polish adhere better.
- Top Coat: Seals your design and adds a glossy finish.
- Thin Nail Art Brush or Dotting Tool: Essential for creating lines, dots, and delicate details. A set often comes with various tip sizes. You can find great beginner sets online or at beauty supply stores.
- Toothpick or Orange Stick: Handy for cleaning up edges or creating subtle swirls.
- Cotton Pads and Nail Polish Remover: For correcting mistakes and cleaning stray polish.
- Your Favorite Nail File & Buffer: To prep your nails for a smooth canvas.
Optional (but helpful!) Tools:
- Nail Art Stencils: For geometric or patterned designs.
- Foils: To add metallic accents or textured effects.
- Rhinestones or Glitter: For an extra pop of sparkle.
Step-by-Step: Easy Pastel Abstract Nail Designs
Let’s get creative! These designs are simple to follow and perfect for making your nails look chic and artistic.
Design 1: The Soft Swirl
This design is all about fluid movement and gentle color blending. It looks sophisticated but is surprisingly easy!
Steps:
- Prep Your Nails: Start with clean, dry nails. Apply a thin layer of base coat and let it dry completely.
- Apply the Base Color: Paint one or two nails with a solid pastel color (e.g., a soft lavender). Let it dry thoroughly. You can do this on all nails or just an accent nail.
- Create the Swirls: Take a contrasting pastel shade (e.g., mint green) and your thin nail art brush. Dip the brush into the polish and paint a gentle, swooping swirl or a couple of wavy lines across your base color. Don’t worry about perfection; let the brush flow naturally.
- Add Another Color (Optional): If you want more depth, use a third pastel color (e.g., pale yellow) to add a thinner swirl or a few dots alongside your first swirl.
- Clean Up: Use a toothpick or a brush dipped in nail polish remover to clean up any stray polish around your cuticles.
- Seal the Deal: Once your design is completely dry, apply a generous layer of top coat to protect your artwork and add a beautiful shine.
Design 2: The Dotted Gradient
This technique creates a beautiful fading effect with playful dots. It’s a modern take on the classic gradient.
Steps:
- Prep & Base: Apply base coat and let it dry. Then, paint your nails with your lightest pastel shade (e.g., baby pink). Let it dry completely.
- Create the Gradient Base: On a clean surface (like a piece of foil or a palette), place a drop of your second pastel color (e.g., sky blue) and a drop of your lightest pastel. Use your nail art brush or a toothpick to gently swirl them together, creating a blended effect.
- Dot the Gradient: Load your dotting tool with the blended color. Start at the tip of your nail and gently tap the dotting tool to create dots, moving down the nail. Overlap the dots slightly. As you move towards the cuticle, use less pressure and fewer dots to create a fading look.
- Add a Third Color (Optional): If you’re feeling adventurous, use a third color (like lilac) to add a few strategic dots near the tip for added dimension.
- Clean and Seal: Clean up edges with a nail pencil dipped in remover. Apply a clear top coat to seal the design and give it a smooth finish.
Design 3: The Minimalist Geometric
For a cleaner, more modern abstract look, geometric shapes are your friend. Pastels make them feel softer and more approachable.
Steps:
- Prep & Base: Apply base coat. Paint your nails with a neutral pastel color like a very pale cream or a light grey. Let it dry.
- Add Geometric Lines: Using a fine nail art brush and a bold pastel color (like coral or teal), carefully paint simple geometric lines. Think thin, straight lines across the nail, or a few intersecting lines to form a triangle or square. You can also create a simple diagonal line.
- Layer Shapes (Optional): Once the first line is dry, you can add another line in a different pastel color, perhaps perpendicular to the first, or a small dot in a corner.
- Focus on Placement: The key here is intentional placement. Don’t overdo it; a few well-placed lines can be very striking.
- Finish Up: Clean up any mistakes and apply a top coat for a glossy, polished look.
Understanding Nail Polish Finishes with Pastels
The finish of your pastel nail polish can completely change the look of your abstract design. Mixing finishes can add an extra layer of interest!
Common Nail Polish Finishes
| Finish Type | Description | Effect on Pastel Abstract Designs |
|---|---|---|
| Cream/Crème | Opaque, smooth, and glossy. The most common finish. | Provides a classic, solid color base for abstract art. Blends smoothly for gradients and swirls. |
| Matte | Non-shiny, velvety finish. | Creates a sophisticated, modern look. Excellent for contrasting with glossy lines or dots within the abstract design. |
| Shimmer/Pearl | Contains fine particles that create a subtle sheen. | Adds a delicate glow to pastel colors, making them appear more ethereal and light. Great for background colors. |
| Glitter | Contains larger particles of shimmer for sparkle. | Can be used sparingly in abstract designs for a pop of fun and dimension, especially in pastel glitter form. |
| Metallic | Shiny, reflective finish that mimics metal. | Adds a modern, chic edge. Pastel metallic shades are unique and can create striking abstract patterns. |
Tips for Long-Lasting Pastel Abstract Nails
Want your beautiful pastel abstract nails to last as long as possible? Here are a few pro tips:
- Proper Nail Prep: Ensure your nails are clean, dry, and free of oils. Pushing back your cuticles gently aids in polish longevity. For extended wear, you can buff your nails very lightly to create a slightly rougher surface for the base coat to grip onto. Be gentle to avoid damaging your nail bed.
- Don’t Skip the Base Coat: A good base coat protects your nails from staining and provides a smooth surface for polish application, which helps the design adhere better. Consider using a ridge-filling base coat if your nails have an uneven surface.
- Thin Layers are Key: Apply polish in thin, even coats. It’s better to apply two or three thin coats than one thick one, as thick coats take longer to dry and are more prone to chipping.
- Let Each Layer Dry: This is crucial! Allow each coat of color and each detail of your abstract design to dry completely before adding the next layer or the top coat. Patience will save you from smudges and ruined art.
- Cap Your Free Edge: When applying your color coats and your top coat, run your brush along the tip of your nail. This “caps” the edge, sealing it and preventing chips from the free edge.
- Apply Top Coat Generously: A good top coat is your best friend. Apply a thick, glossy layer over your entire design, making sure to cap the free edge. Reapply top coat every 2-3 days to refresh the shine and extend the life of your manicure.
- Be Gentle: Avoid using your nails as tools to scrape, pry, or open things! They are art, not utility items.
Troubleshooting Common Abstract Nail Design Issues
Even with simple designs, you might run into a common hiccup or two. Don’t worry, these are easy to fix!
- Smudged Polish? If you accidentally smudge a line or a dot, you have a few options. For minor smudges, you might be able to gently smooth it out with a toothpick. For larger smudges, use a small brush dipped in nail polish remover to clean up the area and then carefully redraw the affected part of the design.
- Polish Not Drying? Ensure you’re applying thin coats. If a layer is taking too long, it might be too thick. You can try dabbing a tiny bit of quick-dry drops on the surface. For abstract art, using a fast-drying top coat can help seal in your design while it’s still slightly soft underneath, preventing smearing.
- Uneven Lines? Practice makes perfect! For straighter lines, use a steady hand and rest your wrists on a stable surface. A thin, angled brush can also offer more control than a standard brush. If a line is wobbly, you can often go back with a fine brush and a color matching the base coat to “clean up” the edges and make the line appear sharper.
- Color Bleeding Together? This is common with wet-on-wet techniques. Sometimes it’s desired for a blurred effect! If you want sharper separation, ensure the underlying color is completely dry before adding the next. You can also use a quick-dry top coat over a completely dry color layer to create a barrier before adding more design elements on top. Many artists use a product like nail polish remover (used carefully on a brush) to clean up lines or edges between colors.
FAQs About Pastel Abstract Nail Designs
Q1: Are abstract nail designs hard to do for beginners?
Not at all! Pastel abstract designs are perfect for beginners because the soft colors and varied patterns are very forgiving. Imperfections often add to the artistic charm.
Q2: What are the best pastel colors to mix for abstract designs?
You can mix and match any pastels! Great combinations include soft pinks with mint green, lavender with baby blue, or peach with pale yellow. Aim for colors that complement each other for a harmonious look.
Q3: How long do abstract pastel nails usually last?
With a good base and top coat, and proper application, your abstract pastel nails can last anywhere from 5-7 days, especially if you cap your free edges and reapply top coat every few days.
Q4: Can I use regular nail polish for abstract designs?
Yes, absolutely! Regular nail polish is perfect for creating abstract pastel looks. You’ll just need thin brushes or tools to help you create the designs.
Q5: What’s the easiest abstract nail design for a complete beginner?
The “Soft Swirl” or simple “Dotted Gradient” are fantastic starting points. They involve basic brush strokes and tapping motions that are easy to master.
Q6: How do I clean up mistakes in my abstract nail design?
A small brush (like an old, clean makeup brush or a dedicated cleanup brush) dipped in nail polish remover is your best friend for cleaning up stray marks. A toothpick can also be used for tiny touch-ups.
Conclusion
See? Creating beautiful abstract nail designs with essential pastel colors is totally achievable, even if you’re new to nail art. With just a few tools, some lovely soft polishes, and a willingness to play around, you can transform your nails into mini masterpieces. Remember, the beauty of abstract art is its subjectivity, so embrace the process, have fun with the dreamy pastel palette, and let your creativity flow. Don’t be afraid to experiment with different color combinations and techniques. You might just discover your new favorite way to express yourself, one gorgeous nail at a time!