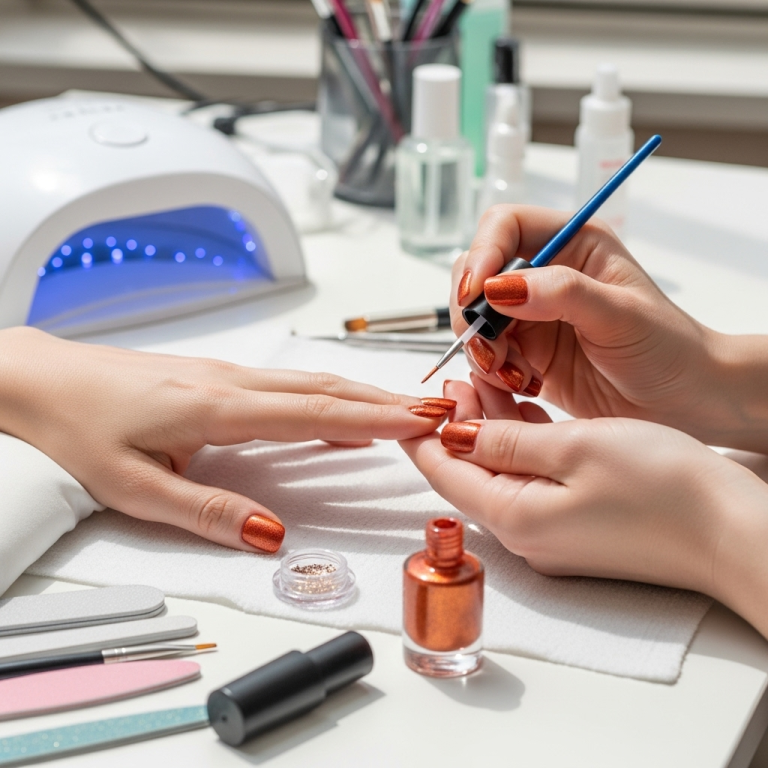
Abstract Nail Design Inspiration: Genius Ideas for Beginners
Ready to dive into the world of abstract nail art? This guide offers simple, creative ideas and steps to help you achieve stunning abstract manicures at home, no matter your skill level! Get ready to express your unique style with these fun and accessible designs.
Hello, nail lovers! Are you looking for a way to make your nails pop without needing artistic superpowers? Abstract nail designs are perfect for this! They can look super fancy, but many are surprisingly easy to do yourself. Sometimes, we see amazing nail art online and think, “There’s no way I can do that!” That’s where abstract designs shine. They are all about lines, shapes, colors, and textures in a way that’s meant to be free and creative. This post will give you tons of inspiration and show you how to create your own abstract masterpieces. You’ll be surprised at how simple and fun it can be to get salon-worthy abstract nails right at your fingertips! Let’s get painting!
Here’s a quick look at what we’ll cover:
What is abstract nail design?
Essential tools for abstract nail art.
Easy peasy abstract design ideas.
Simple step-by-step tutorials.
Tips for perfecting your abstract look.
Your abstract nail art questions answered.
What Exactly IS Abstract Nail Design?
Abstract nail design is all about ditching the rulebook and letting creativity flow. Think of it as painting without trying to draw a specific picture. It’s about patterns, shapes, lines, dots, swirls, and color combinations that don’t represent anything realistic but look super cool. The beauty of abstract art is that there’s no right or wrong way! It’s a fantastic way to express your mood, personality, or just have fun with color. It can range from minimalist and chic to bold and vibrant.
Why You’ll Love Abstract Nail Designs
Abstract designs are incredibly versatile and forgiving, making them a dream for beginners and pros alike. Here’s why they’re a big win:
- Beginner-Friendly: You don’t need a steady hand for perfect lines or intricate details. Wobbly lines can actually add to the charm!
- Endless Possibilities: Combine colors, shapes, and textures in infinite ways. Your nails become your personal canvas.
- Customizable: Match your nails to any outfit, mood, or occasion. Want something subtle or a total statement? Abstract has you covered.
- Forgiving: Mistakes can often be incorporated into the design. A smudged line? Make it a new stripe!
- Trendy: Abstract art is always in style and adds a modern, artistic flair to your look.
Essential Tools for Your Abstract Nail Adventure
You don’t need a professional nail studio to create amazing abstract designs. Most of these items are probably already in your nail polish stash! Here are a few key players:
- Base Coat: Protects your natural nails from staining and helps your polish last longer.
- Top Coat: Seals your design and gives it a glossy, finished look.
- Nail Polish Colors: Your chosen palette! Have fun with classics, neons, metallics, or pastels.
- Fine-Tip Brush or Dotting Tool: Perfect for creating delicate lines, dots, and intricate details. You can find these at most drugstores or beauty supply stores. A toothpick can also work in a pinch for dots!
- Striping Tape (Optional): For creating super sharp, clean lines and geometric patterns.
- Sponge (Optional): Great for gradient effects or a textured look.
- Tweezers (Optional): If you plan to add small embellishments like glitter or studs.
- Clean-up Brush or Cotton Swab: For tidying up any polish that lands outside your nail edge. A small brush dipped in a little nail polish remover works wonders.
For a deeper dive into nail art tools, check out resources that explain their benefits, like those found on reputable beauty industry sites. Understanding your tools is the first step to unlock your creative potential!
Genius Abstract Nail Design Inspiration: Ideas for Beginners
Let’s get inspired! These ideas are designed to be easy to recreate, even if you’re just starting out. We’ll start with the simplest and move to slightly more involved, but still totally achievable, concepts.
1. Minimalist Lines and Dots
This look is chic, modern, and super simple. It’s all about clean lines and precise dots that add a touch of detail without being overwhelming.
- Colors: Think neutrals with a pop of metallic, or a single accent color.
- How-to: Apply your base coat and 1-2 coats of your chosen base color. Once dry, use a fine-tip brush or dotting tool to add a few thin lines diagonally across one or two nails, or place a few small dots strategically.
- Tip: Keep it sparse! One or two lines or a cluster of dots is sometimes all you need.
2. Color Blocking Creativity
Color blocking involves using distinct blocks of color next to each other. It’s bold, graphic, and surprisingly easy to achieve.
- Colors: Play with complementary colors, contrasting shades, or even different finishes (matte and glossy!).
- How-to: Paint each nail a different solid color, or paint accent nails with one color and then use striping tape to create geometric sections to fill with other colors. Alternatively, freehand larger shapes in different colors.
- Tip: Make sure each layer of polish is completely dry before applying tape or a second color to avoid lifting the polish.
3. Wavy Wonderland
Who says lines have to be straight? Wavy lines add a playful, organic feel to your nails.
- Colors: Marbled pastels, bold brights, or a monochrome look with different shades of the same color.
- How-to: Use a fine-tip brush to freehand gentle waves across your nail. You can do one large wave or several smaller ones.
- Tip: Don’t aim for perfection! Slight imperfections can make the waves look more natural and artistic.
4. Splatter Art Effect
This technique mimics abstract splatter painting for a truly artistic and unique look. It looks complex but is quite simple!
- Colors: A neutral base with contrasting “splatters” or go all out with multiple vibrant colors.
- How-to: Paint your nails with a base color. Once dry, take a stiff brush (like an old toothbrush or a stiff fan brush) and dip it lightly into a contrasting polish. Hold the brush over your nail and flick the bristles with your finger to create splatters.
- Tip: Practice on a piece of paper first to get a feel for how hard to flick and how much polish to use. You can also use a straw to blow blobs of polish across the nail for a different splatter effect.
5. Geometric Gems
This is where striping tape truly shines! Create sharp, clean lines and geometric shapes for a modern, architectural vibe.
- Colors: Metallics, black, white, and bold primary colors work well.
- How-to: Paint your nail a base color and let it dry completely. Apply striping tape to create your desired geometric design (triangles, squares, lines). Paint over the tape with a second color. Once the second color is dry but not fully cured (still slightly soft), carefully peel off the tape using tweezers.
- Tip: Ensure the tape adheres well to the nail to prevent polish from seeping underneath.
6. Abstract French Tips
Put a twist on the classic French manicure with abstract shapes instead of simple curves. Think zig-zags, diagonal lines, or even little dots along the tip.
- Colors: Classic nudes with white or black tips, or go bold with bright colors.
- How-to: Paint your nails your base color. Once dry, use a fine-tip brush to paint an abstract shape along the free edge of your nail.
- Tip: Experiment with different shapes – a single wavy line or half-moons are easy and striking.
7. Gradient Swirls
Combine the smooth transition of a gradient with the fluidity of abstract swirls for a dreamy effect.
- Colors: Soft pastels, sunset hues, or deep jewel tones.
- How-to: Create a gradient on a makeup sponge (e.g., dab two or three colors next to each other). Gently dab the sponge onto your nail to transfer the gradient. Once dry, use a fine-tip brush to draw thin, delicate swirls over the gradient.
- Tip: Work quickly with gradients, as polish can dry on the sponge.
Step-by-Step Abstract Nail Art Tutorials
Ready to get your hands (or nails!) dirty? Here are a couple of super simple tutorials to get you started.
Tutorial 1: Easy Wavy Lines
This is perfect for a quick, stylish update!
- Prep Your Nails: Make sure your nails are clean, filed to your desired shape, and buffed smooth. Apply a good base coat to protect your nails.
- Apply Base Color: Paint 1-2 thin, even coats of your chosen base color. Let it dry completely. For this look, a light or neutral color works beautifully.
- Create the Waves: Grab your fine-tip brush or a toothpick. Dip it into your accent color. Gently paint a wave across your nail. You can place it near the tip, in the middle, or from side to side.
- Add More Waves (Optional): If you like, add a second wave slightly above or below the first, perhaps in a different shade or the same color. Don’t overthink it – imperfect waves are charming!
- Clean Up: Use a clean-up brush dipped in nail polish remover to tidy any stray polish around your cuticles or nail edges.
- Seal the Deal: Once everything is dry, apply a generous coat of top coat to seal your design and add shine.
Tutorial 2: Geometric Tapestry (with Tape)
This design requires a little patience but the sharp results are worth it!
- Prep and Base: Start with clean, filed nails and a base coat. Apply 1-2 coats of your primary base color. Allow it to dry completely. This is super important for tape.
- Apply Striping Tape: Cut small pieces of striping tape and carefully place them on your nail to create geometric shapes. You can make triangles, squares, or intersecting lines. Press the tape down firmly to ensure a good seal.
- Paint Over the Tape: Apply your second color over the taped section(s). You can also paint over the entire nail again with a different color if you want a layered effect.
- Remove the Tape: While the second color is still slightly tacky (but not wet!), carefully use tweezers or a pointed tool to lift and peel off the striping tape. Go slowly to avoid smudging the fresh polish or lifting the tape too soon.
- Repeat if Desired: If you are creating a multi-colored geometric design, let the current layer dry slightly and then apply more tape and color.
- Clean Up Edges: Neatly clean up any polish that might have seeped under the tape on your edges.
- Top Coat: Once all your polish is dry, apply a protective top coat.
Looking for more tools to help you achieve a smooth finish? For in-depth information on proper nail prep and cuticle care, the resources from the American Academy of Dermatology Association offer excellent guidance.
Tips & Tricks for Flawless Abstract Nails
Even simple designs can look amazing with a few helpful hints. Here are some pro tips to elevate your abstract nail game:
- Patience is Key: Let each layer of polish dry completely before adding the next, especially when using tape or layering colors. A quick-dry top coat can be a lifesaver!
- Less is More: Don’t feel the need to cover your entire nail with complex art. Sometimes a single accent nail or a few subtle details are the most impactful.
- Clean Up is Crucial: A precise clean-up brush with a bit of remover can make a huge difference between a DIY look and a professionally done one. Dip your brush, wipe off the excess remover, and gently glide it around your cuticle and sidewalls.
- Experiment with Tools: Don’t limit yourself to brushes. Toothpicks, bobby pins, and even the edge of your polish bottle can create interesting textures and shapes.
- Color Combinations: Think about your color palette. Complementary colors (opposite each other on the color wheel) create high contrast, while analogous colors (next to each other) create harmony.
- Vary Thickness: Try mixing thin, delicate lines with thicker strokes or larger blocks of color for added visual interest.
- Embrace Imperfection: Remember, abstract art is about freedom. A slightly wobbly line or an uneven dot can add character and an artistic touch.
Your Abstract Nail Art FAQ
Here are some common questions beginners have about abstract nail designs:
Q1: How do I make lines thin and even?
A: Use a dedicated fine-tip nail art brush. Load it with a small amount of polish and practice drawing on a piece of paper first. For the steadiest hand, rest your pinky finger on your other hand or the table for support.
Q2: Can I do abstract nails if I have short nails?
A: Absolutely! Abstract designs are fantastic for short nails. Simple lines, dots, or small geometric shapes can look incredibly chic and elegant on shorter nail lengths.
Q3: What kind of polish is best for abstract art?
A: Standard nail polish works perfectly. For detailed work, polishes with good pigmentation and a smooth consistency are ideal. Some artists also enjoy using gel polish for its durability and smooth application, but it requires a UV/LED lamp to cure.
Q4: How do I prevent my tape from lifting polish?
A: The key is to let your base color dry completely. Once it’s fully hardened, apply the tape firmly. When removing the tape, do so very carefully while the new layer of polish is still slightly tacky, not fully dry. Clean up any seepage immediately.
Q5: What if I mess up my abstract design?
A: Don’t worry! Abstract art is forgiving. You can often:
- Cover it up: Add another layer of color or a different design element over the mistake.
- Embrace it: Sometimes a “mistake” looks like an intentional artistic detail!
- Clean it off: Use your clean-up brush with remover to carefully wipe away the polish before it dries completely.
- Start over: If it’s really not working, a bit of nail polish remover will take it all off for a fresh start.
Q6: How can I make my abstract nails last longer?
A: Using a good quality base coat and top coat is essential. Reapply your top coat every 2-3 days to maintain shine and protect the design. Avoid using your nails as tools, and wear gloves when doing household chores or washing dishes.
Q7: Can I mix different finishes (matte, glossy, metallic) in my abstract designs?
A: Absolutely! Mixing finishes is a fantastic way to add depth and interest to your abstract nails. For example, a matte base with glossy lines or metallic accents can look incredibly sophisticated.
Conclusion: Your Abstract Nail Art Journey Begins Now!
See? Abstract nail designs are wonderfully accessible and incredibly fun. You don’t need to be a Picasso to create stunning art on your nails. These ideas and simple techniques are your launchpad to endless creative expression. Whether you’re opting for delicate lines, bold color blocks, or playful waves, the most important ingredient is your own unique style.
Remember to start small, enjoy the process, and don’t be afraid to experiment. Mistakes are just opportunities for creative detours! Gather your favorite polishes, grab a detail brush or a toothpick, and let your imagination take over. Your nails are a canvas waiting for your personal touch, and with these abstract design inspirations, you’re all set to create looks that are as unique and vibrant as you are. Happy painting, and happy abstract nail art creating!

