Abstract art-inspired nail designs are a fun, creative way to express your style. You can achieve stunning, unique manicures at home with simple techniques and a few key tools. Get ready to unleash your inner artist for a gorgeous, personalized look!
Painting your nails is a fantastic way to show off your personality! Sometimes, we want our nails to be more than just a single color. Maybe you’re drawn to the bold lines of Kandinsky or the colorful shapes of Matisse. Abstract art offers endless inspiration for unique nail designs that stand out. It might seem complicated, but with a few easy steps, you can create your own masterpiece right at home. Ready to transform your fingertips into tiny works of art? Let’s dive in!
Why Abstract Art for Your Nails?
Abstract art, with its focus on shapes, colors, and forms rather than realistic representation, makes a perfect muse for nail art. It’s all about emotion, energy, and individualism. This translates beautifully to nails because it allows for so much freedom and personal interpretation.
Unleash Your Creativity
Unlike more structured designs, abstract art-inspired nails give you permission to play. There’s no “wrong” way to do it! Think bold strokes, geometric patterns, random splatters, or fluid lines. Your nails become a canvas for your mood and imagination.
Unique & Eye-Catching
Forget basic manicures; abstract designs are conversation starters! They add a touch of sophistication and artistry to any outfit. People will notice your unique style and artistry.
Beginner-Friendly Potential
While some abstract art can be intricate, many styles are incredibly simple to achieve. Splatter effects, simple lines, and color blocking are all accessible for beginners. You don’t need years of art school to create something stunning.
Essential Tools for Your Abstract Nail Studio
Before we dive into the design process, let’s gather our supplies. Don’t worry if you don’t have everything at first; you can build your collection over time! Having the right tools makes the process smoother and the results much better.
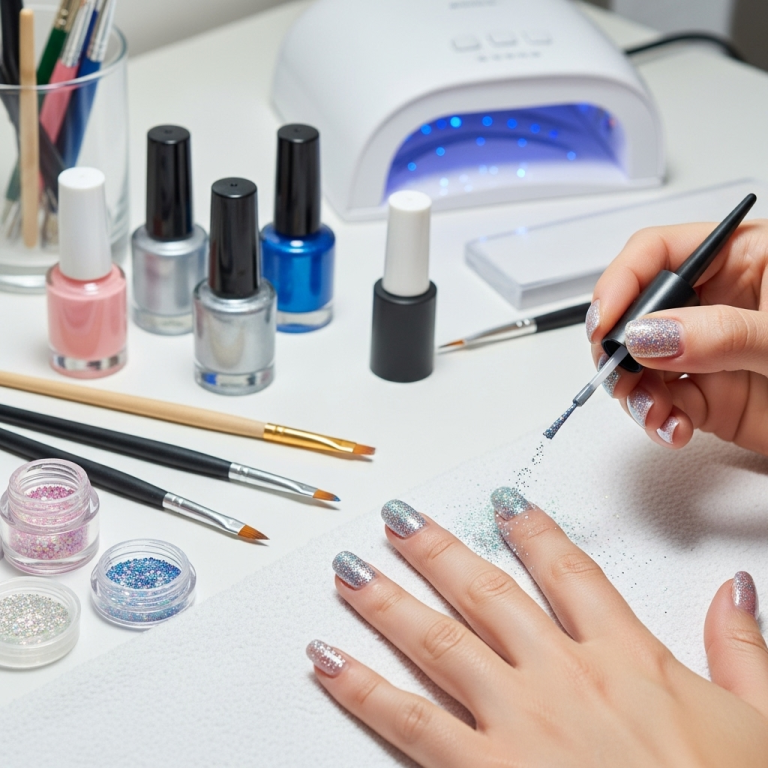
Here are the essentials you’ll want to have on hand:
- Base Coat: Protects your natural nails and helps your polish last longer. Look for a good quality one that also helps smooth out imperfections.
- Top Coat: Seals your design, adds shine, and prevents chipping. A quick-dry top coat is a lifesaver for busy bees!
- Nail Polish in Various Colors: This is your paint palette! Choose colors that inspire you or match your outfit. Consider a mix of opaque, shimmery, and metallic shades for interesting textures.
- Dotting Tools: These come with different sized ball tips, perfect for creating dots, swirls, and small details. They are incredibly versatile.
- Thin Nail Art Brushes: Essential for drawing lines, creating patterns, and filling in small spaces. A variety of thin brushes will give you more control.
- Toothpicks or Orange Wood Sticks: Great for picking up small amounts of polish, cleaning up edges, or creating simple line designs.
- Nail Polish Remover: For those inevitable little mistakes!
- Cotton Pads or Balls: For applying polish remover.
- Clean-up Brush: A small, flat brush (like a concealer brush) dipped in polish remover can clean up polish that gets on your skin around the nail.
- Paper Towel or Wax Paper: For practicing your designs and creating splatter effects.
Getting Started: Preparing Your Nails for Art
Just like any great artist prepares their canvas, we need to prepare our nails. This prep work is crucial for a smooth finish and long-lasting design.
Step 1: Clean and Shape
Start with clean, dry nails. Gently remove any old polish. If needed, trim and file your nails to your desired shape. Smooth any ridges with a fine-grit buffer.
Step 2: Apply Base Coat
Apply one thin coat of your favorite base coat. Let it dry completely. This step protects your nails from staining and provides a good surface for polish to adhere to.
Abstract Nail Design Techniques for Beginners
Now for the fun part! Let’s explore some simple yet impactful abstract nail design techniques that anyone can master. We’ll start with super easy methods and build up from there.
Technique 1: The Splatter Splash
This is one of the easiest and most artistic-looking techniques. It mimics a spontaneous paint splatter.
- Choose Your Colors: Select 2-4 nail polish colors that work well together. A neutral base color (like white, black, or nude) works great for splatters.
- Apply Base Polish: Paint one or two coats of your chosen base color on each nail. Let it dry completely.
- Prepare for Splatter: Place a piece of wax paper or a paper towel on your work surface.
- Create the Splatter: Dip a stiff brush (like an old toothbrush or a stiff nail art brush) into one of your accent colors. Hold the brush a few inches above your nail and gently flick the bristles with your finger to splatter the polish onto the nail. You can also drag the brush down the nail for a streaky effect.
- Repeat with Other Colors: Once the first color is relatively dry, repeat the splattering process with your other accent colors. Layering colors adds depth.
- Let Dry Completely: Make sure all layers are thoroughly dry. This might take a bit longer than usual due to the multiple layers.
- Apply Top Coat: Seal your masterpiece with a clear top coat. Go over it a couple of times if you want to smooth out the texture of the splatters.
Technique 2: Geometric Blocks & Lines
This technique is clean, modern, and incredibly versatile. It’s all about sharp edges and defined shapes.
- Choose Your Palette: Select 2-3 colors. Consider contrasting colors for a bold look or complementary shades for a softer feel.
- Paint a Base: Apply your base color to all nails and let it dry fully. You can also use this technique to create color-blocked nails without a solid base.
- The Magic of Tape (Optional but Recommended): For super sharp lines, nail art tape is your best friend. Cut small pieces of tape and carefully place them on your dried base color to create geometric shapes or borders. Press down the edges firmly to prevent polish bleed.
- Apply Accent Colors: Paint nail polish in your chosen accent colors within the taped sections or freehand if you’re feeling confident.
- Remove Tape (Carefully!): While the accent color is still slightly wet (not fully dry, or it might lift the polish), carefully peel off the tape using tweezers or your fingers. If the polish is too dry, wait until it’s completely dry before removing to avoid smudging.
- Freehand Designs: If you’re not using tape, use a thin nail art brush to draw straight lines, squares, triangles, or other geometric shapes.
- Multiple Layers: You can layer tape and colors to create more complex geometric patterns on top of each other. Let each layer dry before applying tape and the next color.
- Finish with Top Coat: Once all your polish is dry, apply a good layer of top coat to seal the design.
Technique 3: Marbling & Swirls
This technique creates a fluid, organic look by swirling colors together. It’s beautiful and surprisingly easy!
- Start with a Base: Paint your nails with a light or neutral color and let it dry completely.
- Prepare Your Swirl Colors: Get 2-3 colors ready that you want to marble.
- Method A: Water Marbling (Requires Practice):
- Fill a small cup with room-temperature water.
- Add a few drops of your chosen nail polish colors directly onto the surface of the water. They will float.
- Use a toothpick to gently swirl the colors together. Don’t over-swirl, or the colors will become muddy.
- Dip your nail into the swirled colors on the water’s surface. Twist your wrist slightly to get a good coat.
- Carefully remove your finger from the water.
- Immediately clean up any excess polish from your skin.
- Repeat for each nail. This method has a learning curve but produces stunning effects!
- Method B: Direct Swirls on Nail:
- Apply 2-3 blobs of different colors next to each other on a piece of wax paper.
- Use a thin brush or toothpick to swirl the colors together gently on the wax paper.
- Carefully transfer the swirled design onto your nail using a stamper or by dabbing it.
- Alternatively, for a simpler on-nail swirl: While your base polish is still wet, add a few drops of accent color onto the nail and use a toothpick to gently swirl them in. This is more forgiving.
- Let Dry and Seal: Allow the design to dry completely, then apply a generous top coat.
Technique 4: The Minimalist Dot & Line
Sometimes, less is more! This technique is chic, modern, and understated.
- Base Color: Apply your favorite base polish and let it dry completely.
- For Dots: Use a dotting tool (or the rounded end of a toothpick) to pick up a small amount of polish. Gently press the dot onto your nail. You can create patterns with dots of varying sizes or place them randomly.
- For Lines: Use a thin nail art brush or a toothpick. Dip the very tip into polish and carefully draw straight lines, wavy lines, or sharp angles across your nail.
- Combine: Mix dots and lines for a dynamic look. For example, a few strategically placed dots near a thin diagonal line can look very sophisticated.
- Highlight: Consider a metallic or neon polish for a subtle pop against a neutral background.
- Top Coat: Apply a thin, even layer of top coat to protect your art.
Bringing in Famous Abstract Art Styles for Inspiration
Ready to take your abstract nail art to the next level? Let’s look at movements and artists that can spark your imagination.
1. Mondrian-Inspired Nails (Geometric Minimalism)
Think Piet Mondrian’s iconic grid paintings.
- Colors: Primarily red, yellow, blue, black, and white.
- Technique: Use nail art tape to create a grid of thick black lines. Fill in some of the resulting squares with blocks of red, yellow, or blue. Leave others white.
- Tip: Precision is key here. Ensure your tape edges are super sharp for clean lines.
2. Kandinsky-Inspired Nails (Bold & Expressive)
Wassily Kandinsky was a pioneer of abstract art, known for his vibrant colors and dynamic forms.
- Colors: A spectrum of bright, bold colors – reds, blues, yellows, greens, oranges.
- Technique: Layer bold, sweeping lines, circles, and organic shapes. Don’t be afraid of overlapping colors and forms. Splatter effects and mixed media (like glitter accents) can also work well.
- Tip: Think about energy and movement. Let your brushstrokes be visible and bold.
3. Pollock-Inspired Nails (Drip & Splatter)
Jackson Pollock’s “drip painting” technique is perfect for achieving a chaotic yet beautiful abstract look.
- Colors: Often uses multiple contrasting colors, with black and white as common elements.
- Technique: This is all about controlled chaos. Drip, splatter, and flick paint onto your base using brushes, toothpicks, or even by flicking the polish bottle lid (carefully!).
- Tip: Layering is important to get depth. Start with a base color, then add drizzles and splatters of other colors.
4. Cubism-Inspired Nails (Fragmented & Bold)
Inspired by artists like Picasso and Braque, Cubism breaks down objects into geometric shapes and views them from multiple angles.
- Colors: Can range from muted earth tones to bold primary colors.
- Technique: Create fragmented geometric shapes – triangles, squares, rectangles within rectangles. Use sharp lines (tape can help) to define these broken segments. You can also try painting different shapes on different nails for a unified collection.
- Tip: Think about breaking up the nail surface into distinct, angular planes.
Color Palettes & Combinations for Abstract Art Nails
Choosing your colors is a huge part of the creative process. Here are some ideas to get you started.
Consider these combinations to inspire your abstract nail designs:
| Style Inspiration | Color Palette Examples | Vibe |
|---|---|---|
| Monochromatic | Shades of blue (navy, sky, teal) | Sophisticated & Serene |
| Bold Contrast | Black, White, Red, and Gold | Dramatic & Modern |
| Earthy Tones | Olive Green, Terracotta, Beige, Cream | Natural & Chic |
| Neon Pop | Black base with accents of neon pink, lime green, electric blue | Edgy & Playful |
| Pastel Dreams | Mint green, baby pink, lavender, pale yellow | Soft & Whimsical |
Common Abstract Nail Design Mistakes & How to Fix Them
Even with simple techniques, we all make mistakes. That’s totally okay! Here’s how to salvage your art.
- Polish Bleed Under Tape: If your lines aren’t crisp, it’s usually because the tape wasn’t pressed down firmly enough, or you applied polish too thickly near the edge.
- Fix: Wait for the polish to dry completely. Then, use a fine-tipped brush dipped in nail polish remover to carefully clean up the fuzzy edges.
- Muddy Swirls or Water Marbles: Over-swirling colors or dipping your finger too many times can lead to brown or muddy results.
- Fix: For water marbling, it’s often best to start over with fresh polish on the water. For direct swirls, try adding a tiny bit more of one of the original colors to re-define the pattern, or simply cover it with a new abstract design.
- Gloppy Top Coat: Applying too much top coat, especially over textured designs (like splatters), can flatten the detail. Or, if the polish underneath isn’t dry, it can drag and create streaks.
- Fix: Apply top coat in thin, even layers. If the polish is truly not dry, let it cure fully before applying top coat. For textured designs, try a gel-like top coat applied slightly thicker for best results.
- Uneven Splatter Coverage: Some areas might have too much splatter, others too little.
- Fix: You can go back in with a fine brush and manually add or blend small splatters in sparse areas, or cover up an over-splattered area with a strategic line or blob of a different color.
Maintaining Your Abstract Nail Art
Once your artwork is complete and sealed, you want it to last!
- Wear Gloves: When doing chores, especially washing dishes or cleaning, wear rubber gloves to protect your nails from harsh chemicals and prolonged water exposure.
- Avoid Using Nails as Tools: Don’t use your nails to pry open cans, scrape labels, or anything similar. This can quickly chip your beautiful design.
- Moisturize: Keep your cuticles and the skin around your nails hydrated with cuticle oil or hand cream. Healthy cuticles make your manicure look polished.
- Quick Touch-Ups: If you notice a tiny chip or a slight wear on an edge, you can sometimes carefully touch it up with a matching polish or even strategically add a dot or line to disguise it.
- Top Coat Refresh: Every few days, especially if your nails are heavily used, you can apply another thin layer of top coat to refresh the shine and protection.
Frequently Asked Questions About Abstract Nail Art
Q1: What is abstract art-inspired nail design?
A1: It’s nail art that takes cues from abstract art movements, focusing on shapes, colors, lines, and textures rather than realistic imagery. Think bold patterns, expressive strokes, and creative use of color.
Q2: Do I need special tools for abstract nail designs?
A2: While you can get by with toothpicks and a steady hand, tools like dotting tools, thin nail art brushes, and nail art tape make creating abstract designs much easier and more precise. Basic nail polish, a base, and top coat are essential.
Q3: How do I make my abstract nail designs last longer?


