Quick Summary: Learn the easy steps to achieve a stunning, classic red nail design with an effortless glossy finish. This guide provides simple instructions for a salon-worthy look at home, perfect for any occasion. Get ready for perfectly polished, chic red nails!
Ah, the classic red nail. It’s timeless. It’s bold. It’s undeniably chic. But achieving that perfectly smooth, high-gloss finish at home can sometimes feel like a beauty puzzle. Many of us struggle with streaks, unevenness, or a finish that fades too quickly. Don’t worry! With a few simple techniques and the right approach, you can master the classic red nail design with an effortless, enviable gloss, bringing a touch of sophisticated glamour to your fingertips. Let’s dive into making your nails shine.
Why We Love Classic Red Nails
The allure of a classic red manicure is undeniable. It’s a color that has graced movie stars on the red carpet and exudes confidence and style. Red nails have a way of completing an outfit, adding that perfect pop of color and a touch of vintage glamour or modern sophistication. Whether you’re heading to a job interview, a fancy dinner, or just want to feel a little more put-together on a Tuesday, red nails are a universally flattering and powerful choice. They say you’re in control, you’re polished, and you know what you want. Plus, they pair beautifully with just about anything!
Gathering Your Glossy Red Essentials
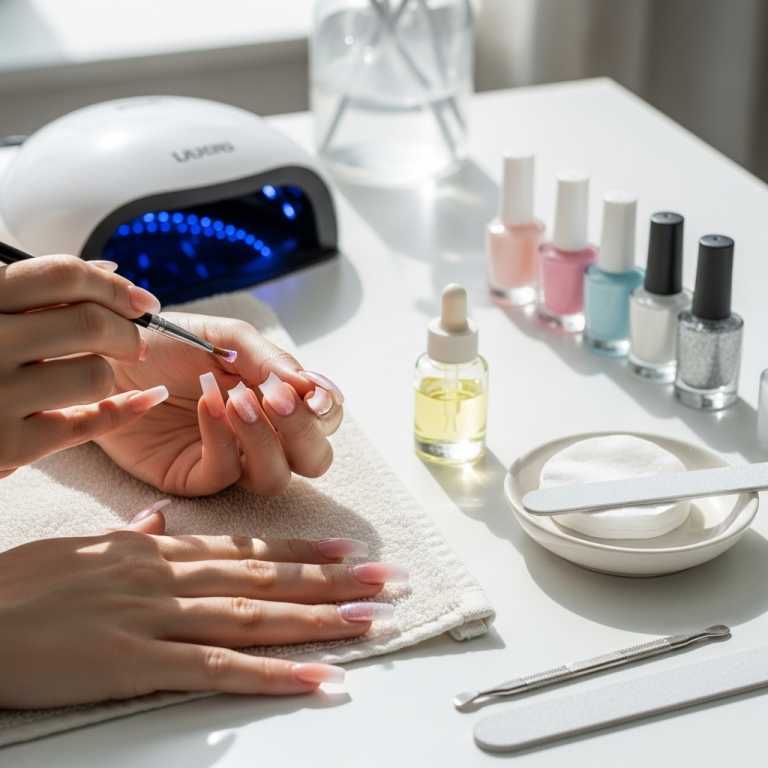
Before we start painting, let’s make sure you have everything you need for that perfect glossy finish. Having the right tools makes all the difference, turning a potentially frustrating DIY session into a relaxing and rewarding experience. Think of this as setting up your own mini-nail salon at home. You’ll want to have high-quality products that work well together to create that smooth, durable, and super shiny result. Don’t be tempted to skip steps; each one plays a crucial role in the final masterpiece!
Essential Tools for Your Red Manicure
- Base Coat: This invisible layer is your nails’ best friend. It creates a smooth canvas, prevents staining from darker polishes (especially important for red!), and helps your color adhere better.
- Classic Red Nail Polish: Choose a high-quality, opaque red shade you adore. Look for formulas that promise good coverage in one or two coats.
- Top Coat: This is the secret weapon for that incredible, long-lasting gloss! A good top coat seals in your polish, adds immense shine, and protects against chips.
- Cuticle Pusher or Orangewood Stick: Gently pushing back your cuticles creates a clean nail bed, allowing for a more professional-looking polish application.
- Nail File and Buffer: For shaping your nails and smoothing any ridges before you begin.
- Lint-Free Wipes: These are essential for cleaning nail surfaces without leaving behind fuzzy bits.
- Nail Polish Remover: For any little oopsies or for starting fresh.
- Optional: Quick-Dry Drops or Spray: If you’re short on time, these are lifesavers for speeding up the drying process.
Step-by-Step: Achieving Effortless Glossy Red Nails
Now for the fun part! Following these steps will help you achieve that beautiful, salon-quality glossy red finish right in your own home. Remember, patience is key, especially when working with a vibrant color like red to ensure a flawless application.
Step 1: Prep is Paramount – Clean and Shape
A beautiful paint job starts with a clean canvas. Gently push back your cuticles using a cuticle pusher or orangewood stick. Be careful not to push too hard; the goal is to reveal the nail plate. Next, use your nail file to shape your nails. Whether you prefer rounded, square, or almond, ensure all nails are a uniform length and shape. A quick buffing with a nail buffer can smooth out any surface ridges, creating an even base for your polish to adhere to. Finally, wipe down each nail with a lint-free wipe and a bit of nail polish remover to remove any natural oils or dust. This ensures your polish will stick well.
Step 2: The Foundation – Applying Your Base Coat
Every stunning masterpiece needs a solid foundation, and your nails are no different! Apply a thin, even layer of your base coat. Make sure to cap the free edge of your nail by painting a tiny bit of polish along the tip. This helps prevent chipping and protects your natural nail from staining, especially with pigmented polishes like red. Let the base coat dry completely – usually about 60 seconds. Rushing this step can lead to a less durable manicure.
Step 3: Building the Color – Your First Coat of Red
Here comes the star of the show! Start with your classic red nail polish. For the best control and an even application, use the three-stroke method: one stroke down the center of the nail, then one down each side. Avoid loading your brush with too much polish; you can always go back for a second dip if needed. Don’t worry if the first coat looks a little streaky or patchy – that’s completely normal! The goal of the first coat is to lay down a thin, even layer of color. Carefully paint as close to the cuticle as possible without touching it, and remember to cap the free edge again. Let this coat dry for at least two minutes.
Step 4: Deepening the Hue – Your Second Coat of Red
This is where the magic of that rich, opaque red really comes to life. Apply a second thin, even coat of your red polish, using the same three-stroke method. This coat should cover any streaks from the first application and make the color uniform and vibrant. Again, get as close to the cuticle as you can for a full coverage look, and cap the free edge. Let this second coat dry for a good three to five minutes. The better this layer dries, the smoother your top coat will be.
Step 5: Sealing the Shine – The All-Important Top Coat
This is the step that truly delivers that “effortless gloss”! Apply a generous, but not gloopy, layer of your glossy top coat. Just like with the color, paint from the cuticle to the free edge, and crucially, cap the free edge. This sealing of the tip is a major step in preventing chips and keeping that shine intact. Some top coats can be a bit thick; if yours is, use slightly less to avoid a bulky finish. Make sure the top coat covers the entire nail surface, including the red polish. If you have any small imperfections or slightly uneven spots, a good top coat can often smooth them out beautifully.
Step 6: The Finishing Touch – Quick Drying and Clean-Up
Now, patience is your best friend! For the ultimate glossy finish that lasts, resist the urge to use your hands heavily for at least 30 minutes. If you’re using quick-dry drops or spray, now is the time to apply them according to the product instructions. These can significantly reduce the drying time and help prevent smudges. Proper drying and ventilation are key to a durable manicure. Once your nails feel dry to the touch, carefully use a small brush dipped in nail polish remover to clean up any polish that may have gotten on your skin or around your cuticles. This small step makes a huge difference in the final, polished look.
Pro Tips for a Flawless Glossy Red
Want to elevate your classic red nail design from great to absolutely breathtaking? Here are a few extra tips honed from years of playing with polish:
- Quality Matters: Invest in good quality base and top coats, and a red polish with a good formula. They make a significant difference in application, wear time, and the final shine.
- Thin Coats are Key: It’s always better to build up color with two or three thin coats than to apply one thick, streaky coat. Thicker coats take longer to dry and are more prone to smudging.
- Don’t Forget to Cap the Edge: This is the golden rule for preventing chips and extending the life of your manicure. Ensure every layer, including the base and top coats, seals the free edge of your nail.
- Clean Your Brush: If your polish brush starts to get goopy or unevenly coated, wipe it gently on the neck of the bottle to remove excess polish and maintain a clean, precise application.
- The “Floating” Top Coat Trick: If your red polish is slightly bumpy after drying, you can sometimes smooth it out by applying the top coat directly over the polish without touching the polish with the brush. Let the top coat “float” and spread over the nail. This works best if the polish underneath is fully dry.
- Revive Your Top Coat: If your go-to top coat starts to thicken over time, you can sometimes add a few drops of nail polish thinner to revive it. Proper thinning can extend its life and improve its application.
Common Red Nail Design Challenges and Solutions
Even with the best intentions, sometimes things don’t go perfectly. Here’s how to tackle some common issues when creating your classic glossy red nails:
| Problem | Solution |
|---|---|
| Streaky application of red polish | Ensure you’re using thin coats and allowing each to dry sufficiently before applying the next. A smooth base coat also helps. If still streaky, consider a different red polish formula known for good pigmentation. |
| Smudges or dents shortly after applying | This usually means the polish isn’t dry enough. Be patient! Use quick-dry drops or a fan to speed up drying. Avoid touching abrasive surfaces. |
| Chipping at the edges | This is often due to not capping the free edge properly with each coat (base, color, and top). Ensure you seal the tip of your nail with every layer unless the polish is already too thick. |
| Yellowing of natural nails under red polish | A good quality base coat is crucial for preventing this. If you notice staining, focus on using a protein-based base coat, and ensure your red polish is fully opaque before deciding you don’t need enough coats. |
| Glossy finish not lasting | Your top coat might not be strong enough, or you may be being too rough with your nails. Reapply a thin layer of top coat every 2-3 days to refresh the shine. Look for top coats specifically designed for long wear and high gloss. |
Beyond the Solid Shade: Simple Red Nail Accents
While a solid, glossy red is a statement in itself, you can add subtle touches to make your classic red nail design even more special. These ideas are beginner-friendly and don’t require complex techniques:
- The Red French Manicure: Instead of white tips, use a slightly lighter or darker shade of red, or even a metallic red, for the tips.
- A Single Accent Nail: Paint one nail, perhaps your ring finger, a different complementary color (like a soft gold, black, or nude), or add a subtle shimmer top coat to that one nail.
- Dotting Detail: Use a dotting tool or the tip of a bobby pin to add a few small dots of black, gold, or white polish near the cuticle or along the free edge.
- Subtle Glitter Top Coat: Apply your red polish as usual, then use a sheer glitter top coat over it. This adds a hint of sparkle without overpowering the classic red.
- Glossy Ombre: While a bit more advanced, a simple ombre can be achieved by blending a lighter shade of red into your classic red using a sponge. Finish with a generous top coat to blur the lines.
Remember, the key is to keep any accents subtle so they enhance, rather than detract from, the beautiful glossy red.
Maintaining Your Glossy Red Manicure
Once you’ve achieved that perfect glossy red finish, you’ll want it to last! Proper care can extend the life of your manicure significantly. Think of it as giving your beautiful nails a little ongoing TLC.
- Be Gentle: Avoid using your nails as tools. Opening cans, scraping stickers, or aggressively scrubbing can lead to chips and lifting.
- Moisturize: Keep your cuticles and hands hydrated with a good cuticle oil and hand cream. Dryness can make polish brittle and prone to chipping. Apply cuticle oil daily, and hand cream whenever your hands feel dry.
- Gloves are Your Friend: When doing household chores, especially those involving water or harsh cleaning products, wear rubber gloves. Water can seep under the polish and weaken its bond to the nail.
- Refresh the Shine: Every two to three days, apply a thin layer of your top coat over your existing manicure. This will refresh the shine, even out any minor imperfections, and add an extra layer of protection against chipping.
- Avoid Hot Water Soaks: Prolonged soaking in very hot water can soften the nail and the polish.
Frequently Asked Questions About Classic Red Nail Design
Q1: Why does my red nail polish always look streaky?
Streaky red polish is a common frustration! It often happens when the polish formula is too thin, or if you’re applying it too thickly. Ensure you’re using very thin coats and letting each layer dry sufficiently before applying the next. A good quality, opaque red polish usually helps with this. Also, making sure the polish is well-mixed by rolling the bottle (not shaking!) can ensure even pigment distribution.
Q2: How can I make my glossy red nails last longer?
The secret to longevity lies in proper prep, application, and maintenance. Always use a base coat and cap the free edge of your nail with every layer. Apply thin coats of color and a generous, sealing top coat. Avoid using your nails as tools and wear gloves for chores. Refreshing your top coat every few days can also significantly extend the wear time and keep that shine looking fresh.
Q3: How do I avoid getting red polish on my skin?
Precision is key here! Before painting, ensure your nail polish brush isn’t overloaded with polish. Use the three-stroke method (center, then sides) and get as close to the cuticle as possible without touching it. If you do get polish on your skin, wait for it to dry slightly, then use a small brush dipped in nail polish remover to carefully clean up the excess. Many people also swear by using a liquid latex or a barrier balm around the cuticle before painting.
Q4: Can I achieve a glossy finish with matte red polish?
Yes! While matte polish is designed to dry to a flat finish, you can easily achieve a stunning glossy look by applying a high-shine, glossy top coat over your matte red polish. This creates a beautiful, often unexpected, juxtaposition of textures and completely transforms the finish. Just ensure the matte polish is fully dry before applying the glossy top coat.
Q5: My red nails seem to stain my natural nails. How can I prevent this?
The best defense against red polish staining is a barrier! Always, always use a good quality base coat. Look for ones that are specifically designed to prevent staining or are formulated with strengthening ingredients. Some people find a thicker, more opaque base coat helps more. Ensure your red polish has good coverage in two coats; if you’re trying to get away with one thin coat of a sheer red, you’re more likely to experience staining.
Q6: What’s the best way to remove red nail polish without staining?
When removing red polish, especially if it’s dark or has been on for a while, it’s crucial to use a good quality nail polish remover, preferably one with acetone for tougher polishes. Use a generous amount of remover on a lint-free pad and press it onto the nail for about 15-30 seconds before wiping. This allows the remover to break down the pigment. Wiping gently and repeating the process will help avoid harsh scrubbing which can spread residual color. Applying a fresh base coat immediately after removing the polish can also help protect against any lingering staining.
The Enduring Charm of Classic Red
The classic red nail design with an effortless glossy finish is more than just a manicure; it’s an iconic beauty statement. It’s a symbol of confidence, sophistication, and timeless style that never goes out of fashion. By following these simple steps and tips, you can achieve that coveted salon-quality shine and a flawless application right at home. From the crucial prep work to the perfect top coat seal, each stage contributes to a manicure that looks stunning and lasts. So, embrace the power of red, don’t shy away from the gloss, and let your nails do the talking. You’ve got this!


