Unlock Magical Nails: Get Stunning Unicorn Nail Design Inspiration Perfect for Beginners! Discover easy tips and dazzling ideas to create your own enchanting unicorn manicures that shine.
Are you ready to add a touch of magic to your fingertips? Unicorn nails are everywhere, and for good reason! They’re whimsical, colorful, and totally enchanting. But if you’re new to nail art, the thought of creating these dazzling designs might seem a little intimidating. Don’t worry, that’s where we come in! At Nailerguy, we believe nail art should be fun and accessible for everyone. We’re here to break down the magic of unicorn nails, offering inspiration and easy-to-follow tips so you can craft your own stunning creations with confidence. Get ready to sparkle and shine!
Why Unicorn Nails Are Pure Magic
Unicorn nails aren’t just a trend; they’re a vibe! They embody fantasy, dreams, and a whole lot of sparkle. Think iridescent finishes, pastel rainbows, glitter, and holographic accents that capture the light and everyone’s attention. They’re perfect for adding a playful pop to any outfit, a special touch for a party, or just for days when you need a little extra joy. The beauty of the unicorn nail trend is its versatility. You can go for a full-on magical fantasy look or incorporate subtle hints of unicorn magic.
Essential Tools for Your Unicorn Nail Journey
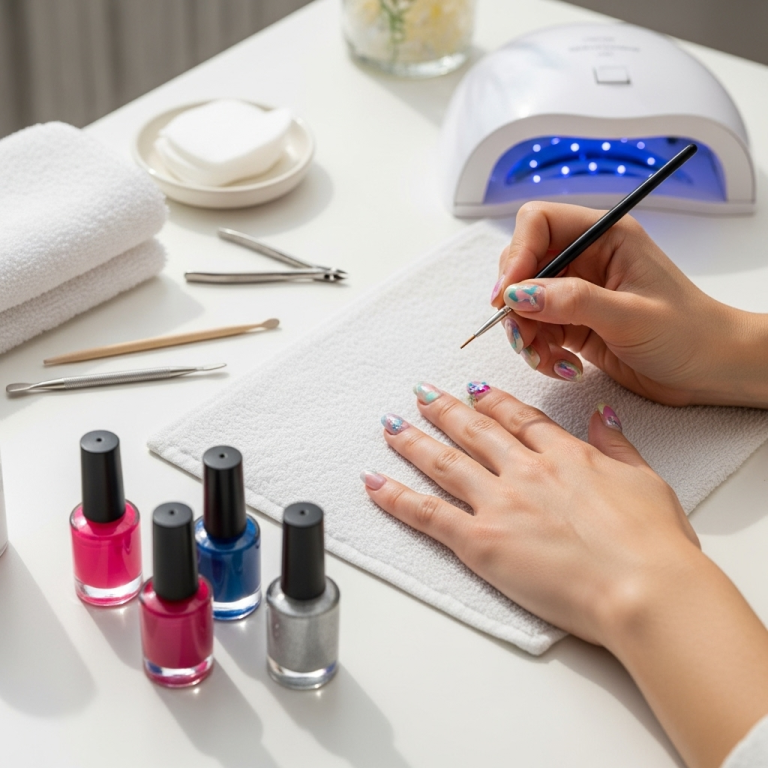
Before we dive into the fun designs, let’s chat about making sure you have the right gear. Having the correct tools can make a world of difference, turning a potentially tricky DIY manicure into a smooth and enjoyable experience. Don’t worry, you don’t need a professional salon setup to create amazing unicorn nails!
Here’s a list of essentials to get you started:
- Base Coat: Crucial for protecting your natural nails and helping polish adhere better. A good quality base coat prevents staining and makes your manicure last longer.
- Top Coat: This is your magic finisher! A shiny top coat seals your design, adds gloss, and prevents chipping. Look for a quick-drying one to save time.
- Nail Polish Colors: Think pastels, iridescent shades, white, silver, gold, and various rainbow colors.
- Dotting Tools: These come in various sizes and are perfect for creating small dots, swirls, and even simple floral patterns.
- Fine-Tipped Nail Art Brushes: Essential for drawing delicate lines, creating gradients, and adding intricate details.
- Nail Polish Remover & Cotton Pads: For mistakes and cleanup.
- Cuticle Pusher/Orange Stick: To gently push back cuticles for a clean canvas.
- Nail File & Buffer: To shape and smooth your nails.
- Optional: Glitter & Holographic Polish/Flakes: For that extra unicorn sparkle!
- Optional: Chrome Powder & Applicator: For a stunning, mirror-like effect.
Understanding Unicorn Nail Aesthetics
What exactly makes a nail design “unicorn-esque”? It’s all about capturing that mythical creature’s essence. Here are the key elements you’ll often see:
- Iridescence & Holo: This is probably the most defining feature. Think pearly finishes, shimmery shifts in color, and dazzling rainbow glints under light.
- Pastel Rainbows: Soft, dreamy colors blending into each other, mimicking a gentle rainbow.
- Sparkle & Glitter: Lots of it! From fine glitter to chunky flakes, sparkle is a must.
- Whimsical Accents: Think tiny stars, moons, clouds, or even tiny unicorn horns.
- Matte vs. Glossy: While glossy is classic, a matte finish can give a sophisticated, dreamy unicorn look.
Beginner-Friendly Unicorn Nail Design Ideas
Ready to get creative? These designs are designed with beginners in mind, focusing on techniques that are easy to master but deliver maximum wow factor.
1. The Iridescent Dream
This is a fantastic way to get that unicorn shimmer without complex art.
- Prep your nails: Start with a clean canvas. File your nails to your desired shape, push back your cuticles, and apply a base coat. Let it dry completely.
- Base color: Apply two thin coats of a pale pastel color, like baby pink, lavender, or mint green. Let each coat dry fully.
- The iridescent magic: Once your base color is dry, apply one coat of a sheer, iridescent or holographic top coat or polish. This will give your nails a beautiful, color-shifting sheen.
- Seal it in: Apply a clear, glossy top coat to protect your design and add extra shine. Viola! Instant unicorn magic.
2. Pastel Rainbow Gradient
A gentle fade of rainbow colors is quintessentially unicorn.
- Prep: Base coat, as usual.
- Base color: A clean white or very pale pastel works best as a base for vibrant gradients. Apply one or two coats and let it dry.
-
Gradient creation:
- Use a makeup sponge or a dedicated nail art sponge.
- Apply thin stripes of your chosen pastel rainbow colors (e.g., pink, orange, yellow, green, blue, purple) side-by-side onto the sponge.
- Gently dab the sponge onto your nail, blending the colors. You might need to reapply polish to the sponge and dab a few times to build up the color intensity.
- For cleaner lines between colors, you can use a fine-tip brush with nail polish remover to clean up the edges around your cuticle.
- Bring on the sparkle: Once the gradient is dry, a sheer glitter top coat can add depth and disguise any sponging imperfections.
- Seal: Finish with a glossy top coat.
3. Glitter Accent Nail
Sometimes, all you need is a touch of sparkle.
- Prep: Base coat, always!
- Color application: Paint your accent nail (usually the ring finger) with a solid pastel color. Paint your other nails with a different complementary pastel, or keep them clear for a softer look.
- Glitter bomb: On your accent nail, apply a generous coat of iridescent or holographic glitter polish. You can go for full coverage or just a glitter gradient starting from the tip and fading down.
- Second coat (optional): For more intense glitter, apply a second coat once the first is dry.
- Top it off: A thick, glossy top coat is essential to smooth out the glitter texture and seal it in.
4. Simple Dot & Star Designs
Easy to do with dotting tools or even the tip of a toothpick!
- Prep: Base coat.
- Base color: Choose a milky white, light grey, or a soft pastel. Apply one or two coats until opaque.
-
Add the magic:
- Dots: Using a small dotting tool dipped in white, silver, or a contrasting pastel, create tiny dots scattered across your nail.
- Stars: You can find tiny star-shaped glitters to press onto wet polish, or if you’re feeling steady, use a very fine brush to paint tiny star shapes with white or silver polish.
- Seal: A good top coat will keep those little details in place.
Level Up Your Unicorn Nails: Intermediate Techniques
Feeling a bit more adventurous? Try these designs that build on the basics.
5. Chrome Unicorn Horns
This is where the magic really happens! Holographic chrome powders are your best friend here.
- Prep: Base coat.
- Solid color: Apply two coats of your desired base color – white, pink, or a soft blue work wonderfully.
- Matte or Glossy Base: For chrome powder to adhere, you typically need a specific base. Some powders work best on a regular glossy top coat (apply and cure if gel, or let it set), while others require a special no-wipe gel top coat. Check the instructions for your specific chrome powder.
- Apply the Chrome: Using a silicone tool or your fingertip, pick up a small amount of holographic chrome powder and rub it firmly onto your nail. You want to create a smooth, even surface.
- Buff and reveal: Keep rubbing until the entire nail has a shimmering, mirror-like, holographic effect.
- Seal it: This is crucial for chrome! Apply a no-wipe gel top coat, ensuring you cap the free edge to prevent chipping. If you’re not using gel, a very good quality, quick-drying, and durable top coat is essential, but results may vary.
6. Watercolor Unicorn Swirls
Create a dreamy, ethereal look with this technique.
- Prep: Base coat and a sheer white or pale pink base color.
-
Watercolor Effect:
- On a palette or a piece of foil, put small drops of 2-3 pastel watercolor-like polishes (think soft blues, purples, pinks).
- Add a tiny drop of alcohol (rubbing alcohol works) to each polish drop. This will help them spread and create a watercolor look.
- Using a fine art brush, pick up the watered-down polish and gently swirl or dab it onto your nail. Experiment with blending the colors.
- Work quickly as the alcohol evaporates. You can layer colors for more depth.
- Add subtle shimmer: Once dry, a sheer iridescent top coat can enhance the magical feel.
- Seal: Finish with a glossy top coat.
Essential Tips for Unicorn Nail Success
Patience is Key: Don’t rush the drying process between coats. This prevents smudges and ensures a smooth finish.
Thin Coats: Applying multiple thin coats of polish is almost always better than one thick, gloopy coat.
Clean Up: Keep a fine brush dipped in nail polish remover handy to clean up any polish that gets on your skin or cuticles. It makes a huge difference!
Good Lighting: Work in a well-lit area to see your designs clearly and avoid mistakes.
Practice Makes Perfect: If a design doesn’t turn out exactly as you hoped the first time, don’t get discouraged! Keep practicing, and you’ll see improvement.
Experiment with Texture: Don’t be afraid to mix matte and glossy finishes, or add different types of glitter for a unique look.
* Hydrate Your Cuticles: Healthy cuticles make for beautiful nails and a better manicure application. Use a cuticle oil regularly.
Choosing Your Unicorn Color Palette
The beauty of unicorn nails is that they celebrate color! While pastels are a go-to, don’t limit yourself.
Here’s a quick guide to popular unicorn palettes:
| Palette Type | Colors to Use | Vibe/Occasion |
| :—————– | :——————————————————————————– | :—————————————— |
| Classic Pastel | Baby pink, lavender, mint green, baby blue, soft yellow | Dreamy, whimsical, everyday magic |
| Jewel Tone | Deep amethyst, sapphire blue, emerald green, ruby red, with iridescent finishes | Bold, mystical, evening enchantment |
| Neon Pop | Bright fuchsia, electric blue, lime green, vibrant orange, with holographic shift | Funky, festival-ready, playful and bold |
| Iridescent White| Opal, pearl, and shimmering silver over a white or clear base | Ethereal, bridal, sophisticated shimmer |
| Rainbow Bright | Full spectrum of bright, cheerful colors blended together | Joyful, vibrant, ultimate unicorn fantasy |
How to Maintain Your Magical Manicure
Once you’ve created your stunning unicorn nails, you’ll want them to last! Here are some tips:
- Avoid Harsh Chemicals: Wear gloves when doing household chores, especially when using cleaning products, as they can break down polish and diminish shine.
- Reapply Top Coat: A quick refresh of your top coat every 2-3 days can help extend the life of your manicure and keep that shine going.
- Be Gentle: Try not to use your nails as tools (e.g., opening cans, scraping things).
- Moisturize: Keep your hands and cuticles hydrated with lotion and cuticle oil. This prevents dryness that can lead to chips and peeling, and it keeps the nail bed healthy for future manicures.
Frequently Asked Questions About Unicorn Nails
Q1: What’s the easiest way to get a unicorn shimmer on my nails?
The simplest method is to use a dedicated iridescent or holographic top coat over a solid pastel base color. It gives you that magical shift without complicated techniques!
Q2: Can I do unicorn nails without special tools?
Yes! You can achieve beautiful unicorn nails with just regular polish, a steady hand, and maybe a toothpick for dots. For gradients, a household sponge can work.
Q3: My chrome powder isn’t turning iridescent. What am I doing wrong?
Ensure you’re using a holographic chrome powder for the rainbow effect. Also, check that your base coat (often a no-wipe gel top coat) is fully cured but still tacky enough for the powder to adhere. Rubbing the powder in firmly is key!
Q4: How do I prevent my gradient nails from looking streaky?
Use a makeup sponge and dab gently rather than swiping. Applying polish to the sponge in thin stripes and redabbing as needed helps build color and blend smoothly. A glitter top coat can also help disguise minor imperfections.
Q5: Can I make unicorn nail designs with regular nail polish, or do I need gel?
You can definitely create many unicorn nail designs with regular nail polish! While gel polish offers more durability and sometimes easier application for specific effects like chrome, most shimmering, pastel, and glitter looks are achievable with traditional polish.
Q6: How long do unicorn nails typically last?
With proper application (base and top coats are crucial!) and care, regular polished unicorn nails can last 5-7 days. Gel versions can last 2-3 weeks.
Embrace Your Inner Unicorn!
Creating unicorn nails is all about embracing joy, color, and a little bit of fantasy. Whether you’re a seasoned nail art pro or just starting, these designs offer a fun way to express yourself and add some sparkle to your day. Remember, nail art is a journey, and practice is your best friend. Don’t be afraid to experiment, mix and match ideas, and most importantly, have fun with it! So grab those polishes, get inspired, and let your nails shine with the magic of unicorns. You’ve got this!


