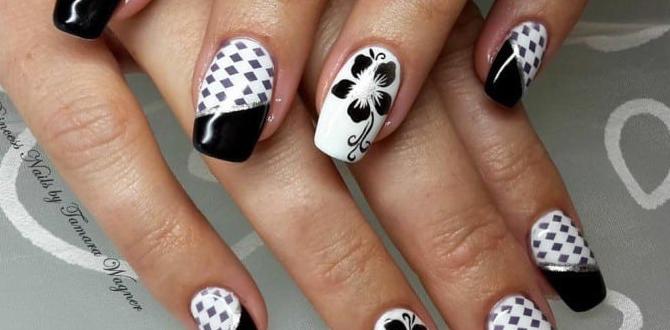
Need a romantic rose nail design that’s simple to create and looks stunning? This beginner-friendly guide unlocks the secrets to effortless rose nail art, perfect for adding a touch of elegance and beauty to your fingertips. Get ready to bloom with confidence as we walk you through easy steps and essential tips for a gorgeous, romantic manicure.
Hello, nail lovers! Lisa here from Nailerguy, bringing you a touch of floral beauty for your fingertips. Do you love the idea of delicate rose designs on your nails but feel a bit intimidated by intricate art? Many of us dream of elegant, romantic manicures, but the execution can seem daunting. You might think you need a steady hand of a professional artist or a whole arsenal of special tools. But what if I told you that creating a beautiful romantic rose nail design is more achievable than you think, even for beginners? Forget the stress! We’re going to break it down into simple, fun steps. Get ready to transform your nails into a canvas of effortless beauty. Let’s dive into how you can easily paint your way to a breathtaking rose garden!
Why Romantic Rose Nail Designs Are Always in Bloom
Roses. They’re the classic symbol of love, beauty, and romance. It’s no wonder they’ve captured hearts for centuries, and their charm is far from fading, especially in the world of nail art. A romantic rose nail design isn’t just a trend; it’s a timeless statement that adds a touch of sophistication and gentle femininity to any look. Whether you’re heading to a special occasion, a romantic date, or just want to feel a little more elegant on a regular Tuesday, roses on your nails bring an instant uplift.
The beauty of rose nail art lies in its versatility. You can opt for deep, velvety reds for a passionate look, soft blush pinks for a delicate touch, or even chic whites and creams for a modern, minimalist vibe. They can be bold and dramatic or subtle and understated. Plus, they work wonderfully on any nail shape and length! The best part? Creating them doesn’t require you to be a Picasso. With a few simple techniques and the right tools, you can achieve professional-looking results right at home. Ready to let your nails blossom?
Essential Supplies for Your Rose Nail Art Journey
Before we get our hands dirty (or rather, our nails painted!), let’s gather the essentials. Don’t worry; you probably have most of these already, or they’re easy to find. Having the right tools makes all the difference, turning a potentially tricky art project into a smooth, enjoyable experience.
- Base Coat: This is your nail’s protector! It prevents staining from polishes and helps your color last longer. A good base coat creates a smooth surface for your design.
- Your Chosen Polish Color(s): For a classic rose look, you’ll need a pink or red for the petals and a green for the leaves. You can also play with pastels, nudes, or even black for a dramatic contrast!
- Detail Brush or Dotting Tool: This is key for creating those delicate petal shapes. A fine-tipped art brush or a dotting tool with a small ball end is perfect.
- Top Coat: Seal your masterpiece! A good top coat adds shine, protects your design from chipping, and makes your manicure last.
- Nail Polish Remover & Cotton Swabs: For any little oopsies. These are your best friends for clean-up around the edges.
- Optional: Glitter Polish or Rhinestones: For that extra sparkle and glam!
Understanding Your Tools
Let’s talk a little more about those brushes and dotting tools. For a beginner-friendly rose, simplicity is key. A fine-tipped nail art brush (often called a liner brush) is excellent for drawing fine lines and shaping petals. A dotting tool, on the other hand, can be used to create dots that you can then manipulate into petal shapes, or to add tiny details. You can even use the tip of a toothpick if you’re in a pinch, though a brush or dotting tool will give you more control.
A great resource for understanding different nail art brushes and their uses can be found on educational sites like Nails Magazine’s Nail Art Brush Guide. It details how different brush types can help create various effects, which can be super inspiring as you get more comfortable with nail art!
Effortless Rose Nail Design: Step-by-Step Tutorial
Ready to paint some pretty petals? This gentle approach focuses on creating beautiful, romantic roses that look intricate but are surprisingly simple to achieve. We’ll be using a technique that builds the rose petal by petal, making it easy to follow and adapt.
Step 1: Prep Your Canvas
First things first: prep your nails. This step ensures a smooth, long-lasting manicure.
- Start with clean, dry nails. Remove any old polish.
- Gently push back your cuticles using an orange stick or cuticle pusher.
- Apply a thin layer of your favorite base coat. Let it dry completely. This protects your natural nail and acts as a sticky base for your polish, helping it adhere better.
Step 2: Lay Down Your Base Color
Apply one or two coats of your chosen base color. This could be a soft pink, a classic nude, or even a dreamy white. Let each coat dry thoroughly between applications. A smooth, even base is the foundation for any beautiful design.
Step 3: Sketching the Rose’s Center
Now for the fun part! Grab a small amount of your pink or red polish onto your detail brush or dotting tool.
- On your nail, create a small, curved line or a tiny swirl to represent the tightly wound center of the rose. Think of a little comma shape or a simple C-curve. This is the heart of your rose!
Pro Tip: Don’t worry about perfection here. Roses are organic, so a slightly imperfect swirl is totally okay and can even add to the charm!
Step 4: Adding the First Layer of Petals
With the same pink or red polish, we’ll build out from the center.
- Using your brush or dotting tool, carefully draw a few curved strokes that overlap slightly and wrap around the center swirl. Imagine you’re drawing little C-shapes or curved teardrops that start at the center and curve outwards.
- These should be looser than the center swirl, giving the impression of opening petals. Aim for 2-3 strokes around the initial center.
Step 5: Building More Petals
Continue adding petals, making them progressively larger and more open.
- Dip your brush again, pick up more polish, and draw larger, more outward-curving strokes.
- Place these new petals so they slightly overlap the previous ones, creating depth and dimension.
- Think of an outward spiral motion, with each stroke forming a new petal that fans out.
- You can make the petals more leaf-like by using slightly more curved strokes.
Beginner’s Tip: If you’re finding it tricky to get the polish to flow smoothly, you can thin your polish slightly with a nail polish thinner (never remover, as it can break down the polish). Or, simply wipe off excess polish from your brush on a lint-free wipe to get a finer line.
Step 6: Adding Subtle Dimension (Optional)
For a touch of realism, you can add a slightly darker shade of your petal color into the deepest crevices of the rose.
- Dip your fine brush into a darker red or pink.
- Gently dab a tiny amount into the areas where the petals naturally fold or are most shaded, usually where they overlap and near the center.
- Blend slightly with a clean part of your brush. This creates a subtle 3D effect.
Step 7: Painting Delicate Leaves
Now, let’s add some greenery to frame your rose.
- Clean your brush and dip it into your green polish.
- On either side of your rose, or nestled at the base, paint small, elongated leaf shapes.
- You can create a simple pointed shape, or use a fine brush to draw a central vein and a couple of smaller veins for a more detailed leaf.
- Usually, one or two leaves on each side are enough to complement the rose without overpowering it.
Step 8: Adding Accents (Optional)
Want to add a little extra flair?
- Glitter: A sheer glitter polish over the petals can add a magical shimmer without hiding the rose design.
- Dots: Small gold or silver dots near the base of the rose can add a touch of elegance.
- Small Flowers: Tiny white dots around the main rose can mimic smaller buds or delicate accents.
Step 9: Seal and Shine!
Once everything is completely dry, it’s time to protect your beautiful artwork.
- Apply a generous layer of your favorite clear top coat.
- Be sure to cap the free edge of your nail (swipe the brush across the very tip of your nail) to prevent chipping.
- Let it dry completely.
And there you have it! A gorgeous, romantic rose nail design created by you!
Variations to Make Your Roses Truly Your Own
The beauty of nail art is in personalization! Once you’ve mastered the basic rose, feel free to experiment with these variations to create looks that perfectly suit your style and the occasion.
Color Play
Don’t feel limited to traditional red and pink!
- Pastel Roses: Use soft lavenders, baby blues, or mint greens for a whimsical, fairy-tale feel.
- Monochromatic Magic: Use different shades of the same color family on one nail – a deep crimson center fading to a soft blush pink.
- Dramatic Roses: Try deep burgundies, plums, or even black for a bold, gothic-inspired look.
- White Roses: Classic, elegant, and perfect for weddings or chic events. Use a thin black or grey liner for subtle definition.
Texture and Finish
Play with different polish finishes for unique effects.
- Matte Finish: Apply a matte top coat for a sophisticated, velvety look that can make deep colors pop.
- Metallic Accents: Use a metallic polish for the center swirl or to outline petals for a touch of luxury.
- Glitter Gradient: Apply a glitter polish from the cuticle down, fading out towards the tip, with your rose design placed on top or blended in.
Design Placement
Where you put your roses can change the whole vibe.
- Accent Nail: A single, detailed rose on your ring finger is a classic for a reason.
- Full Bloom: Cover all nails with smaller roses for a powerful floral statement.
- Nautical Twist: Pair your roses with stripes or polka dots in complementary colors.
- French Tip Roses: Paint small roses along the smile line of a French manicure.
Remember, nail art is all about having fun and expressing yourself! These variations are just starting points. Get creative and see what beautiful designs you can dream up.
Maintaining Your Romantic Rose Manicure
You’ve worked hard to create a beautiful rose nail design, and you want it to last! Here are some simple tips to keep your manicure looking fresh and fabulous for as long as possible:
- Be Gentle: Avoid using your nails as tools. Don’t scrape, pry, or dig with them, as this can chip the polish and damage your design.
- Moisturize Daily: Keep your hands and nails hydrated! Apply cuticle oil and hand cream regularly. Healthy nails and cuticles are less prone to chipping and peeling.
- Wear Gloves: When doing household chores like washing dishes, cleaning, or gardening, wear rubber gloves to protect your hands and nails from harsh chemicals and excessive moisture.
- Reapply Top Coat: If your manicure starts to lose its shine or you notice minor wear after a few days, a fresh layer of top coat can work wonders. This is especially helpful for designs that have texture.
- Avoid Hot Water Soaks: Prolonged soaking in hot water can weaken the polish bond. Try to keep your hands out of hot water for extended periods.
- Touch-Ups: For very minor chips, you can sometimes carefully touch them up with a bit of top coat or even a tiny bit of polish if you have a good color match.
A well-maintained manicure not only looks great but also helps your beautiful rose design stay looking its best, allowing you to enjoy your floral elegance for longer.
Troubleshooting Common Rose Nail Art Hiccups
Even with the simplest designs, sometimes things don’t go exactly as planned. Don’t get discouraged! Here’s how to fix those common little issues:
Here’s a quick guide to common issues and their easy fixes:
| Problem | Solution |
|---|---|
| Polish is too thick or stringy. | This usually means the polish is old or has been exposed to air too much. Try adding a drop of nail polish thinner (not remover!). If that doesn’t help, it might be time for a new bottle. Make sure to store your polishes with lids tightly closed in a cool, dark place. |
| Lines are too thick or blotchy. | This can happen if you have too much polish on your brush. Carefully wipe off excess polish onto a lint-free wipe or paper towel before painting. Also, ensure your brush is clean and free of dried polish. |
| My rose looks like a blob! | Don’t worry! Sometimes a little definition is all it needs. Use a fine brush and a slightly darker shade of your petal color to trace over the “petal” lines, or use a fine black or brown liner to sketch in subtle outlines and shadows. For the center swirl, try refining it slightly. |
| Nail polish smudges while I’m working. | This means the polish isn’t dry yet! Patience is key. Let each step dry adequately before moving on. If a smudge happens, gently try to smooth it out with your fine brush and a tiny bit of polish, or even dab a little bit of your base nail color to “erase” it and try again carefully. |
| My leaves look awkward. | Try making them simpler! A single, slightly curved stroke with a pointed end is often all you need for a basic leaf. You can also use a fine liner brush to add a central line for more detail. Less is often more when it comes to leaves so they don’t distract from the rose. |
| The design looks flat. | Add subtle shading! Use a slightly darker shade of your petal color and dab it into the deepest parts of the rose (where petals overlap or curl inwards). Blend gently with your brush. A touch of shimmer or a subtle holographic top coat can also add depth. |
Remember, practice makes perfect! Every time you paint your nails, you’ll get a little better and a little more confident. The goal is beautiful, expressive nails, not absolute perfection.
Frequently Asked Questions About Romantic Rose Nail Designs
Got more questions buzzing around? Let’s clear them up!
Q1: Can I really do this if I have zero nail art experience?
A1: Absolutely! This guide is designed specifically for beginners. We’ve focused on simple techniques and easy-to-follow steps. With just a few common nail polish tools, you can create a beautiful rose design. It’s more about building shapes with polish than intricate drawing.
Q2: What are the best colors for a romantic rose nail design?
A2: Classic choices include soft pinks, romantic reds, deep burgundies, and elegant whites or creams. Don’t be afraid to experiment with pastels like lavender or baby blue for a whimsical feel, or even a deep plum for a dramatic, modern twist. Green is standard for leaves, but you could also try a deep teal or even a coppery brown for an unusual look.
Q3: How long does a rose nail design typically take to complete?
A3: For a beginner focusing on one or two nails as accents, you can expect it to take about 20-30 minutes per hand, plus drying time. If you’re doing roses on all ten nails, it might take a bit longer, perhaps 40-60 minutes. The drying time between coats and of the final top coat is also crucial, so factor that in!


