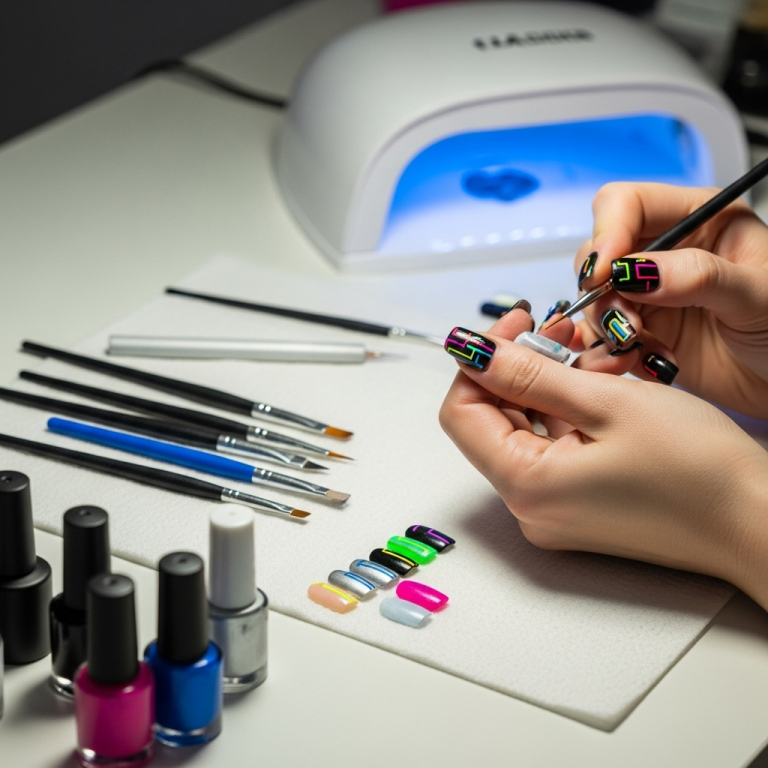
Applying nail design decals is a quick and easy way to add stunning, professional-looking art to your nails at home. With just a few simple steps, you can transform your manicure into a custom masterpiece without any artistic skill required. Get ready to elevate your nail game effortlessly!
Love the idea of gorgeous nail art but don’t have a steady hand or hours to paint? You’re not alone! Many of us admire intricate designs but feel they’re out of reach. The good news? You can achieve beautiful, salon-worthy nail designs with minimal fuss. Nail design decals, also known as nail stickers or transfers, are your secret weapon for effortless beauty. They’re perfect for busy bees, beginners, or anyone who wants to add a pop of wow to their nails. Stick around, and I’ll guide you through exactly how to apply them so your nails look fabulous every time!
What Are Nail Design Decals and Why Are They Amazing?
Nail design decals are thin, pre-printed designs that you can easily apply to your nails. Think of them as tiny, stylish tattoos for your fingertips! They come in thousands of patterns, from delicate florals and geometric shapes to sparkly glitter and intricate lacework. The best part? You don’t need to be a nail art pro to use them. They’re incredibly user-friendly, making them a go-to for anyone wanting to spice up their manicure.
Why are they so popular? Let’s count the ways:
- Effortless Application: You don’t need a steady hand or artistic talent.
- Variety Galore: Endless designs mean you can match your mood, outfit, or occasion.
- Time-Saving: Get a complex look in minutes, not hours.
- Budget-Friendly: A fraction of the cost of professional nail art.
- Long-Lasting: When applied correctly, they can stay put for days.
Gather Your Nail Decal Application Kit
Before we dive into the fun part, let’s make sure you have everything you need. You probably already have most of these items in your nail care stash!
Essential Tools for Decal Success:
- Your Chosen Nail Design Decals: Pick ones you love! They come in various types, like water-transfer (decals you soak) and adhesive stickers. We’ll cover both.
- Base Coat: This protects your natural nail and helps polish adhere better.
- Nail Polish: The color you’ll apply as your base before the decal.
- Top Coat: Crucial for sealing in your design and adding shine.
- Tweezers: For delicate handling and precise placement.
- Small Bowl of Water (for water-transfer decals): Clean, lukewarm water is ideal.
- Cuticle Pusher or Orangewood Stick: To gently smooth down the decal.
- Lint-Free Wipes or Cotton Pads: To absorb excess water and clean up.
- Rubbing Alcohol (Isopropyl Alcohol): To ensure a clean, oil-free surface.
- Optional: A Clear Nail File: For gently refining edges if needed.
Step-by-Step Guide to Applying Nail Design Decals
Applying nail decals is surprisingly simple. Whether you have water-transfer decals or adhesive stickers, the process is straightforward. Let’s break it down!
Method 1: Applying Water-Transfer Decals
These are super popular and offer a very seamless look. You’ll soak them briefly in water, which activates the adhesive backing.
- Prep Your Nails: Start with clean, dry nails. Apply a base coat and let it dry completely. Then, apply your desired nail polish color—this is the background for your decal. Let this polish dry until it’s tacky but not fully wet. This is key! If it’s too wet, the decal will smudge; too dry, and it won’t stick. A good test is to gently touch your nail with a clean finger—if it leaves a slight imprint but doesn’t feel sticky, it’s ready.
- Cut and Soak Your Decal: Using small nail scissors or cuticle scissors, carefully cut out your chosen decal design. Try to get as close to the image as possible. If your decal has a clear protective film, remove it now. Then, using your tweezers, dip the decal into a small bowl of lukewarm water for about 15-30 seconds. You’ll see the decal start to loosen on its backing paper. Don’t over-soak!
- Position the Decal: Gently slide the decal off the backing paper onto your nail. You can use your tweezers to help position it. If your polish is tacky enough, you can lightly slide the decal into its final spot. If the polish is too dry, you might need to add a tiny drop of water or top coat to the nail to help it slide.
- Smooth and Secure: Once the decal is in place, use a cuticle pusher or orangewood stick to gently smooth it down from the center outwards. This pushes out any air bubbles and ensures the decal adheres smoothly to your nail. Immediately after smoothing, use a lint-free wipe to gently dab away any excess water around the edges.
- Seal the Deal: Once the decal is smoothed and the water is removed, let it dry for a minute or two. Then, apply a generous layer of top coat. This is where the magic happens! The top coat seals the decal, protects it, and makes it look like it’s part of your nail. Ensure you cap the free edge of your nail by running your top coat brush along the tip of your nail to prevent lifting.
Method 2: Applying Adhesive Nail Stickers
These are the easiest to use, as they’re basically sticky labels for your nails!
- Prep Your Nails: Just like with water-transfer decals, start with clean nails. Apply a base coat and let it dry. Then, apply your colored polish and let it dry completely. Unlike water decals, your polish must be fully dry for adhesive stickers to stick properly.
- Clean with Alcohol: To ensure maximum adhesion, lightly swipe each nail with rubbing alcohol on a lint-free wipe. This removes any oils that could prevent the sticker from sticking. Allow the alcohol to evaporate completely.
- Peel and Place: Carefully peel your chosen adhesive sticker from its backing sheet using tweezers or your fingers. Position the sticker onto your nail.
- Smooth and Press: Gently press the sticker down, starting from the center and working your way to the edges. Use a cuticle pusher or orangewood stick to smooth out any wrinkles or air bubbles. Ensure the sticker conforms to the curve of your nail.
- Seal and Protect: Once the sticker is perfectly smoothed and adhered, apply a good quality top coat over the entire nail, including the sticker. This seals the edges and protects the design from wear and tear. Again, remember to cap the free edge!
Tips for Long-Lasting Decal Manicures
Want your beautiful decal designs to last as long as possible? Here are a few pro tips:
- The Dry Factor: Patience is your best friend! Make sure each layer of polish and the decal itself (if applicable) is sufficiently dry before moving to the next step.
- Smooth Operator: Really take your time smoothing out the decal. Air bubbles are the enemy of a flawless finish and can lead to lifting.
- Generous Top Coat: Don’t be stingy with your top coat! A thick, even layer provides the best protection.
- Cap the Edges: This is a game-changer! Sealing the free edge of your nail with top coat, especially over the tip of the decal, prevents water from getting underneath and causing lifting.
- Gentle Handling: Avoid picking at your nail edges or using your nails as tools.
- Avoid Harsh Chemicals: When cleaning or doing chores, wear gloves to protect your manicure.
Troubleshooting Common Decal Issues
Even with the best intentions, sometimes things don’t go perfectly. Don’t worry, these are common hiccups!
| Problem | Solution |
|---|---|
| Decal won’t slide off backing (water-transfer). | Soak for a few more seconds. Ensure water is lukewarm, not cold. |
| Decal is wrinkling or bubbling. | Gently lift an edge with tweezers and reposition. Try smoothing with an orangewood stick. If it’s too late, carefully remove and start over with a new decal. |
| Decal won’t stick (adhesive). | Ensure nails are completely dry and free of oils (use rubbing alcohol). Try pressing down more firmly. If it still won’t adhere, a tiny dot of nail glue or clear polish might help, but be careful not to create lumps. |
| Decal looks dull or matte after application. | This often happens if the top coat wasn’t applied evenly or if the decal itself has a unique finish. A second coat of glossy top coat usually fixes this. |
| Decal edges are lifting. | This usually means it wasn’t sealed properly. Carefully lift the edge and try to smooth it down again, then apply an extra-thick top coat, making sure to cap the free edge. If it’s significantly lifted, it might be time for a refresh with a new decal. |
Different Types of Nail Decals and How They Differ
The world of nail decals is vast! Understanding the different types can help you choose the best fit for your style and skill level.
Water-Transfer Decals (Decal Stickers)
These are applied by soaking the design in water. The backing paper dissolves, leaving the thin film design ready to be transferred onto the nail. They offer a very smooth, painted-on appearance and can be repositioned slightly when wet. They are excellent for intricate patterns and tend to blend seamlessly.
You can find a great variety of water-transfer decals on reputable beauty supply sites. For example, many professional nail artists recommend brands like Born Pretty for their extensive selection and quality.
Adhesive Nail Stickers
These are essentially self-adhesive stickers that you peel and stick directly onto your nail. They are generally thicker than water-transfer decals and can sometimes be a little trickier to get perfectly flat on the nail’s curve. However, they don’t require water and are incredibly fast to apply. They are perfect for quick touch-ups or when you’re in a real rush.
3D Nail Art Stickers
These stickers have a bit more dimension, offering raised elements or metallic finishes. They can add a lot of visual interest and flair. While they can be applied similarly to regular adhesive stickers, their 3D nature means you need to be extra careful to smooth down the edges and seal them well with top coat to prevent snagging.
Nail Foils
Nail foils are different from decals. They are typically applied over a sticky nail polish layer or a special foil glue, and then peeled away, leaving a metallic or holographic design behind. While they create a stunning effect, the application process is distinct from decals and often requires a specific adhesive.
For an in-depth look at nail art materials and techniques, the NailPro website offers valuable insights into various tools and materials used in the industry.
When and Where to Use Nail Decals
Nail decals are incredibly versatile! They’re perfect for:
- Everyday Chic: Add a subtle accent to your nails with a delicate pattern or a touch of sparkle for a polished everyday look.
- Special Occasions: Amp up your glamour for weddings, parties, or holidays with bold designs that make a statement.
- Themed Events: Show your team spirit, celebrate a holiday (think hearts for Valentine’s Day or tiny pumpkins for fall!), or match a costume.
- Fashion Forward: Keep up with trends by trying out the latest popular nail art styles without commitment.
- Testing Designs: Want to try a complex look? Decals are a low-risk way to see if you like a certain style.
Frequently Asked Questions About Nail Decals
Q1: Can nail decals be applied over gel polish?
A1: Yes, absolutely! Decals work wonderfully over gel polish. Just ensure your gel color coat is cured and wiped clean of the sticky residue (unless using gel-specific decals that require it). Then, apply your decal and seal with a gel top coat, curing it under your lamp.
Q2: How long do nail decals typically last?
A2: With proper application and a good top coat, nail decals can last anywhere from 5-10 days, depending on how well you care for your nails.
Q3: Are nail decals safe for natural nails?
A3: Yes, nail decals themselves are safe. The key is proper nail prep and removal. Always use a base coat to protect your natural nail, and remove decals gently with nail polish remover to avoid damaging your nail plate.
Q4: Can I combine different types of decals or decals with polish art?
A4: Definitely! Get creative! You can layer stickers, place water decals over hand-painted designs, or combine different patterns for a truly unique look. Just make sure each layer is dry before adding the next.
Q5: Do I need a special top coat for nail decals?
A5: Not necessarily, but a good quality, chip-resistant, and glossy top coat works best. Avoid quick-dry formulas that can sometimes react with the decal and cause cloudiness. Gel top coats are excellent for sealing and longevity over both regular and gel polish.
Q6: How do I remove nail decals?
A6: Soak a cotton ball or pad with regular nail polish remover and hold it on your nail for a few seconds to soften the decal and top coat. Then, gently wipe the decal away. For stubborn decals or those applied over gel, you might need a bit more remover or a gentle soak.
Conclusion: Your Effortless Nail Art Journey Begins Now!
See? Applying nail design decals is a fantastic, accessible way to express your style and enjoy beautiful, intricate nail art without the stress or expense of professional salon visits. By following these simple steps, gathering your tools, and using a little patience, you can achieve stunning results right at home. Whether you’re a complete beginner or just looking for a quick way to elevate your mani, decals are your secret weapon. Experiment with different designs, have fun with the process, and wear your gorgeous, effortless nail art with confidence!


