Want dazzling celebrity-inspired nails? Discover essential styles like chic minimalist manis, glamorous gemstone accents, and bold artistic designs. Get inspiration to easily recreate these looks and elevate your manicure game!
Thinking about a fresh manicure but feeling stuck for ideas? You’re not alone! Keeping up with nail trends can be a whirlwind, and sometimes, the most stylish inspiration comes from our favorite stars. Whether you love a subtle, sophisticated look or a head-turning statement, celebrity nails offer a treasure trove of ideas. We’ve broken down some of the most popular and achievable celebrity nail design trends to help you find your next fabulous mani. Ready to get inspired?
Why Celebrity Nail Designs Are Great for Beginners
Stars often work with top nail artists, meaning their manicures are usually on-trend and expertly executed. This can be a fantastic starting point for beginners because many celebrity styles are surprisingly simple to recreate at home. You get the “wow” factor without needing advanced skills. Plus, seeing these designs on famous faces proves their versatility – they look amazing on everyone!
Essential Celebrity Nail Design Styles to Try
1. The Classic Nude/Minimalist Manicure
Think of celebrities like Hailey Bieber or Zendaya. Their go-to often involves beautifully shaped nails in soft, muted tones. This is the ultimate “clean girl” aesthetic and is surprisingly easy to achieve.
- Why it works: It’s sophisticated, goes with everything, and makes your hands look polished.
- Key shades: Sheer pinks, milky whites, soft beige, pale greys.
- How to achieve it: Focus on perfect nail shaping (almond or squoval are popular) and a flawless application of a single, sheer or opaque nude polish. A high-shine top coat is essential!
2. Glamorous Gemstone & Crystal Accents
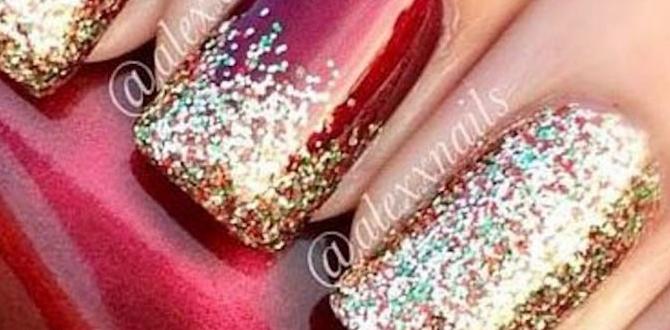
Who doesn’t love a bit of sparkle? Celebrities like Cardi B or Doja Cat often sport nails adorned with crystals, rhinestones, or even small 3D charms. This is all about adding a touch of luxury.
- Why it works: It instantly elevates a simple base color and adds major glamour.
- Key elements: Small to medium-sized crystals, pearls, metallic studs, strategically placed glitter.
- How to achieve it: Start with a base polish color. While the polish is still slightly tacky, use tweezers or a dotting tool to carefully place your chosen embellishments. For longer-lasting hold, apply a dab of nail glue or a clear top coat directly where the gem will sit before placing it. Finish with a generous layer of top coat, being careful not to cover the entire gem if you want it to stand out.
A great resource for understanding nail embellishments and how they adhere can be found on sites like the Harvard Health Publishing “How Skincare Products Work” page, as similar bonding principles apply to nail adhesives and top coats ensuring longevity.
3. Bold & Artistic Abstract Designs
For the trendsetters and art lovers, abstract nails are a fantastic canvas. Celebrities like Megan Fox have been seen rocking edgy, artistic looks that stand out.
- Why it works: It’s unique, expressive, and a great way to show off your personality.
- How to achieve it: This can range from simple lines and dots to more intricate, swirling patterns.
- Easy Abstract: Use contrasting polish colors to draw freehand lines, dots, or chevrons with a fine-tip brush or a dotting tool.
- Color Blocking: Use nail tape to create sharp geometric shapes with different colors.
- Marbling: Gently swirl two or three colors together on a water surface to create a marble effect, then dip your nail in (check out tutorials for the water marbling technique!).
4. The Chic French Manicure (with a twist!)
The French manicure is back, but celebrities are giving it a modern update. Forget the stark white tips; think colored tips, micro-French, or even a reverse French.
- Why it works: It’s a timeless classic that’s been given a fresh, trendy makeover.
- Modern twists:
- Colored Tips: Instead of white, use vibrant blues, greens, or even metallics.
- Micro-French: A very thin, delicate line of color along the very edge of the nail.
- Reverse French (Half Moon): Polish the cuticle area in one color and the rest of the nail in another, or leave the cuticle area clear.
- How to achieve it: Use a fine brush or nail guides for precision. For micro-French, a thin polish brush works best.
5. Dramatic Dark & Moody Hues
Deep, rich colors are always in vogue, especially during cooler months or for a sophisticated evening look. Think deep reds, oxblood, navy, forest green, or even black. Celebrities like Rihanna and Selena Gomez often wear these luxurious shades.
- Why it works: These colors are universally flattering and exude confidence and elegance.
- Shades to try: Cherry red, deep plum, charcoal grey, emerald green, obsidian black.
- How to achieve it: Ensure your base and top coats are immaculate. Two thin coats of a high-quality dark polish usually provide opaque coverage.
6. Chrome & Metallic Finishes
The chrome effect has taken the nail world by storm! From subtle shimmer to full-on mirror shine, metallic finishes create a futuristic and eye-catching look. Think of the nails seen on Megan Thee Stallion or Normani.
- Why it works: It’s incredibly modern and eye-catching, turning heads wherever you go.
- Types of finishes: Mirror chrome, holographic chrome, iridescent chrome.
- How to achieve it: This often requires a special chrome powder applied over a gel or regular polish base. For beginners, you can find press-on nails with a chrome finish or try metallic polishes for a similar effect. A smooth base is key for that seamless, reflective look.
7. Pastel Power
Especially popular in spring and summer, pastel shades offer a softer, playful take on color. Think of actresses like Emma Stone or Lily Collins opting for lovely pastel manicures.
- Why it works: They are cheerful, fresh, and add a pop of color without being too overpowering.
- Popular shades: Baby blue, mint green, lavender, soft pink, butter yellow.
- How to achieve it: Similar to dark shades, focus on a smooth application. Pastels can sometimes be streaky, so two thin coats over a good base coat are usually best.
Tools & Supplies for Celebrity Nail Designs
You don’t need a professional salon to recreate these looks! Here are some essential tools and supplies that will help you achieve celebrity-worthy nails at home:
| Tool/Supply | What it’s for | Beginner Tip |
|---|---|---|
| Nail File & Buffer | Shaping nails and smoothing the surface. | Use a fine-grit file for shaping and a buffer to gently smooth ridges before polish. |
| Cuticle Pusher/Orange Stick | Gently pushing back cuticles. | Do this after a warm shower when cuticles are soft. Be gentle! |
| Base Coat | Protects natural nails and helps polish adhere. | Always use a base coat to prevent staining, especially with dark or vibrant colors. |
| Top Coat | Seals the polish, adds shine, and prevents chipping. | A quick-dry top coat is a lifesaver when you’re in a hurry! |
| Fine-Tipped Brushes / Dotting Tools | For creating lines, dots, and intricate designs. | Start with simple dots and lines. You can even use a toothpick in a pinch! |
| Nail Polish Remover & Cotton Pads | Cleaning up mistakes and removing old polish. | Use with precision for cleaning up edges around your nails after painting. |
| Nail Glue (optional) | For attaching embellishments like gems. | Use sparingly; a little goes a long way. |
| Tweezers (optional) | For precise placement of small gems or stickers. | Fine-tipped, pointed tweezers are best for picking up tiny items. |
| Nail Art Stickers/Stencils (optional) | For easy transfer of designs. | Great for beginners who want clean lines or detailed patterns without freehand painting. |
Step-by-Step Guide: The “Modern French” Manicure
Let’s walk through creating a popular celebrity look: the Modern French Manicure with a colored tip. This is achievable for beginners and looks super chic!
- Prep Your Nails: Start by filing your nails into your desired shape and gently pushing back your cuticles. Ensure nails are clean and dry.
- Apply Base Coat: Paint one thin layer of a clear or nude base coat. Let it dry completely. This is crucial for a smooth finish and to protect your nails.
- Choose Your Color: Select your main nail polish color (a nude, pale pink, or sheer white works well for the base) and a contrasting color for the tips.
- Paint the Base Color: Apply one or two thin coats of your chosen base color. Let each coat dry thoroughly.
- Create the Tip:
- Method 1 (Freehand): Using a fine-tipped brush (or even the polish brush for a slightly thicker line), carefully paint a thin line of your tip color along the very edge of your nail. Keep it steady and controlled.
- Method 2 (With a Guide): You can buy French tip sticker guides. Apply the sticker a few millimeters from the tip of your nail, paint over the tip, and carefully remove the sticker while the polish is still slightly wet.
- Clean Up Edges: Dip a small brush or an orange stick in nail polish remover and carefully neaten up any wobbly lines around your nail bed or cuticle.
- Apply Top Coat: Once the tip color is completely dry, apply a generous layer of high-shine top coat over the entire nail. This seals everything in and gives that beautiful glossy finish.
- Drying Time: Let your nails dry completely. You can use a quick-dry spray or drops to speed this up.
Tips for Long-Lasting Celebrity-Inspired Nails
Want your gorgeous new design to last? Follow these pro tips:
- Smooth Surface: Always start with clean, dry nails. Make sure there’s no old polish or oils on them.
- Base Coat is Key: Never skip the base coat! It provides an even surface and prevents staining.
- Thin Coats: Apply polish in thin, even layers rather than one thick glob. This allows for faster drying and a smoother finish.
- Seal the Deal: A good quality top coat is your best friend. Reapply it every 2-3 days to refresh the shine and protect against chips.
- Be Gentle: Avoid using your nails as tools to open cans or scrape things. This is the fastest way to chip or break them.
- Moisturize: Keep your cuticles and hands moisturized with cuticle oil and hand cream. Healthy nails and skin make any manicure look better.
Beginner Nail FAQs
Q1: What is the easiest celebrity nail design for a beginner?
A1: The classic nude or sheer pink manicure is the easiest. It requires good nail prep, a nice shape, and flawless application of a single color. A high-shine top coat makes it look incredibly polished.
Q2: Can I achieve chrome nails at home without special tools?
A2: While true mirror chrome powder requires specific application over gel polish, you can get a similar metallic effect using highly reflective metallic polishes or by purchasing press-on nails with a chrome finish.
Q3: How do I stop my nail polish from chipping so quickly?
A3: Use a good base coat and seal your manicure with a quality top coat. Reapply the top coat every couple of days. Also, avoid harsh activities that could chip your nails.
Q4: What’s the best way to clean up polish mistakes?
A4: Dip a small, stiff brush (like an old eyeliner brush) or a pointed orange stick into nail polish remover. Gently trace around your cuticle and nail edge to remove any stray polish.
Q5: How do celebrities get their nails to look so perfect?
A5: They often work with highly skilled nail technicians who are experts in application techniques, nail health, and precision art. However, many celebrity styles are also designed to be simple and elegant, making them achievable with practice.
Q6: Are press-on nails a good option for trying celebrity styles?
A6: Absolutely! Press-on nails are a fantastic, budget-friendly, and quick way to experiment with complex celebrity nail designs. Many come in stunning finishes and intricate patterns.
Conclusion
Getting that celebrity-inspired manicure is completely within reach! By focusing on essential styles like chic nudes, sparkling accents, modern French tips, and bold abstract art, you can transform your nails into a stylish statement piece. Remember, the key to great nails, whether inspired by a star or your own imagination, lies in good preparation, quality products, and a willingness to experiment. So grab your favorite polishes, try out a new technique, and most importantly, have fun expressing yourself through your nails. Your next fabulous mani awaits!


