Transform your nails into cosmic masterpieces with easy galaxy swirl nail designs! Create mesmerizing swirls and star-studded effects at home, even as a beginner. Discover essential looks and simple steps to achieve stunning, out-of-this-world manicures.
Ever looked at the night sky, with its deep blues, vibrant purples, and twinkling stars, and wished you could capture that magic on your nails? You’re not alone! Galaxy nail art can seem incredibly complex, like something only a professional can achieve. But what if I told you that creating your own stunning galaxy swirl nail designs is totally doable, even if you’re just starting out? It’s all about embracing a few simple techniques and a little bit of creative energy. Forget frustrating smudges or missed stars; we’re going to break down how to create these mesmerizing looks so you can rock your own little piece of the universe right on your fingertips! Get ready to make your nails shine brighter than a supernova.
What Exactly Are Galaxy Swirl Nail Designs?
Galaxy swirl nail designs are a type of nail art that mimics the appearance of outer space. They typically feature a dark base (like black, navy, or deep purple) overlaid with swirling patterns of brighter colors (pinks, blues, whites, purples) to represent nebulae and galaxies. Tiny dots or specks of glitter or white polish are then added to resemble stars. The beauty of these designs lies in their abstract nature – no two galaxy nails are ever exactly alike, making each manicure unique and personal. It’s a way to bring a little bit of the cosmos and its endless beauty right to your fingertips.
Why Galaxy Swirl Nails Are a Hit
Galaxy swirl nails have exploded in popularity for so many great reasons. They’re incredibly eye-catching and unique, offering a bold statement that sets you apart. Plus, they’re surprisingly versatile! You can opt for a soft, dreamy galaxy or a vibrant, electric one. The abstract nature means they’re forgiving for beginners – perfection isn’t the goal; cosmic chaos is! They’re also fantastic for adding a touch of magic to any outfit, from a casual day look to a glamorous evening out. And let’s be honest, who doesn’t love a little bit of sparkle and mystery?
Essential Tools for Your Galaxy Journey
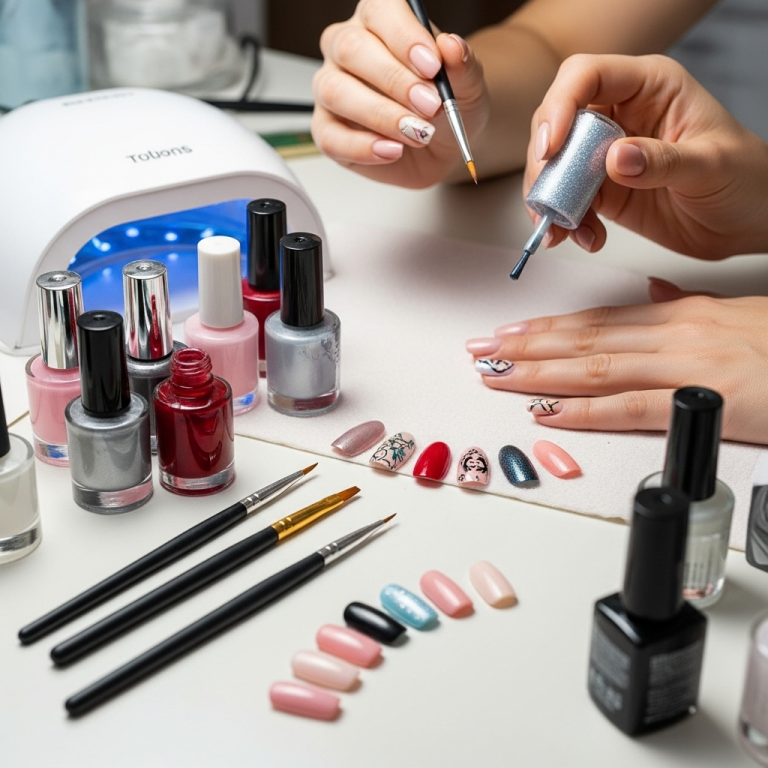
Before we dive into the fun part of creating galaxy swirls, let’s gather our cosmic toolkit. Having the right supplies makes all the difference and ensures a smoother, more enjoyable experience, even for DIY beginners.
Here’s what you’ll need:
- Base Coat: To protect your natural nails and provide a smooth surface.
- Dark Polish: Typically black, navy blue, or deep purple, for your base color.
- Accent Polishes: A few shades of brighter blues, purples, pinks, and white.
- Glitter Polish: Silver, blue, or iridescent glitter polish is perfect for stardust.
- Top Coat: To seal in your design and add shine.
- Small Sponge: A makeup sponge (like a beauty blender or even a regular kitchen sponge cut into small pieces) works wonders for creating the swirl effect.
- Fine-tipped Brush or Toothpick: For adding delicate star details.
- Nail Polish Remover: For cleaning up any smudges.
- Cotton Swabs or Lint-Free Wipes: For applying remover.
- Optional: Holographic Flakes or Fine Glitter: For extra cosmic sparkle.
Don’t worry if you don’t have all of these right away. You can often improvise! For example, a regular toothpick can be used instead of a fine-tipped brush for those tiny stars. The key is to have fun and experiment with what you have.
Step-by-Step Galaxy Swirl Nail Tutorial for Beginners
Ready to blast off into nail art creation? This simple guide will help you achieve stunning galaxy swirl nails. We’ll focus on the sponge technique, which is super forgiving and gives a beautifully blended effect.
Step 1: Prep Your Nails
First things first, let’s get those nails ready for their cosmic makeover!
- Clean: Make sure your nails are clean and free of any old polish. Wash your hands and gently push back your cuticles.
- File: Shape your nails to your desired length and shape.
- Buff (Optional): A light buff can create a smoother surface, but don’t overdo it.
- Base Coat: Apply a generous layer of clear base coat. This is crucial for protecting your nails from staining, especially with dark polishes, and it helps your polish adhere better. Let it dry completely.
Step 2: Apply Your Base Color
Now, let’s set the cosmic scene!
- Choose your dark shade: Grab your black, navy, or deep purple polish.
- Apply two thin coats of your chosen dark polish. Make sure each coat is fully dry before applying the next. A perfectly opaque dark base will make your galaxy colors pop!
Step 3: Create the Swirls with Your Sponge
This is where the magic happens!
- Get your sponge ready: Cut a small piece of your makeup sponge. It should be small enough to handle easily.
- Apply colors to the sponge:
- On a piece of foil or a palette, dab small amounts of your lighter polishes – think blues, purples, pinks, and white. Don’t mix them too much; just place them next to each other.
- Gently press your sponge onto these colors, picking up a mix of them.
- Dab onto your nail: Lightly and randomly dab the sponge onto your nail. You’re not trying to cover the entire nail in one go. Think of it as layering colors and creating depth.
- Reapply and blend: You can repeat this process several times, picking up different color combinations on your sponge and dabbing them onto your nail. Focus on areas where you want more color or blend. The goal is to create soft, blended swirls. Don’t aim for perfect lines; abstract is best!
- Clean up: Use a small brush dipped in nail polish remover to clean up any harsh edges or polish on your skin. This step makes a huge difference in making your design look polished.
Step 4: Add Your Stardust and Sparkle
Every galaxy needs stars!
- Glitter Polish: Once your swirled colors are dry to the touch, apply a thin layer of glitter polish over your design. This mimics distant stars and adds a beautiful shimmer. You can dab it on strategically or apply it more evenly, depending on the look you want.
- Fine Glitter or White Polish: For more defined stars:
- Dip a dry, fine-tipped brush or a toothpick into white polish or a very fine silver glitter.
- Gently tap or flick the brush/toothpick onto your nail to create tiny dots and splatters. Less is more here! You want them to look like distant celestial bodies.
- Optional: Holographic Flakes: If you have holographic flakes, you can lightly press a few into the wet polish for an extra dazzling effect that catches the light.
Step 5: Seal the Deal with a Top Coat
The grand finale!
- Apply Top Coat: Once everything is completely dry, apply a generous layer of clear top coat. This will smooth out any unevenness from the sponging and glitter, seal your design, and give your nails a beautiful, long-lasting shine.
- Let it Dry: Be patient and let the top coat dry thoroughly.
And voilà! You’ve just created your own stunning galaxy swirl nail designs. Give yourself a pat on the back – you’ve just channeled the cosmos!
Galaxy Swirl Nail Variations to Try
The beauty of galaxy swirls is their adaptability! Once you’ve mastered the basic technique, you can play around with different color palettes and effects to create a galaxy that’s uniquely yours.
Nebula Dreams
Colors: Focus on soft, dreamy pastels like lavender, baby blue, and pale pink, swirled over a sheer white or light grey base. Add iridescent glitter for a magical, ethereal feel.
Effect: Creates a whimsical, cloudy nebula look reminiscent of images from the Hubble Space Telescope.
Deep Space Dive
Colors: Deep blacks, midnight blues, and dark purples are your base. Swirl in electric blues, vibrant magentas, and shocking pinks. Use holographic glitter or flakes for intense shimmer.
Effect: This provides a dramatic, intense galaxy with bright nebulae against a vast, dark expanse.
Cosmic Sunset
Colors: Transition from a warm yellow or orange base to fiery reds and deep purples for your swirls. Black can be used sparingly as a background.
Effect: Mimics the colors of a sunset viewed from space or a distant star system.
Minimalist Galaxy
Colors: A sheer nude or white base with just a few subtle swirls of deep blue or purple and a sprinkle of fine silver glitter.
Effect: For those who love the galaxy concept but prefer a more understated look.
Tips for Variation
- Layering: Don’t be afraid to layer colors. Apply a sponge layer, let it dry slightly, then add another layer with different colors or a bit more white for highlights.
- Color Combinations: Experiment with unexpected color pairings. Think greens and blues, or even teals and mauves.
- Glitter Placement: Instead of all-over glitter, try dabbing it on specific areas to create brighter star clusters.
- Ombre Start: You can start with a subtle ombre base before adding your galaxy swirls for an extra dimension.
Achieving a Smooth Finish and Longevity
Want your galaxy swirls to last and look as smooth as a polished meteor? Here are some pro tips:
Smooth Application
- Drying Time: Patience is key! Ensure each layer (base coat, color, sponge layers, glitter) is dry to the touch before moving to the next. This prevents accidental smudging and creates cleaner lines.
- Top Coat Technique: Apply your top coat in smooth, even strokes. Avoid going over the same spot too many times, which can reactivate the polish underneath and cause streaks.
- “Floating” the Top Coat: With your final top coat application, try not to press down too hard. Let the brush glide over the surface of the nail. This helps preserve the texture and details of your design.
Making Them Last
- Quality Products: Using good quality polishes and a reliable top coat can significantly impact longevity. Look for formulas known for chip resistance.
- Avoid Harsh Chemicals: When doing chores like washing dishes, wear rubber gloves. Exposure to hot water and cleaning agents can weaken the polish.
- Maintenance: If you notice a tip starting to wear, you can carefully apply a tiny bit of top coat to that area to reinforce it.
- Reapplication: Even with the best care, nail polish naturally wears down. A touch-up with another layer of top coat every few days can help extend the life of your manicure.
A well-applied galaxy swirl design, with attention to drying times and a good top coat, can easily last 7-10 days, sometimes even longer!
Troubleshooting Common Galaxy Nail Issues
Even with the best intentions and tutorials, nail art can sometimes throw a curveball. Here are some common issues and how to fix them:
Issue: Sponge Marks are Too Harsh or Chunky
Why it happens: Pressing too hard with the sponge, or not blending colors enough on the sponge before dabbing.
Solution: After the initial sponging is dry, you can lightly go over the design with a clean, slightly damp sponge (with just a tiny bit of your base dark color or clear polish) to gently blend the edges. Alternatively, use a fine-tipped brush with a little bit of your base dark polish to “fill in” any harsh lines or apply an extra sheer layer of a darker color to deepen the swirls.
Issue: Colors Look Muddy Instead of Swirled
Why it happens: Too many colors applied too close together, or the colors are too similar and just blend into each other without definition.
Solution: This often happens when polish layers are still too wet, or when you’ve used too many colors at once. For the next attempt, use fewer color dabs on your sponge. Let the first set of sponged colors dry more before adding another layer. Adding small, strategic dots of white or a lighter color after the main swirls can help define them.
Issue: Not Enough “Galaxy” Effect, Looks Too Plain
Why it happens: Not enough contrast or layering of colors.
Solution: Don’t be shy with the dabbing! Apply more layers of color onto the sponge and dab onto the nail. Focus on creating depth by adding lighter colors over darker ones and vice versa. A good glitter polish or strategically placed fine glitter can also enhance the cosmic feel significantly.
Issue: Smudging While Adding Stars
Why it happens: Adding stars before the underlying polish is completely dry.
Solution: Always ensure your sponged layers and glitter are fully dry to the touch before attempting to add star details with a brush or toothpick. If you do smudge, carefully use a fine-tipped brush dipped in nail polish remover to clean up the area and then reapply the star dots.
Issue: Polish Staining Your Nails
Why it happens: Dark polishes can sometimes stain natural nails if a base coat isn’t used.
Solution: A good quality, opaque base coat is your best friend! Always apply at least one, if not two, coats of base coat before your dark color. If staining does occur, a nail whitening treatment or a very gentle buff can help. For future attempts, consider a thicker base coat or a nail strengthener that has a tint.
Remember, the beauty of galaxy nails is their abstract nature. Don’t strive for perfection; strive for cosmic beauty!
Advanced Galaxy Techniques for the Adventurous
Once you’re comfortable with the sponge method, why not push your galaxy art a little further? These techniques can add even more depth and professionalism to your cosmic creations.
Water Marbling for Galaxy Swirls
This classic nail art technique can be adapted for galaxy designs.
- How-to: Drop your chosen galaxy colors (black, deep blues, purples, a touch of pink or white) into a cup of room-temperature water. Use a toothpick to swirl them gently. Dip your nail (prepped with a thick base like petroleum jelly around the cuticle to catch excess polish) into the swirling colors.
- Pros: Creates incredibly organic and unique swirls.
- Cons: Can be messy and requires practice to get the swirling and dipping just right. You’ll need to work quickly before the polish sinks.
Freehand Detail Painting
How-to: After applying your base colors and some blended swirls with a sponge, use a very fine-tipped brush (like a 00 or 000 size brush specifically for nail art) loaded with white, light blue, or pink polish to “paint” delicate streaks and nebulae shapes. You can also use this technique for very precise star patterns.
Pros: Offers ultimate control over the design and allows for intricate details.
Cons: Requires a steady hand and specialized brushes; takes more time and patience.
Using Stencils for Galaxy Effects
How-to: While not for the swirls themselves, stencils can be used to add celestial elements like stars, planets, or moons on top of your galaxy background. Apply your galaxy base, let it dry completely, place the stencil, then apply a contrasting polish (like white or silver) over the stencil using a makeup sponge or a stamper.
Pros: Great for adding crisp, defined elements.
Cons: Less control over the “swirl” aspect of the galaxy itself.
Adding Dimension with 3D Elements
How-to: After your nail art is complete and sealed with a top coat, you can use nail glue to further embellish with small rhinestones (for stars), larger glitter pieces, or even small metallic charms shaped like stars or moons.
Pros: Adds a real “wow” factor and texture.
* Cons: Can snag on things and might not be practical for everyday wear.
Remember, these advanced techniques build upon the foundational skills you learn with the basic sponge method. It’s about gradually expanding your nail art toolkit and confidence.
Nail Care Tips for Maintaining Your Galaxy Manicure
Keeping your nails healthy is just as important as making them look beautiful. Here are some tips to ensure your nails stay strong and your


