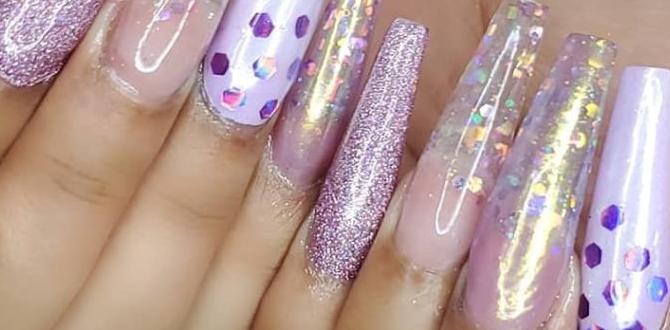
Glitter flake nails are stunning, multi-dimensional manicures that add dazzling texture and shine. This guide will show you exactly how to create them at home, whether you’re a total beginner or looking to level up your nail art game. Get ready for salon-worthy results with our easy, step-by-step instructions!
Hey nail lovers! Are you ready to add some serious sparkle and dimension to your fingertips? Glitter flake nails are the trend you absolutely need to try. They’re not just glitter; they’re tiny, reflective pieces that catch the light like nothing else, creating a look that’s both sophisticated and incredibly eye-catching.
Sometimes, achieving that perfect, multi-dimensional glitter effect at home can feel a bit tricky. You might worry about a chunky, uneven finish or glitter that just doesn’t seem to stick. Well, I’m here to tell you it’s totally achievable, and honestly, quite fun! Think of it as adding a little bit of magic to your nails.
This guide is your go-to resource for everything glitter flake nails. We’ll break it down into simple steps, cover the best tools, and even share some pro tips. You’ll be rocking these dazzling nails in no time, boosting your confidence and letting your unique style shine through. Ready to dive into the sparkly world of glitter flakes? Let’s get started!
What Exactly Are Glitter Flake Nails?
Glitter flake nails are a type of nail design that uses small, thin, and often iridescent pieces of glitter, also known as flakes or foils, to create a shimmering and textured effect. Unlike traditional, uniform glitter particles, these nail flakes are irregular in shape and size, allowing them to lay flatter on the nail surface while still reflecting light from multiple angles. This results in a more dynamic and sophisticated sparkle that can range from subtle shimmers to bold, holographic finishes.
Why You’ll Love Glitter Flake Nails
Glitter flake nails have taken the nail art world by storm, and for good reason! They offer a unique blend of glamour, subtlety, and creative freedom that makes them a perfect choice for many occasions. Here’s why you might fall in love with this dazzling trend:
- Stunning Visual Appeal: The way glitter flakes catch the light creates an almost holographic effect. They offer depth and dimension that regular glitter just can’t match.
- Versatile Sparkle: Whether you want a subtle shimmer for everyday wear or a bold, eye-catching statement for a special event, glitter flakes can be adapted to your desired look.
- Easy to Use (Yes, Really!): With the right techniques, applying glitter flakes is surprisingly simple, even for beginners. You don’t need a steady hand of a professional artist!
- Long-Lasting Shine: When applied correctly and sealed with a good top coat, glitter flake manicures can be surprisingly durable and chip-resistant.
- Creative Freedom: The flakes come in a vast array of colors, shapes, and finishes, allowing you to mix and match, create ombrés, or embed them for a truly custom design.
Essential Tools and Materials
Before we get our hands (and nails!) dirty, let’s gather our supplies. Having the right tools makes all the difference in achieving that flawless glitter flake finish. Don’t worry if you don’t have everything right away; many of these are reusable for countless other nail art adventures!
For the Best Glitter Flake Nails, You’ll Need:
- Base Coat: Essential for protecting your natural nails and helping your polish adhere.
- Nail Polish Color: Choose a color that complements your glitter flakes. A sheer nude, a classic black, or a vibrant shade can all work beautifully.
- Glitter Flakes: The stars of the show! These come in countless colors, shapes (like squares, hexagons, irregular shards), and finishes (iridescent, holographic, metallic).
- Top Coat: A good quality, non-UV (unless you’re using gel) top coat is crucial for sealing in the flakes and providing a glossy, durable finish. Look for one that’s known for its long-lasting wear.
- Tweezers or Orangewood Stick: For precisely picking up and placing individual glitter flakes.
- Small Brush (Optional): A fluffy brush can help to gently sweep away excess flakes.
- Clear Nail Polish or Gel Adhesive (Optional): Sometimes, a little extra tackiness is needed to pick up or secure flakes, especially larger ones.
- Nail File and Buffer: To shape and smooth your natural nails before you begin.
- Cuticle Pusher: To gently push back your cuticles for a clean canvas.
- Rubbing Alcohol or Nail Polish Remover: To clean and dehydrate the nail surface.
Step-by-Step Guide to Glitter Flake Nails
Ready to get sparkly? Follow these simple steps to create your own stunning glitter flake nails at home. We’re going to cover a popular method that works well with regular nail polish.
Step 1: Prep Your Canvas
A perfect manicure starts with perfectly prepped nails. This is non-negotiable for a long-lasting, beautiful finish!
- Clean Your Nails: Start by removing any old nail polish with a good quality nail polish remover. Wash your hands thoroughly with soap and water afterwards.
- Shape Your Nails: Use a nail file to shape your nails to your desired length and shape. File in one direction to avoid weakening the nail.
- Buff Gently: Lightly buff the surface of your nails with a buffer. This helps to smooth out any ridges and provides a better surface for polish adhesion. Don’t over-buff!
- Push Back Cuticles: Gently push back your cuticles with a cuticle pusher or an orangewood stick. Avoid cutting them unless you are very experienced, as this can lead to infection.
- Cleanse the Nail Plate: Wipe each nail with rubbing alcohol or a nail cleanser. This removes any oils and dust, ensuring your polish and flakes will adhere properly.
Step 2: Apply Your Base Coat and Color
Now for the fun part – adding color!
- Apply Base Coat: Apply one thin layer of your base coat and let it dry completely. This forms a protective barrier between your natural nail and the polish, preventing staining.
- Apply First Coat of Color: Apply a thin, even coat of your chosen nail polish color. Let it dry for at least 2-3 minutes. Avoid rushing this step!
- Apply Second Coat of Color: Apply a second thin, even coat of your nail polish. This layer is crucial for achieving opaque color. Let it dry for a few minutes, but it doesn’t need to be completely dry. A slightly tacky surface is actually ideal for applying glitter flakes with regular polish.
Step 3: Apply the Glitter Flakes
This is where the magic happens! The technique can vary slightly depending on whether you want a sparse, scattered look or a dense, full coverage.
Method 1: Scattered & Textured Look (Easier for Beginners)
This method is fantastic for creating a beautiful, textured sparkle without getting overwhelmed.
- Pick Up Flakes: Using tweezers or an orangewood stick dipped slightly in clear polish for grip, carefully pick up a few glitter flakes.
- Place Flakes Onto the Nail: Gently place the flakes onto the still-tacky second coat of your colored polish. Don’t press down too hard initially. You can place them strategically for a more artistic look, or scatter them more randomly.
- Build Coverage: Continue picking up and placing flakes until you achieve your desired coverage. You can overlap them slightly or leave some gaps.
- Gentle Press (Optional): Once you’re happy with the placement, you can very gently press down on the flakes with your orangewood stick to help them lay a bit flatter against the nail.
- Sweep Away Excess: If any flakes have fallen onto the surrounding skin, use a dry, fluffy brush to gently sweep them away.
Method 2: Full Coverage Application
This method is great for a more intense, embedded glitter effect.
- Apply a “Tacky” Layer: With your second coat of colored polish slightly tacky, or by applying a thin layer of clear polish over the second color coat and letting it get tacky, you create a sticky surface.
- Dip or Sprinkle: Carefully dip your nail directly into a container of glitter flakes, or use a small spoon or spatula to gently sprinkle a generous amount of flakes over the tacky nail polish. Work over a tray or paper to catch excess.
- Press and Smooth: Gently press the flakes into the polish using your fingertip (if wearing gloves) or an orangewood stick. You want to encourage them to embed into the polish.
- Remove Excess: Once the polish starts to set slightly but before it fully dries, carefully brush away any loose, unadhered flakes.
Step 4: Seal and Protect
The final, and most important, step for longevity and shine!
- Apply Top Coat Carefully: Once the glitter flakes are applied and the polish is mostly dry to the touch, it’s time for the top coat. Apply a thick, generous layer of your top coat. The key here is to create a smooth, encapsulating layer that covers all the flakes. You might need two coats!
- Cap the Edges: Make sure to drag your top coat brush along the free edge (the unattached tip) of your nail. This “capping” action helps prevent chipping and lifting.
- Allow to Dry Thoroughly: Let your top coat dry completely. This can take longer than usual because of the added layers of polish and flakes. Be patient! Avoid touching anything for at least 20-30 minutes, and ideally wait longer for full hardness.
Tips for Achieving Flawless Glitter Flake Nails
Creating beautiful glitter flake nails is all about technique and a few insider tricks! Here are some tips to help you achieve a professional-looking finish every time:
- Work in Thin Layers: Whether it’s your color polish or your top coat, thin, even layers are your best friend. Too much polish at once can cause unevenness and long drying times.
- Don’t Be Afraid of Top Coat: You may need a couple of generous coats of top coat to fully smooth out the textured surface created by the flakes. The key is to encapsulate every flake so it doesn’t snag on anything.
- Allow Drying Time: Rushing between steps is the most common mistake. Give each layer of polish and top coat adequate time to dry. A “tacky” surface is good for flake application, but a fully wet nail will lead to smudging.
- Use a Gel Top Coat for Extra Durability: If you’re using regular nail polish, a high-quality gel-like top coat can offer superior shine and longevity. For ultimate staying power, consider a full gel manicure system for application.
- Experiment with Placement: Don’t feel like you have to cover the entire nail. Try a glitter accent nail, a diagonal striped effect, or an ombré fade by concentrating flakes at the tip and fading them down.
- Consider a Gel Base/Top Coat System: If you’re looking for a truly long-lasting, salon-quality finish, using a gel base coat, color, and top coat system with a UV/LED lamp offers incredible durability and a smooth finish, making it easier to embed flakes seamlessly. For more information on UV/LED lamps and gel polish safety, check out resources from organizations like the FDA on UV safety.
- Clean Up Mistakes: Keep a small brush or an orangewood stick dipped in nail polish remover handy for cleaning up any stray flakes or smudges around the cuticle area before the polish fully dries.
Glitter Flake Nail Variations and Ideas
Once you’ve mastered the basic application, the possibilities for glitter flake nails are endless! Here are some popular variations and creative ideas to inspire your next manicure:
Ombré Glitter Flake Nails
Create a beautiful gradient effect by concentrating the glitter flakes at the tip of your nails and gradually fading them towards the cuticle. This can be achieved by applying more flakes to the tip and gently blending them out with a brush or your finger.
Accent Nail Sparkle
Not ready for full-on sparkle? Apply glitter flakes to just one or two accent nails for a subtle yet stylish touch. This is a great way to incorporate the trend into an everyday look.
Underlayer Shimmer
Apply a sheer or milky colored polish first, then apply glitter flakes, and finish with another sheer coat. This creates an intriguing depth, as if the glitter is suspended within the nail.
Color-Blocked Sparkle
Combine different colored nail polishes and complement them with matching or contrasting glitter flakes. For example, a navy blue base with silver flakes, or a pink base with iridescent flakes.
Geometric & Striped Designs
Use nail tape or stencils to create geometric patterns. Apply your base color, place the tape, apply the glitter flakes over the exposed area, and then carefully remove the tape for sharp, defined lines.
Multi-Color Magic
Mix and match different colors of glitter flakes on each nail or even on the same nail for a truly vibrant and playful look. Iridescent flakes are particularly good at showcasing a spectrum of colors.
A Comparison: Glitter Flakes vs. Traditional Glitter
Understanding the differences between glitter flakes and traditional glitter can help you choose the right product for your desired look.
| Feature | Glitter Flakes | Traditional Glitter |
|---|---|---|
| Particle Shape | Irregular, thin shards, squares, or hexagons. They are often described as foil-like. | Uniform, small particles, usually round or hexagonal. |
| Texture & Finish | Creates a smoother, more multi-dimensional, often holographic or iridescent finish. Lays flatter. | Can create a more textured, “chunky” finish. Particles stand out more. |
| Application Ease | Can be slightly trickier to get perfectly flat initially, but the result is smoother. Easier to embed. | Easier to apply evenly for a consistent sparkle, but can feel more “gritty.” |
| Appearance | High reflectivity, depth, and shimmer. Can appear holographic or color-shifting. | Consistent sparkle, less depth. Can be metallic, iridescent, or matte. |
| Best For | Sophisticated shimmer, holographic effects, smooth textured manicures. | Bold, classic glitter looks, textured finishes where particle definition is desired. |
Frequently Asked Questions About Glitter Flake Nails
Q1: How do I prevent glitter flakes from feeling rough or snagging?
Answer: The key is thorough top coating! Apply at least two generous coats of a good quality top coat, ensuring each flake is fully encapsulated. “Capping” the free edge of your nail with the top coat also helps prevent snagging.
Q2: Can I use glitter flakes with regular nail polish?
Answer: Absolutely! Apply them over a slightly tacky top layer of your colored nail polish. Ensure you use enough top coat to smooth everything out once the flakes are applied.
Q3: Do I need a special adhesive for glitter flakes?
Answer: For regular nail polish, the tackiness of the polish itself is usually enough. If you’re using gel polish, the gel coat acts as the adhesive. Some crafters use specific nail glues for larger or more difficult-to-adhere embellishments, but for standard nail art flakes, it’s typically not necessary.
Q4: How do I remove glitter flake nail polish?
Answer: Glitter can be stubborn! Soak a cotton ball in nail polish remover (preferably acetone-based for glitter), place it on your nail, and wrap it with foil. Let it sit for 5-10 minutes to break down the polish and glitter, then gently wipe away. You may need to repeat.
Q5: Can I apply glitter flakes over acrylic or gel nails?
Answer: Yes! You can apply them over gel polish before the final top coat cure, or embed them within acrylics during application for a super durable, internal glitter effect. Always ensure the surface is prepped and clean.
Q6: What’s the difference between glitter flakes and regular glitter?
Answer: Glitter flakes are thin, irregular pieces that lay flatter and provide a smoother, often holographic or iridescent finish. Traditional glitter particles are uniform and can feel more textured, creating a classic sparkle.
Q7: Are glitter flake nails safe for my natural nails?
Answer: Yes, when applied and removed properly, glitter


