Negative space half moon nails are a chic, modern manicure trend. They feature a distinct unpolished or sheer area at the nail’s base, creating a “half moon” shape. This versatile design works for many styles, is beginner-friendly, and adds a sophisticated touch to any look.
Finding the perfect nail design can feel like a quest, right? You want something that’s stylish, unique, and totally you. If you’ve ever scrolled through endless nail inspo, you might have spotted the elegant half moon manicure. But what if I told you there’s a super cool twist that takes it to the next level? That’s where negative space half moon nails come in! They are surprisingly easy to achieve and look incredibly chic. This guide will show you exactly how to rock this trend.
—
What Exactly Are Negative Space Half Moon Nails?
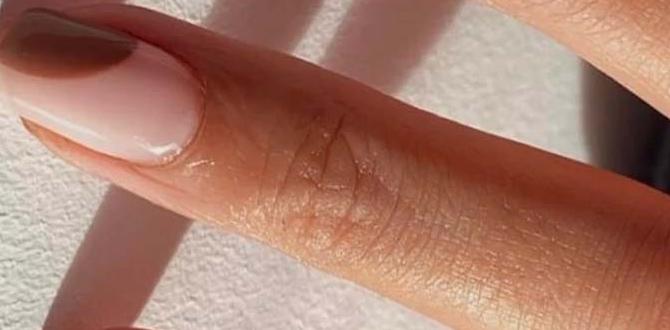
Let’s break it down! Negative space, in general, refers to unpolished areas on a nail design. It’s like leaving a part of your canvas blank to make the colors and shapes pop even more. When applied to the half moon manicure, it means that classic semi-circle shape at the base of your nail isn’t painted, or it’s painted with a sheer polish. This creates a beautiful contrast with the rest of your colored or designed nail. It’s a sophisticated look that gives a modern, airy feel, and it’s perfect for all nail lengths and shapes!
Why Choose Negative Space Half Moon Nails?
There are so many reasons why this design has captured our hearts (and fingertips!):
- Chic & Modern: It offers a subtle yet impactful style statement that feels very current.
- Versatile: Whether you’re heading to work, a party, or just a casual day out, this design fits every occasion.
- Fuss-Free Growth: Because the cuticle area is often left clear, it’s super forgiving as your nails grow. You won’t see a harsh line like you might with a solid color.
- Beginner-Friendly: While it looks intricate, it’s surprisingly easy to create at home!
- Endless Customization: The possibilities are limitless when it comes to colors, finishes, and added accents.
Essential Negative Space Half Moon Designs
Ready to be inspired? Here are some of the most popular and beautiful negative space half moon nail designs to try:
1. The Classic Clear Crescent
This is the quintessential negative space half moon nail. It’s simple, elegant, and timeless. The natural nail forms the half moon shape at the base, while the rest of the nail is painted with a solid color. It works beautifully with any shade, from bold reds to soft nudes and classic black.
Pro Tip: For a super clean look, ensure your natural nail bed is perfectly shaped and buffed before applying your polish.
2. The Reverse Half Moon (Cuticle Accent)
Instead of focusing on the tip, the negative space is at the cuticle. This means the polish starts from the tip of the nail and stops before it reaches the cuticle, leaving a clear crescent shape right at the base. It’s a super stylish and modern take!
Tool Spotlight: A fine-tipped brush or a stencil can help you achieve a crisp line at the cuticle.
3. The Sheer Shimmer Moon
This design plays with translucency. The half moon area is filled with a sheer polish—think subtle glitters, pearlescent finishes, or nude-toned sheers. It adds a delicate sparkle and depth without being overpowering. It’s perfect for a wedding or a special event.
4. The Two-Toned Elegance
Combine two complementary or contrasting colors. Paint the main body of the nail in one color and create the half moon shape in another. Or, paint the half moon in one color and the rest of the nail in a contrasting shade. It’s elegant and adds a bit more visual interest.
5. The Glitter Dipped Moon
This is a fun and festive option! Use glitter polish to create the half moon shape, or apply glitter only to the half moon area on an otherwise solid-colored nail. You can go for bold, chunky glitter or fine, subtle shimmer. It’s a great way to add some bling!
6. The Geometric Twist
Get creative with shapes! Instead of a perfect semi-circle, try a sharp, angular “half moon” or a more abstract curved line. You can also add tiny geometric accents, like a single dot or a thin line, within the negative space or along the edge of the moon. This adds a contemporary edge.
7. The Metallic Outline
This design uses a thin metallic polish (gold, silver, rose gold) to outline the negative space half moon. It’s a super chic way to define the shape and add a touch of luxury without overwhelming the nail with color. It’s a subtle yet striking detail.
8. The Ombré Effect
Blend two colors smoothly from the cuticle to the tip, leaving the very base of the nail unpolished to form your half moon. Or, create an ombré effect within the half moon itself, blending it into the negative space. This is a bit more advanced but looks stunning!
9. The Minimalist Dot
For the ultimate in subtle chic, a single tiny dot of polish placed right at the apex of the negative space half moon can be incredibly effective. It’s understated, modern, and perfect for those who prefer a very pared-back aesthetic.
How to Create Negative Space Half Moon Nails at Home
Don’t worry, you don’t need to be a nail pro to create these looks! Here’s a step-by-step guide:
Step 1: Prep Your Nails
Like any manicure, good prep is key!
- Start by cleaning your nails to remove any old polish or oils.
- Gently push back your cuticles using a cuticle pusher. You can trim any hangnails if needed, but be careful! For healthy cuticles, you can learn more at the National Center for Complementary and Integrative Health.
- Shape your nails with a nail file. A squoval or almond shape often complements the half moon design beautifully.
- Lightly buff the surface of your nails to create a smooth base for polish. This also helps the polish adhere better.
- Wipe your nails with a lint-free cloth and rubbing alcohol or a nail cleanser to remove any dust and oils.
Step 2: Apply a Base Coat
A good base coat protects your natural nails from staining and helps your polish last longer.
Step 3: Create the Half Moon Shape
This is where the magic happens! You have a few options:
Method A: Using Stencils
This is the easiest method for beginners.
- Choose your stencils: You can find half moon or curved nail stencils online or at beauty supply stores.
- Apply the stencil: Carefully place the half moon stencil at the base of your nail, just above your cuticle, to create the area you want to leave unpolished (the negative space). Ensure it’s pressed down firmly to prevent polish from bleeding underneath.
- Paint the rest: Apply your chosen polish color(s) over the exposed part of the nail.
- Remove the stencil: While the polish is still slightly wet, carefully peel off the stencil. This gives you a clean, crisp line.
Method B: Freehanding with a Fine Brush
This method takes a little practice but offers great control.
- Apply a thin layer of color: Paint your nail with your desired color, but stop about halfway up, leaving the bottom half bare.
- Refine the shape: Dip a very fine-tipped nail art brush into your polish (or some nail polish remover for cleanup). Carefully sculpt the curve at the bottom of your polish to create the half moon shape.
- Clean up edges: Use a small brush dipped in nail polish remover to clean up any stray marks around the cuticle and nail edges for a neat finish.
Method C: Outlining the Moon
This works well for the classic look where the half moon is the natural nail.
- Paint your nail: Apply your chosen polish color to the main part of your nail, leaving the half moon area at the base unpainted.
- Use a fine brush: Dip a super fine nail art brush into a contrasting polish (like metallic gold or silver) and carefully paint a thin, curved line around the edge of the unpolished half moon area.
Step 4: Apply a Top Coat
Once your polish is completely dry, apply a generous layer of top coat. This seals in your design, adds shine, and protects against chips. For a matte finish, opt for a matte top coat.
Tools and Materials You’ll Need
To achieve stunning negative space half moon nails, here’s a quick list of what you might want to have on hand:
| Tool/Material | Why You Need It | Beginner Tip |
|---|---|---|
| Nail File | To shape your nails | Use a fine-grit file for a smooth finish. |
| Cuticle Pusher | To gently push back cuticles | Be gentle; avoid pushing too hard. |
| Nail Buffers | To smooth nail surface | Use a gentle buffer block. |
| Rubbing Alcohol or Nail Cleanser | To clean nails before polishing | A cotton pad works well. |
| Base Coat Polish | Protects nails and helps polish adhere | Choose a good quality one. |
| Nail Polish Colors | Your chosen shades for the design | Start with two contrasting or complementary colors. |
| Top Coat Polish | Seals the design, adds shine, prevents chipping | A quick-dry top coat is great for busy hands! |
| Half Moon or Curved Stencils (Optional) | To create a clean, defined half moon | Available online; try different shapes. |
| Fine-Tipped Nail Art Brush (Optional) | For freehanding the curve or adding details | A thin liner brush or an old eyeliner brush can work. |
| Cotton Swabs/Small Cleanup Brush | To clean up polish mistakes | Use with a tiny bit of nail polish remover. |
Advanced Techniques and Tips
Once you’ve mastered the basics, try these tips to take your negative space half moon nails to the next level:
- Matte Finish: Pair a matte top coat with a glossy outline or a glossy half moon for a sophisticated textural contrast.
- Chrome Accents: Apply a chrome powder just to the half moon area for a futuristic, reflective effect.
- Marble or Swirls: Incorporate marble or abstract swirl patterns into the colored part of your nail, leaving the base clear.
- Negative Space French: Instead of a white tip, create a French manicure where the tip is a color and the half moon at the base is clear.
- Color Blocking: Divide the nail into sections with different colors, ensuring one section creates or is bordered by your negative space half moon.
- 3D Embellishments: Add tiny rhinestones, studs, or pearls along the curve of the half moon for extra sparkle and dimension. Be sure to use a strong top coat or nail glue to secure them.
Maintaining Your Negative Space Half Moon Nails
The beauty of negative space designs is their longevity! Here’s how to keep them looking fresh:
- Moisturize: Keep your hands and cuticles hydrated with cuticle oil and hand cream. Healthy cuticles make the negative space look even better.
- Be Gentle: Avoid using your nails as tools to open cans or scratch things, as this can cause chips.
- Touch Up as Needed: For minor chips on the colored part, you can carefully touch them up with polish. If the negative space area starts to look a bit dull, a fresh layer of clear top coat can revive it.
- Reapply Top Coat: Every few days, adding another thin layer of top coat can help extend the life of your manicure.
Frequently Asked Questions
Q1: Are negative space half moon nails hard to do myself?
A: Not at all! They are surprisingly beginner-friendly, especially when using stencils. Even freehanding can be mastered with a little practice. The key is patience and neat application.
Q2: Won’t my nails look messy if I leave a part unpolished?
A: The goal of negative space is a clean, intentional look. By carefully defining the edges of the unpolished area, it actually enhances the design. Stencils are fantastic for achieving that crisp line.
Q3: What colors work best for negative space half moon nails?
A: Any color can work! Neutrals, pastels, bold bolds, metallics, and even glitter all look fantastic. The contrast between the polished and unpolished areas is what makes the design stand out.
Q4: Can I do this with gel polish?
A: Absolutely! The techniques are the same for gel polish as they are for regular polish. Stencils work well with gel, and you can use a gel art brush for freehanding. You’ll just need to cure each layer under a UV/LED lamp.
Q5: How do I keep the edges of the negative space sharp?
A: For the sharpest edges, use high-quality stencils that adhere well to your nail. If freehanding, use a very fine brush and a steady hand. Clean up any mistakes immediately with a small brush dipped in nail polish remover.
Q6: Do negative space half moon nails look good on short nails?
A: Yes! Negative space half moon designs are incredibly flattering on short nails. They can visually elongate the nail bed, making your fingers appear more slender and elegant.
Conclusion: Embrace Your Inner Nail Artist
Negative space half moon nails are a beautiful, versatile, and totally achievable trend. Whether you’re a seasoned nail art enthusiast


