Lava flow nail art is a stunning technique that mimics the look of molten rock with vibrant colors and flowing patterns. Easy to achieve for beginners, it adds a dramatic and stylish flair to any manicure.
Ever looked at your nails and thought, “I want something fiery and fabulous”? Lava flow nail art is the answer! It’s a way to bring the powerful beauty of nature right to your fingertips. Don’t worry if you’re new to nail art; this trend is surprisingly easy to master. We’ll walk you through it step-by-step, transforming your nails into stunning works of art that will make heads turn. Get ready to unleash your inner artist!
Unleash the Fire: Your Guide to Lava Flow Nail Art
Lava flow nail art is all about capturing the mesmerizing, molten beauty of volcanic eruptions. Think rich reds, fiery oranges, and deep blacks, artfully blended to create a sense of movement and heat. It’s a design that’s both bold and beautiful, perfect for anyone looking to add a touch of drama to their look. Whether you’re heading out for a special occasion or just want to spice up your everyday style, this nail art idea is a winner. Let’s dive into how you can create your own stunning lava flow nails!
Why Lava Flow Nail Art is a Must-Try
This nail art trend is incredibly versatile and offers a fantastic way to express yourself. The organic, flowing pattern means no two nails will ever be exactly alike, making each manicure uniquely yours. Plus, the color palette can be adapted to suit your mood or outfit. Feeling bold? Go for vibrant reds and yellows. Want something a bit more subtle? Try deep burgundies and charcoal. It’s a creative playground for your nails!
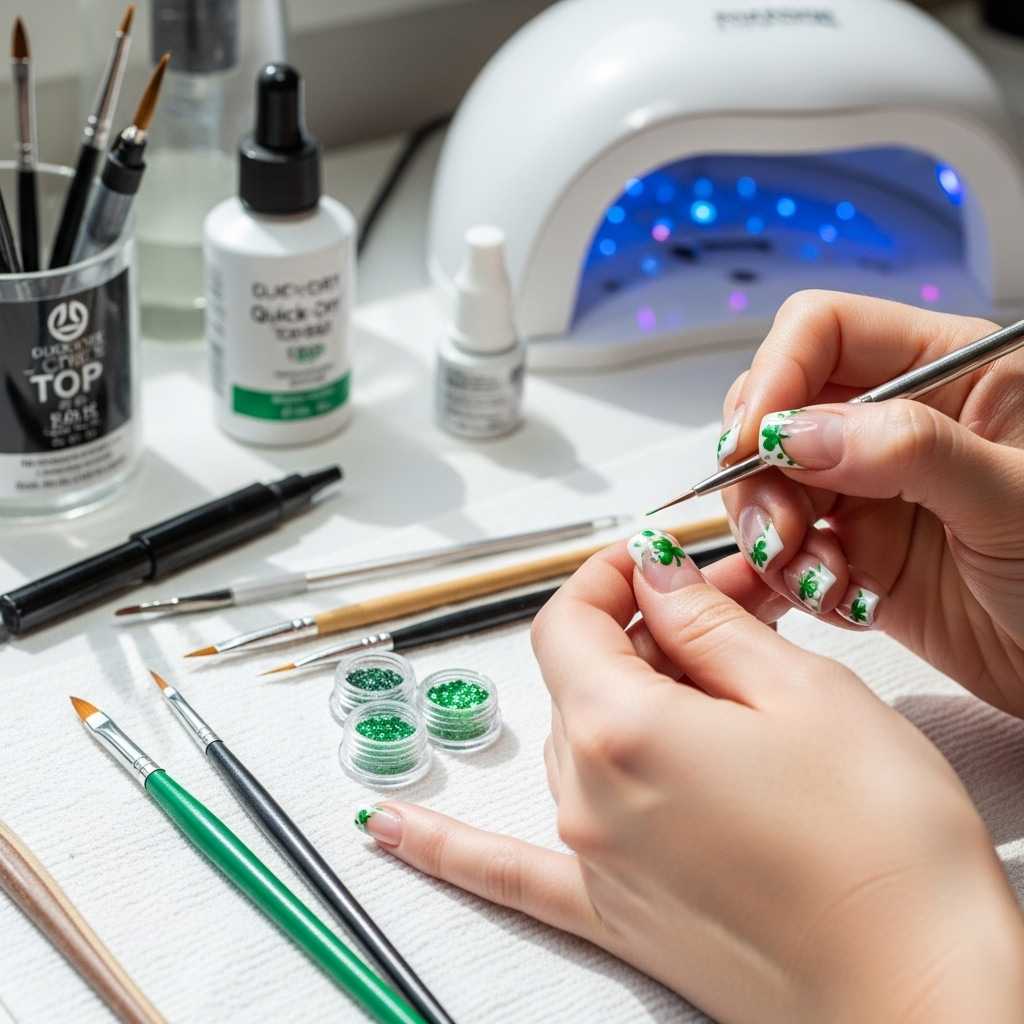
Getting Started: Your Lava Flow Nail Art Toolkit
Before we start swirling colors, let’s gather our supplies. Having the right tools makes all the difference and ensures a smoother, more enjoyable nail art experience. You don’t need a professional salon’s worth of equipment; a few key items will do the trick.
Essential Tools for Lava Flow Nails
- Base Coat: Protects your natural nails and provides a smooth canvas.
- Top Coat: Seals your design and adds a glossy finish.
- Nail Polish Colors: You’ll need at least 2-3 colors that work well together, mimicking lava. Traditional choices include red, orange, yellow, and black.
- Thin Nail Art Brush or Dotting Tool: For creating the flowing lines and details. A fine-tipped brush is perfect for intricate work.
- Sponge or Makeup Sponge: A small piece can be great for creating subtle gradients and texture.
- Nail Polish Remover & Cotton Swabs: For cleaning up any mistakes.
- Optional: Glitter Polish: For an extra sparkle that mimics the heat!
Color Palette Inspiration
The classic lava flow look uses deep reds, fiery oranges, and bright yellows, often with a black or dark grey base to represent cooled rock. However, don’t feel limited! You can get creative with:
- Cooler Tones: Think blues and purples with white or silver for an icy lava effect.
- Earth Tones: Browns, deep greens, and gold for a more grounded, earthy feel.
- Monochromatic: Different shades of the same color, like a spectrum of reds from deep crimson to bright scarlet.
Experimenting with color is part of the fun! For more tips on choosing harmonious color combinations, you might find resources on color theory helpful. Understanding basic principles can elevate your nail art designs.
Step-by-Step: Creating Your Own Lava Flow Masterpiece
Ready to get your hands (and nails) a little messy? Follow these simple steps to create a gorgeous lava flow effect. Remember, practice makes perfect, so don’t worry if your first try isn’t exactly what you envisioned. Just have fun with it!
Step 1: Prepare Your Canvas
Start by ensuring your nails are clean and dry. Apply a base coat to protect your nails and help the polish adhere better. Let it dry completely.
Step 2: Lay the Foundation
Apply your base color. For a classic lava look, a deep black or dark gray works wonderfully. This acts as the “cool rock” beneath the flowing lava. Apply one or two coats, allowing each to dry thoroughly.
Step 3: Introduce the Lava Colors
Now for the fun part! Load your thin nail art brush with your first lava color, such as a vibrant red. Gently paint thin, flowing lines or organic shapes onto your base color. Think of how real lava moves – it’s not in perfect circles, but more like irregular, sweeping motions.
Step 4: Blend and Build
While the red is still slightly wet, add streaks or dots of your next color, like orange, next to or overlapping the red. You can use your brush to gently swirl them together a bit, creating a blended, molten effect. Don’t over-mix; you want to see distinct color areas. Repeat with yellow or any other colors you’re using.
Pro Tip: For a softer blend, you can dab a small piece of makeup sponge into your colors and lightly tap them onto the nail over the base color before adding fine lines with your brush. This creates a more diffused, gradient-like effect.
Step 5: Add Depth and Detail
Once your main lava colors are in place and slightly dry, go back with your fine brush and the darkest color (like black or dark red). Add some fine, wispy lines within the lighter colors, or outline some of the shapes. This adds dimension and makes the “flow” look more realistic. You can also add a few tiny dots of yellow or white to represent intense heat.
Step 6: The Finishing Touch
Let your design dry completely. This is crucial! Rushing this step can smudge your beautiful work. Once dry, apply a generous layer of top coat. A good top coat will smooth out any textures and seal your design, making it last longer. For extra sparkle, you can even use a glitter top coat!
Gorgeous Lava Flow Nail Art Designs to Inspire You
The beauty of lava flow nail art is its adaptability. Here are a few proven gorgeous designs to get your creative juices flowing:
1. Classic Fiery Flow
This is the quintessential lava flow look. It features a black or charcoal base with swirling patterns of deep red, vibrant orange, and sunny yellow. The key is the soft blending between the colors and the organic, flowing lines. This design is eye-catching and undeniably hot!
| Color Layers | Effect | Best For |
|---|---|---|
| Black/Dark Grey Base | Cool, solidified rock | Dramatic contrast |
| Deep Red Swirls | Molten core | Creating the base flow |
| Bright Orange & Yellow Accents | Intense heat and light | Adding dimension and visual interest |
| Fine Black Outlines (Optional) | Defining edges and texture | Adding depth and realism |
2. Subtle Smoldering Shades
For a more sophisticated take, opt for a muted color palette. Think deep burgundy, burnt sienna, and a touch of gold or copper. This design still captures the lava flow texture but with a more subdued, elegant vibe. It’s perfect for those who love the look but prefer softer colors.
3. Icy Volcanic Eruption
Who says lava has to be hot? Try a cool-toned lava flow! Use a white or pale grey base and swirl in shades of icy blue, deep teal, and perhaps a hint of lavender. Accents of silver or white can mimic the glint of ice. This is a unique and stunning interpretation.
4. Glittering Lava Gloss
Amp up the drama by incorporating glitter! After applying your base color, use a glitter polish in a complementary shade (gold, silver, or even iridescent) to create streaks within your lava flow. Alternatively, finish with a glitter top coat for an all-over shimmer. This adds an extra layer of magic!
5. Abstract Lava Art
Don’t be afraid to get abstract! Instead of perfect swirls, create more fragmented, splattered, or jagged lines. Think of shattered glass or a more chaotic eruption. This approach can be incredibly artistic and modern.
6. French Tip Lava
A fun twist on a classic. Instead of a white French tip, use your lava colors. You could have a red-orange gradient on the tips, or even paint tiny lava patterns on each tip.
Maintaining Your Lava Flow Nails
Once you’ve perfected your lava flow design, you’ll want to keep it looking its best! Proper care will ensure your manicure lasts and continues to impress.
Tips for Longevity
- Wear Gloves: When doing chores, especially washing dishes or cleaning, wear rubber gloves. Harsh chemicals can break down nail polish and ruin your design.
- Avoid Harsh Chemicals: Even when not washing dishes, be mindful of prolonged contact with strong cleaning agents, hand sanitizers, or acetone-based removers (unless removing polish, of course!).
- Reapply Top Coat: Every couple of days, a quick swipe of a clear top coat can refresh the shine and protect the polish from chips and wear.
- Moisturize: Keep your cuticles and the skin around your nails hydrated with cuticle oil or hand cream. Healthy skin makes your manicure look even better.
- Be Gentle: Avoid using your nails as tools – this goes for any manicure, but especially intricate nail art.
Troubleshooting Common Lava Flow Nail Art Issues
Even the most experienced nail artists run into a snag now and then. Here are some common problems with lava flow nail art and how to fix them.
Problem: Colors Are Muddy and Blended Too Much
Solution: This usually happens when you over-mix the colors or try to blend them while they’re too wet. For future attempts, work faster or let one color dry slightly before adding the next. If it happens on the nail, gently wipe it off with nail polish remover and start that section again. For simple fixes, you can sometimes add a fine black line to redefine the colors.
Problem: Lines Are Too Thick or Uneven
Solution: Ensure your brush is clean and not overloaded with polish. For thinner lines, try holding your brush a bit further up the handle. If lines are wobbly, practice on paper first. If you make a mistake, use a fine-tipped cotton swab dipped in nail polish remover to carefully clean up the line.
Problem: Polish is Chipping Already
Solution: Ensure you applied a good base coat and, most importantly, a solid top coat. Make sure you cap the free edge of your nail with your top coat – meaning, swipe the brush across the very tip of your nail. This seals the polish and prevents chipping. Also, ensure each layer of polish was fully dry before the next application.
Problem: The Design Doesn’t Look “Flowy” Enough
Solution: Look at photos of real lava for inspiration! Real lava has irregular, organic movement. Try to mimic those sweeping, curved lines rather than perfect shapes. Don’t be afraid to let the colors bleed slightly into each other. Adding subtle dark outlines can also enhance the illusion of depth and flow.
Frequently Asked Questions About Lava Flow Nail Art
Here are some common questions beginner nail artists have about creating lava flow nail art.
What colors are best for lava flow nail art?
The most popular combination is a dark base (like black or deep grey) with fiery colors like red, orange, and yellow. However, you can get creative with any colors that evoke a sense of molten or flowing material!
Do I need a special brush for lava flow nail art?
A thin, fine-tipped nail art brush is ideal for creating the delicate, flowing lines. A dotting tool can also be used for dabbing colors or creating smaller accents. Basic synthetic brushes can also work if they have fine tips.
How long does lava flow nail art usually take to do?
For beginners, it might take anywhere from 30 minutes to an hour, especially if you’re being meticulous with drying times and cleanup. Experienced artists can often do it faster.
Can I do lava flow nail art on short nails?
Yes! Lava flow nail art looks great on all nail lengths. On shorter nails, you’ll be working with smaller patterns, which can be just as striking and requires less polish.
How do I clean up mistakes?
Dip a fine-tipped cotton swab or a small, stiff brush into nail polish remover. Carefully trace around the mistake to remove excess polish without disturbing the rest of your design.
Is lava flow nail art difficult to achieve?
It’s considered one of the more beginner-friendly artistic nail designs. The organic, flowing nature means imperfections can actually enhance the look. With a little practice, most people can achieve beautiful results.
Can I use nail polish pens for lava flow designs?
Yes, nail polish pens with fine tips can be a great alternative to brushes for creating the flowing lines. They offer good control and can be easier for some beginners to manage.
Conclusion: Embrace Your Inner Artist with Fiery Nails!
There you have it! Creating stunning lava flow nail art is totally achievable, even if you’re just starting out. It’s a fantastic way to experiment with color, texture, and design, all while expressing your unique style. Remember to gather your tools, choose your favorite color combinations, and take your time with each step. Mistakes are part of the learning process, and often, they lead to surprisingly beautiful outcomes. So go ahead, embrace the heat, and let your nails erupt with fiery, gorgeous lava flow designs. Happy polishing!