Crystal rhinestone nail accent designs add instant glamour and sparkle to any manicure, making them a perfect way to express your style. Easy to apply for beginners, these dazzling accents can elevate your look with a touch of luxury and sophistication in just a few simple steps.
Nails that shimmer and shine! If you’ve ever admired those stunning manicures adorned with tiny, sparkling gems, you’re in the right place. Adding crystal rhinestone nail accent designs might seem tricky, but it’s actually a beginner-friendly way to bring some serious glamour to your fingertips. Forget complicated art; a few carefully placed rhinestones can transform your nails into miniature works of art. Don’t worry if you’ve never done it before, we’ll walk through everything you need to know. Get ready to make your nails the star of the show!
Why Add Crystal Rhinestones to Your Nails?
Let’s talk about the magic of rhinestones! These little gems are your secret weapon for an instant style upgrade. They’re not just for the red carpet; they’re for everyday fabulousness too. Think about it: a little sparkle can boost your mood and make you feel more put-together. Rhinestones offer a touch of luxury that feels special without requiring a professional salon visit every time. They’re versatile, allowing you to go for a subtle hint of shine or a full-on dazzling statement. Plus, they’re a fantastic way to try out nail art without needing advanced artistic skills. You can customize them to match any outfit, any mood, or any occasion. It’s all about adding that personal touch of glamour that makes your manicure uniquely yours.
Achievable Glamour for Everyone
The best part about crystal rhinestone nail accent designs is that they’re incredibly achievable, even for beginners. You don’t need a steady hand of a surgeon or years of art school training. With the right tools and a little patience, you can create beautiful, eye-catching designs that look professionally done. This is your chance to experiment and have fun with your nails! Whether you’re going for a simple single stone on each nail or creating a more elaborate pattern, the result is always a touch of sparkle that elevates your entire look. It’s about embracing creativity and expressing yourself through your manicure.
Essential Tools and Materials for Your Rhinestone Nails
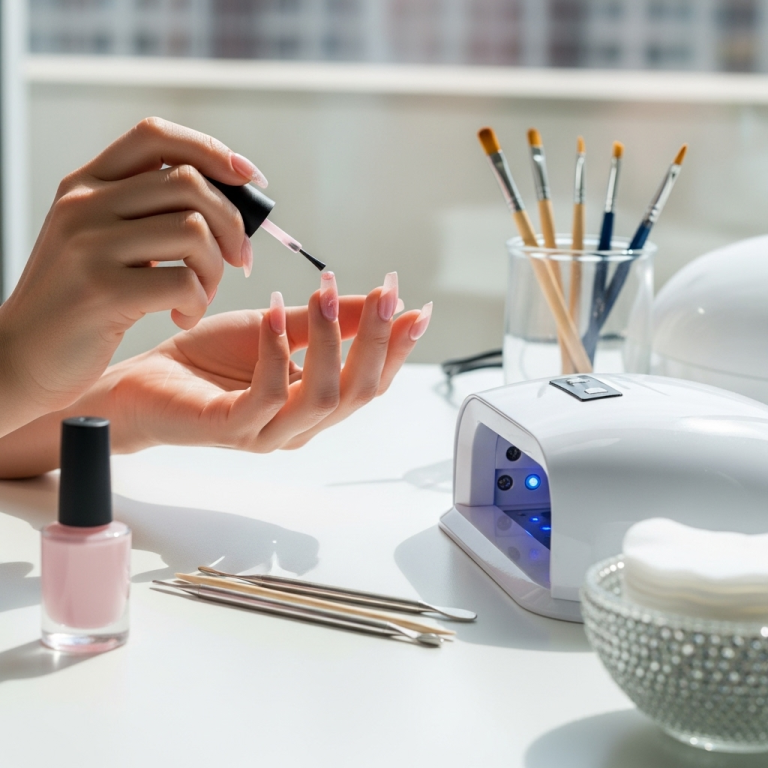
Before we dive into the fun part of placing those sparkly gems, let’s make sure you have everything you need. Gathering the right tools will make the process smooth and enjoyable. Think of this as your rhinestone nail art toolkit!
What You’ll Need:
- Nail Polish/Gel Polish: Your base color! Choose a shade that complements your rhinestones.
- Top Coat or Nail Glue: This is your adhesive. A good quality top coat works for smaller gems, while nail glue is best for larger ones or for extra security. For gel manicures, you’ll use a no-wipe top coat or a dot of gel builder.
- Crystal Rhinestones: These come in various sizes, shapes, and colors. Start with a mixed pack to see what you like! Small, flat-backed ones are easiest for beginners.
- Wax Pencil or Toothpick: This is your “magic wand” for picking up and placing rhinestones precisely. A wax pencil is usually best as the wax helps the tiny stones stick to it.
- Tweezers: For finer adjustments or picking up stones the wax pencil missed.
- Dotting Tool (Optional): Useful for placing small dots of adhesive or creating patterns with tiny gems.
- Rubbing Alcohol or Nail Polish Remover: For cleaning your nails and removing any stray polish.
- Patience and Creativity! The most important ingredients!
Having these items on hand will ensure you have a successful and fun rhinestone application experience. Now, let’s get those gorgeous gems onto your nails!
Step-by-Step Guide: Applying Crystal Rhinestones to Your Nails
Ready to add some sparkle? Follow these simple steps, and you’ll have dazzling rhinestone accents in no time. We’ll cover both regular nail polish and gel polish applications.
For Regular Nail Polish:
- Prep Your Nails: Start with clean, dry nails. File them to your desired shape and push back your cuticles. Apply your base coat and then your chosen nail polish color. Let it dry completely. This is crucial – if your polish is still wet, the rhinestones will just sink in and ruin your design.
- Apply Adhesive: Once your polish is fully dry, apply a small dot of nail glue or a thicker-than-usual layer of your top coat where you want to place your first rhinestone. Don’t spread it out too much; a concentrated spot is best.
- Pick Up the Rhinestone: Use your wax pencil or the tip of a toothpick. Gently press the waxy tip onto the flat side of a rhinestone. It should stick to the wax.
- Place the Rhinestone: Carefully transfer the rhinestone from your wax pencil onto the wet adhesive on your nail. Gently press down to secure it. If using tweezers, pick up the stone carefully and place it onto the adhesive.
- Add More (Optional): Repeat steps 2-4 to create your desired design. You can make a single accent nail, line the tips, create shapes, or cover an entire nail for maximum drama!
- Seal the Deal: Once your design is complete and you’re happy with it, carefully apply a thin layer of top coat around the rhinestones. Be careful not to flood them, as this can make them look cloudy. For larger stones, applying top coat from the sides, not over the top, is a good technique to maintain their shine. Let it dry completely.
For Gel Polish Manicures:
- Prep and Polish: Prepare your nails as usual for a gel manicure. Apply your base coat, color coats, and cure each layer under a UV/LED lamp.
- Apply Rhinestones: After your final color coat and curing, you have two main options for applying rhinestones:
- With No-Wipe Top Coat: Apply a thin layer of a “no-wipe” or “tack-free” gel top coat over the entire nail or just the accent area. While the top coat is still sticky (or even before applying it if you prefer), use your wax pencil or tweezers to pick up your rhinestones and place them directly onto the sticky surface.
- With Builder Gel or Adhesive Gel: Place a tiny bead of clear builder gel or a specialized nail art gel adhesive onto your nail where you want the stone placed. Then, use your wax pencil or tweezers to pick up the rhinestone and press it into the gel bead.
- Cure: Once your rhinestones are in place, cure your nails under the UV/LED lamp according to your gel product’s instructions. This will harden the gel and secure the rhinestones.
- Seal (Optional but Recommended): For extra durability, especially if you didn’t use a no-wipe top coat initially, you can apply another thin layer of no-wipe top coat around the rhinestones, being careful not to cover their facets. Cure again.
Pro Tips for Perfect Placement and Longevity:
- Start Small: Begin with just one or two rhinestones on an accent nail. It’s easier to control and less intimidating.
- Work Fast (but carefully): Rhinestones need to be placed while the adhesive is wet or tacky. Have your design in mind before you start.
- Cleanliness is Key: Make sure your hands and nail tools are clean. Oils can prevent the adhesive from sticking properly.
- Don’t Overdo It: Too many rhinestones can look cluttered and are more likely to snag. Less can be more!
- Consider Nail Shape: Almond or stiletto nails can elongate your fingers and provide a fantastic canvas for a line of stones.
- Proper Sealing: For regular polish, ensure your top coat seals the edges without dulling the stones. This is vital to prevent them from falling off.
- Edge Control: Avoid placing rhinestones too close to the free edge of your nail, as this is where they are most likely to snag or pop off.
Rhinestone Nail Design Ideas for Beginners
Feeling inspired? Let’s look at some simple yet stunning design ideas that are perfect for anyone just starting with crystal rhinestone nail accents. These are easy to replicate and deliver maximum impact!
Simple Sparkle Accents
This is the easiest way to start! It’s all about a single, beautiful rhinestone.
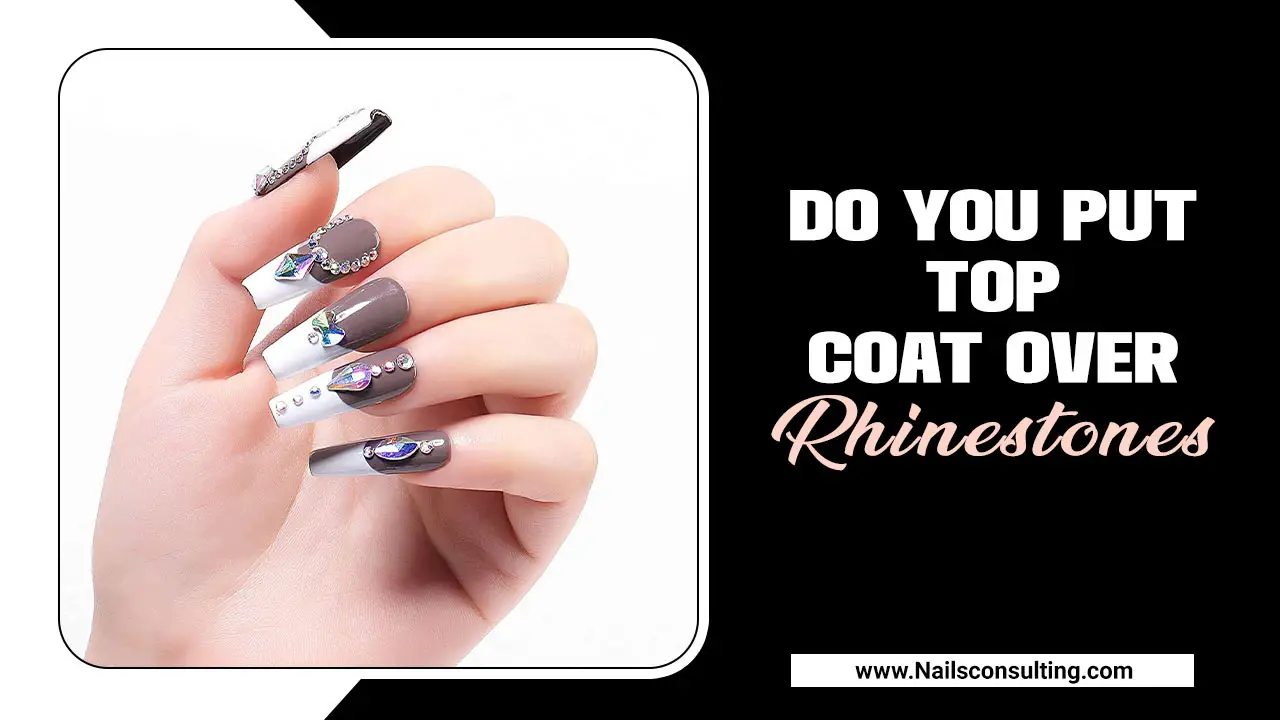
- The Lone Gem: Place one perfectly sized rhinestone in the center of your nail, just above the cuticle. It’s elegant and incredibly chic.
- The Cuticle Cluster: Arrange three to five tiny rhinestones in a small, neat cluster right at the base of your nail, near the cuticle.
- The Diagonal Dazzle: Place a single rhinestone at one corner of your nail, creating a subtle, stylish shimmer.
Minimalist Lines and Patterns
These designs use a few stones to create a graphic, modern look.
- The French Tip Sparkle: Instead of a white tip, place a delicate line of tiny rhinestones along the smile line of your French manicure.
- The Vertical Stripe: Apply a single, slender line of rhinestones vertically down the center of your natural nail or an accent nail for an elongating effect.
- The Accent Nail Statement: Dedicate one nail (usually your ring finger) to a more elaborate pattern. Try a cascade of stones, a simple shape like a heart, or a minimalist crescent moon.
Creating a “Jewelry” Effect
This technique makes your nails look like they’re wearing tiny pieces of jewelry.
- The Ring Finger Spotlight: Focus all your embellishments on one finger. You can create a concentrated focal point with a larger stone surrounded by smaller ones, or a delicate pattern that wraps around the nail.
- The Nail Head Accent: Place a single, larger rhinestone right at the apex of your nail curve (where the nail starts to grow from the cuticle).
Remember, the key is to choose a design that speaks to your personal style and feels achievable for you. Don’t be afraid to experiment! You can find great inspiration on Pinterest or Instagram by searching for “easy rhinestone nail designs.”
Choosing the Right Rhinestones and Shapes
The world of rhinestones is vast and exciting! Choosing the right ones can make a big difference in your design and the overall look. Here’s a quick guide:
Types of Rhinestones:
- Glass vs. Acrylic: Glass rhinestones offer superior sparkle and clarity, mimicking real gems. Acrylic ones are lighter and often more budget-friendly. For a beginner, good quality acrylic or resin stones are perfectly fine!
- Flat-Backed vs. Pointed-Back: For nail art, flat-backed rhinestones are almost always preferred. They lie flush against the nail, making them easier to adhere and less likely to snag. Pointed rhinestones are usually set into jewelry.
- Rhinestone Finishes: Beyond clear, you’ll find AB (Aurora Borealis) finishes that create a rainbow effect, colored stones, and even metallic finishes.
Popular Shapes and Their Effects:
While round is the most common and versatile, exploring other shapes can add unique flair.
| Shape | Description | Best For |
|---|---|---|
| Round | Classic, versatile, and easy to work with. Available in all sizes. | Everyday sparkle, borders, filling spaces, single accent. |
| Teardrop/Marquise | Elongated shapes that can mimic a small jewel or petal. | Creating elegant lines, flower petals, or a sophisticated single accent. |
| Square/Cushion | Geometric and modern. | Adding sharp detail, creating patterns, or a bold statement. |
| Stars/Hearts | Fun shapes for thematic designs. | A playful touch, themed manicures (like Valentine’s Day) or as a central design element. |
| Pearls (often categorized with rhinestones) | Smooth, lustrous beads that offer a classic, elegant look. | French tips, subtle accents, vintage-inspired designs. |
For your first few attempts, I highly recommend starting with small, round, flat-backed rhinestones in clear or AB finish. They are the most forgiving and universally flattering.
Troubleshooting Common Rhinestone Nail Problems
Even with the best intentions, sometimes things don’t go perfectly. Don’t get discouraged! Here are some common issues and how to fix them.
Problem: Rhinestones Won’t Stick
Cause: Adhesive isn’t wet/tacky enough, or the nail surface has too much oil or dust.
Solution:
- For regular polish, reapply a fresh dot of top coat or glue.
- For gel polish, ensure you’re working on a tacky surface (either the sticky layer of a gel color/base coat or a no-wipe top coat before curing). If using builder gel, ensure you’re using enough product to embed the stone.
- Always clean your nails thoroughly with rubbing alcohol before starting.
Problem: Stones Fall Off Quickly
Cause: Not enough adhesive, improper sealing, or snagging on objects.
Solution:
- Use a slightly larger dot of adhesive or ensure your builder gel completely surrounds the base of the stone.
- For regular polish, carefully paint top coat around the base of the rhinestones, ensuring it creates a sort of “cup” holding the stone in place without covering its top. Let it dry thoroughly.
- Be mindful of rough surfaces and activities that might catch your rhinestones.
- For gel, ensure the rhinestones are fully cured within the gel medium.
Problem: Top Coat Makes Rhinestones Look Dull or Cloudy
Cause: Top coat covering the facets of the rhinestone, especially with acrylic ones.
Solution:
- For regular polish, use a good quality, quick-drying top coat and apply it very carefully around the stones, not over their tops.
- For gel polish, use a “no-wipe” top coat and only apply it to the nail surface surrounding the stones, or carefully around their edges after they are secured.
- Consider using glass rhinestones, which are less prone to clouding.
Problem: Rhinestones Look Too Big or Too Small for the Nail
Cause: Incorrect size selection for the nail size or design intention.
Solution:
- Practice on different nails to gauge scale. A single large stone on a short nail might overwhelm it, while a cluster of tiny stones on a long nail might get lost.
- It’s often better to start with smaller stones and build up, or choose a single, well-proportioned accent stone.
Dealing with these minor hiccups is part of the learning process! With a bit of practice, you’ll get the hang of it.
Maintaining Your Crystal Rhinestone Nail Accents
You’ve created a masterpiece, and you want it to last! Proper care will help keep your sparkling nails looking fabulous for as long as possible.
Daily Care:
- Be Gentle: Avoid using your embellished nails to pick at things, open cans, or scrape surfaces. Treat them like the delicate jewelry they are!
- Moisturize: Keep your hands and cuticles moisturized. Dry skin can sometimes lead to snagging, and dry cuticles can make nails more prone to breakage.
- Gloves are Your Friend: When doing chores, especially washing dishes or anything involving harsh chemicals, wear rubber gloves. This protects both your polish and your rhinestones.
When Your Manicure Starts to Fade:
- Touch-Ups: If a stone comes loose, you can often re-adhere it with a tiny dot of nail glue or top coat. Apply carefully and let it dry/cure completely.
- Refresh the Shine: For regular polish, a fresh coat of top coat around the stones can help refresh the look and add extra protection.
Taking these simple steps will help ensure your beautiful rhinestone accents remain intact and continue to add that essential glamour to your look.
The Final Sparkle: Embrace Your Glamour!
And there you have it! Creating stunning crystal rhinestone nail accent designs is not just for the pros; it’s an accessible and incredibly rewarding way for anyone to add a touch of glamour to their manicure. We’ve covered the essential tools, walked through the step-by-step application for both regular and gel polish, explored design ideas perfect for beginners, and even tackled common troubleshooting tips. Remember to choose your rhinestones wisely – glass for


