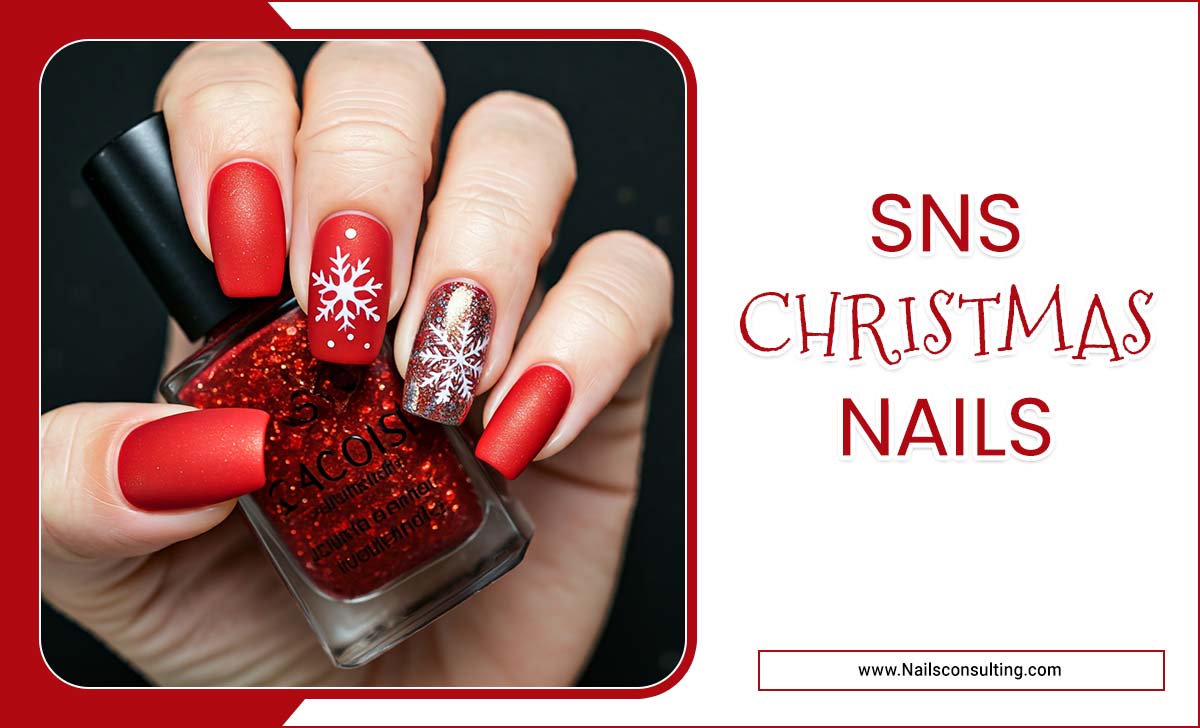
Transform your nails into festive masterpieces with beautiful Christmas wreath nail art! Discover easy-to-follow ideas, essential tools, and simple techniques perfect for beginners to create stunning holiday manis at home.
The holiday season is all about sparkle, joy, and expressing your festive spirit! And what better way to do that than with adorable Christmas wreath nail art? Sometimes, getting the perfect holiday look can seem a bit tricky, especially if you’re new to nail art. You might worry about smudging, getting the details just right, or not having the right tools. But don’t you worry! This guide is made just for you. We’ll break down everything you need to know to create cute and celebratory wreaths on your nails. You’ll be amazed at how simple it can be to bring this festive cheer right to your fingertips. Get ready to learn some fun and easy techniques that will make your nails the star of any holiday gathering!
Frequently Asked Questions
What are the basic colors for Christmas wreath nail art?
The most popular colors are various shades of green for the wreath itself, with accents of red (for berries or bows), gold or silver (for glitter or ornaments), and sometimes white or cream for a snowy effect. You can also get creative with rustic browns or even blues!
What tools do I need for Christmas wreath nail art?
For beginners, you’ll want a few essential tools: a good base coat and top coat, nail polish in your chosen colors (greens, reds, metallics), a thin striping brush or a dotting tool for details, and nail polish remover for clean-up. Tweezers can also be helpful for applying tiny embellishments.
How do I create a basic wreath shape?
Start by painting a green circle or oval on your nail. You can achieve this with a thin brush by going around a central dot, or by using a dotting tool to create many small green dots that form a circle. Then, add your details like berries or a bow.
Can I do Christmas wreath nail art with short nails?
Absolutely! Christmas wreath designs can be scaled down beautifully for short nails. A simple green ring with a few red dots or a tiny bow looks just as festive on shorter tips as it does on long ones.
How long does Christmas wreath nail art usually last?
With a good base and top coat, and proper application, your Christmas wreath nail art can last anywhere from 5 to 10 days. Keeping your nails moisturized and avoiding harsh chemicals can help extend its life.
Are there any beginner-friendly alternatives to freehand painting the wreath?
Yes! You can use nail stamping plates with wreath designs, or even small green nail stickers. You can also trace a small round object like a coin with your polish if freehanding the circle is tough.
What should I do if I make a mistake while painting?
Don’t panic! Use a small brush dipped in nail polish remover to gently clean up the mistake. For larger errors, you can carefully wipe away the polish and start that section again. It’s all part of the learning process!
Deck Your Nails for the Holidays: Your Guide to Christmas Wreath Nail Art
The holiday season is here, and it’s time to add a festive touch to your look! Christmas wreath nail art is a super popular and utterly charming way to celebrate. Imagine tiny, beautiful wreaths adorning your fingertips – how delightful! Sometimes, creating these intricate designs can feel a little daunting, especially if you’re just starting out with nail art. You might be thinking, “How do I get that perfect circle?” or “What if my lines aren’t straight?” But guess what? It’s much simpler than you think! This guide is designed to make Christmas wreath nail art accessible and fun for everyone. We’ll walk you through everything you need to know, from the essential tools to simple techniques, so you can easily create stunning holiday nails that will sparkle all season long.
Christmas Wreath Nail Art: Essential Ideas for Beginners
Getting into the holiday spirit with your nails is so much fun! Christmas wreath designs are classic for a reason – they’re festive, cheerful, and surprisingly easy to create once you know a few tricks. Whether you have short nails or long ones, want a super simple look, or something a little more detailed, there’s a wreath design for you. Let’s dive into some essential ideas that will get your nails looking holiday-ready in no time!
Why Christmas Wreath Nail Art is Perfect for You
Festive & Fun: It’s an instant mood booster and a cheerful way to show your holiday spirit.
Versatile: Works on any nail length and shape.
Customizable: You can alter colors, add embellishments, and play with different wreath styles.
Beginner-Friendly: Many techniques are simple and don’t require advanced artistic skills.
Economical: You can achieve professional-looking results at home without salon prices.
Essential Tools for Your Christmas Wreath Manicure
Before we jump into the designs, let’s gather your nail art toolkit. You don’t need a lot of fancy gadgets to create beautiful wreaths. Here’s what will help you achieve that salon-quality look right at home:
Must-Have Nail Polishes
Base Coat: Protects your natural nails and helps polish adhere better. Check out this guide on the importance of base coats from the American Academy of Dermatology.
Top Coat: Seals your design, adds shine, and prevents chipping.
Green Polish: Various shades are great – think deep forest green, bright emerald, or even a muted olive.
Red Polish: For berries, bows, or accent details.
Gold or Silver Polish: For a touch of sparkle, glitter, or metallic bows.
White or Cream Polish: For snowy accents or a base if you want a lighter wreath.
Basic Nail Art Tools
Thin Striping Brush: Perfect for drawing delicate lines, creating wreath outlines, or adding fine details.
Dotting Tool: A double-ended tool with metal balls of different sizes. Use the smaller end for tiny dots (like berries) and the larger end for creating small shapes or filling in colors.
Toothpick: A very accessible tool for picking up small dots of glitter or making tiny embellishments.
Fine-tipped Tweezers: Useful for placing small rhinestones or glitter precisely.
Nail Polish Remover & Cotton Swabs/Pads: For cleaning up any smudges or mistakes cleanly.
Optional Embellishments
Small Rhinestones or Gems: To mimic ornaments or add extra sparkle.
Glitter Polish or Loose Glitter: For a dazzling finish.
Step-by-Step Wreath Creation Techniques
Let’s get creative! Here are a few ways to paint a Christmas wreath on your nails, starting with the easiest. Remember to let each layer dry properly before moving to the next step to avoid smudges!
Technique 1: The Simple Dot Wreath (Super Easy!)
This is perfect for absolute beginners! It’s all about using dots to build your wreath.
1.
Prep Your Nails: Apply a base coat, let it dry, and then apply your chosen nail polish color for the base of your nail. A nude, white, or a classic red works beautifully.
2.
Create the Green Base: Using your green nail polish and a dotting tool (or even the brush from the bottle if it’s thin enough), start making small dots in a circle on your nail. Don’t aim for perfection; the more organic it looks, the better!
3.
Connect the Dots (Optional): If you want a more solid wreath shape, you can gently connect the dots with a thin striping brush, or just add more dots to fill in any gaps.
4.
Add Berries: With a smaller dotting tool or a toothpick, carefully add small red (or gold/silver) dots around the green wreath to mimic berries.
5.
Add a Bow (Optional): You can paint a small red or metallic bow at the bottom or top of the wreath using your striping brush.
6.
Seal It: Once everything is completely dry, apply a generous layer of top coat to protect your design and add shine.
Technique 2: The Outline and Fill Wreath (Slightly More Detail)
This method gives a slightly more defined look.
1.
Prep Nails: As before, start with a base coat and your chosen nail color for the nail itself.
2.
Outline the Wreath: Using a thin striping brush and green polish, carefully paint a rough circle or oval shape on your nail. This is your wreath’s outline.
3.
Fill It In: While the outline is still wet, or after it has slightly dried, use a smaller brush or the tip of your polish bottle to fill in the outline with a slightly thicker layer of green polish. Alternatively, use your dotting tool to fill the inside of the outline with more green dots.
4.
Add Festive Touches: Now, add your red berry dots or a painted bow using your striping brush. You can also add tiny white dots for a “snowy” effect.
5.
Embellish (Optional): Place a tiny gold or silver rhinestone at the top or bottom to represent a decorative ornament or bow knot.
6.
Top Coat: Finish with a good layer of clear top coat.
Technique 3: Wreath on an Accent Nail
This is a great way to incorporate the design without overwhelming your whole manicure.
1.
Choose Your Accent Nail: Typically, this is your ring finger, but you can choose any nail you like!
2.
Paint Base Colors: On your accent nail, you might choose a contrasting color like white, cream, dark red, or even a glitter polish. For your other nails, use a complementary color – perhaps a deep green or a classic red. This creates a nice visual contrast.
3.
Create the Wreath: Use either the dotting or outlining technique described above on your accent nail. You might opt for a smaller wreath to fit the space.
4.
Add Details: Add your berries, bows, or any other embellishments.
5.
Seal: Apply top coat to all nails.
Creative Christmas Wreath Design Variations
Once you’ve mastered the basic techniques, you can start playing and making the designs your own! Here are some fun variations to inspire you:
The Berry-Heavy Wreath
Focus: Use more red dots and make them slightly larger than usual. You can even make them overlap a bit for a lush, abundant look.
Color Palette: Deep greens and rich reds are stunning here. A matte finish can also give a sophisticated, natural feel.
The Bow-Centric Wreath
Focus: Paint a prominent bow – maybe a classic red ribbon bow, or a sparkly gold or silver one. Then, wind the green wreath around it.
Color Palette: Contrast a deep green wreath with a bright red bow, or a gold glitter wreath with a simple white bow.
The Snowy Wreath
Focus: Use white polish to add tiny dots or streaks, making it look like the wreath is lightly dusted with snow. You can also add a few white dots around the wreath for a frosty effect.
Color Palette: Greens and whites scream winter wonderland. Add silver accents for extra sparkle.
The Ornament Wreath
Focus: Instead of berry dots, use small rhinestones or glitter dots in colors like gold, silver, red, or blue to mimic tiny Christmas ornaments hanging on the wreath.
Color Palette: Festive jewel tones or classic metallics work best.
The Minimalist Wreath
Focus: A single, clean green line forming a circle with just one or two tiny red dots or a subtle metallic accent. Perfect for a chic, understated look.
Color Palette: Muted greens, soft reds, and subtle metallics.
The Rustic Wreath
Focus: Use a muted, earthy green and perhaps a touch of brown. You could even add a small twine-like bow effect with brown polish.
Color Palette: Olive green, brown, cream, and maybe a deep burgundy.
What If I Don’t Have Nail Art Tools?
Don’t have fancy brushes or dotting tools? No problem! You can still create amazing Christmas wreath nail art with items you likely already have.
Toothpicks: These are fantastic for making small dots (berries or wreath fillers) and for picking up tiny glitters. Just dip the tip into the polish and dot away!
Ballpoint Pen (New Ink): For very fine lines, a new ballpoint pen can sometimes be used carefully. Make sure the ink is fully dried before applying top coat!
The Edge of Your Polish Brush: The brush that comes with your nail polish can be used for more than just painting your whole nail. The corner or edge can be used to create smaller lines or dollops of color.
Hairpin: The rounded end of a hairpin can function like a dotting tool for creating slightly larger dots.
Stencils or Stickers: For a truly foolproof method, you can buy pre-made Christmas wreath nail stencils or stickers. Apply your base colors, place the stencil or sticker, paint over it, and carefully remove. Or, simply stick on a wreath sticker and seal with top coat!
Tips for Long-Lasting Christmas Wreath Nails
Want your festive designs to stay looking fresh for as long as possible? Follow these simple tips:
Start with Clean, Dry Nails: Ensure your nails are free from oils and old polish.
Use a Good Base Coat: This creates a smooth surface and protects your nails from staining, while also helping polish adhere better.
Allow Layers to Dry: Patience is key! Give each coat of polish and each design element time to dry before adding the next. This prevents smudging and lifting.
Apply Thin Coats: Thicker coats take longer to dry and are more prone to chipping. Aim for thin, even layers.
Seal with a Quality Top Coat: A good top coat is your best friend. Apply it generously over your entire design, making sure to cap the free edge (paint a little along the tip of your nail) to prevent chips.
Reapply Top Coat: If you’re finding your manicure is starting to wear down, another layer of top coat on day 3 or 4 can refresh it.
Moisturize: Keep your cuticles and hands moisturized. Dry cuticles can lead to lifting of nail polish around the edges.</p


