Get the perfect natural nude look on your nails with this easy guide! Learn simple techniques, essential tools, and quick tips for effortless, chic nail designs that enhance your natural beauty. Achieve polished, sophisticated nails with ease, no matter your skill level.
Dreaming of nails that look effortlessly put-together? The natural nude look is your secret weapon! It’s that chic, polished vibe that complements every outfit and occasion. Sometimes, achieving that subtle elegance can feel tricky, leaving you wondering if you’re doing it right. Don’t worry, you’re not alone! This guide is here to demystify the art of the natural nude nail. We’ll walk you through everything, from choosing the right shade to the simple steps that make your nails look amazing. Get ready to discover how easy it is to embrace this timeless trend and feel fantastic about your hands!
Why We Love the Natural Nude Nail Design
The natural nude look is more than just a trend; it’s a staple for a reason. It’s incredibly versatile, making it the perfect canvas for any style. Whether you’re heading to a job interview, a wedding, or just a casual brunch, nude nails always look sophisticated and refined. They have a way of making your hands appear longer and more elegant. Plus, they’re super low-maintenance, which is a huge win for busy bees!
Effortless Sophistication
There’s an undeniable charm in simplicity. A well-executed nude manicure offers a clean, polished appearance that speaks volumes without shouting. It’s subtle yet impactful, exuding confidence and grace. This understated elegance is what makes the natural nude look a go-to for discerning individuals.
Universally Flattering
One of the best things about nude nails is their universal appeal. With the vast array of nude shades available, there’s a perfect match for virtually every skin tone. Finding your ideal nude can enhance your natural complexion, making your hands look radiant and healthy. It’s like finding the perfect nude lipstick, but for your nails!
Minimalist Chic
In a world of bold colors and elaborate designs, sometimes less is more. The minimalist chic of a nude nail design is its superpower. It’s clean, modern, and never goes out of style. It’s the perfect foundation for a polished look that feels current and timeless all at once.
Choosing Your Perfect Nude Shade
The term “nude” is wonderfully broad, and finding your ultimate shade is key to nailing the natural look. It’s all about complementarity – finding a color that harmonizes with your skin tone rather than clashes.
Understanding Your Undertones
Your skin has undertones, which are the subtle hues that lie beneath your surface color. Knowing these helps immensely in shade selection:
- Cool Undertones: If your veins look blue or purple, and silver jewelry flatters you most, you likely have cool undertones. Look for nudes with pink or rosy undertones. Think soft blush pinks, pale beiges with a hint of rose.
- Warm Undertones: If your veins appear greenish, and gold jewelry looks best, you have warm undertones. Opt for nudes with yellow, peach, or golden brown undertones. Warm beiges, peachy nudes, and caramel shades work beautifully.
- Neutral Undertones: If you can’t tell if your veins are blue or green, and both silver and gold look good on you, you’re likely neutral. You have a wider range of options! Most nudes will suit you, but try to find shades that aren’t too far from your natural skin color.
A great resource for understanding your skin tone and its undertones can be found on websites like Mayo Clinic, which offers general insights that can be applied to beauty choices.
Testing Shades
When in doubt, always test! Most beauty stores allow you to swatch nail polish on a clean nail or a nail wheel. Apply a thin coat to see how it truly looks against your skin. Remember, the color can look different in the bottle than on your actual nail.
The Nude Spectrum
Don’t be afraid to explore the entire nude spectrum:
- Pale Pink Nudes: Delicate and fresh, perfect for a “my nails but better” look.
- Soft Beige Nudes: Classic and versatile, a safe bet for almost everyone.
- Caramel or Tan Nudes: Rich and warm, fantastic for deeper skin tones.
- Peachy Nudes: Adds a hint of warmth and glow, great for balancing cool tones.
- Creamy or Milky Nudes: Soft, opaque, and modern, offering a smooth finish.
Essential Tools for Your Nude Manicure
You don’t need a professional salon to achieve a stunning nude manicure. A few essential tools will make the process smooth and the results flawless. Think of these as your DIY manicure toolkit!
The Must-Haves:
- Nail File: For shaping your nails. A fine-grit file (around 240 grit) is gentle yet effective.
- Nail Buffer: A multi-sided buffer can smooth ridges, add shine, and prepare your nail for polish.
- Cuticle Pusher/Orange Stick: To gently push back your cuticles, creating a clean nail bed.
- Nail Polish Remover: Acetone-free is best if you have dry cuticles or want to preserve nail health.
- Cotton Pads/Balls: For removing old polish and cleaning nails.
- Base Coat: Essential for protecting your natural nail and helping polish adhere better.
- Your Chosen Nude Polish: This is the star of the show!
- Top Coat: For shine, protection, and longevity.
- Cuticle Oil: To nourish and hydrate your cuticles after your manicure.
Optional Extras for Extra Polish:
- Nail Strengthener: If your nails are prone to breaking.
- Cuticle Remover Cream: For stubborn cuticles (use sparingly).
- Lint-Free Wipes: For a streak-free clean.
- Small Fan: To speed up drying time.
Step-by-Step: Achieving the Perfect Natural Nude Look
Ready to transform your nails? Follow these simple steps for a beautiful, natural nude manicure that you can do right at home. We’ll break it down so it’s easy to follow, even if you’re new to DIY manicures!
Step 1: Prep Your Canvas (Nail Preparation)
Good prep makes all the difference! Start with clean, dry nails.
- Remove Old Polish: If you have any old nail polish on, gently remove it with nail polish remover and a cotton pad.
- Shape Your Nails: Using your nail file, gently file your nails into your desired shape. Always file in one direction to prevent splitting. Aim for a soft square, round, or squoval shape for a natural look.
- Gently Push Back Cuticles: Apply a tiny bit of cuticle oil or remover to your cuticles. Use your cuticle pusher or orange stick to gently push them back. Avoid cutting them as this can lead to infection. Cleanse your nails thoroughly afterward to remove any residue.
Step 2: Prime Your Nails (Base Coat Application)
This step is crucial for a long-lasting manicure and protecting your natural nail.
- Apply one thin, even coat of your chosen base coat.
- Let it dry completely (usually 1-2 minutes). A good base coat creates a smooth surface for the color and prevents staining, especially with lighter shades.
Step 3: The Nude Polish Application
This is where the magic happens! Patience is key for a streak-free finish.
- First Thin Coat: Apply a thin layer of your chosen nude polish. Start with a stroke down the center of the nail, then one on each side. Don’t worry if it’s streaky or uneven; this is normal for the first coat.
- Strokes to Avoid: Try to avoid dabbing or painting back and forth too much, as this can create streaks.
- Dry Time: Let the first coat dry for at least 2-3 minutes. Rushing this will lead to a smudged mess.
- Second Thin Coat: Apply a second thin coat, focusing on even coverage. This coat should largely even out any streaking from the first.
- Third (Optional) Coat: If your polish is particularly sheer or you want deeper opacity, apply a third thin coat after letting the second dry. Remember, thin coats are always better than one thick, gloopy coat.
A tip for beginners: Ensure you wipe most of the polish off the brush before applying to avoid flooding your cuticles. Your nail care tools are your best friends here!
Step 4: Seal the Deal (Top Coat Application)
Don’t skip this step! A top coat seals in your color, adds shine, and prevents chips.
- Apply one generous, even coat of your favorite top coat over the dried nude polish. Make sure to cap the free edge of your nail by running the brush along the tip. This helps prevent chipping.
- Let your nails dry completely. This can take anywhere from 10-30 minutes depending on the top coat and your environment. Sit back and relax!
Step 5: The Finishing Touch (Cuticle Care)
Hydration is key for healthy-looking nails.
- Once your polish is fully dry, apply a drop of cuticle oil to each nail.
- Gently massage it into your cuticles and the surrounding skin.
- This will make your manicure look even more polished and keep your nails healthy in the long run.
Variations on the Natural Nude Look
While a single-shade nude manicure is timeless, you can add subtle twists to make it your own. These variations embrace the natural nude aesthetic while offering a touch of personal flair.
Subtle French Manicure
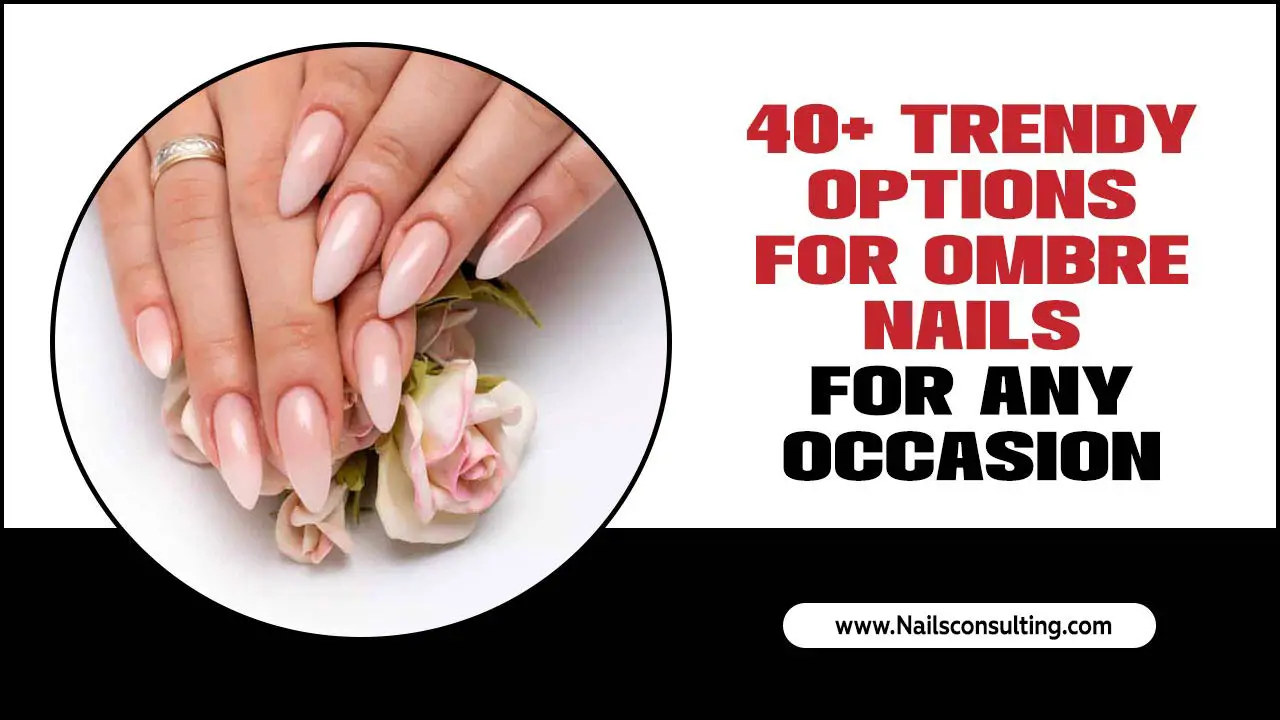
A modern take on the classic French mani. Instead of stark white tips, use a sheer nude polish as your base and a milky white or very pale pink for the tips. This creates a refined, almost “clean girl” aesthetic.
The “Lip Gloss” Nail
This trend uses sheer, high-shine polishes to give nails a “lip gloss” effect. Think of a sheer nude or blush pink with an ultra-glossy top coat. It’s incredibly minimalist and chic.
Negative Space Nude
Incorporate negative space into your design. This could mean a thin nude line running down the center, a half-moon at the base, or geometric shapes left clear. It adds an artistic touch while keeping the natural feel.
Matte Nude Finish
Swap your glossy top coat for a matte one. A matte nude has a sophisticated, velvety finish that’s incredibly modern and chic. It can make even the simplest nude shade look more high-fashion.
Subtle Ombre
Blend two very similar nude shades together for a soft ombre effect. This can be done vertically or horizontally, keeping the transition soft and natural.
Troubleshooting Common Nude Nail Issues
Even with the simplest designs, small hiccups can occur. Here’s how Nailerguy Lisa Drew tackles common problems:
Issue: Streaky Polish
Cause: This is common with nude polishes, especially lighter or sheerer ones. It can also happen if the polish is too thick or applied unevenly.
Solution: Always apply thin coats. Let each coat dry adequately before applying the next. A smoothing base coat can help. If it’s still streaky, try a different brand or finish. A good quality top coat can often smooth out minor imperfections.
Issue: Polish Chipping Quickly
Cause: Lack of proper prep, inadequate base coat, no top coat, or flooding of the cuticles can all lead to chips.
Solution: Ensure nails are clean and dry before starting. Cap the free edge with both your base and top coats. Reapply your top coat every 2-3 days. Avoid harsh chemicals or activities that can chip polish directly.
Issue: Nude Polish Makes Nails Look Yellow or Dull
Cause: Sometimes, certain nude pigments can interact with your natural nail, or the polish itself might be a shade that isn’t complementary.
Solution: Always use a good base coat to create a barrier. If a specific polish consistently causes this, it might not be the right shade for you. Try a nude with a different undertone or consider a slightly more opaque formula from a reputable brand like OPI or Essie.
Issue: Uneven Application Near Cuticles
Cause: This often happens when too much polish is on the brush, or the technique isn’t precise.
Solution: Wipe excess polish from your brush onto the rim of the bottle. Start with a clean brush and find your rhythm: center, left, right. For mistakes, use a small cleanup brush (an old fine-tipped eyeliner brush works!) dipped in nail polish remover to carefully neaten the edges while the polish is still wet. Don’t try to fix it once it’s dry!
Maintaining Your Natural Nude Manicure
Keeping your nude nails looking fresh is straightforward. A little care goes a long way!
Daily TLC:
- Hydrate: Apply cuticle oil daily, especially after washing your hands. Healthy cuticles contribute to an overall polished look.
- Protect: Wear gloves when doing household chores or washing dishes. This protects your polish from harsh chemicals and prevents chipping.
- Avoid Harsh Contact: Try not to use your nails as tools (e.g., to open cans).
Refreshing Your Look:
- Top Coat Refresh: Every 2-3 days, apply another thin layer of top coat. This will revive the shine and reinforce the protective layer, helping your manicure last longer.
- Quick Cleanup: If you notice any polish on your skin or edges wearing thin, use a small brush dipped in nail polish remover to carefully clean up the edges.
When It’s Time for a Change:
A well-maintained nude manicure can last 7-10 days, sometimes longer. When it starts to show wear that can’t be refreshed, it’s time to remove it and start anew. Remember to give your nails a day or two to breathe between manicures if you can, hydrating them with oil during that time.
Natural Nude Look Nail Design: Tools & Shades Comparison
Choosing the right tools and shades can elevate your nude manicure experience. Here’s a quick comparison to guide you:
| Category | Essential Tools | Recommended Shades (by Undertone) | Finishes to Consider |
|---|---|---|---|
| Prep & Application | Nail File | N/A | N/A |
| Buffer | |||
| Cuticle Pusher / Orange Stick | |||
| Color & Finish | Base Coat | Cool: Rose Taupe, Pale Pink Beige | Cream, Sheer |
| Nude Nail Polish | Warm: Warm Beige, Caramel Nude | Matte, Glossy | |
| Top Coat | Neutral: Most Shades Work | High-Shine, Gel-Like | |
| Post-Manicure Care | Cuticle Oil | N/A | N/A |
| Nail Polish Remover (Acetone-Free) |
Remember, these are general guidelines. Personal preference and trying different options are the best ways to find what works for you. The journey to your perfect nude is part of the fun!
Frequently Asked Questions (FAQs)
Here are some common questions people have about achieving the natural nude look.
What is the best way to find my perfect nude nail polish shade?
Look at your skin’s undertones (cool, warm, neutral). Cool undertones often suit nudes with pink or rosy hues, while warm undertones look great with peachy or yellowish beiges. Neutral undertones have a wider range

