Metallic robot-inspired nails are a futuristic and eye-catching manicure trend that adds a touch of edgy glamour to your look. These designs mimic the sleek, polished aesthetic of robots with metallic finishes, geometric patterns, and often silver or chrome accents, making them a genius way to express your bold style with essential DIY techniques.
Get ready to power up your nail game! Ever looked at a sleek robot and thought, “Wow, I want my nails to look like that”? You’re not alone! Metallic robot-inspired nails are taking the nail art world by storm, offering a super cool, futuristic vibe. They’re perfect for anyone who loves to stand out and wants a manicure that feels both modern and a little bit edgy.
Don’t worry if you’re new to nail art. This guide will break down everything you need to know, from the basic tools to simple steps. We’ll make it super easy to create these awesome metallic looks right at home. Ready to transform your nails into miniature works of art? Let’s get started!
Why Metallic Robot Nails Are a Must-Try Trend
There’s something undeniably captivating about metallic finishes. They catch the light beautifully, making your nails look incredibly chic and polished. When you combine this with the sharp, geometric lines often associated with robotics, you get a nail design that’s both sophisticated and playfully futuristic. It’s like having a piece of modern art on your fingertips!
This trend taps into a few exciting aspects of style:
- Futuristic Vibes: Think sleek chrome, brushed metal textures, and clean lines. It’s a nod to science fiction and innovation.
- Edgy Sophistication: Metallic sheens aren’t just for parties. They can add a polished, high-fashion edge to everyday looks.
- Versatility: While “robot” might sound specific, the metallic trend can be adapted to many styles, from minimalist chrome to intricate geometric patterns.
- Confidence Boost: A unique, well-executed manicure can make you feel amazing! These nails are definitely conversation starters.
The essence of robot-inspired nails lies in their clean, often metallic, and sometimes geometric appearance. It’s about the shine, the precision, and the sense of advanced design. This isn’t just about slapping on some silver polish; it’s about creating an intentional look that feels deliberate and stylish.
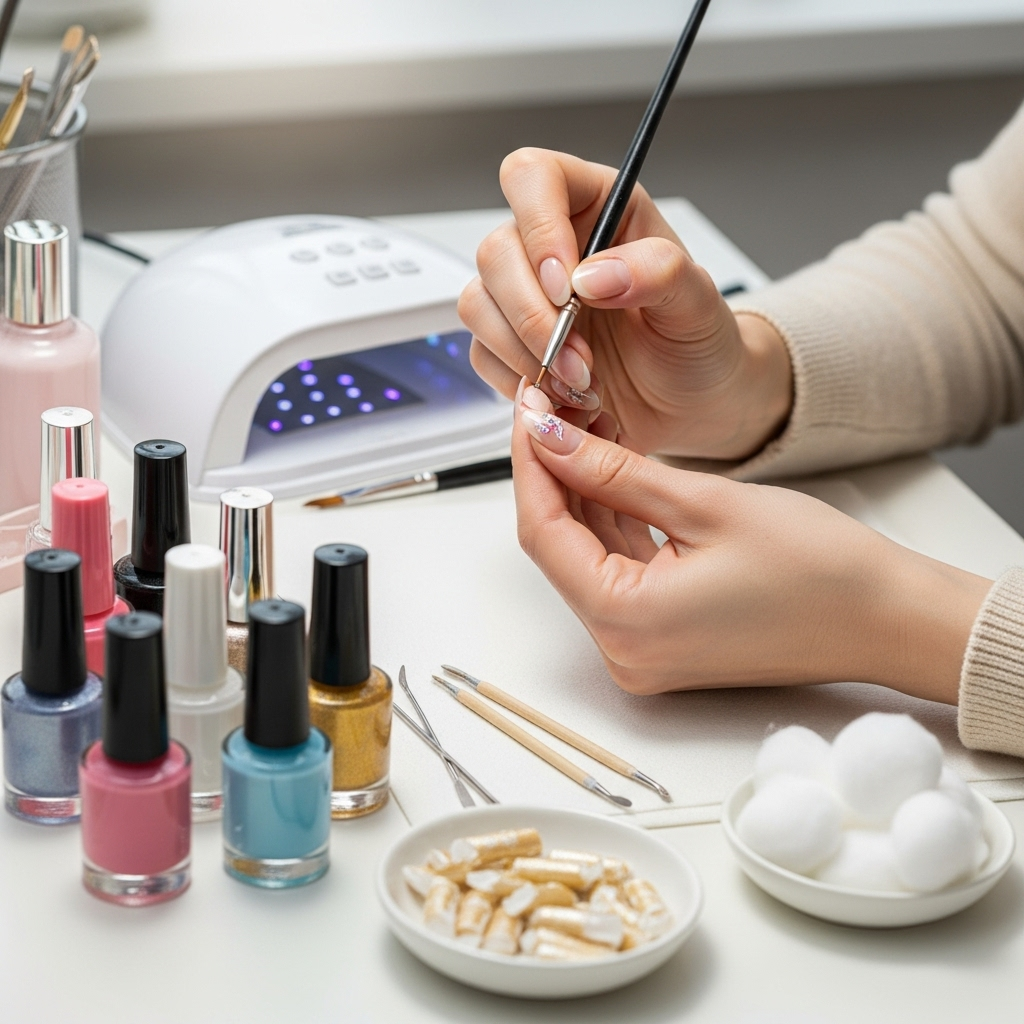
Essential Tools for Your Metallic Robot Manicure
Before we dive into the fun part of creating designs, let’s get acquainted with the tools you’ll need. Don’t be intimidated; many of these are basic nail art supplies that are super useful for all sorts of manicures!
The Must-Haves:
- Base Coat: This protects your natural nails and helps your polish adhere better.
- Top Coat: Seals your design, adds shine, and makes your manicure last longer.
- Metallic Nail Polish: Think silver, chrome, gold, rose gold, or even colored metallics!
- Detail Brushes or Dotting Tools: For creating fine lines, dots, and intricate details.
- Nail Polish Remover and Cotton Pads: For cleanup and fixing mistakes.
- Nail File and Buffer: To shape your nails and smooth the surface.
Optional, But Super Helpful:
- Nail Art Pens: These are like markers for your nails, making it easy to draw lines and shapes.
- Stencils or Tape: For creating sharp geometric designs.
- Adhesive Rhinestones or Studs: For adding 3D accents, like buttons or rivets.
- UV/LED Lamp and Gel Polish: If you want a super durable, salon-quality finish. Gel polishes offer incredible shine and longevity.
Getting your supplies ready is half the battle! Think of these tools as your digital painter’s brushes, ready to bring your metallic robot vision to life.
Beginner-Friendly Metallic Robot Nail Design Ideas & Tutorials
Let’s get creative! These designs are perfect for beginners and can be easily customized.
1. The Sleek Chrome Finish: Effortless Futurism
This is the easiest way to get that robot-inspired vibe. It’s all about the shine!
What You Need:
- Base Coat
- Chrome Powder (or a highly reflective metallic polish)
- Top Coat
- Your chosen metallic nail polish (optional, as a base for the powder)
Steps:
- Prep: Start with clean, filed nails. Apply one coat of your base coat and let it dry completely.
- Color Base (Optional): Apply one or two thin coats of a black or dark-colored nail polish. This makes the chrome powder pop even more! Let it dry until it’s tacky, not fully hard.
- Apply Chrome:
- Using Chrome Powder: Dip a silicone applicator or your fingertip into the chrome powder. Gently rub it all over the tacky nail polish. You’ll see it start to shine! Buff until the entire nail is covered with a mirror-like finish.
- Using Metallic Polish: If you don’t have chrome powder, apply one or two coats of your most reflective metallic polish.
- Seal the Shine: Apply a generous coat of top coat. This is super important to lock in the chrome and prevent chipping. Make sure to cap the free edge of your nail to prevent lifting. Let it dry thoroughly.
Pro Tip: For the best chrome powder results, make sure your base coat or color layer is slightly tacky before applying the powder. A no-wipe gel top coat is perfect for applying chrome powder over if you’re using gel polish.
2. Geometric Lines: Adding Robotic Precision
Geometric shapes are key to that structured, robot-like feel. This design uses tape to create crisp lines.
What You Need:
- Base Coat
- A metallic nail polish (e.g., silver, gunmetal)
- A contrasting color (e.g., black, white, or another metallic)
- Detail brush or nail art pen
- Striping tape or fine masking tape
- Top Coat
Steps:
- Base Color: Apply your base coat, let it dry, then apply 1-2 coats of your metallic polish as the main color. Let it dry completely! This is crucial for the tape not to peel off the polish.
- Apply Tape: Carefully place strips of tape onto your dried metallic polish. You can create triangles, squares, lines, or checkerboard patterns. Press the tape down firmly to avoid polish bleeding underneath.
- Add Contrast: Use a thin brush or nail art pen to fill in the taped-off sections with your contrasting color. If you’re using tape for a checkerboard, you’d paint the squares, then peel the tape off to reveal the metallic underneath. For lines, you might outline taped-off sections.
- Peel Carefully: While the contrasting color is still slightly wet (but not runny), carefully peel off the tape. This gives you super sharp lines.
- Seal It Up: Once everything is completely dry, apply a generous coat of top coat to seal the design and add shine.
External Link: For more on understanding nail polish drying times and techniques to prevent smudging, you can refer to resources on proper nail care and polish application from reputable beauty organizations or even educational materials on drying polymers.
3. The “Circuit Board” Accent Nail: Intricate Detail
This design adds a touch of complexity that looks super impressive but is achievable with patience.
What You Need:
- Base Coat
- A dark base color (black or deep navy works well)
- Metallic polish (e.g., gold, silver)
- A very fine detail brush or dotting tool
- Top Coat
Steps:
- Base Game: Apply base coat, then 1-2 coats of your dark base color. Let it dry thoroughly.
- The “Lines”: Using your fine detail brush and metallic polish, carefully paint thin, straight lines across the nail. Think of connecting dots or creating a grid pattern. Don’t aim for perfection; organic, slightly uneven lines can look even cooler and more technical.
- Adding “Nodes” or “Dots”: Use the tip of your detail brush or a small dotting tool to add tiny dots where lines intersect or at random points along the lines. These represent the connections or components on a circuit board.
- Let It Dry: Allow the metallic polish to dry completely.
- Final Seal: Apply a protective top coat.
DIY Tip: If painting fine lines is challenging, consider using a nail art pen specifically designed for fine details. They offer more control for beginners.
4. Metallic Accents with Studs/Gems: Robotic Hardware
This is for adding a bit of 3D texture and shine, like rivets or control panels on a robot.
What You Need:
- Base Coat
- Your chosen polish color(s) (metallic or complementary)
- Small metallic studs, rhinestones, or caviar beads
- Tweezers or a wax pencil for placement
- Top Coat (a slightly thicker gel top coat can help adhere gems better)
Steps:
- Paint Your Base: Apply your base coat and 1-2 coats of your main nail polish color. Let it dry.
- Place Your “Hardware”: Apply a small dot of top coat (or gel top coat) where you want to place a stud or gem. Use tweezers or a wax pencil to pick up the embellishment and place it onto the dot of polish.
- Strategic Placement: Think about where rivets or control panel buttons would be on a robot. A line of studs down the center, a cluster in a corner, or just a few scattered accents can make a big impact.
- Additional Polishing: You can also add metallic polish accents around the studs or paint geometric shapes on other nails to complement the embellishments.
- Lock It Down: Once all embellishments are in place and the polish is dry, apply a generous top coat. Be careful to coat around the edges of the studs rather than directly over them, especially if they are raised, to avoid filling in their texture. If using gel, ensure you cap all edges.
Understanding Metallic Finishes: Powder vs. Polish
The secret to that incredible shine often lies in the finish. There are two main ways to achieve a dazzling metallic look:
Metallic Nail Polish
These are your everyday nail polishes with metallic pigments mixed in. They come in a vast array of colors and finishes, from subtle shimmers to high-impact foils.
| Pros | Cons |
|---|---|
| Easy to use, widely available. | Can sometimes show brush strokes. |
| Great for solid color looks or as a base. | May not achieve the super-mirror effect of chrome powder. |
| Good for most DIY nail art. | Longevity can vary depending on the brand. |
Chrome Powder
This is a fine, iridescent powder that you rub onto a tacky nail surface, typically gel polish. It creates an intense, almost liquid-metal shine that’s hard to replicate with regular polish.
| Pros | Cons |
|---|---|
| Achieves a true mirror-like, high-impact metallic finish. | Requires a no-wipe gel top coat or a specific tacky layer to adhere. |
| Very little to no brush strokes visible. | Can be a bit messy if not applied carefully; requires specific tools (silicone applicators). |
| Creates a very smooth, futuristic surface. | May require a UV/LED lamp for curing gel base/top coats. |
For beginners, starting with a highly reflective metallic polish is a great entry point. As you get more comfortable, you can experiment with chrome powders for that extra wow factor!
Nail Care for Long-Lasting Metallic Designs
Keeping your gorgeous metallic robot nails looking sharp requires a little TLC. Here are some essential tips:
- Moisture is Key: Dry cuticles can lead to hangnails and make your polish lift. Regularly apply cuticle oil and a good hand cream.
- Handle with Care: Avoid using your nails as tools! Try to open cans, scrape things, or pry items with your fingertips instead of your nails.
- Buff Gently: If you notice a slight chip or dullness on a metallic polish, a gentle buff can sometimes revive it. However, avoid over-buffing, which can thin your nails.
- Reapply Top Coat: Every couple of days, apply an extra layer of top coat to refresh the shine and reinforce the design, especially on the free edge.
- Soak, Don’t Peel: If you need to remove your polish or gel, soak it off gently with acetone or polish remover. Never peel or pick at your gel or polish, as this can damage your natural nail.
Caring for your nails ensures your art lasts longer and your natural nails stay healthy underneath. It’s about protecting your investment in your beautiful manicure!
Frequently Asked Questions (FAQ)
Q1: How do I make my metallic nail polish look smooth and not streaky?
A: Ensure your nails are properly prepped and buffed smooth. Apply thin coats of polish, and allow each coat to dry partially before applying the next. Avoid overloading your brush. A good quality metallic polish or chrome powder usually gives a smoother finish.
Q2: Can I use regular nail polish with tape designs?
A: Yes! Make sure your base color is completely dry before applying the tape. Applying tape to wet polish will cause it to lift and smudge. Peel the tape off when the second color is still slightly wet but not runny to get clean lines.
Q3: How long do metallic robot-inspired nails typically last?
A: With regular nail polish and good care, you can expect them to last 5-7 days. If you use gel polish and a UV/LED lamp, they can last 2-3 weeks with proper application and care.
Q4: My chrome powder looks patchy. What am I doing wrong?
A: This is often due to the base layer. Ensure you’re using a no-wipe gel top coat or a very tacky, fully cured regular polish. Apply the powder in thin layers, buffing gently until the shine is even. You might need a second application of powder.
Q5: Are there any specific nail shapes that work best for robot-inspired designs?
A: While these designs look great on any nail shape, sharper shapes like stiletto or almond can enhance the futuristic, edgy feel. However, square or squoval nails are also perfect canvases for geometric patterns.
Q6: Can I mix metallic finishes in one manicure?
A: Absolutely! Mixing a chrome accent nail with a regular metallic polish on others, or using different metallic colors for geometric patterns, can create a dynamic and visually interesting robot-inspired look.
Q7: Where can I find good quality metallic nail polishes or chrome powders?
A: Reputable beauty supply stores, online beauty retailers, and dedicated nail art supply websites are excellent places to find a wide selection of metallic polishes and chrome powders. Look for brands known for their pigmentation and finish. Many online marketplaces also offer these items, but be sure to check reviews!
Conclusion: Embrace Your Inner Tech-Fashionista!
Metallic robot-inspired nails are more than just a trend; they’re a fantastic way to express your unique style and confidence. Whether you opt for a full-on shimmering chrome or subtle geometric accents, these designs offer a futuristic edge that’s surprisingly versatile.
From the smooth, mirror-like finish of chrome powder to the clean lines achieved with tape and metallic polishes, creating these looks at home is totally achievable. With the right tools—which are often staples in any nail art enthusiast’s collection—and a little patience, you can transform your nails into miniature works of technological art.
Remember, the most important part of nail art is having fun and letting your personality shine through. So, gather your polish, grab your tools, and get ready to power up your manicure with these genius, essential metallic robot-inspired designs. Go forth and shine, you tech-savvy trendsetter!