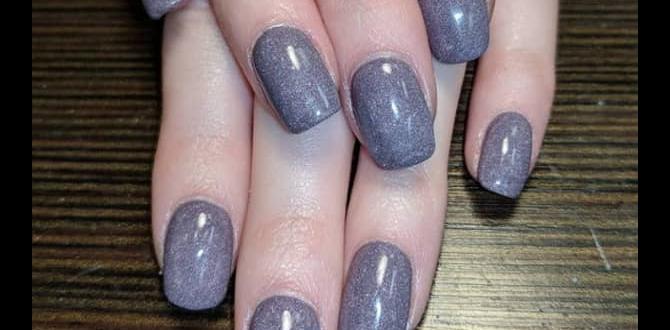
Gradient sponge nail designs offer an easy way to create stunning, blended color effects on your nails. Perfect for beginners, this technique uses a simple makeup sponge to achieve flawless ombre and sunset looks with minimal effort. Get ready for beautiful, salon-worthy nails at home!
Have you ever admired those beautiful nails with colors that smoothly blend into each other, like a perfect sunset or a vibrant rainbow? You know, the ones that look super professional and complicated to create? Well, you’re not alone! Many of us see these stunning gradient designs and think, “There’s no way I can do that myself.” The good news is, you absolutely can! Forget about fancy brushes and hours of practice. We’re about to dive into the wonderful world of gradient sponge nail designs, and trust me, it’s easier and more fun than you might imagine. Get ready to unlock your inner nail artist with this simple, yet impactful technique.
This guide is going to walk you through everything you need to know, from the basic tools to the step-by-step magic. We’ll break down how to achieve those seamless color transitions that will make your nails pop. So, grab your favorite polish colors, and let’s get started on creating some effortless stunning nail art!
What Exactly Are Gradient Sponge Nail Designs?
Gradient sponge nail designs, often called “ombre nails” or ” sponge nails,” are a nail art technique where two or more nail polish colors are blended together on the nail to create a smooth transition from one shade to another. Instead of harsh lines, you get a beautiful, flowing effect that mimics natural gradients like sunsets, sunrises, or even the pearly sheen of a seashell.
The magic behind these designs is a common household item: a makeup sponge. A regular cosmetic sponge, or even a kitchen sponge cut into smaller pieces, acts as the perfect tool to dab and blend multiple colors onto the nail. This method is incredibly forgiving and allows even complete beginners to achieve stunning, professional-looking results with a little practice. It’s a fantastic way to experiment with color combinations and create unique looks that are both trendy and eye-catching.
Why You’ll Love Gradient Sponge Nails
There are so many reasons to fall in love with this nail art technique. It’s not just about the gorgeous results; it’s also about how accessible and enjoyable the process is.
- Beginner-Friendly: Seriously, if you can hold a sponge, you can do this! The blending happens almost magically.
- Stunning Visuals: The seamless color transitions are mesmerizing and add a sophisticated touch to any manicure.
- Endless Color Combinations: From soft pastels to vibrant neons, the possibilities are limitless. Mix and match to create your perfect palette.
- Quick and Easy: Compared to intricate freehand designs, gradient sponge nails are surprisingly fast to execute.
- Affordable: You likely already have most of the supplies, or they are very inexpensive to acquire.
- Customizable: Adjust the number of colors, placement, and intensity to match your personal style.
Essential Tools for Your Gradient Journey
Before we start blending, let’s gather the supplies you’ll need. Don’t worry, most of these are everyday items you probably already have or can find easily at a drugstore or beauty supply store.
The Must-Haves:
- Nail Polish: You’ll need at least two colors that complement each other. For beginners, starting with two colors is best.
- A Sponge: This is crucial! You can use:
- Makeup Sponges: These are ideal. Look for wedge or blenders.
- Cosmetic Sponges: Small ones designed for makeup application work wonders.
- Kitchen Sponges: A clean kitchen sponge can be cut into small pieces (about 1-inch squares). Ensure it’s a smooth-sided sponge, not the abrasive scrubby kind!
- Base Coat: Protects your natural nails and helps the polish adhere better.
- Top Coat: Seals your design, adds shine, and protects against chipping.
- Liquid Latex or Petroleum Jelly (Vaseline): To protect your skin from polish stains. This is a lifesaver!
- Nail Polish Remover: For cleaning up any stray polish.
- Cotton Swabs or Small Brush: For precise cleanup.
Optional (But Helpful) Additions:
- Gradient Tool or Silicone Mat: Some people prefer a firmer surface to apply polish onto before sponging.
- Tweezers: To easily pick up and hold the sponge pieces.
- Clean-up Brush: A small, stiff brush dipped in remover for super clean edges.
Step-by-Step Guide: Creating Your Gradient Masterpiece
Ready to make some magic? Follow these simple steps, and you’ll have stunning gradient nails in no time. Remember, practice makes perfect, so don’t be discouraged if your first try isn’t flawless!
Step 1: Prep Your Nails
Start with clean, dry nails. Shape them to your desired length and file any rough edges. Push back your cuticles gently. Apply a thin layer of base coat and let it dry completely. This is super important for nail health and polish longevity.
Step 2: Protect Your Skin
This step is crucial for a clean finish. You can do one of two things:
- Liquid Latex: Apply a layer of liquid latex (or peel-off base coat) around your nails, onto the skin. Let it dry completely until it forms a protective barrier.
- Petroleum Jelly: Smear a generous amount of Vaseline around your nails, being careful not to get any on the nail plate itself.
This prevents polish from staining your skin, making cleanup a breeze. You can learn more about nail prep and care from resources like the Mayo Clinic’s guide to nail health, ensuring your nails are in the best condition for any design.
Step 3: Prepare Your Sponge
If you’re using a makeup sponge or cosmetic sponge, you might want to slightly dampen it. Just a tiny bit of water (and then squeeze out the excess) can help the polish blend more smoothly. If using a kitchen sponge, cut a small piece, about 1-inch square. Don’t worry about making it perfect; the texture is what we’re after. Some artists even find dabbing the sponge on a piece of paper first helps control the amount of polish.
Step 4: Apply Your Colors to the Sponge
This is where the fun begins! Apply your chosen nail polish colors directly onto the sponge.
- For two colors: Apply each color in stripes side-by-side on the sponge.
- For three or more colors: Apply them in stripes next to each other, ensuring they slightly overlap where they meet.
Work quickly because nail polish dries fast!
Step 5: The Gradient Application
Now, gently press the sponge onto your nail. Roll or dab the sponge lightly. You want to transfer the blended colors onto your nail in a dabbing motion. Don’t press too hard, or you’ll just push the polish around. A gentle rocking or dabbing motion works best to pick up the gradient effect.
You’ll likely need to reapply polish to your sponge and dab onto your nail a few times to build up the color intensity and achieve the desired gradient. For the best blend, aim to dab the sponge from cuticle to tip. You can slightly angle the sponge to help achieve a smooth transition. The sponge will absorb some of the polish, so don’t be afraid to layer it up!
Step 6: Clean Up the Edges
Once you have your gradient on the nail, it’s time to clean up.
- If you used liquid latex, carefully peel it away.
- If you used Vaseline, use a cotton swab or a small brush dipped in nail polish remover to wipe away the excess polish around your nails.
This step makes a huge difference in the final look, giving you crisp, clean lines.
Step 7: Add a Top Coat
Once the polish on your nails is completely dry (and you’ve cleaned up any smudges or stray bits), apply a generous layer of top coat. This seals the design, adds a beautiful shine, and helps your gradient nails last longer. Make sure to cap the free edge of your nail by running the brush along the very tip.
Step 8: Admire Your Work!
Let your top coat dry fully, and then bask in the glory of your gorgeous gradient nails! You did it!
Tips for Achieving a Flawless Gradient
Even with a simple technique, a few pro tips can elevate your gradient sponge nail designs from good to absolutely stunning. Here are some things to keep in mind:
- Start with Opaque Polishes: Creamy, opaque polishes tend to show up better and blend more smoothly than sheer or glittery formulas, especially for your first few tries.
- Layer, Layer, Layer: Don’t expect perfect opaqueness and blend on the first dab. Reapply polish to your sponge and dab onto your nails multiple times to build depth and smoothness.
- Use a White Base: For vibrant, true-to-color gradients, especially with lighter or pastel shades, applying a thin layer of opaque white nail polish as a base coat before your gradient colors can make a world of difference. Let it dry completely before sponging.
- Sponge Density Matters: Finer-textured makeup sponges can create a more diffused, blended look, while coarser sponges might give a slightly different textured effect. Experiment to find your preference.
- Clean Your Sponge Between Dabs: If you’re doing multiple nails, or if you notice colors getting muddy on the sponge, gently dab the excess polish off onto a paper towel or reapply fresh polish.
- Don’t Over-Saturate: While you need enough polish for transfer, too much can lead to flooding your cuticles and making cleanup harder.
- Work Quickly: Nail polish dries fast! Have all your colors open and ready to go before you start applying them to the sponge.
- The “Shake and Roll” Method: Some nail artists prefer to apply polish to a small palette or piece of foil, then gently swirl their sponge on the colors, rather than applying stripes directly. This can create a more marbled effect.
Gradient Sponge Nail Design Ideas to Try
The beauty of gradient sponge nails is their versatility. They can be adapted to suit any style, occasion, or mood. Here are a few popular ideas to get your creativity flowing:
Sunrise/Sunset Gradient
This is a classic for a reason! Use warm colors like yellow, orange, and pink. Start with yellow at the cuticle, blend into orange in the middle, and finish with pink at the tip. For an extra pop, try a deep red or purple at the very tip.
Ocean Breeze Gradient
Create a calming vibe with blues and greens. Blend shades of turquoise, aqua, and maybe a hint of seafoam green or even a touch of white for a foamy effect. This is perfect for a summer vacation or just bringing a bit of the beach to your day.
Rainbow Gradient
Embrace your inner unicorn! Layer multiple bright colors in rainbow order (red, orange, yellow, green, blue, purple). For a softer rainbow, opt for pastel shades.
Monochromatic Gradient
If bold color blocking isn’t your style, try a gradient within the same color family. Think different shades of pink, from light blush to deep fuchsia, or various tones of purple. This creates a subtle yet sophisticated look.
Berry Bliss Gradient
Combine shades of pink, raspberry, and deep berry or plum. This gradient is perfect for fall or a chic evening look. You can even add a touch of shimmer for extra elegance.
Glitter Fade
Apply your gradient colors as usual, and then top it off with a sheer glitter polish. You can concentrate the glitter at the tips and fade it down, or apply it all over for a sparkly finish. This is a fantastic way to add extra dimension and sparkle.
Color Combinations Made Easy: A Quick Guide
Choosing colors can be overwhelming, but here’s a simple table to help you pick harmonious shades for your gradient designs. These are just suggestions; feel free to mix and match!
| Theme/Vibe | Color 1 | Color 2 | Color 3 (Optional) | Color 4 (Optional) |
|---|---|---|---|---|
| Sunset | Bright Yellow | Coral Orange | Hot Pink | Deep Red/Purple |
| Ocean | Light Blue | Turquoise | Emerald Green | White (for foam) |
| Pastel Dream | Baby Pink | Lavender | Mint Green | Sky Blue |
| Berry Delight | Soft Rose | Raspberry Pink | Deep Berry | Plum |
| Earthy Tones | Creamy Beige | Terracotta | Olive Green | Chocolate Brown |
| Neon Pop | Lime Green | Hot Pink | Electric Blue | Sunny Yellow |
Troubleshooting Common Gradient Nail Issues
Even with the best intentions, things can sometimes go a little awry. Don’t worry! Most common problems have simple fixes.
| Problem | Possible Cause | Solution |
|---|---|---|
| Streaky or uneven color | Not enough polish on the sponge; sponge too dry; pressing too hard. | Reapply polish to the sponge and dab more gently. Ensure sponge is slightly damp if needed. Apply multiple thin coats instead of one thick one. Try a different sponge with a finer texture. |
| Colors look muddy/mixed | Too much overlapping on the sponge; sponge used too many times without refreshing. | Apply colors to the sponge with less overlap. Refresh the sponge with clean polish for each nail or every few dabs. Clean the area of the sponge you’re not using. |
| Polish gets all over skin | Not enough barrier protection; barrier applied too thinly. | Apply a thicker, more generous layer of liquid latex or Vaseline. Practice the dabbing motion first on a piece of paper to get the feel for it. Use a cleanup brush for precision. |
| Gradient isn’t vibrant | Using sheer polishes; not using a white base. | Try using opaque cream formulas. Apply a thin layer of white polish as a base coat and let it dry completely before sponging. |
| Terrible texture on nail | Sponge has a very coarse texture; too much pressure applied. | Try a makeup sponge with a finer pore structure. Use a lighter touch when dabbing. |
Frequently Asked Questions About Gradient Sponge Nails
Here are answers to some common questions beginners have about creating gradient sponge nail designs.
Q1: Do I need a special sponge for gradient nails?
A: Not at all! A regular makeup sponge (like a wedge or beauty blender) works perfectly. You can also cut up a clean kitchen sponge into small, manageable pieces.
Q2: What kind of nail polish is best for gradient designs?
A: Opaque, creamy nail polishes tend to give the smoothest and most vibrant gradients. For brighter colors, consider using a thin layer of white polish as a base first.
Q3: How many times should I dab the sponge on my nail?
A: This varies, but usually, 2-3 gentle dabs are needed to build up the color and blend effectively. You might need to reapply polish to the sponge and dab again. It’s better to build up the color gradually.
Q4: How long does it take for the polish to dry before applying the top coat?
A: Ensure your sponged polish is completely dry to the touch. This can take 2-5 minutes depending on the polish and how many layers you applied. Pressing a clean finger gently onto the nail can help test dryness without smudging (just be careful!).
Q5: Can I use glitter polish with the sponge technique?
A: Yes! While glitter polish can be tricky on its own, you can use it in a gradient by applying it alongside cream polishes on the sponge or by using a glitter top coat over your finished gradient for extra sparkle.


