Butterfly cute kid nails are a delightful way to add sparkle and personality to little hands! These designs are easy to create at home, super fun for kids, and are a fantastic way to encourage creativity and self-expression. Get ready to learn how to make stunning, eye-catching butterfly nail art that your child will adore!
Does your little one love all things pretty and whimsical? Are you on the hunt for a fun, creative activity you can do together? Having your child’s nails sparkle with cute designs is a simple joy that can brighten their day. But sometimes, finding easy, kid-friendly nail art ideas can feel a little overwhelming. Don’t worry, I’m here to help! We’ll walk through how to create adorable butterfly nails step-by-step, making it a breeze for beginners. Your child will be showing off their stunning new nails in no time! Let’s dive into the magical world of butterfly nail art.
Why Butterfly Nails for Kids? The Magic of Mini Manicures
Butterflies symbolize transformation, beauty, and joy – perfect themes for children! Adding these charming creatures to tiny nails is more than just a pretty design; it’s a form of playful self-expression. Kids love showing off their unique styles, and a little butterfly accent can make them feel extra special. Plus, the process of painting nails can be a relaxing and bonding activity for parents and children.
These cute kid nails are incredibly versatile. They can be for a special occasion, a fun playdate, or just because! They don’t require advanced artistic skills, making them perfect for anyone new to nail art. We’ll focus on simple techniques that yield amazing results, turning an everyday activity into a creative adventure.
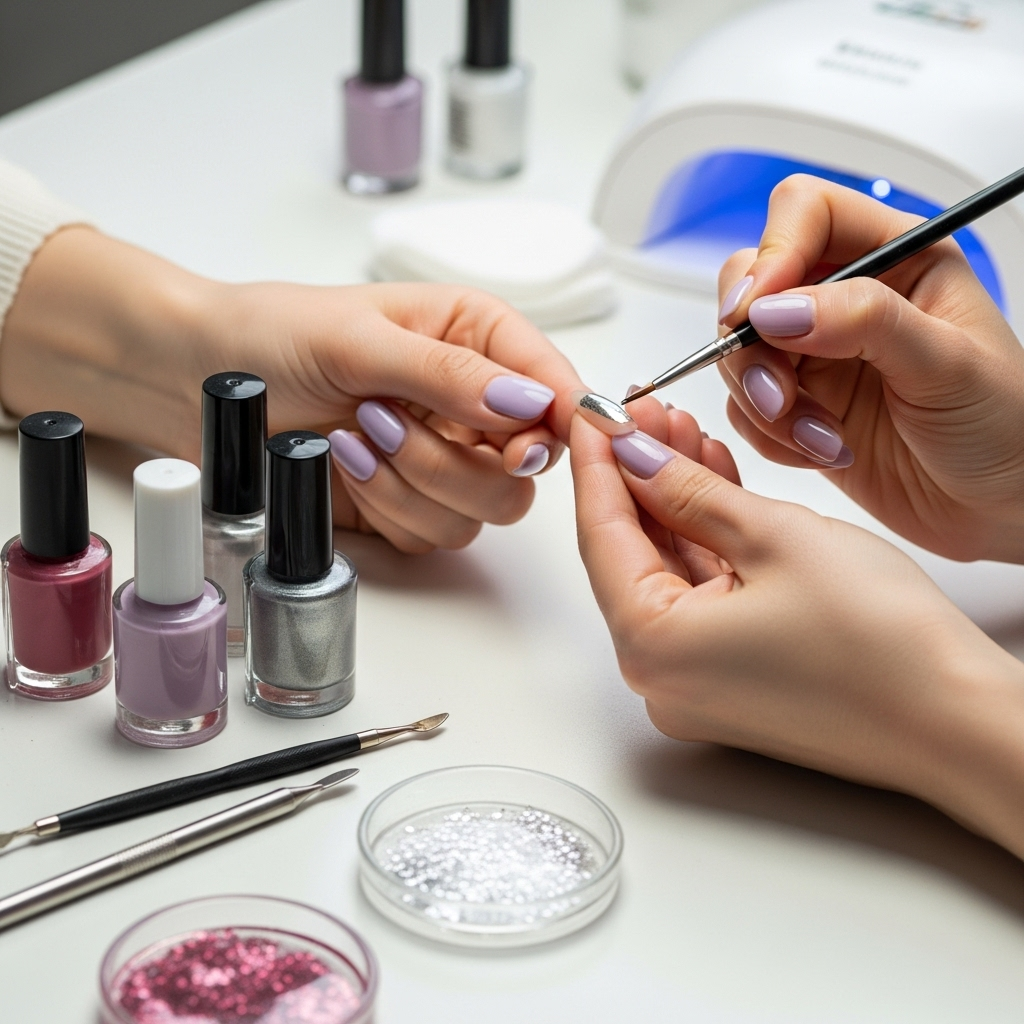
Essential Tools & Supplies for Butterfly Cute Kid Nails
Getting started with butterfly nail art for kids is easy with just a few basic supplies. You don’t need a professional salon setup to create beautiful designs. Here’s what will help you bring your butterfly dreams to life:
Must-Have Supplies:
- Nail Polish Colors: Choose a few vibrant colors for the butterfly wings and a contrasting color for the nail base. Pastels like pink, lavender, and baby blue work wonderfully, as do brights like yellow and orange.
- Top Coat: This seals the design, adds shine, and helps the nail polish last longer. A quick-dry top coat is a lifesaver with busy little hands!
- Nail Polish Remover: For any little oopsies or clean-up around the nail edges.
- Cotton Balls or Pads: For applying nail polish remover.
- Small Nail Art Brush, Toothpick, or Dotting Tool: These are essential for drawing the finer details of the butterfly and its wings. A fine-tipped brush is great for delicate lines. For simpler butterfly shapes, the tip of a toothpick works wonders!
- Optional: Glitter Polish or Stickers: For extra sparkle and fun!
Choosing Kid-Friendly Polish:
When selecting nail polishes for children, look for water-based or non-toxic formulas. These are generally safer and wash off more easily with soap and water. Brands that specifically market “kids’ nail polish” are often a good bet. Many are even peelable, which is a huge plus for easy removal!
For those looking for a more durable, salon-style finish without harsh chemicals, consider “3-free,” “5-free,” or “7-free” polishes. These indicate the absence of certain potentially harmful chemicals like formaldehyde, toluene, and DBP. You can learn more about nail polish ingredient safety on resources like the U.S. Food & Drug Administration’s website, which provides information on cosmetic ingredients and safety.
Beginner-Friendly Butterfly Nail Art: Step-by-Step Guide
Ready to create some magic? This guide focuses on a simple, yet stunning, butterfly design that’s perfect for beginners and kids. We’ll break it down into easy-to-follow steps.
Step 1: Preparation is Key!
- Clean the Nails: Start with clean, dry nails. If your child has old polish on, gently remove it with nail polish remover and a cotton pad.
- Shape the Nails (Optional): You can gently file the nails into a nice shape if desired, but for young children, keeping them short and neat is usually best.
- Apply Base Coat (Optional but Recommended): A clear base coat can help polish adhere better and protect the nail. Let it dry completely.
Step 2: The Base Color
- Paint the Nails: Apply one or two thin coats of your chosen base color. This will be the background for your butterfly. Let each coat dry completely to avoid smudging.
- Drying Time: Patience is key here! A quick-dry top coat can speed things up, or you can use a fan to help.
Step 3: Creating the Butterfly Wings
There are a few super simple ways to do this:
Method A: The Simple Dot & Connect
- The Body: Using your small nail art brush, toothpick, or the tip of a contrasting polish bottle, draw a small vertical line in the center of the nail. This is the butterfly’s body.
- The Wings: Now, create four dots. Two dots on each side of the body line, directly above and below the middle point. These will be the top and bottom wings. Think of it like drawing a plus sign (+) with a slightly elongated vertical line.
- Connect (Gently!): With your brush or toothpick, gently drag the color from the dots slightly towards the body to create a wing shape. You don’t need to be perfect!
Method B: The “W” or “M” Method
- The Body: As before, put a tiny dot or line in the center.
- The Wings: Using your brush or toothpick, draw two small dots for the top wings. Then, draw two more dots for the bottom wings, slightly lower and wider.
- The Connecting Lines: Gently connect the dots to form the wings. You can also try drawing a small “W” or “M” shape above and below the body!
Method C: Using a Thin Brush for Curves
- Butterfly Body: A simple vertical line of color.
- Wing Petals: Use your fine-tip brush and a bright color to create small curved strokes around the body. Imagine drawing little arcs or petals that form the wings. Two on top, two on the bottom.
Step 4: Adding Details & Sparkle
- Antennae: With your fine brush or toothpick, add two tiny lines extending upwards from the butterfly’s body for antennae.
- Details: You can add smaller dots within the wings for more visual interest.
- Glitter: If you have glitter polish, add a touch to the wings or as an accent. Glitter stickers are also a quick and easy way to add shine!
Step 5: The Finishing Touch!
- Seal the Deal: Once all the polish is completely dry (and this is important!), apply a generous layer of top coat over the entire nail. This will make your design last longer and give it a professional, glossy finish.
- Clean Around the Edges: If any polish got on the skin, you can carefully clean it up with a cotton swab dipped in nail polish remover.
Creative Variations for Butterfly Cute Kid Nails
Once you’ve mastered the basic butterfly design, don’t be afraid to get even more creative! Here are some fun ways to personalize your kid’s nails:
Color Combinations:
Experiment with different color palettes! Try rainbow wings, pastel gradients, or even glitter-bombed butterflies. A darker base color with bright wings popping out can also look striking.
Butterfly Placement:
Instead of just one butterfly per nail, try two smaller ones facing each other, or a trail of tiny butterflies across the nail. You can also place them on accent nails (like the ring finger) for a more subtle look.
Beyond the Dots:
Use your nail art brush to create swirls, stripes, or even tiny heart shapes within the butterfly wings. This adds a unique artistic touch.
Themed Nails:
Match the butterfly colors to a favorite outfit or a party theme! For example, use blues and greens for a mermaid-themed party, or reds and yellows for a superhero look.
Butterfly Cute Kid Nails: A Comparison of Nail Art Techniques
Here’s a quick look at some popular methods for creating butterfly nail art on kids’ nails, along with their pros and cons. This table will help you choose the best approach for your needs!
| Technique | Description | Pros | Cons | Best For |
|---|---|---|---|---|
| Dotting Tool/Toothpick | Using ends of tools to create dots that form wings. | Very easy, minimal skill required, quick. | Can be less precise for intricate designs. | Absolute beginners, very young children, simple butterfly shapes. |
| Small Nail Art Brush | Using fine-tipped brushes to paint wing shapes, lines, and details. | More control for detail, can create varied wing styles. | Slightly steeper learning curve than dotting tools. | Beginners wanting to add more detail or fluidity, creating curved wings. |
| Nail Stickers/Decals | Applying pre-made butterfly stickers. | Fastest method, perfectly shaped, no drying time needed for art. | Limited design options, can sometimes lift at edges. | Very short on time, busy parents, kids who want instant results. |
| Stamping | Using metal plates with butterfly designs and a stamper. | Crisp, consistent designs, can be very intricate. | Requires specific tools (stamping plates, stamper, scraper), can be tricky to align. | Those who enjoy precision and want uniform designs across multiple nails. |
Nail Care Tips for Little Hands
Polished or not, taking care of little nails is important. Gentle practices ensure healthy nails that are less prone to breaking.
- Keep them Trimmed: Regularly trim and file nails to prevent snags and breaks.
- Moisturize: Use a gentle hand lotion, especially after washing hands, which can dry out the skin and nails.
- Gentle Polish Removal: Always use an acetone-free nail polish remover for children, as acetone can be drying and harsh.
- Allow Nails to Breathe: Give nails a break from polish every so often to keep them healthy.
- Proper Nutrition: A balanced diet contributes to healthy hair and nails.
You can find more comprehensive guides on children’s nail health from pediatric associations, which often provide advice on common childhood skin and nail concerns. For example, the American Academy of Pediatrics offers general guidance on infant and child care that can indirectly touch upon nail health and safety.
Frequently Asked Questions About Butterfly Cute Kid Nails
Q1: Are nail polishes safe for children?
A1: For most children, yes, especially if you use water-based, non-toxic, or “kid-friendly” polishes. Always check the ingredients and opt for formulas free from harsh chemicals like formaldehyde and toluene. It’s also a good idea to do a patch test on a small area of skin if you’re concerned about allergies.
Q2: How long will these butterfly nail designs last?
A2: With a good base coat and a strong top coat, simple designs can last anywhere from 2-5 days, depending on how active your child is. Peelable polishes or stickers might last a bit less time but are super easy to remove!
Q3: What if my child can’t sit still for nail painting?
A3: Choose a time when your child is calm and relaxed, perhaps while watching a favorite show or during quiet playtime. Using quick-dry polishes and top coats can also help minimize the waiting time. For very wiggly little ones, nail stickers are a fantastic quick alternative!
Q4: How do I easily remove nail polish from kids’ nails?
A4: The easiest way is to use an acetone-free nail polish remover. For water-based or peelable polishes, warm water and a little gentle scrubbing might suffice. You can also soak a cotton ball in remover, press it onto the nail for about 30 seconds, and then gently wipe away.
Q5: Can I combine butterfly designs with glitter?
A5: Absolutely! Glitter polish can add a magical touch. You can use it for the butterfly’s body, as an outline for the wings, or as a full accent nail. Glitter stickers are also a super easy way to add sparkle!
Q6: What are the best colors to use for butterfly cute kid nails?
A6: Bright and cheerful colors work best! Think vibrant yellows, pinks, blues, and purples for the wings. Pastels are also lovely. For the butterfly’s body, black or brown can create a realistic look, or you can pick any color that matches the wings!
Conclusion: Spreading Wings of Creativity
Creating butterfly cute kid nails is such a joyful and rewarding experience. It’s a simple way to add a splash of color and fun to your child’s day, fostering their creativity and sense of style. From choosing the perfect colors to mastering the easy dotting technique, you’ve got all the tools and steps you need to create stunning, miniature works of art.
Remember, perfection isn’t the goal here – it’s about connection, creativity, and the sheer delight of a beautiful, whimsical design. Your child’s smile when they see their sparkling butterfly nails will be the most beautiful reward of all. So grab those polishes, gather your little artist, and let your imaginations flutter into action!