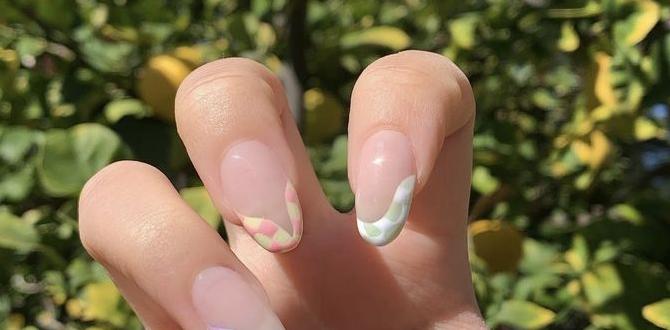
Girly nail designs with pastel pink are a fantastic way to add a sweet, chic, and feminine touch to your look. This guide offers simple, step-by-step instructions and creative ideas for achieving beautiful pastel pink manicures at home, perfect for beginners wanting to express their style with confidence.
Dreaming of nails that are both adorable and stylish? Pastel pink is your go-to shade for that perfect blend of charming and chic! If you’ve ever felt intimidated by nail art or thought it was too tricky for DIY, think again. We’re here to show you just how easy and fun it can be to create stunning girly nail designs with pastel pink, right from your own home.
This guide is designed with you in mind – whether you’re a complete beginner or looking for fresh, simple ideas. We’ll walk you through everything you need to know, from picking the best pastel pink polishes to mastering a few basic, yet beautiful, design techniques. Get ready to fall in love with your nails all over again!
Ready to transform your fingertips into tiny canvases of pastel perfection? Let’s dive in!
Why We Adore Girly Nail Designs With Pastel Pink
Pastel pink is more than just a color; it’s a mood! It’s soft, universally flattering, and instantly adds a touch of sweetness and sophistication to any outfit or occasion. Think of it as your nail wardrobe’s most versatile addition – perfect for everyday elegance, special events, or just when you want to feel a little extra special.
The beauty of pastel pink lies in its adaptability. It pairs beautifully with other soft colors, metallics, and even bold accents for a fun contrast. Plus, it’s incredibly forgiving for at-home manicures, making it the perfect starting point for anyone new to nail art. It’s a shade that screams ‘girly’ in the most charming and confident way possible!
Essential Tools for Your Pastel Pink Nail Art Journey
Before we start creating magic, let’s gather our tools! Having the right supplies makes all the difference in achieving that polished, salon-worthy look. Don’t worry if you don’t have everything right away; many of these are basic nail care items you might already own.
The Must-Haves:
- Base Coat: Protects your natural nails and helps your polish last longer.
- Top Coat: Seals your design, adds shine, and prevents chips. A quick-dry formula is a lifesaver!
- Pastel Pink Nail Polish: The star of the show! Choose a shade that speaks to your personal style – from a soft baby pink to a delicate rose blush.
- Nail File: For shaping your nails to perfection.
- Cuticle Pusher/Orange Stick: To gently groom your cuticles for a clean nail bed.
- Lint-Free Wipes or Cotton Balls: For cleaning nails and removing excess polish.
- Nail Polish Remover: For any oops moments or to clean up edges.
Nail Art Essentials (Optional, but Super Fun!):
- Dotting Tools: These come in various sizes and are amazing for creating perfect dots and simple patterns.
- Thin Nail Art Brushes: For drawing delicate lines, swirls, or tiny details.
- Striping Tape: Creates clean, crisp lines easily.
- Stencils/Stickers: For quick and effortless decorative elements.
- Glitter Polish: To add a touch of sparkle.
Getting Started: The Perfect Pastel Pink Base
Every stunning nail design starts with a flawless base. Preparing your nails properly ensures a smooth application and a manicure that lasts. Here’s how to get that perfect canvas:
- Cleanse and Shape: Start with clean, dry nails. Gently push back your cuticles using a cuticle pusher or orange stick. Shape your nails with a nail file, moving in one direction to prevent weakening.
- Buff (Optional): If you have ridges, a gentle buff can create a smoother surface. Be careful not to over-buff!
- Apply Base Coat: This is crucial! A good base coat protects your nails from staining and helps your polish adhere better. Apply one thin layer and let it dry completely.
- Apply Pastel Pink Polish: Now for the fun part! Apply your chosen pastel pink polish in thin, even coats. Two coats are usually best for opaque coverage. Let each coat dry for a few minutes before applying the next.
- Clean Up Edges: Dip a small brush (or an orange stick with a cotton tip) into nail polish remover to clean up any polish that got on your skin around the nail. This makes a huge difference for a professional look!
- Seal with Top Coat: Once your pink polish is dry, apply a generous layer of top coat. This locks in your color, adds a gorgeous shine, and acts as a protective barrier.
Easy & Chic: Beginner-Friendly Pastel Pink Nail Designs
Now that your nails are prepped and have that beautiful pastel pink base, let’s get creative! These designs are simple enough for beginners but look super chic.
1. The Classic French Twist
A sophisticated take on the traditional French manicure, but with a pastel punch!
- Start with your flawless pastel pink base coat.
- Once dry, use white polish or a complementary pastel shade (like a soft lavender or mint green) to paint a thin line along the tips of your nails.
- Tip for Beginners: Use a fine-tip brush or even a makeup sponge with a dab of polish to gently dab on the tips. Alternatively, nail guides can help you get a crisp line.
- Finish with a clear top coat.
2. Dotted Delight
Dots are incredibly easy to create and add an instant playful charm.
- Ensure your pastel pink base is completely dry.
- Dip a dotting tool (or the tip of a bobby pin!) into a contrasting polish color – white, gold, black, or even a different pastel hue.
- Gently press the tip onto your nail to create a dot.
- Repeat to create a pattern. You can make a line of dots, scatter them randomly, or create a sweet cluster on one or two nails.
- Seal with top coat.
3. Subtle Sparkle Accent Nail
Sometimes, all you need is a touch of glitter to make your manicure pop!
- Choose one nail on each hand to be your accent nail (often the ring finger).
- Paint your accent nail with a glitter polish that complements your pastel pink – think silver, gold, rose gold, or iridescent glitter.
- On your other nails, stick to your beautiful pastel pink base.
- Apply a top coat to all nails.
4. Two-Tone Chic
Simple and elegant, this design uses two complementary colors.
- Apply your pastel pink polish to all nails.
- Once dry, choose a second color. This could be a darker pink, white, a soft grey, or even a metallic shade.
- Paint a clean line across your nail – you can do this halfway up, at the tip, or diagonally. Nail striping tape is your best friend here for super clean lines!
- Carefully remove the tape (if using) once the polish is slightly dry but not fully hardened.
- Finish with a top coat.
5. Delicate Swirls
A touch of elegance that’s easier than it looks!
- Start with your dry pastel pink base.
- Using a thin nail art brush and a contrasting color (white, gold, or a darker pink work well), gently paint a simple swirl on one or two nails.
- Practice on paper first if you’re feeling nervous! A simple curve or a figure-eight shape is all you need.
- Let it dry completely before applying a top coat.
Beyond the Basics: Taking Your Pastel Pink Designs Further
Once you’re comfortable with the basics, why not experiment a little more? Here are some ideas to elevate your pastel pink game:
Ombré Magic
The ombré effect creates a beautiful gradient. For a pastel pink ombré, you can blend your pink into white, a lighter shade of pink, or even a subtle nude.
- Paint your nails with a light base color (like white or a very pale pink).
- Once dry, apply your main pastel pink polish to a makeup sponge.
- Gently dab the sponge onto the tips of your nails, gradually moving down to create a gradient effect.
- Clean up any excess and apply a top coat to blend.
Floral Accents
Small, delicate flowers can add a super sweet touch. Use a dotting tool or a fine brush to create tiny petals or dots that form a flower shape on an accent nail.
Minimalist Lines
Clean, thin lines can offer a modern twist. Use striping tape or a very fine brush with a metallic or black polish to add a delicate line either horizontally, vertically, or diagonally across your pastel pink nail.
Sticker Sanity
For the quickest and most effortless design, use nail stickers! You can find adorable pastel-themed stickers, tiny hearts, stars, or even classic French tips. Simply apply your base coat, let it dry, place your sticker, and seal with a top coat.
Maintaining Your Girly Pastel Pink Manicure
You’ve created beautiful girly nail designs with pastel pink – let’s keep them looking fresh!
- Reapply Top Coat: Every 2-3 days, reapply a layer of top coat. This refreshes the shine and strengthens the polish, helping to prevent chips.
- Moisturize: Keep your hands and cuticles hydrated with cuticle oil or a good hand cream. Dryness can lead to hangnails and make your manicure look less polished.
- Be Gentle: Avoid using your nails as tools. Open cans, scrape things, or pry lids with your fingernails can cause chips and breaks.
- Gloves for Chores: When doing household chores, especially those involving water or cleaning chemicals, wear rubber gloves.
Troubleshooting Common Nail Art Issues
Even the best nail artists have off days! Here are some common issues and how to fix them:
| Problem | Solution |
|---|---|
| Streaky Polish Application | Ensure your polish is well-mixed. Apply in thin coats, allowing each to dry partially before the next. A good quality polish can also reduce streaking. If it’s still bad, try adding a nail polish thinner. |
| Blobs or Thick Patches | This often happens with too much polish on the brush. Wipe excess polish off the brush on the neck of the bottle before applying. Thin coats are key! |
| Smudged Design | Wait until your nails are completely dry before touching anything. If you smudge an accent nail, gently try to smooth it with a clean brush dipped in polish remover, then reapply the design if possible. For a whole nail smudge, it might be best to start over or use a glitter polish to cover it up! |
| Polish Not Drying | Some polishes take longer than others. To speed things up, try a quick-dry top coat or use a nail drying spray/drops. Avoid thick coats. You can also try dipping your nails in ice-cold water for a minute once they feel almost dry. |
| Bubbles in Polish | Bubbles are often caused by shaking the polish bottle vigorously (swirl it instead!) or applying polish too thickly. Ensure your brush isn’t overloaded and apply thin coats. |
Where to Find Inspiration and Quality Products
The internet is a treasure trove of nail art inspiration! Don’t be afraid to explore and find what resonates with your personal style.
- Pinterest & Instagram: Search hashtags like #pastelpinnails, #girlynails, #nailartforbeginners, and #pinknails for endless visual ideas.
- YouTube Tutorials: Many nail artists provide free, detailed video guides for specific designs.
- Beauty Blogs: Sites like ours (and many others!) offer comprehensive guides, reviews, and trend roundups.
- Reputable Retailers: Look for well-known nail polish brands at beauty supply stores or online. Brands like OPI, Essie, and Sally Hansen offer a wide range of pastel shades and quality formulas. For more in-depth ingredient information and safety guidelines for nail products, the U.S. Food & Drug Administration (FDA) provides excellent consumer information.
Frequently Asked Questions About Pastel Pink Nail Designs
Q1: Can beginners really do these pastel pink nail designs?
Absolutely! The designs we’ve covered are specifically chosen for their simplicity and ease of execution. With a little practice and patience, anyone can achieve beautiful results.
Q2: What are the best types of pastel pink polish for beginners?
Cream finishes are generally the easiest to work with as they are smooth and opaque. Avoid polishes with a lot of shimmer or glitter for your first few attempts at detailed designs, as they can be more forgiving.
Q3: How long should I wait between coats of nail polish?
For best results and to avoid smudging, wait at least 1-2 minutes between thin coats of polish. Clear base and top coats can usually be applied once the color coat feels dry to the touch, but check your product’s instructions.
Q4: My nail polish always chips after a day or two. What can I do?
Proper prep (base coat!), making sure your polish is fully dry, and always applying a good quality top coat are key. Reapplying top coat every couple of days can also extend the life of your manicure significantly.
Q5: Are there any specific tools I absolutely need for nail art?
You don’t need many! A nail art brush set and dotting tools are incredibly helpful for creating designs beyond simple color application. Many simple designs can even be achieved with household items like bobby pins or toothpicks.
Q6: Can I mix and match pastel pink with other colors?
Definitely! Pastel pink pairs beautifully with white, cream, soft grey, lavender, mint green, and even gold or rose gold accents. Don’t be afraid to experiment with complementary shades.
Q7: How do I prevent my nails from staining from darker pink polishes?
Always, always use a base coat! A good quality base coat creates a barrier between your natural nail and the polish. If you do notice staining, a nail polish remover with stain-lifting properties or a gentle buffing can help.
Conclusion: Unleash Your Inner Nail Artist!
See? Creating gorgeous, girly nail designs with pastel pink is not only achievable but also incredibly fun and rewarding! We’ve covered everything from essential tools and flawless base application to simple, yet stunning, step-by-step designs. Whether you’re a complete beginner or looking for new ways to express your style, pastel pink is your perfect partner.
Remember, nail art is all about self-expression and having fun with it. Don’t be afraid to try new things, experiment with different colors and patterns, and most importantly, enjoy the process! Your nails are a blank canvas, and with these tips, you’re ready to create something truly beautiful. So grab your favorite pastel pink polish, and let your creativity shine!


