Gel French Manicure Designs For Weddings: Essential Guide
Planning your dream wedding nails? A gel French manicure offers a long-lasting, elegant look perfect for your big day. Discover beautiful, beginner-friendly designs that stay flawless from ceremony to honeymoon, ensuring your hands look polished and celebrated.
Your wedding day is a whirlwind of joy and celebration, and every detail counts – especially your nails! A French manicure is a timeless classic, but for the wedding, you want it to be extra special and absolutely perfect. The good news? Gel polish makes this classic even better! It’s super durable and shines beautifully, meaning your wedding nails will look stunning for weeks, not just days. No chips, no smudges, just pure elegance as you say “I do” and beyond. Let’s explore how to get the most gorgeous gel French manicure for your wedding, no matter your style.
Why Gel French Manicures Are Perfect for Weddings
When it comes to your wedding day, you need nails that can keep up with all the excitement. From holding hands with your partner to cutting the cake, your manicure needs to be resilient. This is where the magic of gel polish truly shines. Unlike traditional nail polish, gel manicures offer:
- Incredible Durability: Gel polish cures under a UV or LED lamp, creating a hard, chip-resistant finish that can last up to two weeks or even longer. This means you don’t have to worry about your nails looking less than perfect during your honeymoon or those precious first few weeks as a newlywed.
- Brilliant Shine: Gel manicures boast a high-gloss finish that stays shiny without dulling. This lustrous look is perfect for complementing your wedding attire and adding a touch of glamour to your hands.
- Quick Drying Time: Once cured, gel polish is instantly dry. Say goodbye to the anxiety of smudging your nails while getting dressed or during those first few photos!
- Versatility: Gel polish provides a smooth, durable base for all sorts of beautiful French manicure variations and nail art.
Essential Tools for Your Gel French Manicure
Getting a salon-quality gel French manicure at home is achievable with the right tools. Don’t worry if you’re new to this; we’ll break it down. Having these items ready will make the process smooth and enjoyable.
The Must-Have Gel Manicure Kit:
- Gel Polish: You’ll need a base coat, your chosen shade(s) of gel color, and a top coat.
- UV or LED Lamp: This is essential for curing (hardening) the gel polish. LED lamps are generally faster. You can find reliable options on sites like Amazon.
- Nail Prep Essentials:
- Nail File: For shaping your nails.
- Buffer Block: To smooth the nail surface.
- Cuticle Pusher/Orange Stick: To gently push back and tidy cuticles.
- Nail Cleanser/Alcohol Wipes: To remove oils and residue.
- Lint-Free Wipes: Crucial for a clean finish.
- French Manicure Tools:
- Thin Nail Art Brush: For creating precise smile lines.
- Striping Tape (optional): For clean, straight lines.
- Dotting Tool (optional): For adding small embellishments.
- Cuticle Oil: To moisturize after the manicure.
Step-by-Step: Creating Your Gel French Manicure
Ready to create your dream wedding nails? Follow these simple steps for a flawless gel French manicure at home. Remember, practice makes perfect, so don’t be afraid to try it out before the big day!
Step 1: Prep Your Nails
This is the most crucial step for longevity. Clean nails are happy nails!
- Gently push back your cuticles using a cuticle pusher or orange stick.
- Lightly buff the surface of your nails with a buffer block. This creates a slightly rough surface for the gel to adhere to.
- Wipe your nails with a nail cleanser or alcohol-based sanitiser on a lint-free wipe to remove any dust and natural oils.
Step 2: Apply the Base Coat
The base coat protects your natural nails and helps the gel polish adhere better.
- Apply a thin, even layer of gel base coat to each nail.
- Cure under your UV/LED lamp according to the manufacturer’s instructions (usually 30-60 seconds for LED).
Step 3: Apply Your Color Layers
For a classic French manicure, this is typically a sheer nude, pink, or milky white. For modern variations, you might use a bolder color.
- Apply a thin, even coat of your chosen base color.
- Cure under the lamp.
- Apply a second thin coat for full opacity if needed, and cure again.
Step 4: Create the French Tip
This is where the “French” part happens! There are a few ways to get that perfect white (or colored) tip.
Method A: Using a Thin Brush
- Carefully paint a curved line across the tip of your nail using a thin nail art brush dipped in your white or contrasting gel color. Aim for a smooth “smile line.”
- For perfection, you can use a clean brush dipped in nail cleanser or alcohol to clean up any wobbly edges before curing.
- Cure under the lamp.
Method B: Using Striping Tape
- Once your base color is cured and the nail surface is still slightly sticky (or after applying a thin top coat to act as ‘glue’), carefully apply striping tape across the nail where you want the tip to begin. Press it down firmly to create a clean seal.
- Paint over the tip area above the tape with your white or contrasting gel color.
- While the polish is still wet, carefully peel off the striping tape.
- Cure under the lamp.
Step 5: Apply the Top Coat
The top coat seals everything in, adds shine, and protects your manicure.
- Apply a thin, even layer of gel top coat over the entire nail, making sure to cap off the free edge (paint a thin layer along the very tip of the nail) to prevent lifting.
- Cure under the lamp.
Step 6: Clean Up
Most gel top coats leave a sticky residue (called the ‘inhibition layer’) after curing. This is normal!
- Using a lint-free wipe soaked in nail cleanser or alcohol, gently wipe away the sticky residue from each nail.
- Apply a drop of cuticle oil around your nail beds and gently massage it in. This hydrates your skin after the curing process.
Elegant Gel French Manicure Designs for Weddings
The classic French manicure is beautiful on its own, but for a wedding, you can elevate it with subtle, elegant twists. These designs cater to different bridal styles, ensuring you find the perfect match.
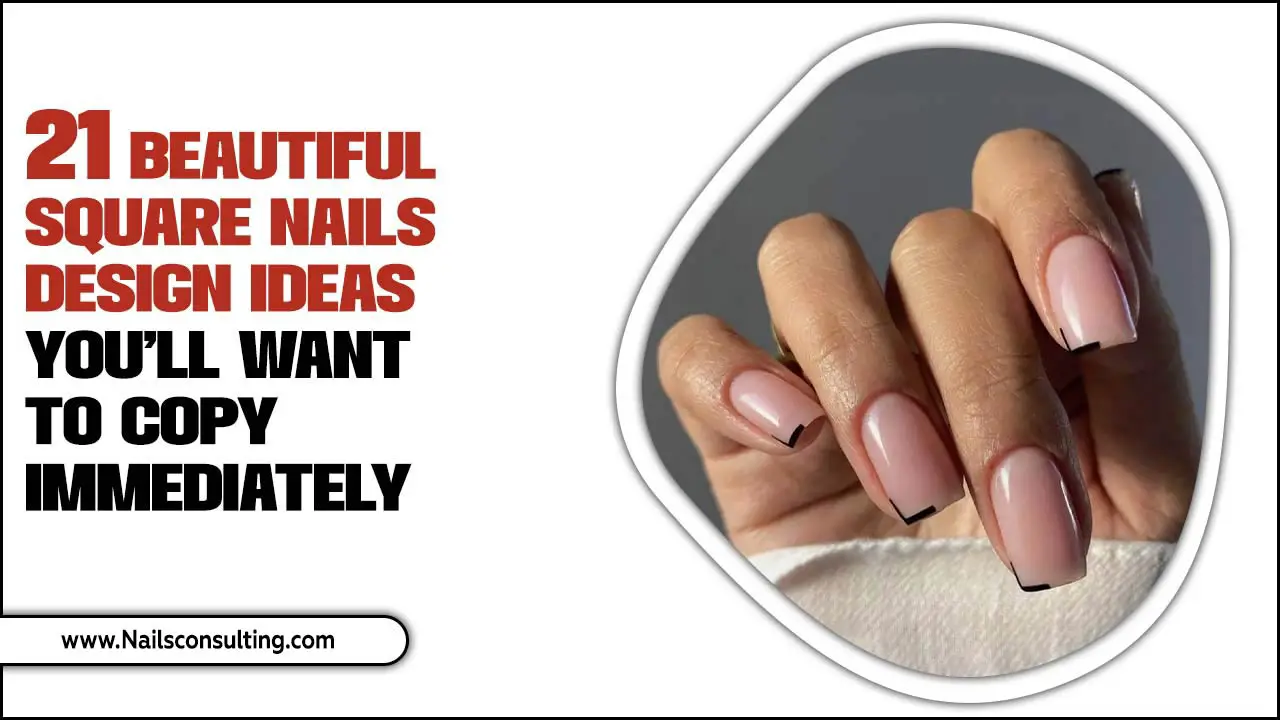
1. The Timeless Classic
Description: A sheer pink or nude base with a crisp, white smile line. This is the epitome of bridal elegance and sophistication. It’s universally flattering and pairs with any wedding dress.
Why it’s great for weddings: Its understated beauty complements intricate lace, sparkling jewelry, and delicate floral arrangements. It’s a safe and eternally chic choice.
Tips for beginners: Focus on achieving a perfectly smooth, consistent smile line. Use a fine brush and take your time. A steady hand and a little patience go a long way here!
2. Milky White & Soft Tip
Description: Instead of a stark white tip, opt for a softer, milky white opaque polish. The base can be a sheer pink or nude. This offers a gentler, more diffused look.
Why it’s great for weddings: It’s slightly more contemporary than the pure white tip but still maintains a soft, bridal feel. It looks beautiful in photographs and adds a touch of modern romance.
Tips for beginners: You can achieve this by using a milky white gel polish for both the base and the tip, or by layering a sheer nude/pink with a milky white over the top. Experiment with opacity on a practice nail.
3. The Pearl Accent
Description: A classic French manicure with a tiny, delicate pearl or crystal precisely placed at the cuticle line or in the center of the smile line on one or two accent nails (usually the ring fingers).
Why it’s great for weddings: Pearls are synonymous with bridal elegance and add a subtle, luxurious touch without being overwhelming. They catch the light beautifully.
Tips for beginners: Use a small amount of top coat as “glue” and carefully place the pearl with tweezers. Seal around the edges of the pearl with a tiny bit more top coat, being careful not to cover the pearl itself.
4. Subtle Ombre French Tips
Description: Instead of a sharp line, the white tip gradually blends into the base color, creating a soft gradient effect. This can be done in classic white or with pastel shades.
Why it’s great for weddings: It’s a modern, softer take on the French tip that looks incredibly chic and effortless. It adds depth and visual interest.
Tips for beginners: This can be tricky at first. Use a makeup sponge or a fine brush to gently dab and blend the white polish into the base color. Patience is key! You can also find pre-made ombre gel tips if DIY blending is too challenging.
5. Delicate Glitter Line
Description: A classic French manicure where the crisp white tip is replaced with a fine line of subtle glitter polish (silver, champagne, or iridescent). The base remains a sheer nude or pink.
Why it’s great for weddings: It adds a touch of sparkle and festivity without being too flashy. It’s perfect for brides who love a bit of shimmer and want their nails to catch the light.
Tips for beginners: Use a very fine glitter polish or brush on a thin layer of glitter top coat along the smile line. Seal well with a smooth top coat application.
6. Colored French Tips
Description: Move away from white! Opt for soft pastels like baby blue, blush pink, lavender, or even a muted mint for your French tips. The base can remain a nude or pink.
Why it’s great for weddings: This is perfect for brides with a specific color scheme or those who want a more personalized, playful touch. It’s subtle yet distinctive.
Tips for beginners: Choose a pastel shade that complements your wedding colors or bouquet. Ensure the color is opaque enough to be clearly visible as a tip. Apply like a standard French tip.
7. Short & Sweet French
Description: A well-executed French manicure looks just as stunning on short nails as long ones. The key is a perfectly proportioned white tip that follows the natural curve of your nail edge.
Why it’s great for weddings: Many brides prefer shorter, more practical nails for their wedding day, and this design proves you don’t need length for elegance. It’s comfortable and chic.
Tips for beginners: Use a very thin brush and paint small sections of the smile line carefully. The tip should be proportionate to the nail length – a little goes a long way on short nails.
Choosing Your Wedding Gel French Manicure Shade
The color choice for your gel French manicure can subtly influence the overall feel of your bridal look. Here’s a quick guide to popular and flattering options:
| Shade Type | Description | Vibe | Best For |
|---|---|---|---|
| Sheer Pink | A translucent pink that mimics a healthy nail bed. | Classic, romantic, soft. | Almost all brides; creates a “your nails but better” look. |
| Nude/Beige | Opaque or sheer shades ranging from light beige to deep tan. | Sophisticated, modern, elegant. | Brides with any skin tone looking for a flawless, polished look. |
| Milky White | Opaque, soft white with a slight creaminess. | Modern, chic, subtle. | Brides opting for a softer, less stark alternative to pure white. |
| Classic White | Bright, opaque white. | Bold, traditional, clean. | Brides wanting a crisp, defined look, often seen in very traditional weddings. |
| Soft Pastels | Pale shades like blush, mint, lavender, pale blue. | Playful, personalized, seasonal. | Brides incorporating color into their wedding theme or wanting a unique touch. |
Tips for a Flawless, Long-Lasting Wedding Manicure
To ensure your gel French manicure looks stunning from your engagement photos right through the honeymoon, here are some pro tips:
- Practice Run: Schedule a practice session at least a week or two before your wedding. This helps you get comfortable with the technique and ensures you love the final look. It’s also a good time to test the durability.
- Don’t Skip Prep: As mentioned, meticulous nail preparation is the secret to a gel manicure that lasts. Ensure nails are clean, dry, and free of oils.
- Thin Layers are Key: Avoid thick, goopy coats of gel. Thin, even layers cure better and result in a smoother, more durable finish.
- Cap the Edges: Always seal the free edge of your nail with each layer (base, color, and especially top coat). This “locks in” the color and prevents chipping or lifting.
- Avoid Water Exposure Immediately After: Try to avoid prolonged exposure to hot water or harsh cleaning products for at least 24 hours after your manicure, as this can affect the curing process.
- Protect Your Hands: Wear gloves when doing household chores involving water or chemicals. This is the golden rule for any manicure’s longevity.
- Moisturize: Keep your hands and cuticles hydrated with cuticle oil. Healthy cuticles contribute to the overall polished look of your manicure.
Frequently Asked Questions (FAQ)
Q1: How long does a gel French manicure typically last for a wedding?
A: With proper application and care, a gel French manicure can last anywhere from 14 to 21 days, or even longer. This durability makes it ideal for weddings and honeymoons, as it should last you throughout the entire celebration and beyond.
Q2: Can I do a French manicure on short nails with gel polish?
A: Absolutely! Gel French manicures look beautiful on short nails. The key is to create a proportional smile line that complements the shape of your natural nail. Use a fine brush to carefully paint the tip, and don’t make the tip too thick.
Q3: What’s the difference between a UV lamp and an LED lamp for gel polish?
A: UV lamps use ultraviolet light, while LED lamps use light-emitting diodes. LED lamps are generally faster, curing gel polish in about 30-60 seconds, whereas UV lamps can take 2-3 minutes per coat. Both are effective for home use, but LED is often preferred for its speed and efficiency. Always follow the specific curing times recommended for your gel polish brand and lamp type.
Q4: My gel French manicure looks a bit thick after application. What did I do wrong?
A: Gel polish can become thick if applied in too many layers or if the layers are too heavy. Always aim for thin, even coats. If a color isn’t opaque enough after two thin coats, consider a third very thin layer rather than one thick one. Ensure you’re not flooding the nail with polish.
Q5: How do I remove a gel French manicure at home?
A: Removal usually involves soaking. Gently buff the surface of the gel with a nail file, soak cotton balls in acetone-based nail polish remover, place them on your nails, wrap with foil, and let sit for about 10-15 minutes. Then, gently scrape off the softened gel with an orange stick or cuticle pusher. You can find more detailed guides on respectful removal techniques online, as improper removal can damage your nails.


